
Pop!_OS is a standalone operating system for STEM and innovative professionals who utilize their PC as a tool to discover and learn. It is a free and non-proprietary Linux distro based on Ubuntu, featuring a custom GNOME desktop environment. This distro was made available by American Linux computer manufacturer System76.
Initially, the OS was built only to be bundled with PCs built by System 76, but it can now be downloaded and installed on several PCs with the incorporated tech. Pop!_OS is a well-known and straightforward distro for gaming because of its inbuilt GPU support. It also offers default disk encryption for security purposes, streamlined window and workspace management, keyboard shortcuts for improved navigational functionality, and built-in power management profiles.
Pop!_OS is primarily maintained by System 76, with the release version source code accommodated in a Github repo despite being an open-source OS. If you are a Linux fanatic, you must, in one way or the other, have heard about Raspberry Pi, even if you have not run into one. As of now, Pop!_OS is available on the Pi 4, and this is what we will take you through in this review.
System 76 says that the Pop!_Pi was meant for the Pi 4 machine to gain experience in building ARM platforms. This means that the intention was not for a public release initially, but its performance exceeded the limit that System 76 could not keep to itself.
Highlights of Pop!_OS
- Workflow customization
- Auto-tiling with pop shell
- Keyboard navigation
- Stacking
- GNOME 3.36
- Improved hybrid graphics support
With that being said, let us take the article a notch higher and look at how to install Pop!_OS on our Pi 4 machine.
How to install Pop!_OS on Raspberry Pi 4/400
Step 1: Download Pop_OS for Raspberry Pi 4
To download the Pop_OS file, visit the Pop_OS official website and click on the download button.
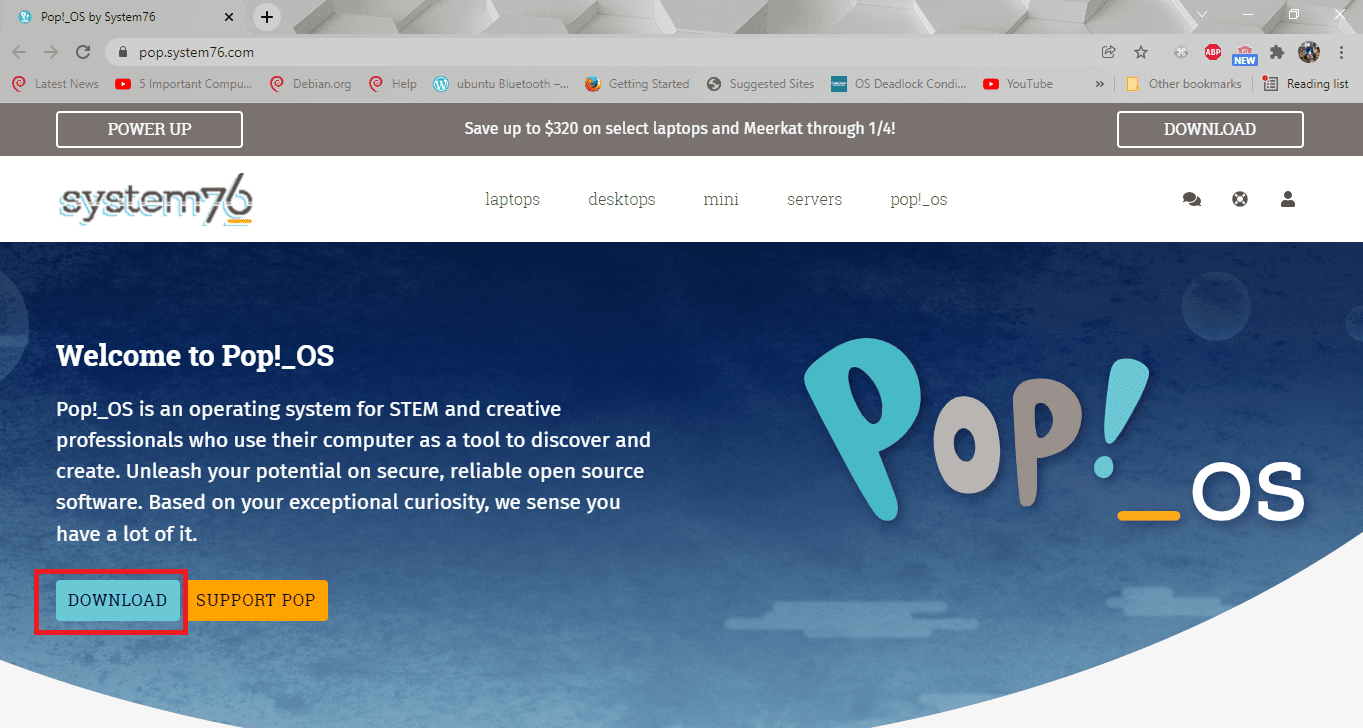
select download
Immediately you hit the download button, a pop-up will appear.
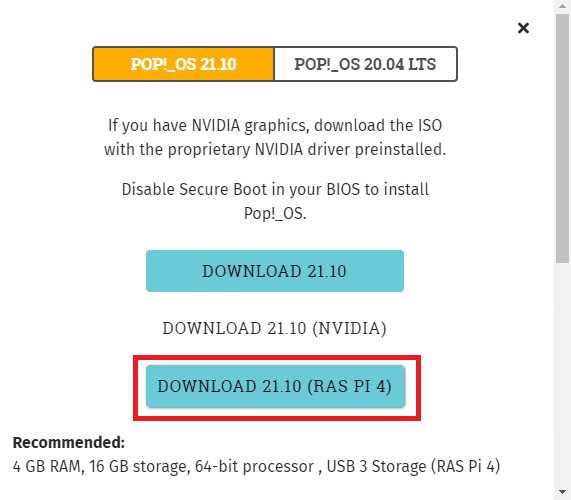
select Ras Pi 4
Here, you will locate the “Download 21.10(Ras Pi 4)” file and click on it to initiate the download process.

download process
Step 2: Install Raspberry Pi Imager
Next, we will install the Raspberry Pi Imager. An Imager is a shortest and most straightforward way to install Raspberry Pi OS and other Operating Systems to a microSD card ready for use. So, in our case, it is the best way to create a Pop_OS installation for our Pi 4 machine.
There are several methods to help us download this software to our machine. If you are a Linux user, it will be best to use the snap package or flatpak manager to install the Raspberry Pi imager. To download this software, open up your terminal. If you are uncertain about launching the terminal, press “CTRL+ALT+T.” On the other hand, you can go to the search menu and type in “Terminal,” then press “Enter” to open. Once the terminal is up and running, we can advance the installation process.
Snap package
The snap format of the pi imager is easy to get working on any Linux OS that supports Snaps. To install imager using snap, copy the following command:
sudo snap install rpi-imager
Flatpak
Alternatively, if snaps are not your thing, there is another way to get still the software tool using Flatpak. If your flatpak is well configured, you can use the flatpak remote-add command to set up the Flathub app store to your system using the following command:
flatpak remote-add --if-not-exists flathub https://flathub.org/repo/flathub.flatpakrepo
Immediately you add the flathub repo to your PC; you should install the imager tool. Utilizing the flatpak install command, set up the pi imager app:
flatpak install flathub org.raspberrypi.rpi-imager
For Arch Linux users, you can begin by using the wget command to download the package to your PC:
wget https://builds.garudalinux.org/repos/chaotic-aur/x86_64/rpi-imager-1.6.2-2-x86_64.pkg.tar.zst
After that, using the Pacman -U command, install the downloaded package to your PC:
sudo pacman -U rpi-imager-1.6.2-2-x86_64.pkg.tar.zst
Note that if you are a mac or Windows user, you will have to get your hands on the imager tool from the official website.
Step 3: Setting up Pop_OS on Our Pi 4 machine
We will launch the Pi imager tool to set up Pop_OS on the Pi 4 machine. Once the software is up and running, follow the subsequent steps below for accurate results.
- Locate the “Choose OS” button inside the Raspberry Pi imager tool and click on it.
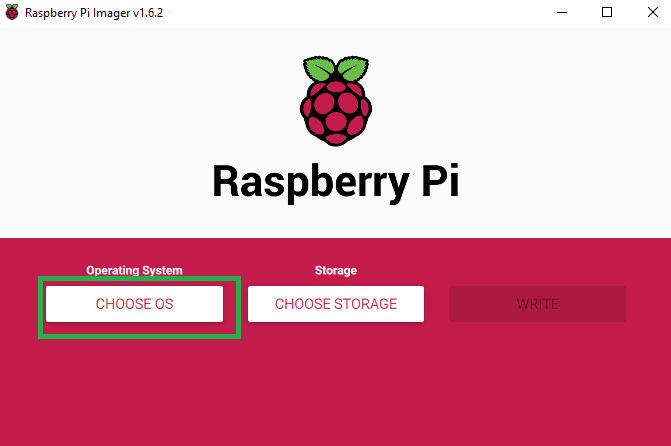
select choose OS
After that, a pop-up menu will appear with several options. Just go straight to the “Use custom” button and click on it.
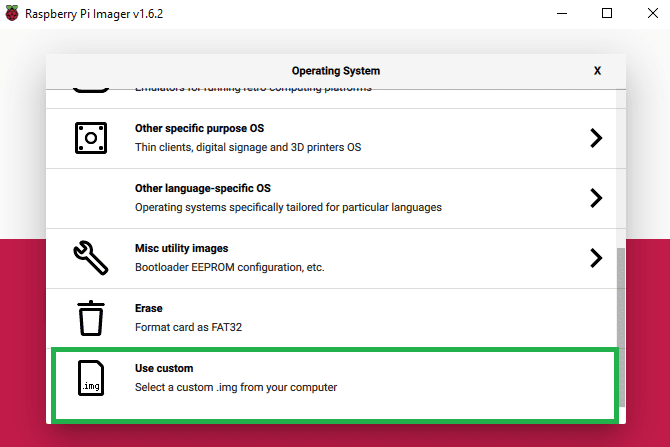
select use custom
- After selecting the “Use custom” button, the next step will be locating the “pop-os_21.10_arm64_raspi_7.img.xz” image we earlier downloaded. After locating, select it by single-clicking on it; after that, click on “Open” to add it (Pop_OS) to the pi imager tool.
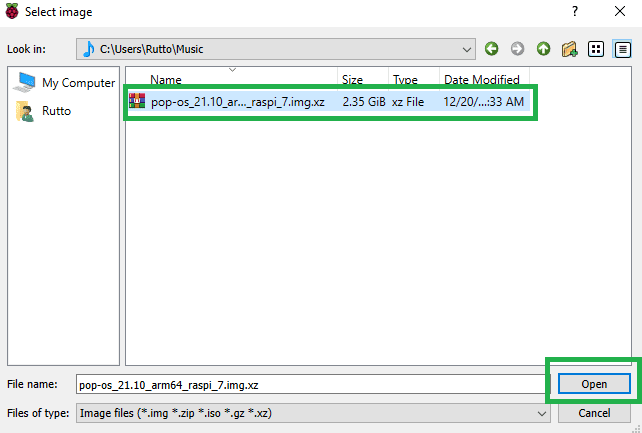
locate file
- Next, select the “Choose storage” button in the imager.
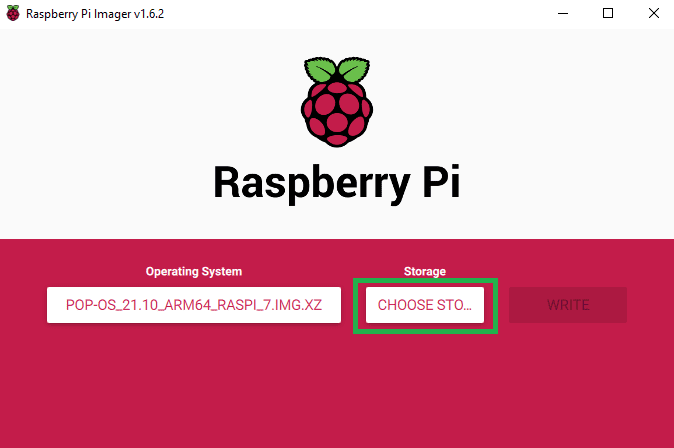
select choose storage
- Once selected, insert your SD card into the SD card reader on your PC.
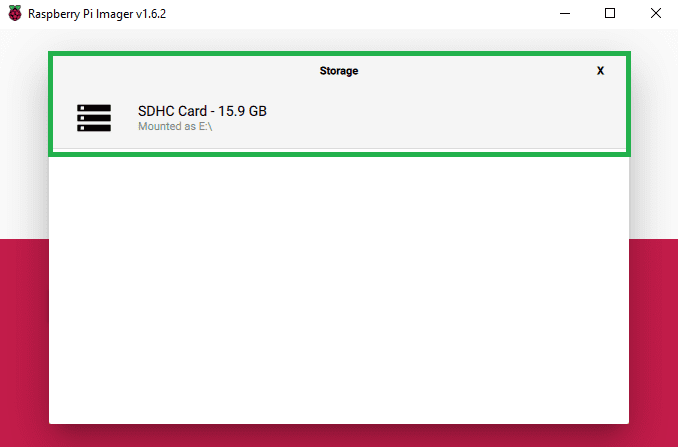
mount SD card
5. Click on the “Write” button to initiate the writing process. Bear in mind that the writing process will take time to finish. Once the writing process is over, eject the SD card from the reader.
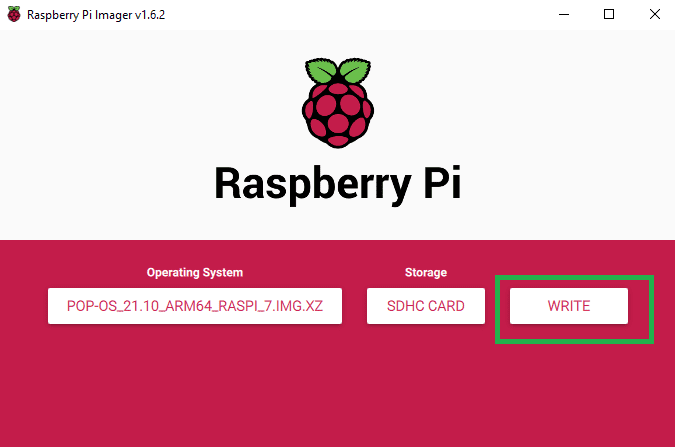
select Write
6. In this step, plug the SD card into your Pi 4 device. Once plugged in, connect a keyboard, mouse, display, and speakers for users who need sound.
7. At this stage, your Raspberry machine will power on when the power cable is connected. So, connect the power cable to your Raspberry Pi 4 machine, and as soon as it is powered up, it should directly boot into the Pop_OS Cosmic desktop environment, as seen in the snapshot below:
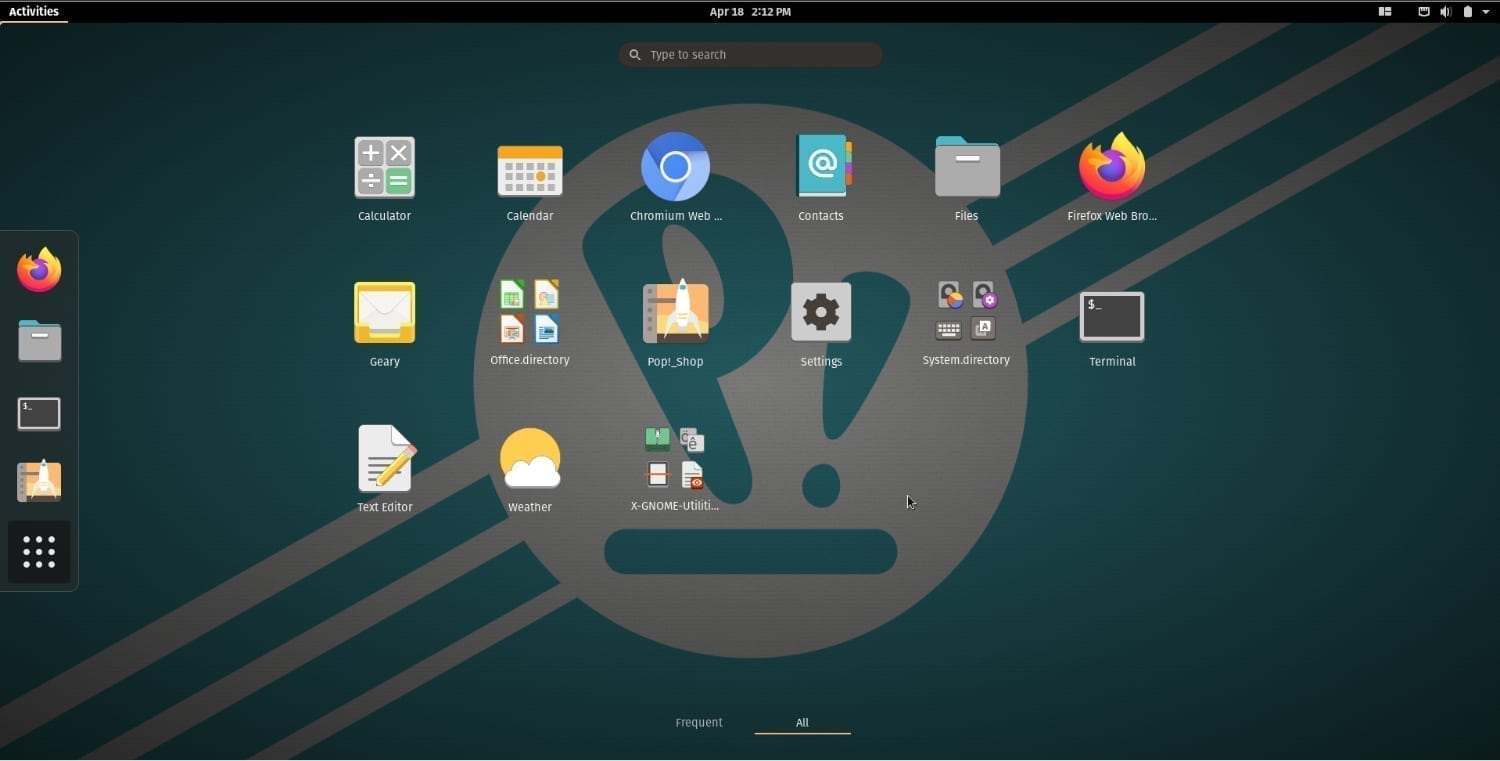
Pop_OS desktop
From here, you should be able to use Pop_OS, all of the applications, and everything right out of the box. If you love tweaking your machine, you can go ahead and do it at this point.
Conclusion
Overly, Pop!_OS build is excellent for an experimental build, thus a perfect choice for users who love trying out new stuff in their wake. The OS consumes approximately 1.3 to 4 GB of Random Access Memory (RAM) when not functional. Its general functionality is incredible and fast but with a hitch on animations as its animations are not that smooth. When it comes to system resource monitoring, this great OS displays Youtube video playback at 720p, and the temperature figures don’t surpass 55℃.
This article has typically covered the steps required to have Pop!_OS up and running on your Raspberry Pi 4 machine without any issue. We looked at a little bit of pop os introduction, features, installed Raspberry Pi imager before installing the OS on the SD card. We hope that the steps were simplified enough for you.