Smart mirrors are the newest thing in home decor. They’re a beautiful way to personalize your space and are helpful for practical purposes. With a little bit of work and know-how, you can build one yourself! A Smart Mirror is a mirror with an interactive display used for various purposes.
They are often used as a personal grooming aid—giving the user access to information about themselves and other people close by. Or they can be used as a digital picture frame, providing soothing scenes or important messages. The latest models use advanced facial recognition technology to help solve mysteries such as “Is it, mom?”
A Smart Mirror doesn’t just give you a reflection of your new haircut or outfit; it provides valuable information that’ll make your life easier. It can show the weather forecast, your following calendar events, traffic updates, and more. It can even connect with Google Assistant or Alexa to answer all of those pesky questions that we ask ourselves throughout the day.
Building a Raspberry Pi Smart-Mirror
The following tutorial gives you a step-by-step guide on building a Smart Mirror from scratch to finish.
Requirements
Unlike other Raspberry Pi tutorials we have done before, where we only need an internet connection and a few Pi accessories, we will need to get a little more physical for this particular post.
- A monitor:
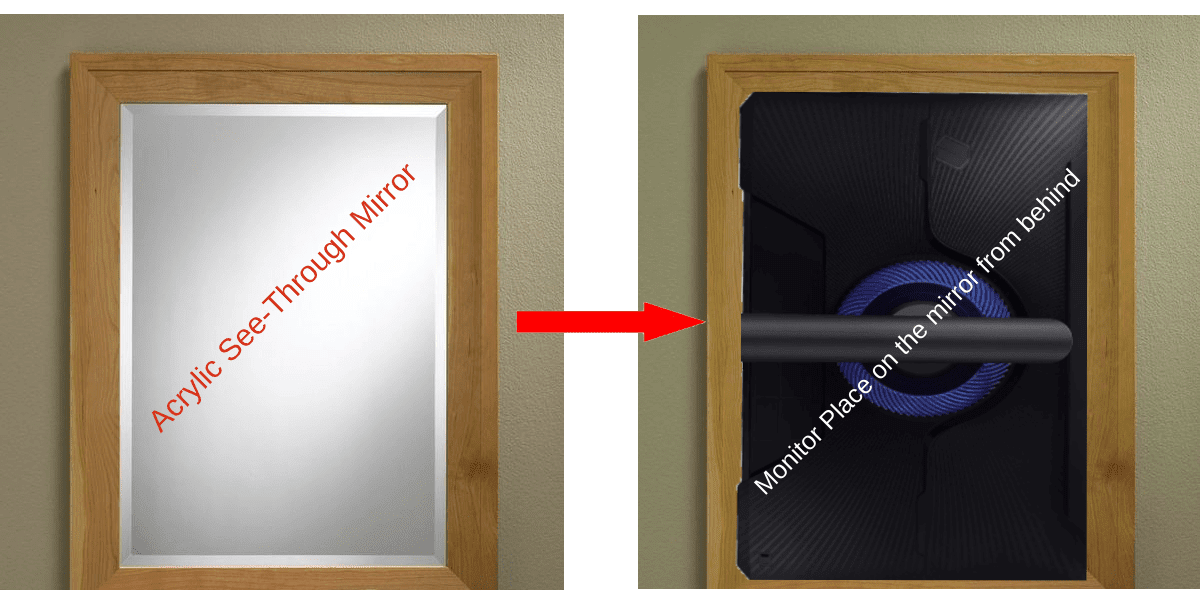
The size of the monitor will be equivalent to the size of the mirror you want to build. Therefore, the bigger the monitor, the bigger the mirror. - Acrylic See-Through Mirror (at least 30% transparent) or Two Way Glass Mirror:
The Acrylic See-Through Mirror would be a great option if you have a tight budget since it’s cheaper and still serves the essential purpose. However, if you want a high-quality mirror, go for the Two Way Glass Mirror since it’s much thicker but quite expensive. For this post, we will use the Acrylic See-Through Mirror. - Pieces of wood and screws or nails:
They will be required to build a frame to hold the monitor and the mirror in place. However, you shouldn’t feel limited in this part. You can use other materials and designs to build a frame. - A Raspberry Pi board
- An Internet connection
The logic
Building a Smart Mirror is not complex as it might sound, and the whole practical part uses quite a simple logic. Place the Acrylic See-Through Mirror or Two Way Glass Mirror in front of a monitor displaying the information you want to see. Since these mirrors allow light to pass through them, whatever the monitor is displaying will appear as if it’s on the mirror. Additionally, every other part of the monitor/screen that you don’t want to see will be black. See the image below.
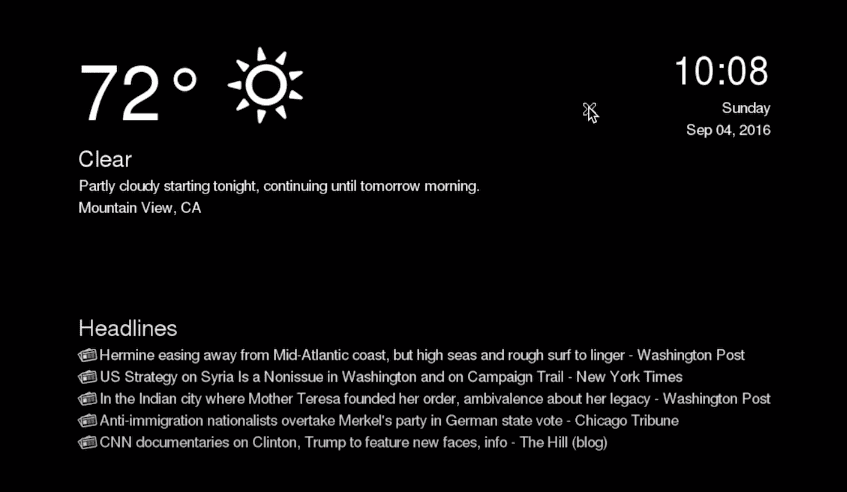
Dark Monitor
If we put the Acrylic See-Through Mirror or Two Way Glass Mirror in front of this monitor, we would have a mirror similar to the image below. Please note the time and temperature appear different since this last image was taken after building the Smart Mirror.
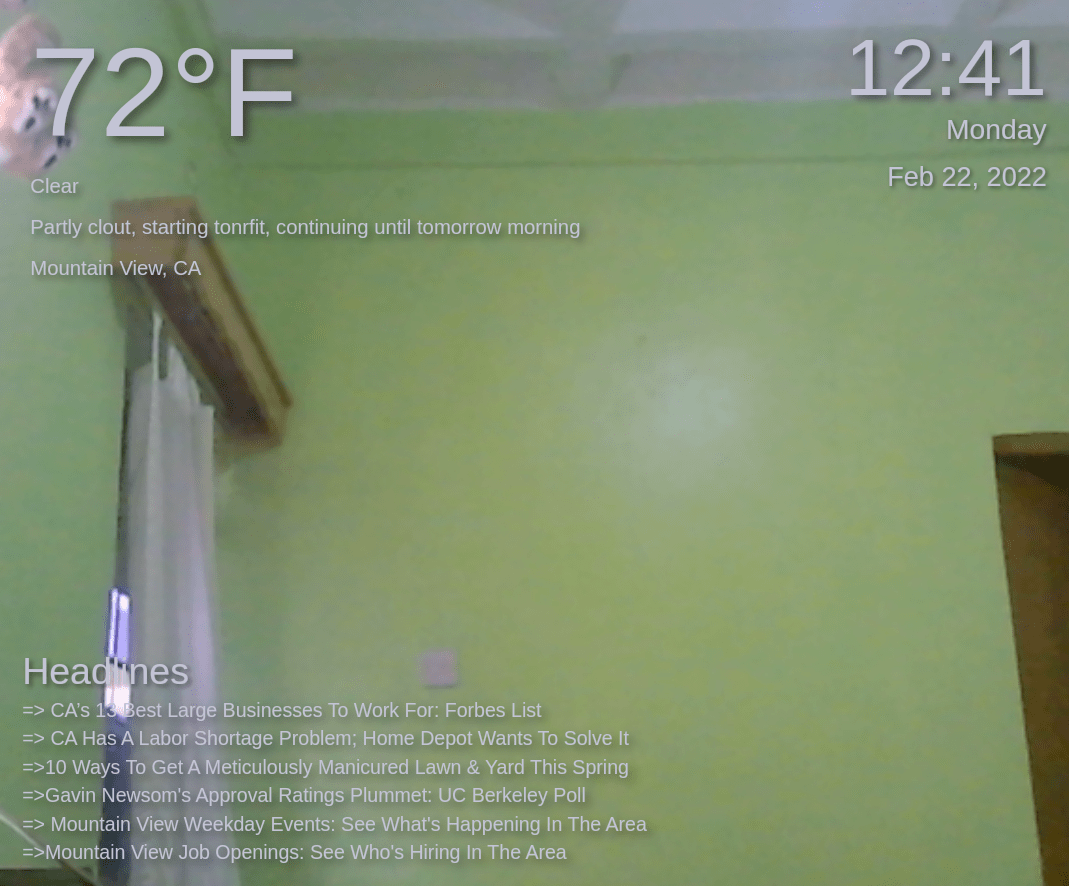
Smart mirror
With that in mind, let’s get started building the Smart Mirror.
Step 1. Build the wooden frame
Building a frame to hold the mirror and the monitor in place shouldn’t be that hard if you have the necessary tools. However, if you don’t want to dive into wood cutting, you can get that work done by a carpenter, which I believe shouldn’t cost that much. For this post, we will build the whole frame ourselves. Some of the tools we will use include:
- Wood Glue
- Ply Wood
- Screws
- Screw Driver/ Drill
- Table saw. A hand saw would also be okay, but it will take some time to cut the woods.
You can use different designs to build the frame depending on what you want to achieve at the end. In this post, we will build a frame to place the Acrylic See-Through Mirror from the back easily, then cover the glass with the monitor (still from the back). Below is a Photoshop design we created.
Final Frame Design
Let’s use the design above to build our frame. A tip you can consider is using a thinner monitor to avoid constructing a big and heavy frame. Feel free to include additional features like holding the Raspberry Pi and the power and HDMI cables. The image below shows our final frame with both the Acrylic See-Through Mirror and the monitor in place.
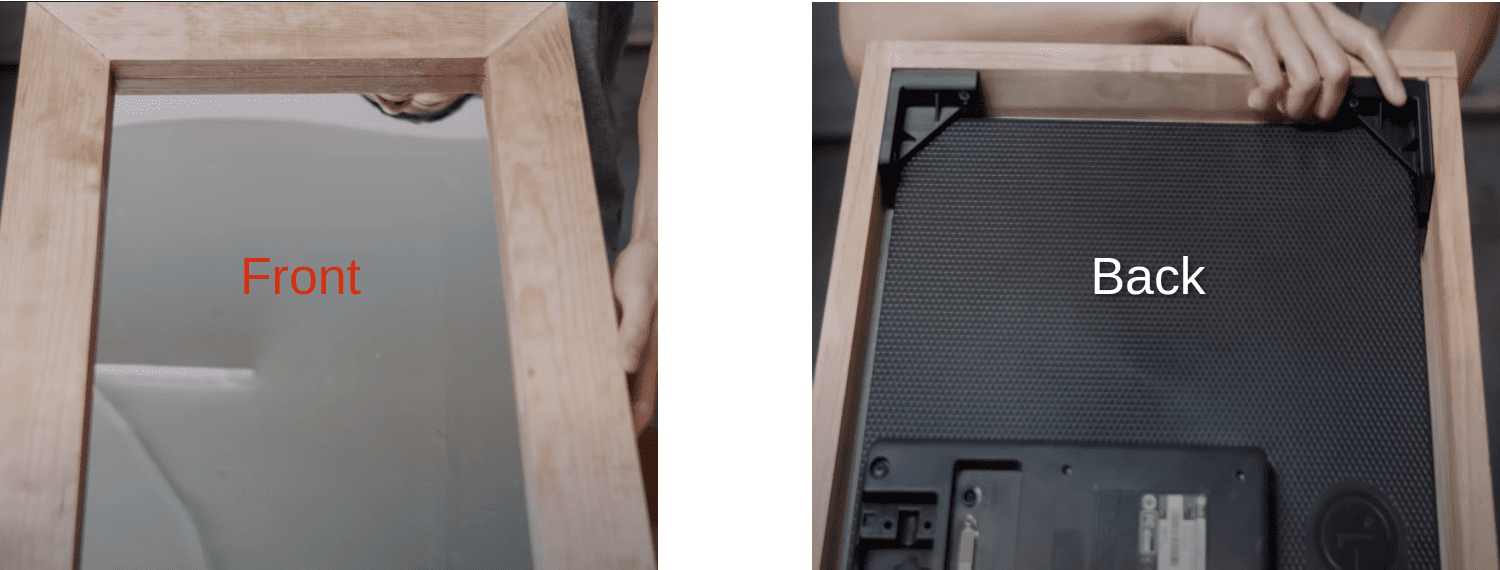
Final Frame Build
Up to this point, I believe you have now designed and built a frame for your smart mirror. Now that we are done with the physical part, let’s get out of the woodshop and back to our tech lab, where we will configure the necessary packages on our Raspberry Pi.
Free tip: Just by the way
As stated above, we need the monitor to display what we want to see at specific sections while all the other parts stay dark/ black. If you are a developer, you can create your application or a webpage that displays information like Time, Day, Temperature at a specific location on the monitor. Remember to use a black background and white color for the text you want to see. That said, let’s go on with building a smart mirror.
Step 2. Configure the Raspberry Pi and install Magic Mirror
There are different open-source repositories to download code to build a smart mirror. We will use the Magic Mirror repositories for this post. It’s a simple Desktop application built using the Electron framework. Set up your Raspberry Pi by installing the official Raspberry Pi OS and enabling the VNC server or SSH server to get started. That will allow us to install all the necessary packages before finally connecting the Pi to the monitor on our Smart Mirror.
When done, launch the Terminal and install the latest version of NodeJS by executing the commands below.
curl -sL https://deb.nodesource.com/setup_16.x | sudo -E bash -
sudo apt install -y nodejs
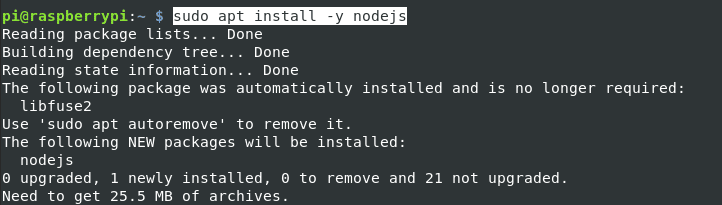
Install Node.JS
Next, we need to clone the Magic Mirror git repository to our system. Execute the commands below.
sudo apt install git #This command will install Git
sudo git clone https://github.com/MichMich/MagicMirror

Clone Magic Mirror Repository
Once done, navigate to the newly created MagicMirror folder with the cd command as shown below.
cd MagicMirror
Next, run the npm install command to install all the packages needed to run the application.
npm install
Note: This step might take some time, mainly if you use Raspberry Pi board 2 or 3 (10 – 25 minutes).

Install Packages
After a successful installation, create a copy of the config file by executing the command below.
cp config/config.js.sample config/config.js

Config File
When done, execute the command below to start the application.
Note: Ensure you have connected your Raspberry to a monitor or via VNC to see how the screen will appear on the Smart Mirror.
npm run start
If you are running the program for the first time, you will see a window similar to the image below. It shows information like Current Time, Year, Day and Month, Weather forecast, upcoming Holidays, and sweet messages like “Hi Sexy,” “You look nice,” “WOW, You Look hot,” and so on. Of course, you can customize these messages to your liking.
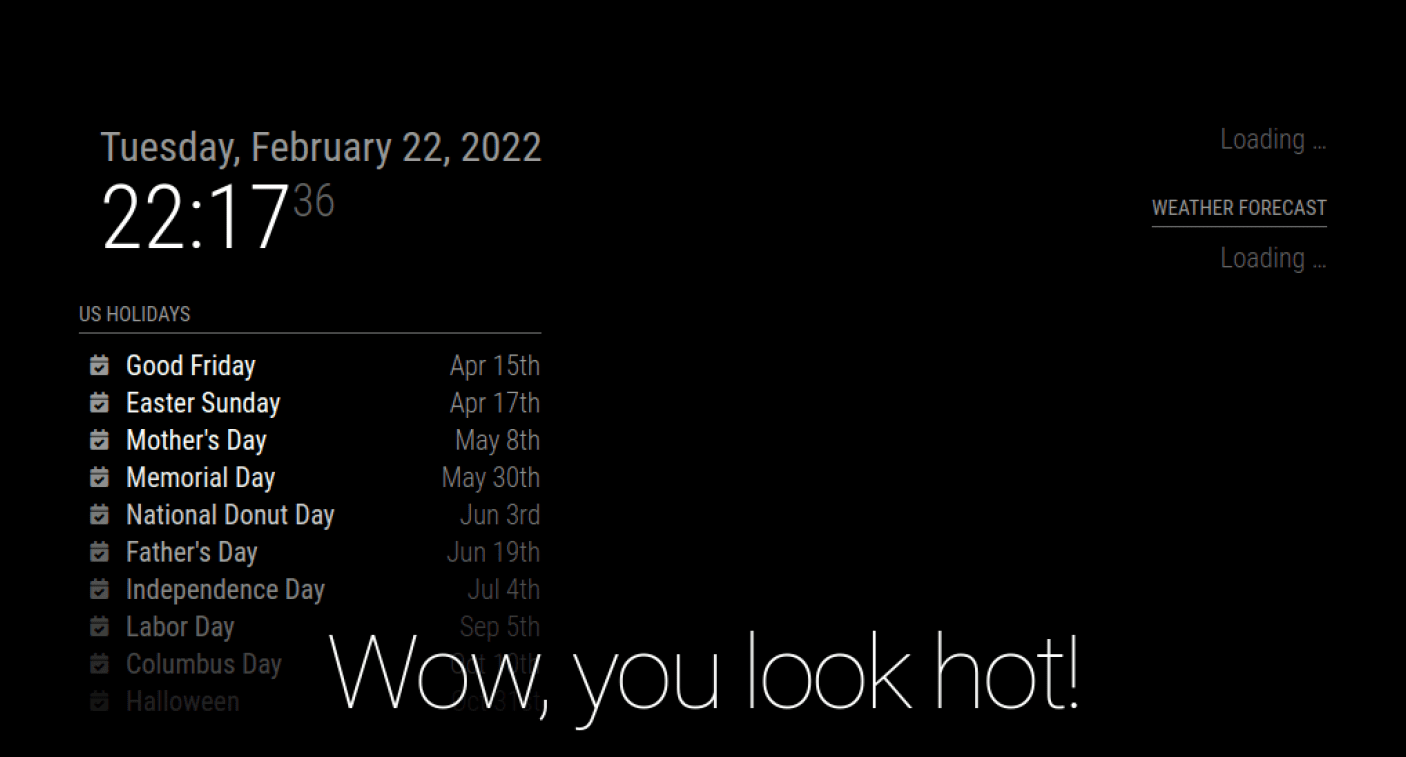
Magic Mirror
Now that you have the application up and running, you can proceed to connect the Raspberry Pi to the monitor on the Smart Mirror using an HDMI cable. That’s it! You should now have a working Smart Mirror. All that’s left now is minor customizations.

Smart Mirror
Step 3. Customizations
As stated above, the Magic Mirror program comes installed with a few modules like:
- Clock
- Alerts
- Calendar
- Current Weather
- News Feed
- Weather Forecast
- Compliments, and much more
To customize these modules to your liking, please visit the Magic Mirror Modules page, which will give you a step-by-step guide. Additionally, you can install more modules from MagicMirror² 3rd Party Modules. If you are well-versed with Javascript, you can also develop your modules by checking out the MagicMirror² Module Development Documentation page.
Wrapping Up
From this post, you can now see that building a Smart Mirror is not hard as it might sound. But you shouldn’t stop there. Think of other ideas you can add to your mirror to make it smarter. For example:
- A face recognition feature greets everybody by their name when they start in front of the mirror.
- Connect the mirror with Google Assistant or Alexa to answer all of those pesky questions.
- Add an email section where you can quickly go through a few mails before rushing to work. etc
Do you have any questions regarding this project? Well, feel free to hit the comments below, and we will respond as soon as we can.