
OctoPrint is an application that you can use to manage your 3D printers making the whole 3D printing process quite simple and interesting. It enables you to control your 3D printer remotely, schedule prints, view detailed information about the printer e.g. temperature and so much more. It also eliminates the hassle of uploading the files to print (G-Code) to the printer via USB or SD card as you can do that wirelessly.
OctoPrint is available for various platforms, including Linux, Windows, and macOS. However, this post will show you how to install OctoPrint on a Raspberry Pi. Let’s dive in and in a few minutes, you should OctoPrint set up and run on your Raspberry Pi.
Installing OctoPrint on Raspberry Pi for 3D printing
Pre-requisites
Here are some of the things you will need to install and run OctoPrint on your Raspberry Pi.
- Raspberry Pi board. OctoPrint is a versatile application and supports many Raspberry Pi models, including 3B, 3B+, 4B, and Zero 2 W. Raspberry Pi Zero and Zero W are not recommended as they have shown quite severe performance issues. For this post, we will be using a Raspberry Pi 4B board
- Storage: You will need at least 8 GB SD card for this project. However, if you plan on attaching a webcam and recording time lapses, please go for a bigger storage, like 16 GB or 32 GB. In our case, we are using a 16 GB SD card.
- Power adapter: Since your Raspberry PI will be controlling a 3D printer, you need to have the right power supply. An under-voltage might interfere with the printing process.
- A USB cable: This is the cable that you will use to connect your Raspberry Pi to the 3D printer. You will first need to verify the USB port present on your 3D printer (USB Type-A, Type-B, Mini, or Micro). The PI comes with a USB type A
Two methods of installing OctoPrint on your Pi
There are two methods that you can use to install OctoPrint on a Raspberry Pi:
- Use the OctoPi image: OctoPi is an OS based on the official Raspberry Pi OS. It comes fully configured to run OctoPrint out of the box, saving you the hassle of configuring components such as webcam, web server, and other components manually.
- Use the OctoPrint snap package: If you already have the official Raspberry OS installed, you don’t have to remove it. You can install the OctoPrint snap package, which also works out of the box.
Method 1: Install OctoPrint using OctoPi
If you are going this route, there are a few things you need to understand.
As described above, OctoPi is an OS image based on the Raspberry Pi OS to run OctoPrint out of the box. Now this OS has been stripped down and is only meant to run OctoPrint. It doesn’t come with a graphical interface; all you will get is a login prompt. Now, how do you access OctoPrint? Well, OctoPi will automatically start a web server where you can access OctoPrint in a browser on another device connected to the same network as the Raspberry Pi.
Follow the steps below.
Download and install Raspberry Pi Imager
There are many tools that you can use to write the OctoPi OS image to the SD card. They include Balena Ethcer, Rufus, etc. However, we insist on using the Raspberry Pi Imager utility, which will enable you to do some prior OS customizations before flashing the OS to the SD card.
Raspberry Pi Imager
You can learn more about the Raspberry Pi Imager and how to install it on your system in our article – How to write Raspbian to an SD card using Imager. This utility is available for various platforms, including Linux, Windows, and macOS.
Download the OctoPi OS image
There are two ways that you can use to download the OctoPi image.
- Download OctoPi from their official website: This method is highly recommended if you prefer having OctoPi stored on your PC, ensuring convenient access whenever needed. Launch your browser and navigate to the official OctoPi website. Scroll down to the “Image Downloads” section and download the “Stable version.” It’s a compressed file around 1GB in size.
- Download OctoPi during the flashing process: Instead of downloading OctoPi manually from their website, you can let the Raspberry Pi Imagwer utility do the download work for you. During the flashing process, you will see an option to either upload OctoPi or download it. The only drawback with this option is that the OctoPi file will not be stored on your system.
Launch Raspberry Pi Imager utility
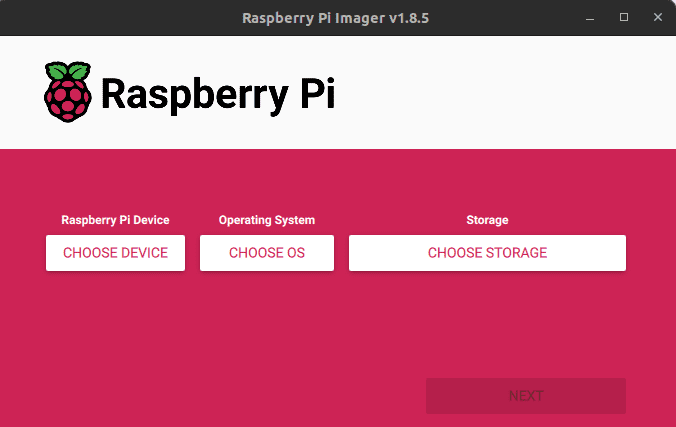
We believe you have already installed Raspberry PI Imager up to this point. Now, proceed to launch the utility from the application menu. You should see a window similar to the image below with three huge buttons: “CHOOSE DEVICE,” “CHOOSE OS,” and “CHOOSE STORAGE.”
Raspberry Pi Imager
Choose storage
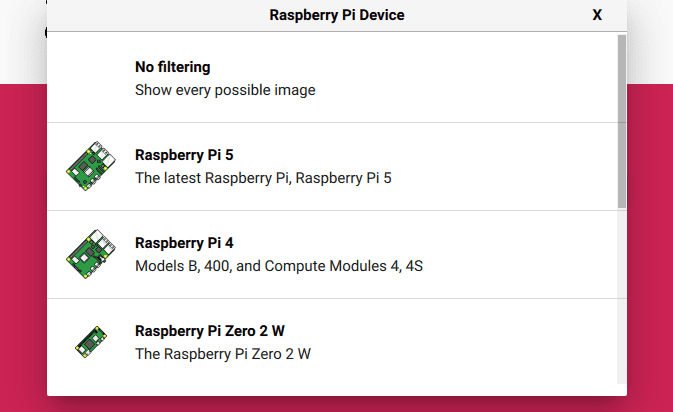
Click the “CHOOSE DEVICE” option on the Raspberry Pi Imager. This option allows you to choose the Raspberry Pi model that you want to use. You will see a pop-up window with a list of all Raspberry Pi models. Scroll down and select your model. In our case, we are using a Raspberry Pi 4B.
Choose storage
Choose OS
Next, you will need to select the OS that you want to write to the SD card. Now here you have two options,
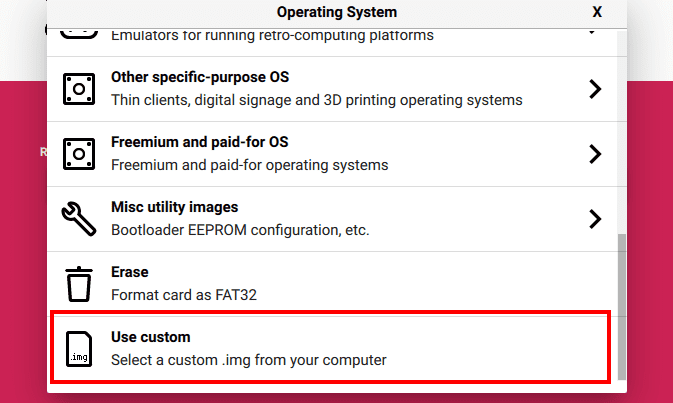
- Option one: If you downloaded OctoPi from the official OctoPi website, that means you have the OS image already stored on your PC files. Click “CHOOSE STORAGE.” A pop-up window will open with several options. scroll to the bottom and select “Use Custom.” This action will open the file manager, and you will need to select the OctoPi image that you just downloaded.

Use custom OS
- Option two: If you have not downloaded the OctoPi image on your system, you can easily download it from the Raspberry Pi image utility. Click “CHOOSE OS” -> “Other specific-purpose OS” -> “3D printing” -> “OctoPi” -> “OctoPi (stable).”
Download OctoPi

Select storage
Connect your SD card to the PC using an SD card adapter and click on ‘CHOOSE STORAGE.’ A window will appear, prompting you to choose the target SD card. Please be careful when selecting the target storage, as it will be formatted clean. You don’t want to lose your important data.
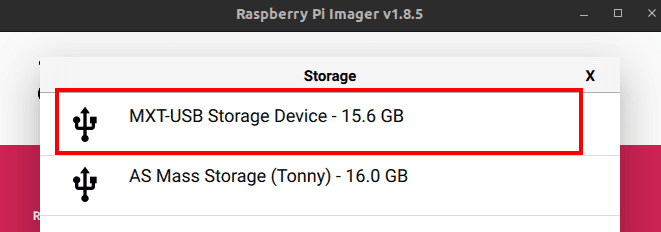
Choose storage
Once done, click “Next.”
OS customizations
Immediately you click the “Next” button, you will see a popup window prompting you to “apply OS customization settings.” These are configurations that you set before installing OctoPi. Click “EDIT SETTINGS.”
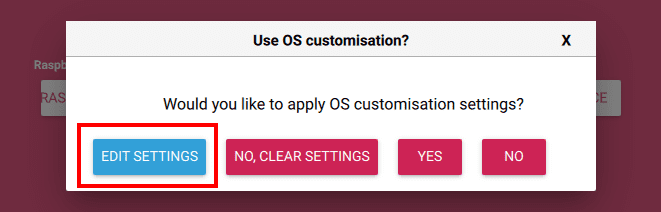
OS customs
A window will open where you can set various configurations, including hostname, wireless configuration, username and password, SSH, etc. Feel free to check out the settings available in the three tabs – GENERAL, SERVICES, and OPTIONS.
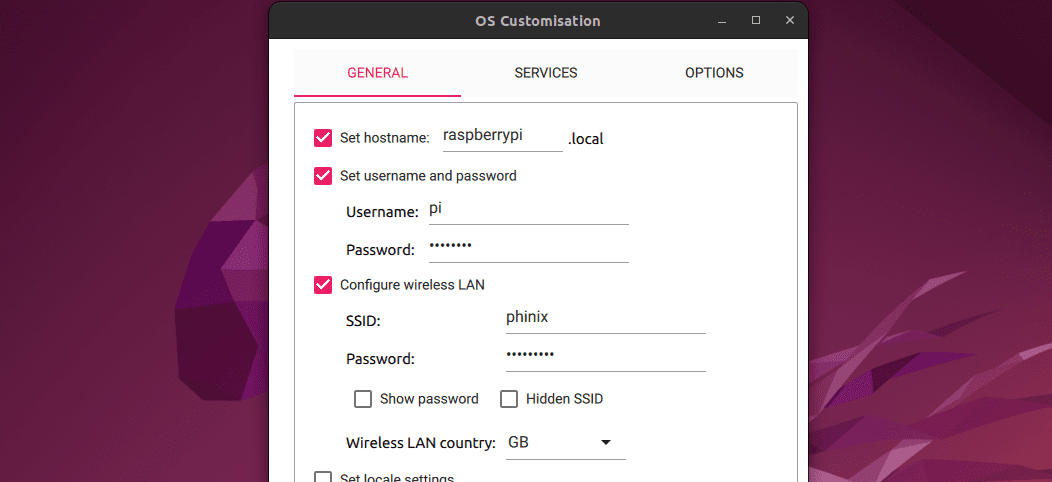
OS settings
Once done, click “SAVE” at the bottom of the window.
You will be taken back to the OS customization window. Now that you have already done your configurations, click “YES” to start writing OctoPi to the SD card.
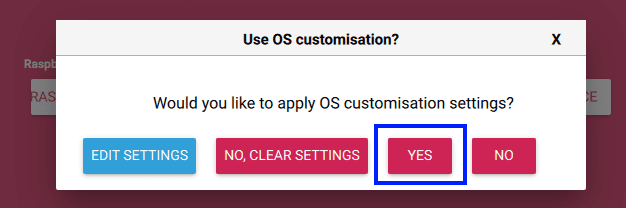
Apply OS customisations
You will see a warning that all data on the SD card will be erased. Click “YES” to proceed. The Raspberry Pi Imager utility will start writing the OS to the SD card.
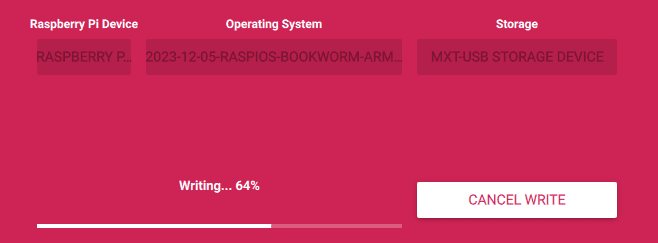
Flash OctoPi to SD card
First start
After successfully writing OctoPi to the SD card, remove the SD card from the PC and insert it into the Raspberry Pi. If you are using the ethernet for an internet connection, ensure you plug in the cable to the Raspberry Pi. Next, connect any other peripherals including the 3D printer. Once done, connect the power adapter to Raspberry and power it ON.
If you are connected to a display monitor, you will see lines running down your screen as OctoPi applies the OS customizations that we set in the Raspberry Pi Imager utility. Since we are booting this image for the first time, it might take a while (around 3 minutes) and also reboot several times before finally showing a login prompt.
Tip: OctoPi doesn’t come with a graphical display. Instead, it starts a web server that you can use to access OctoPrint over the browser on another device on the same network as the Raspberry Pi.
Accessing OctoPrint
After seeing the login prompt (if you have a display monitor) or after 3 minutes, launch the browser on another device on the same network as the Raspberry Pi. Use any of the URLs below to access OctoPrint.
http://raspberrypi.local: Remember to replace “raspberrypi” with the hostname you set during OS customizations.http://[raspberry-IP]: Replace “raspberry-IP” with the IP assigned to your Raspberry Pi. For example http://192.168.1.240
You will see the OctoPrint welcome screen open in your browser, as shown in the image below.
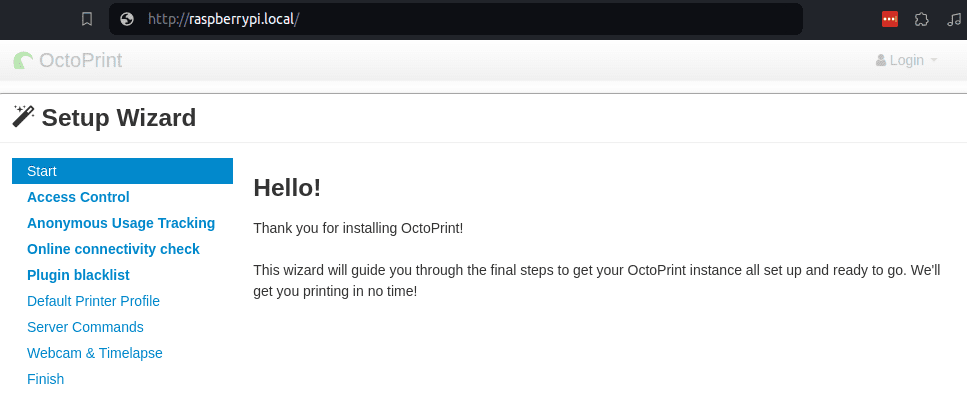
OctoPrint welcome screen
Method 2: Install OctoPrint using the OctoPrint snap package
If you already have the official Raspberry Pi OS installed and running, there is no need to remove it and install OctoPi. Instead, you can install the OctoPrint snap package, which also works out of the box. Follow the steps below to get started.
Install snapd
Snapd is a service that runs in the background (daemon) and manages Snap applications. To install Snapd, execute the commands below.
sudo apt update
sudo apt install daemon
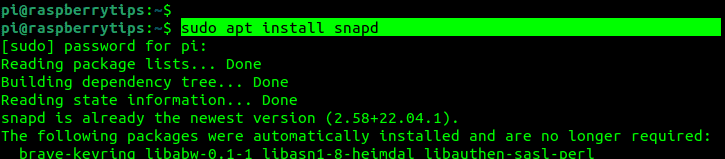
Install snapd
Install the OctoPrint snap package
After successfully installing Snapd, use the command below to install the OctoPrint Snap package.
sudo snap install octoprint-pfs --edge

Install OctoPrint Snap package
After a successful install, launch the browser and access OctoPrint using the URL below. Don’t forget to add the port number (5000).
http://[raspberry-IP]:5000
e.g.,
http://192.168.100.240:5000
OctoPrint welcome screen
Getting started with OctoPi
Up to this point, we hope you already have access to the OctoPrint welcome screen. Whether you installed the OctoPi image or you decide to install the OctoPerint snap package. The first screen is just a welcome message. Click “Next” to continue.
Access control
OctoPrint ships with Access Control enabled, requiring users to log in before interacting with the printer. This precaution prevents unauthorized access, protecting the printer from potential damage or misuse, such as in the case of malicious intent. To get started, set the username and password that you will use to access OctoPrint.
Remember to click “Keep Access Control Enabled” to allow you to log in with a username and password anytime you access OctoPrint.
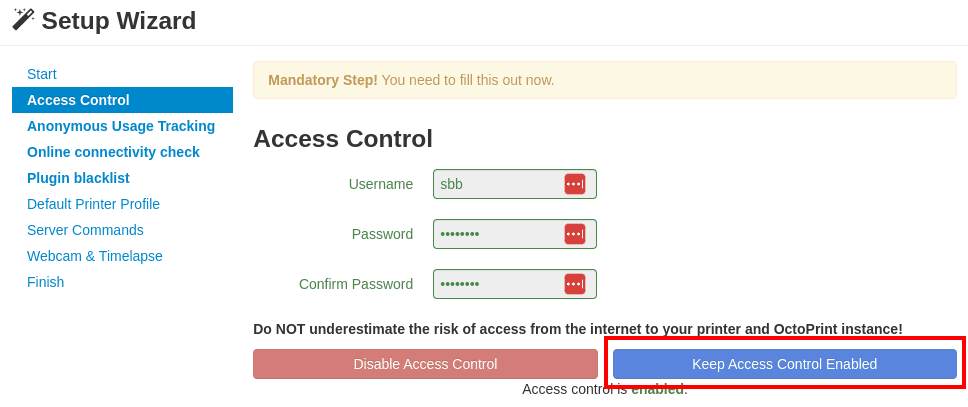
Access control
Anonymous usage tracking
This screen allows you to make a personal preference on whether you want to send data anonymously to the OctoPrint developer team. Enabling anonymous usage tracking contributes valuable data to understanding the OctoPrint user landscape, including instances, versions, and the success of print jobs.
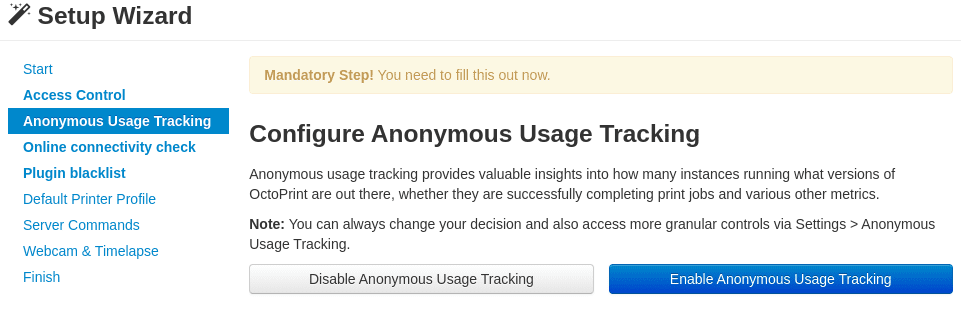
Anonymous data usage
Online connectivity check
The connectivity check in OctoPrint, when enabled, performs regular internet connection checks to optimize resource usage, avoiding resource-intensive operations that would likely fail, such as update checks. If disabled, OctoPrint will assume a constant working connection to the internet. However, if this is not the case, server startups and update checks may experience delays.
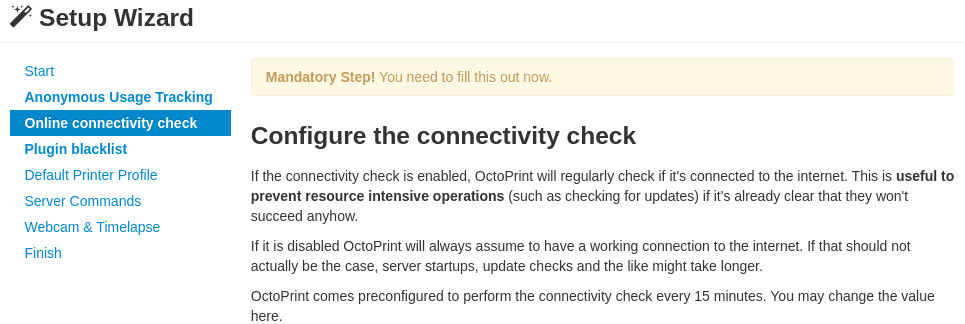
Connectivity check
Click “Enable connectivity check” at the bottom of the window and click “Next.”
Plugin blacklist
OctoPrint provides a crucial security measure by supporting a centralized plugin version blacklist. This feature automatically disables versions of third-party plugins known to cause severe issues, safeguarding normal operations.
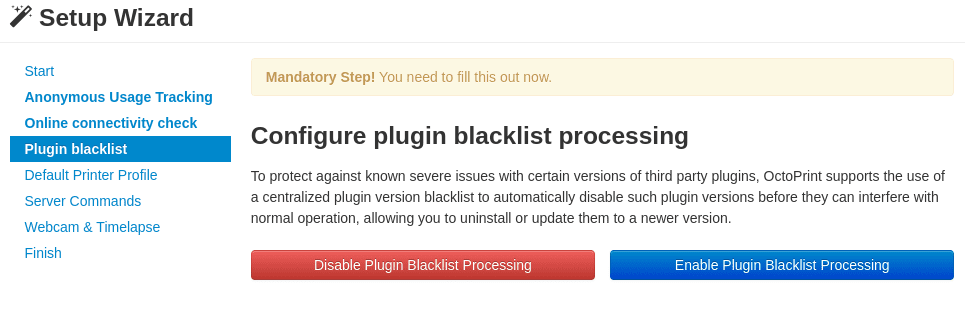
Plugin blacklist
Default printer profile
This screen enables you to configure various settings for your 3D printer. On the “General” tab, you will need to set your printer’s Name and model. Here, you are not restricted, and you can use any fancy name that you would love to call your printer.
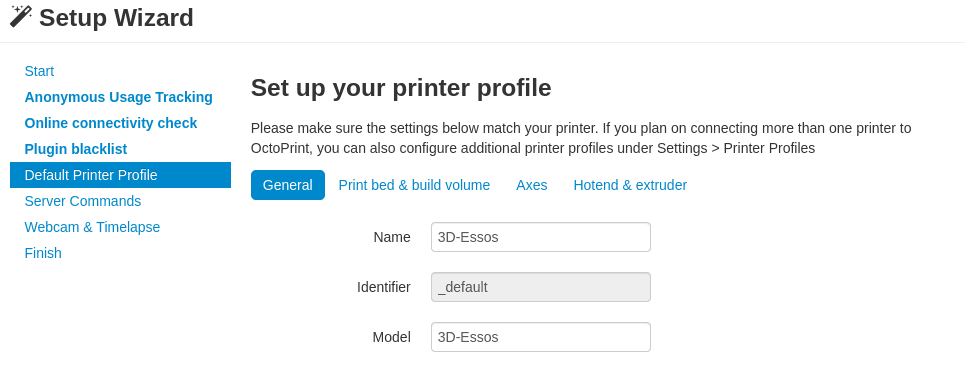
Printer profile
For the other tabs – Print bed & build volume, Axes, and Hotend & extruder – you can leave the values as default or change them to fit your printer’s specifications.
Server commands
OctoPrint supports several system commands that either restart or power off the system on which OctoPrint is running.
- Restart OctoPrint:
sudo systemctl restart octoprint
- Restart system:
sudo systemctl reboot
- Shutdown system:
sudo systemctl poweroff

Server commands
Webcam & timelapse recordings
If you have a webcam, it’s time to set it up. For the webcam, the Stream URL is crucial; it’s the URL OctoPrint utilizes to embed the actual webcam stream, preferably an MJPG stream, into the web interface. Additionally, set the Snapshot URL, which OctoPrint uses to fetch single images from the webcam for creating timelapse recordings. Ensure this URL is fully qualified and accessible from the OctoPrint server.
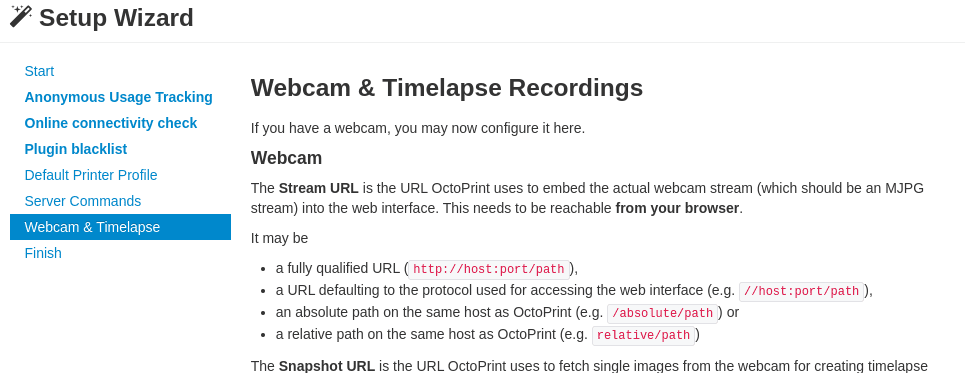
Webcam and timelapse
Using OctoPrint
Once you are done setting up OctoPrint, you will be redirected to the main OctoPrint dashboard, which looks similar to the image below.
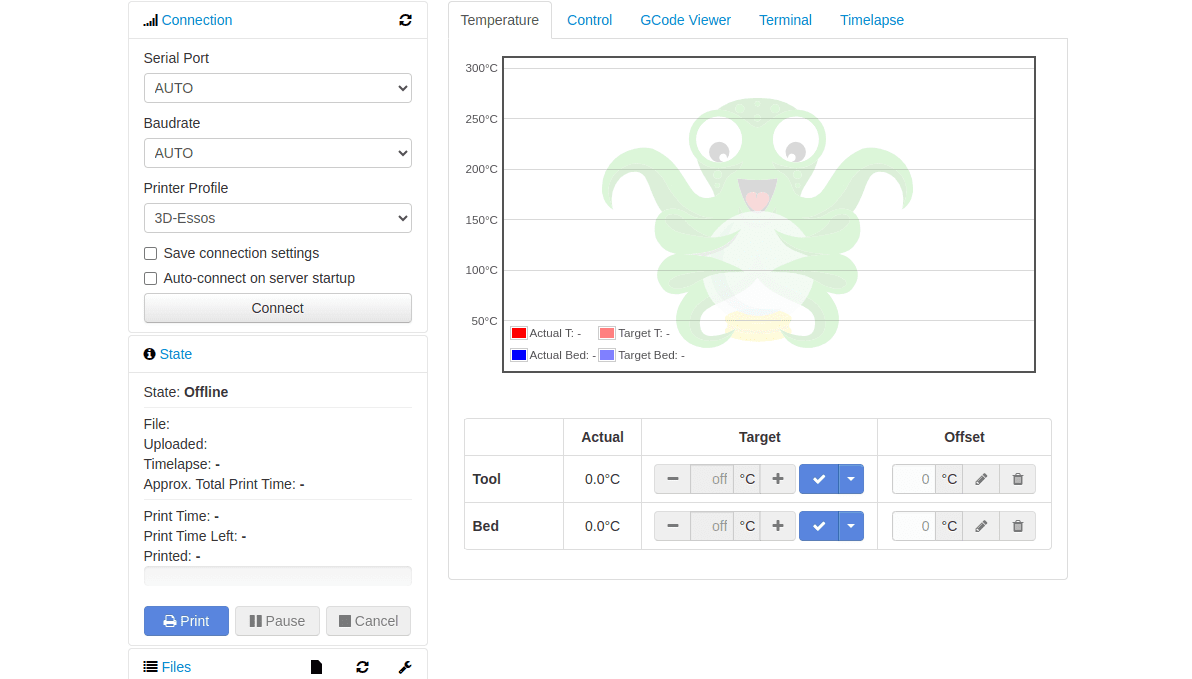
OctoPrint dashboard
That’s it! You have successfully installed OctoPrint on your Raspberry Pi. Now you can go through the various features present on the dashboard.
Wrapping up
We have discussed two methods in detail. The first method is to use the OctoPi image, which is pre-configured to run OctoPrint without any hassle. The second method involves installing the OctoPrint snap package on the official Raspberry Pi OS, which is already installed on your device. If you have any issues during the installation process, please feel free to share them with us in the comments section below. We will be happy to assist you.