
So you bought a new Raspberry Pi? That is amazing. There is a world of interesting ideas to explore now. But wait for a second because it is important to take care of your hardware. It is a known fact that cooling the primary components of a system improves performance dramatically. The best way to do that is to get heat sinks for your Raspberry Pi and possibly also a fan. In this article, we will show you how to install heat sinks on your Raspberry Pi and the difference it makes.
How do Heat Sinks work?
The physics is elementary. If you’ve seen a heat sink, you must have noticed that it is a tall structure with many folds. In your imagination, flatten out the folds of the heat sinks, making it into a large single surface. It is much larger than the small base it has. The heat sink’s base touches the component on the board. The intention is to receive heat on the base ( generated by the component) and spread it out across the large surface area of the top of the heat sink. It is known that hot air rises, and the more surface area, the easier it is for the air to scatter. So the heat from the board can dissipate into the surroundings more easily because of the large surface area, keeping the components relatively cooler. Hence the name ‘heat sink.’
How to install Heat Sinks?
If you have bought heat sinks for your Raspberry Pi 4, you have probably received three heat sinks of different sizes. One is square-shaped, another is longer on one side and the last one is distinctly smaller than the other two. These are all for distinct locations.
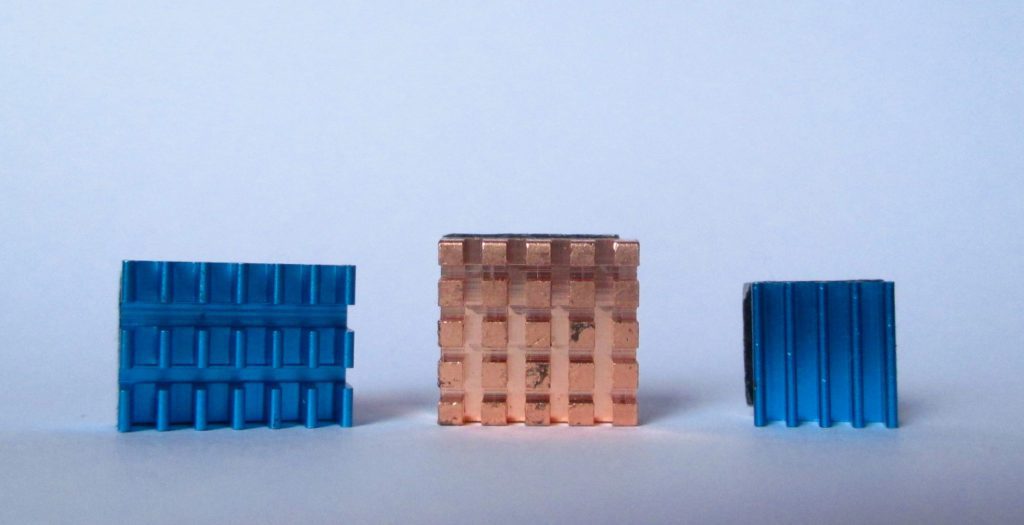
Different Heat Sinks
The square heat sinks go on top of the processor. The long, rectangular one is for the RAM chip and the small heat sink is for the Ethernet-USB controller (makes sense because most connections are made through the USB ports). Don’t worry; we will show the location of each. Let us get started with the square one. The heat sinks will have double-sided tape on the base. Peel off the non-adhesive layer to expose the adhesive base.
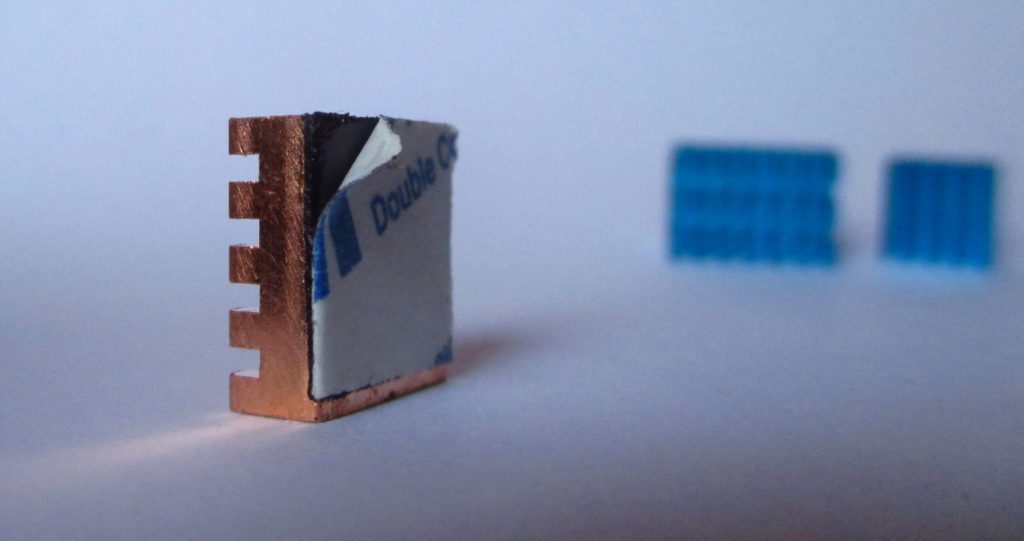
Peeled off layer
Remember, once you place the heat sink, it will not be easy to take it off again and might render it useless. Now place the heat sink carefully on top of the processor, as shown in the image below. Make sure that you place it precisely according to the borders so that it doesn’t get placed skew.
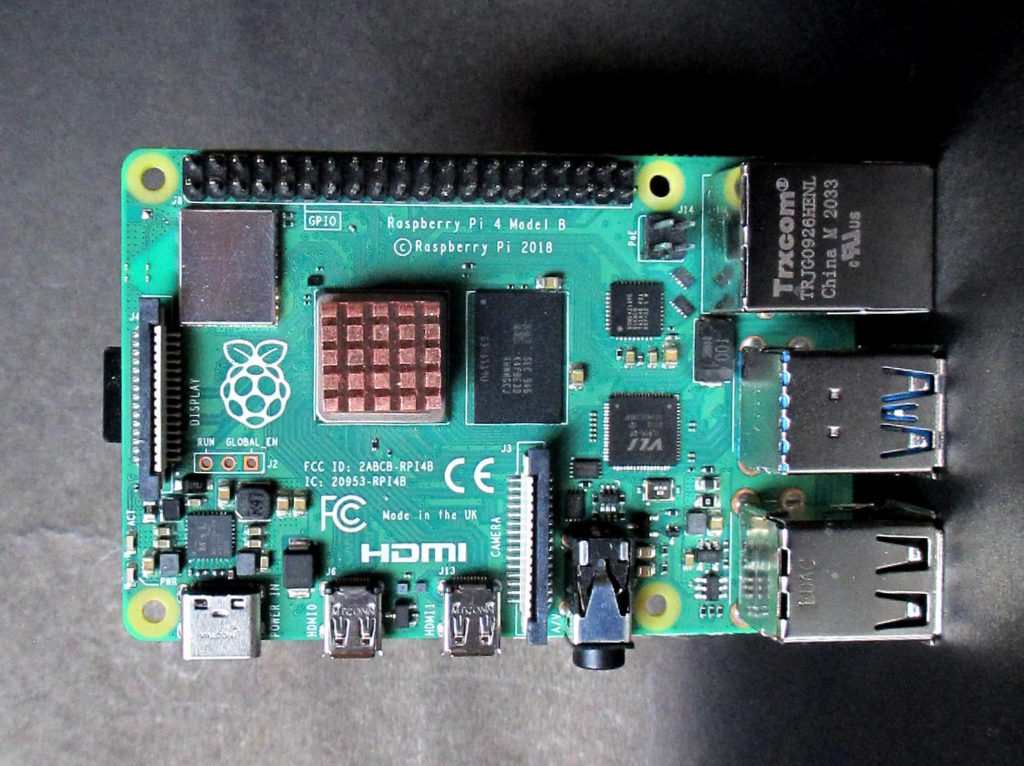
Processor Heat Sink Installed
Take the peel off the rest of the two heat sinks, and place them in the image below.

All Heat Sinks Installed
Additional Cooling with Fan
The cherry on the top for the heat sinks would be a case fan. The heat would be properly pulled and thrown out of the (thermodynamic) system. There are many kinds of cases available, with different kinds of fans. There is the official one, of course. It has speed control and can get triggered automatically if the system goes beyond (by default) 80°C. It has three leads for power, ground, and speed control function.
The case, heat sinks, and fan combined can create an amazing unit, much like a mini-computer. It will be properly cooled, hence will have optimal performance, and the board will be completely safe from physical damage. Making a unit like this is highly recommended if you are planning to use your Raspberry Pi for long stretches or as a desktop replacement. Do this, especially if you are planning to overclock your Pi.
Comparison
To clarify the significance of heat sinks even further, we made a temperature comparison before and after installing the heat sinks. The temperature has been measured right after boot. You can check the temperature on Raspberry Pi OS using the command:
vcgencmd measure_temp
Here is the temperature of the Raspberry Pi, totally bare-bones:

Temperature without Heat Sinks
Now the temperature after installing heat sinks and case fan:

Temperature after installing Heat Sinks
There was a stellar difference of 15°C! This clearly shows how effective heat sinks can be.
Conclusion
As we have seen above, cooling of a system is integral for better performance. Installing heat sinks on your Raspberry Pi will ensure that you get the most out of your little machine. Additionally, install a fan on a case, and you will have yourself an extremely versatile mini computer. We hope this article was helpful to you.