
No matter what operating system you are running or what tasks you are executing, taking screenshots from time to time always comes in handy. Maybe you are writing a piece of code and want to ask for clarification on several lines on your social media platforms; a screenshot would be better than copying the lines of code and pasting them on the chatbox.
Or maybe you are playing a game and want to keep a snap of your “high score record” to show it to your friends online; a screenshot will be the perfect option. Those are but a few examples of why screenshots are pretty helpful.
Different operating systems come with other methods of taking screenshots. Windows users use the PrintScreen button, macOS users use the Cmd + Shit +4/5 combination, and Linux users use the PrntScrn button or the screenshot utility provided by their Desktop distribution. We will focus on Raspberry Pi in this post. How do you take a screenshot on the Raspberry Pi OS?
Taking screenshots on Raspberry Pi OS
Tip: We will use Raspberry Pi OS – BullsEye for this post. However, the methods discussed here should also work for any other Raspberry Pi OS you are running.
Method 1: Take Screenshots Using the PrtSc (PrintScreen) Key
The print screen is not new when it comes to taking screenshots. Most Windows and Linux users utilize the Print Screen key to take screenshots on their systems. When working with Raspberry Pi, pressing the Print Screen key will a screenshot of your whole desktop and save the file in the /home/pi directory. The image below shows a screenshot we took by pressing the Print Screen key.
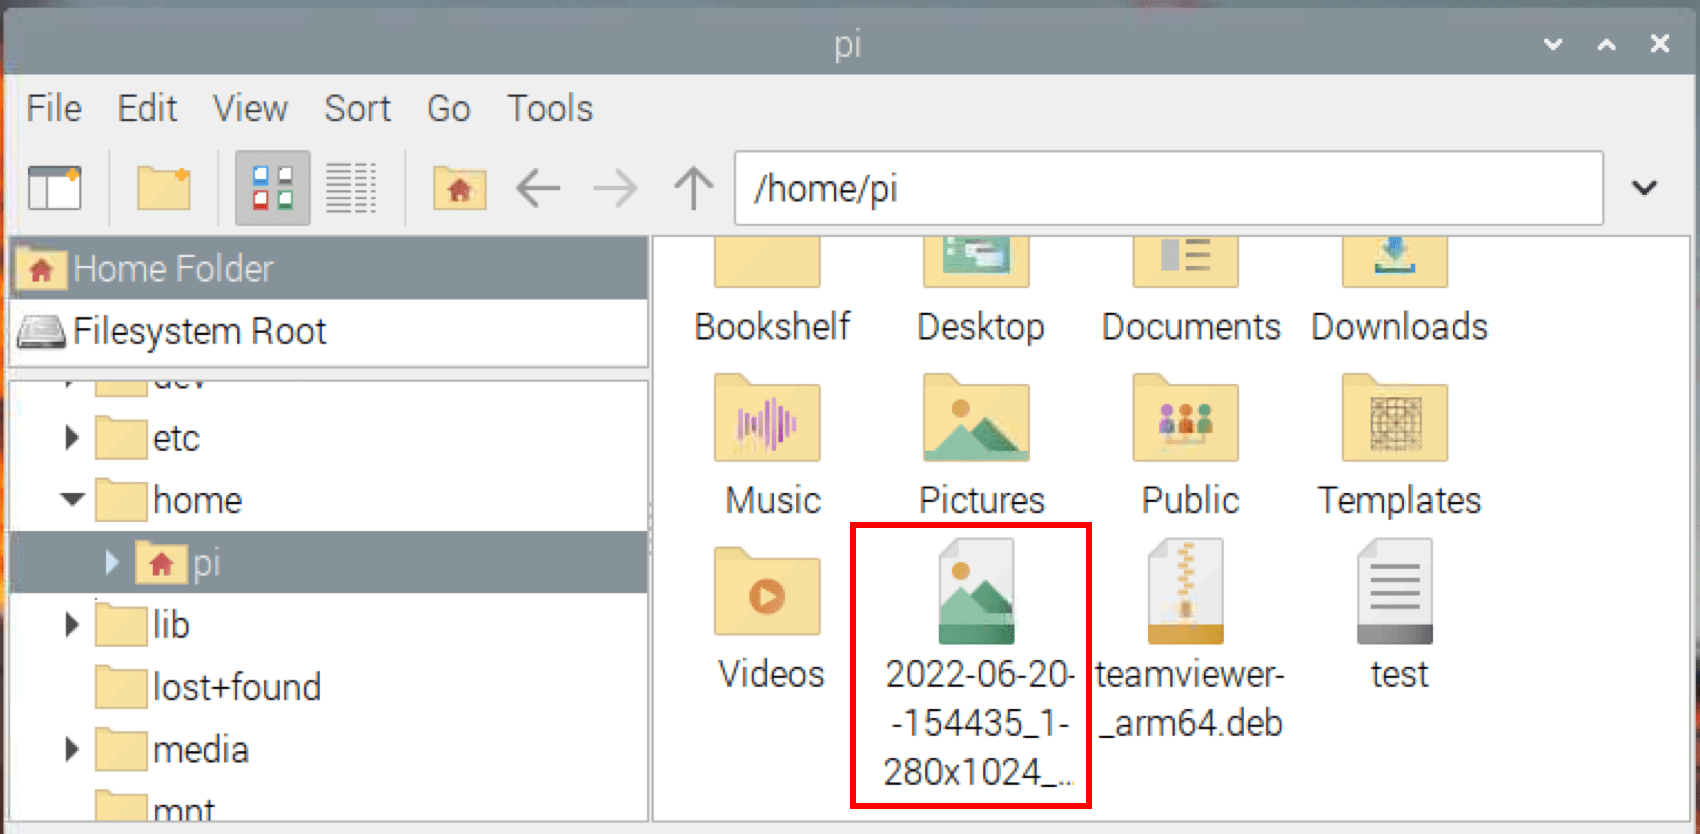
Home directory
That was pretty easy. Let’s understand what happens when you press the Print Screen key. The Raspberry Pi OS comes with a command-line screenshot tool called “scrot.” We will look more into this tool below. The Raspberry calls the scrot command behind the scenes whenever you press the Print Screen button. This utility takes a screenshot of the entire desktop and saves it in the /home/pi directory.
Method 2: Take Screenshots Using the Scrot Command
As we have mentioned in “Method 1,” the Raspberry OS comes with a command-line utility that you can use to take screenshots from the Terminal. By executing the scrot command without any parameters, it will take a screenshot of the whole desktop and save it in the /home/pi directory with the current date and time as the file name.
scrot
There are several arguments that you can pass to the Scrot command. Let’s take a look at each of them below.
Set File name: Scrot automatically saves any screenshot with the date and time as the file name. It might not be a reliable solution, especially when you have many screenshots you want to sort. The most reliable solution is to specify the “file name” whenever executing the Scrot command. For example, to take a screenshot and save it as “Screenhot1,” I will run the command below.
scrot Screenhot1
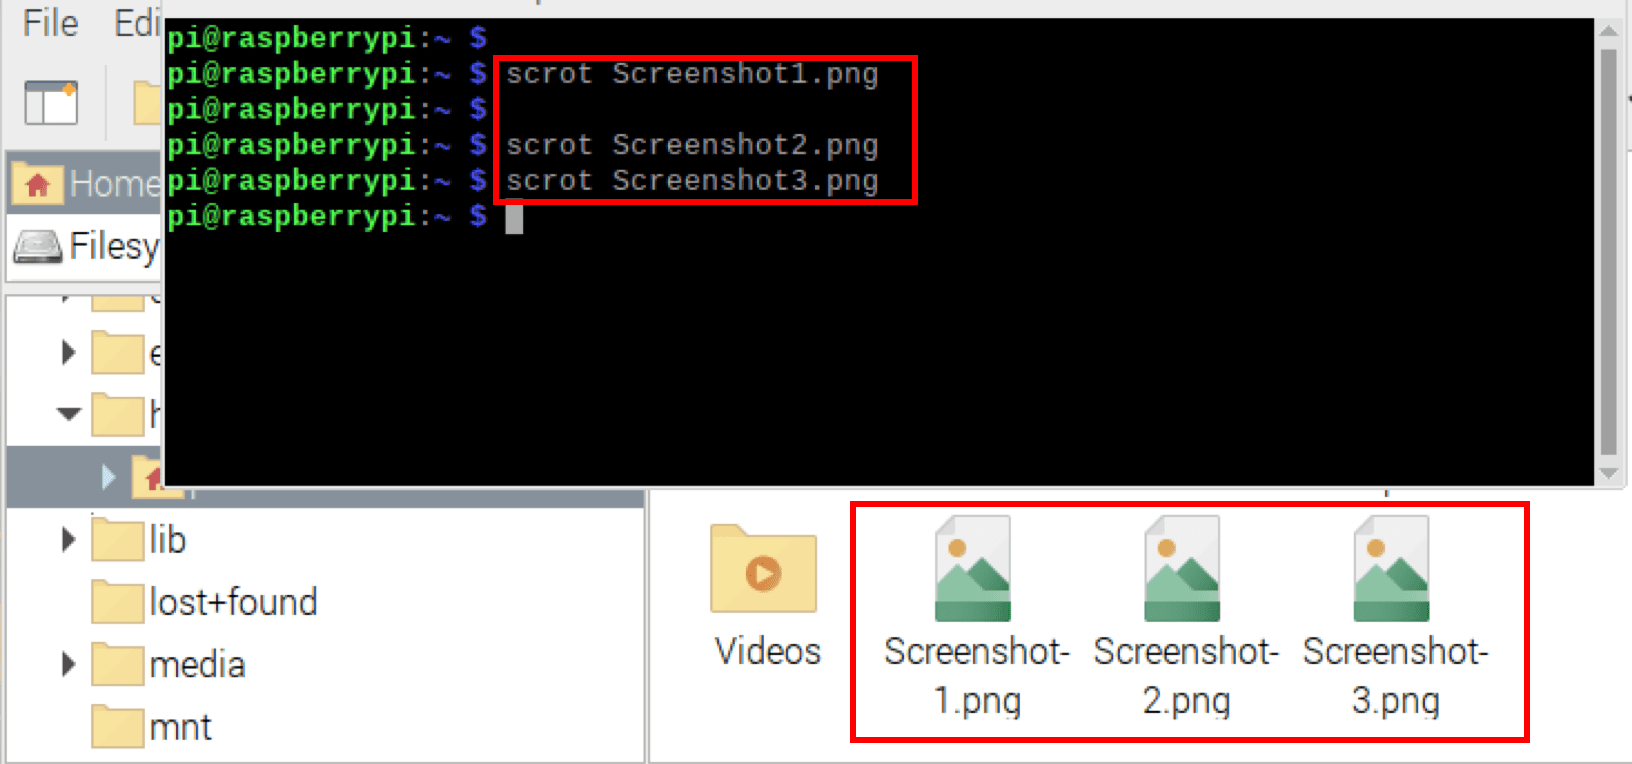
Set filenames in the screenshot
Delay Timer: Another parameter you can use is setting a delay timer. When you execute the scrot command, it captures what is on the desktop at that point, including the Terminal where you run the command. Unfortunately, most times, you might not be interested in the Terminal but something else like the browser, file manager, etc. The trick we can use is setting a delay timer for the Scrot utility, which will give us time to arrange the desktop as we wish.
The command below will set a five seconds delay before taking a screenshot of the whole desktop.
scroll -d 5
Capture active window: With other screenshot utilities, whenever you want to take a screenshot of a specific window, you are constantly forced to take a screenshot of the whole desktop and then use cropping tools to crop the image. Luckily, the Scrot utility relieves you of all this hustle. You can take a screenshot of the active window using the -u parameter below.
scrot -u
However, there is a catch! Whenever you run the scrot -u command, the current active window is the Terminal. To solve that, you can add a delay which will give you time to click on another window. The command below will provide us with five seconds to select another window.
scrot -u -d 5
Alternatively, instead of using the -u parameter to take a screenshot of the currently active window, you can use the -s parameter, which will wait for you to click on the window you want to screenshot.
scrot -s
If you want to include the window border, add the b parameter after the scrot -u or scrot -s command as shown below.
scrot -ub
scrot -sb
Using Scrot over SSH: If you are connected to your Raspberry Pi via SSH, you will get the error “Can’t open X display” whenever you try executing the Scrot command. To solve that, you need to tell Scrot to use the local display by adding ‘DISPLAY=:0’ as shown below.
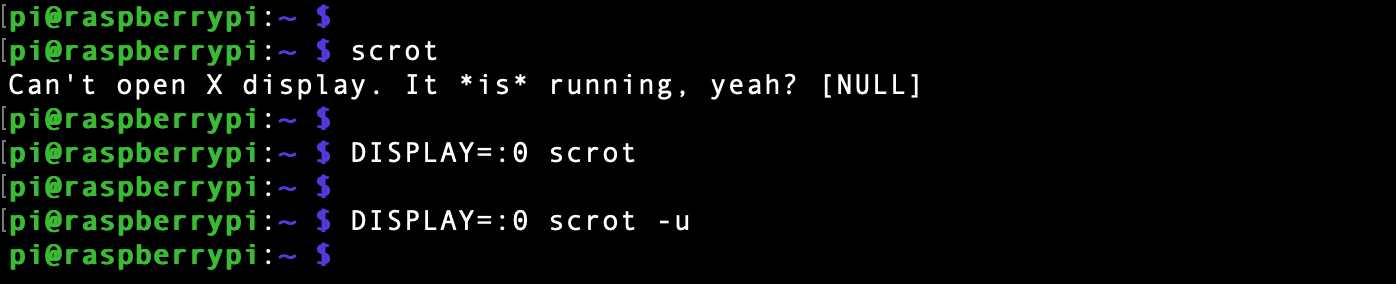
Use Scrot over SSH
Method 3: Use the Graphical Screenshot Tool
Another simple method to take screenshots on your Raspberry Pi is the Gnome Screenshot tool. Unfortunately, this utility doesn’t come pre-installed. Execute the command below to install it.
sudo apt update
sudo apt install gnome-screenshot
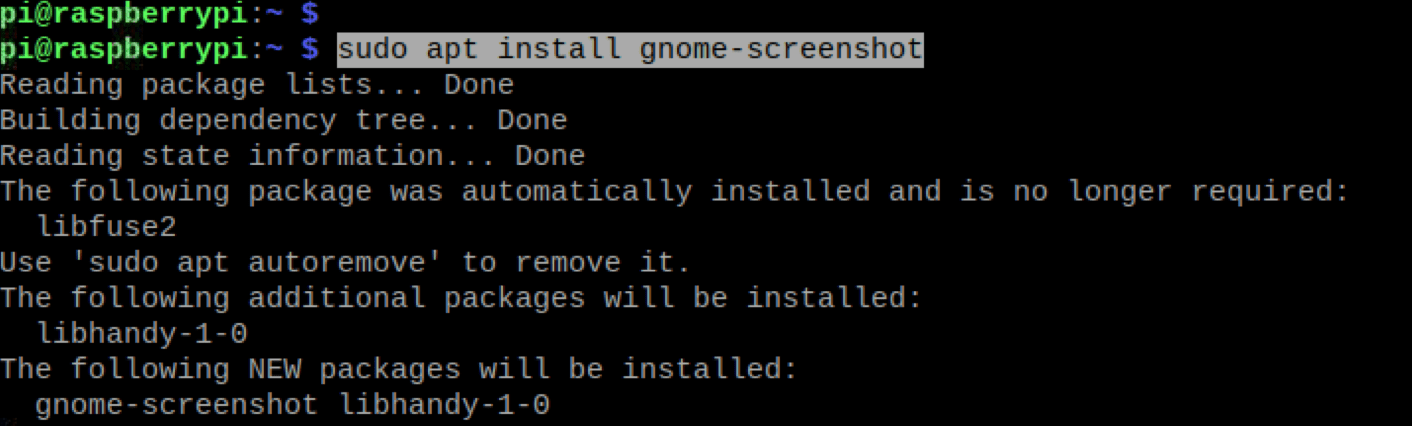
Install Gnome screenshot
After a successful installation, you can find the Screenshot tool under the accessories menu, as shown below.
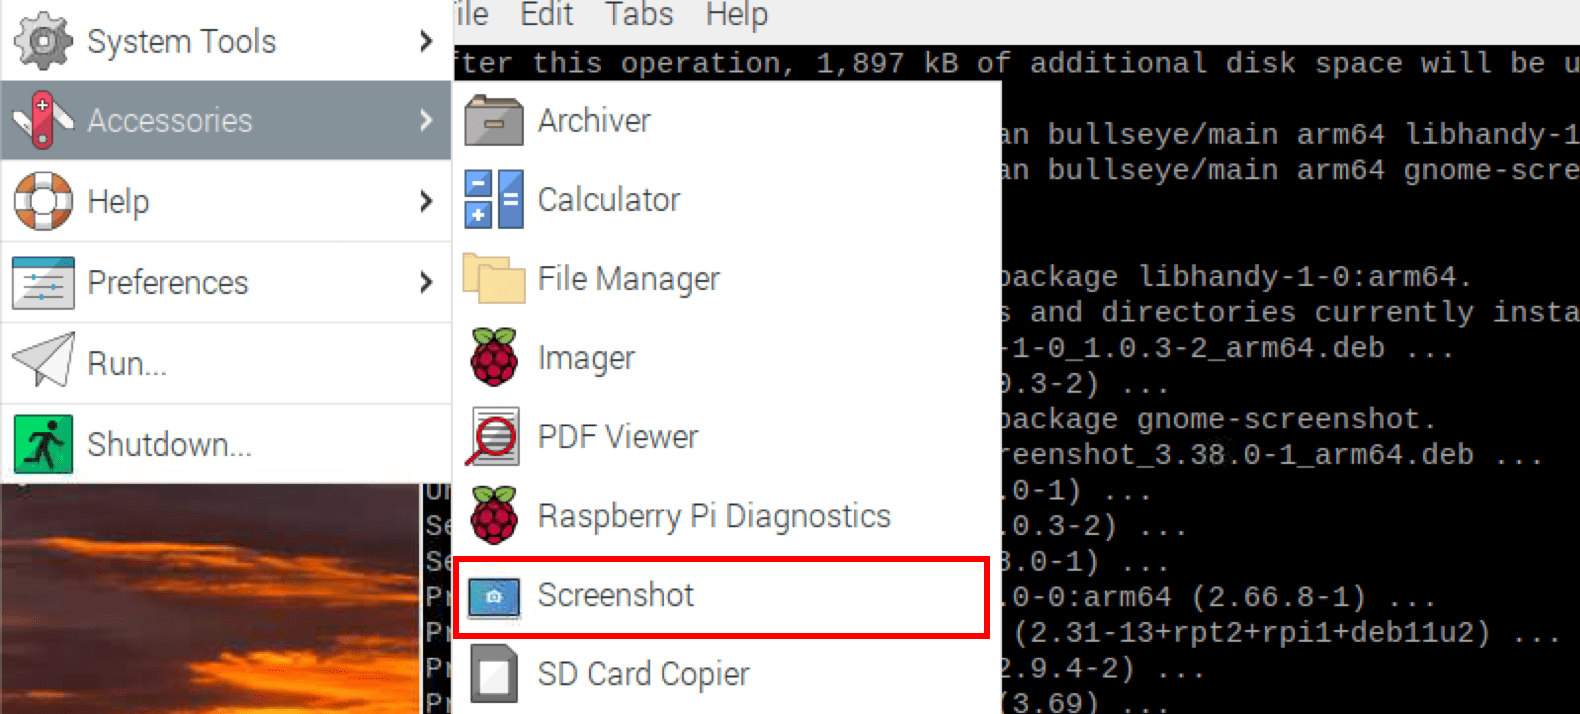
Launch Gnome Screenshot
The Gnome-screenshot tool comes with all the features available in the Scrot command-line utility. It includes options like:
- Grab the whole screen: This option allows you to take a screenshot of the entire desktop window.
- Grab the current window: This option takes a screenshot of the active window.
- Select area to grab: This option allows you to select a screen section where you want to take a screenshot.
- Grab after delay: This option allows you to set a delay (in seconds)
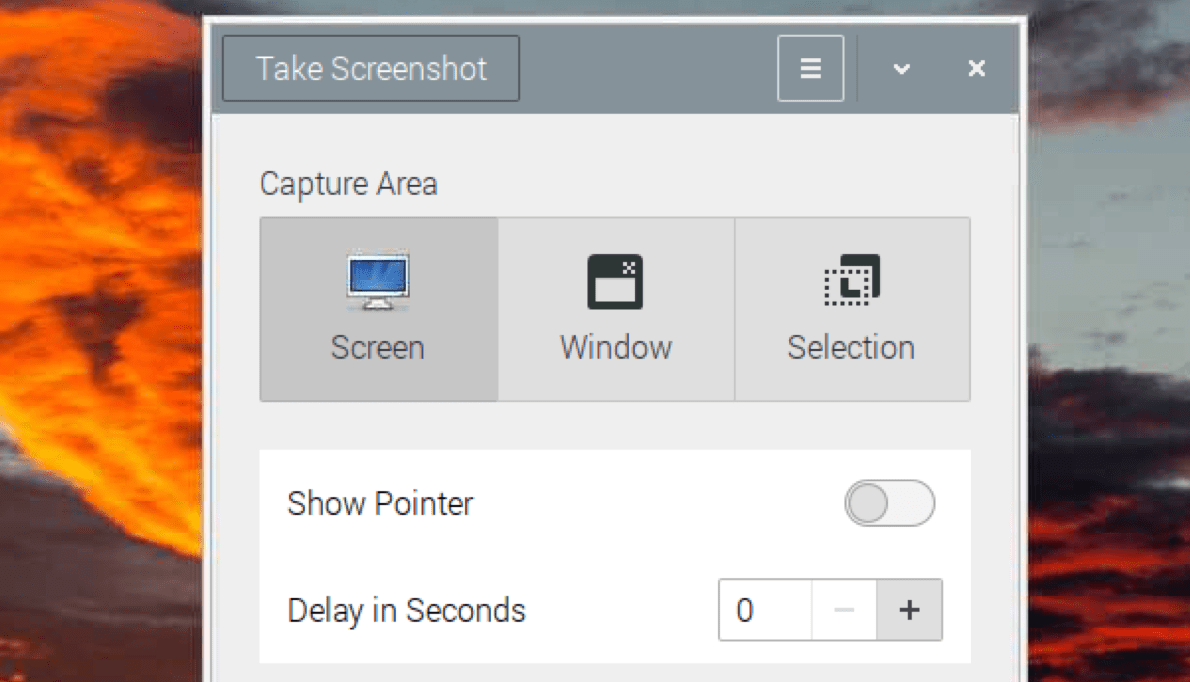
Gnome Screenshot
Another feature you will notice with the Gnome screenshot utility is that whenever you take a screenshot, you will see a prompt to enter the name and directory where you want to save the screenshot, as shown below.
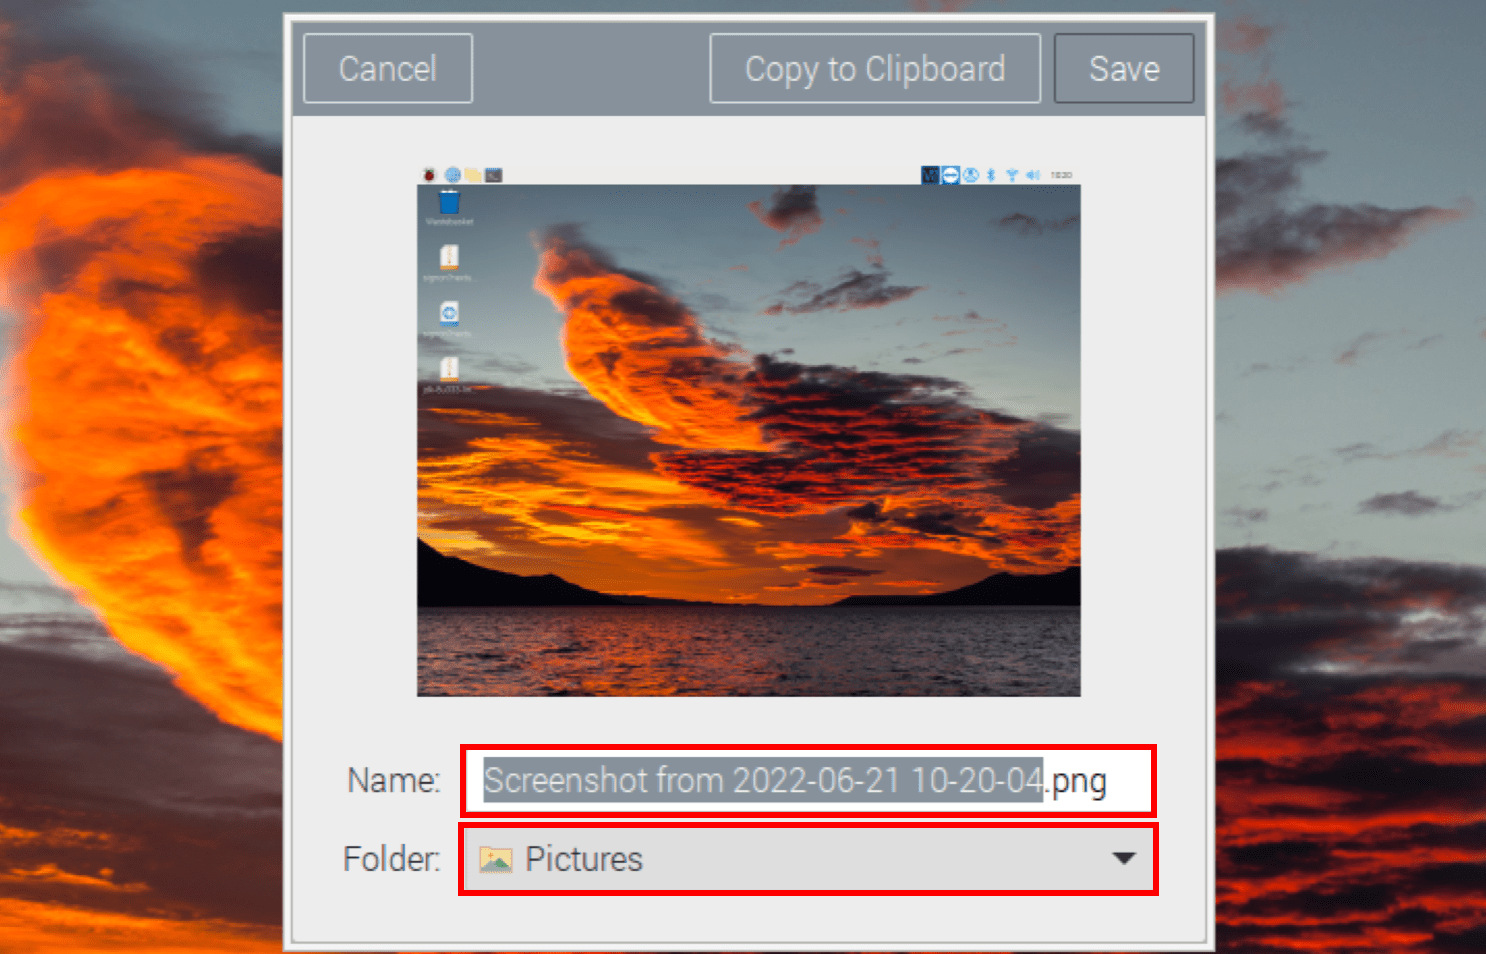
Enter a filename and select the directory
Make a Shortcut for Gnome Screenshot
After using the Gnome screenshot for a while, you will notice it has one major flaw. Whenever you take and save a screenshot, the Gnome-screenshot window will close, and you will have to relaunch it to take another screenshot. That might not be very time efficient. We will create a keyboard shortcut to launch the Gnome-screenshot tool to solve that. Follow the steps below.
Open the Terminal and use the cd command to navigate to the /etc/xdg/openbox/ directory. When you run the ls command inside this directory, you will see a file with the name “lxde-pi-rc.xml.”

Set Shortcut
Open the file using the nano editor using the command below.
sudo nano lxde-pi-rc.xml
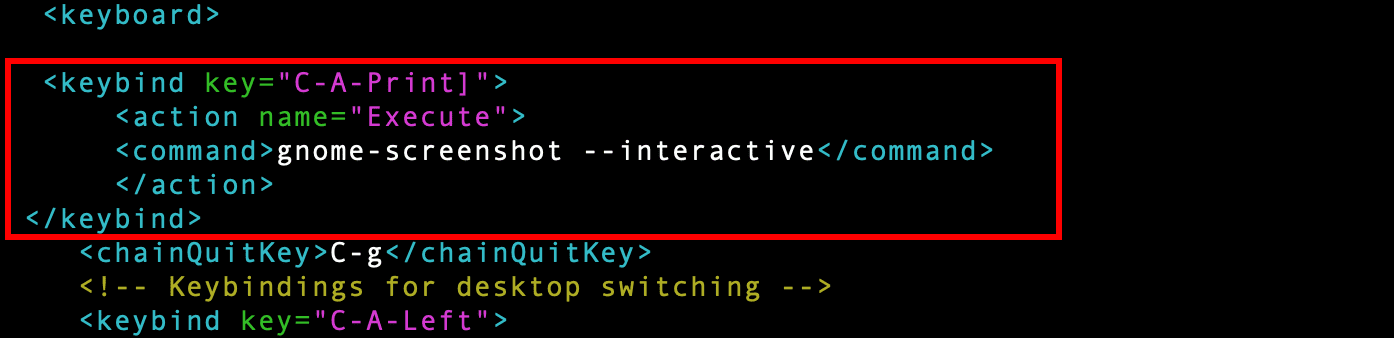
Scroll through this file and find the <keyboard> line. Paste the lines below under that line.
<keybind key="C-A-Print]">
   <action name="Execute">
     <command>gnome-screenshot --interactive</command>
   </action>
</keybind>
Add shortcut
Let’s look at this code in detail:
- <keybind key=”C-A-Print]”>: Here, we are setting the Ctrl + Alt + PrintScreen keys
- <command>gnome-screenshot –interactive</command>: Here, we are setting the command that will be executed when we type the Ctrl+Alt+PrintScreen keyboard combination.
Conclusion
This post has shown you three methods that you can use to take screenshots on your Raspberry Pi. Of all the three methods, the Gnome-screenshot tool is my favorite. It is easy to use and incorporates all the features you need to take perfect screenshots. Is there a method you use that we left out? If so, please let us know in the comments below.