
The ODROID-N2+ is a versatile and powerful single-board computer that offers exceptional performance for hobbyists, enthusiasts, and developers. If you’re new to the world of single-board computers or the ODROID-N2+ specifically, this comprehensive guide will help you get started. From understanding what the ODROID-N2+ is to setting it up with your preferred operating system and peripherals, we’ll walk you through the process step by step. Let’s get started!
The ODROID-N2+ is developed by a company called Hardkernel, based in South Korea. It’s designed to offer exceptional performance and versatility, making it a popular choice for hobbyists, enthusiasts, and developers alike.
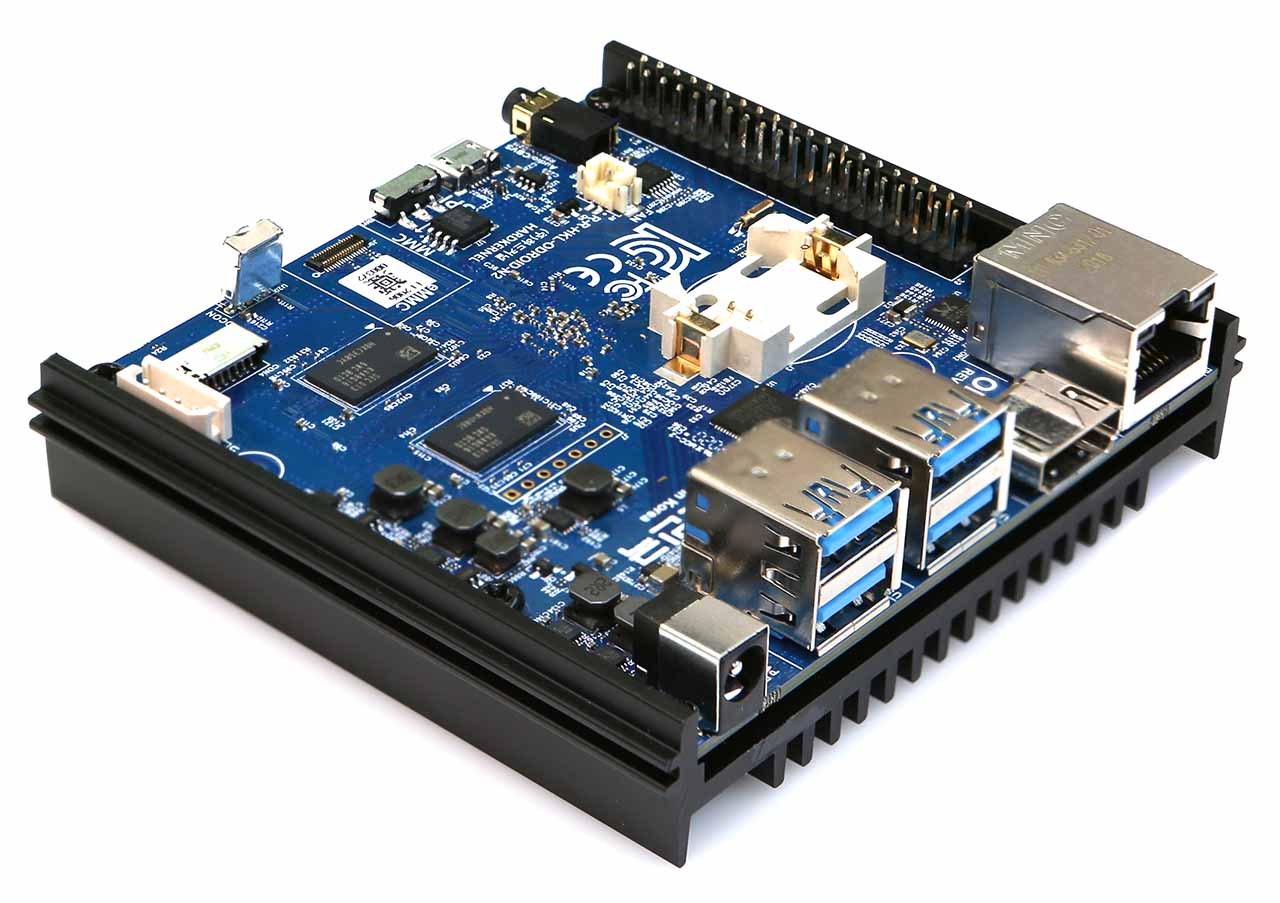
Odroid N2+ Single-Board Computer
So, let’s dive in! The first thing you need to know is what exactly the ODROID-N2+ is. It’s essentially a tiny computer that you can use for a wide range of tasks, from running software and applications to controlling hardware and electronics. It’s powered by an Amlogic S922X quad-core Cortex-A73 and dual-core Cortex-A53 processor, and it comes with either 2GB or 4GB of DDR4 RAM.
The ODROID-N2+ is an updated version of the ODROID-N2, featuring several improvements such as a maximum CPU clock of 2.4Ghz for the quad-core Cortex-A73 and 2.0Ghz for the dual-core Cortex-A53. Additionally, it includes an on-board RTC backup battery holder.
Before we go any further, it’s worth noting that there are a few different versions of the ODROID-N2+. The differences between them are mostly related to the amount of RAM and storage they come with, so make sure you choose the one that best suits your needs.
Odroid N2+ Specifications
Here are the specifications for the Odroid N2+:
- CPU: Amlogic S922X (Quad-core Cortex-A73 @ 2.4GHz + Dual-core Cortex-A53 @ 1.8GHz)
- GPU: ARM Mali-G52
- RAM: 4GB or 2GB LPDDR4
- Storage: eMMC module socket (8GB or more) and microSD slot (up to 128GB)
- Connectivity: Gigabit Ethernet, 802.11ac Wi-Fi, Bluetooth 4.2
- USB: 4 x USB 3.0 Host ports, 1 x USB 2.0 OTG port
- Video Output: HDMI 2.0a, DisplayPort 1.2 (up to 4Kp60)
- Audio Output: HDMI, 3.5mm audio jack, SPDIF
- Expansion Headers: 40-pin GPIO header with SPI, I2C, UART, PWM, and ADC pins; 7-pin I2S header, 22-pin eMMC header
- Operating System: Linux (Ubuntu, Debian, Armbian, etc.), Android
The quad-core Cortex-A73 CPU and ARM Mali-G52 GPU make it capable of running demanding applications and games, while the various expansion headers provide ample connectivity options for adding peripherals and sensors. The board is also well-supported by the open-source community, with many Linux distributions and software packages available.
Now that you know what the ODROID-N2+ is, it’s time to get started! Here are the steps you need to follow to set up your device:
Choose an operating system
The ODROID-N2+ can run a variety of different operating systems, so the first thing you need to do is choose one that suits your needs. Some popular options include Ubuntu, CoreELEC, and Android.
Install the operating system
Installing an operating system on the ODROID-N2+ is a crucial step in getting the device up and running. Fortunately, the process is straightforward, and there are several options available to choose from.
Before you begin, it’s important to choose an operating system that’s compatible with the ODROID-N2+. Some popular choices include Ubuntu, CoreELEC, and Android. Make sure to download the version of the operating system that matches your device’s specifications, including the amount of RAM and storage you have. Here are officially supported OS from Hard Kernel.
Once you’ve selected an operating system, the next step is to install it on your ODROID-N2+. There are a few different methods to do this, but using a pre-built image file is probably the easiest. Here are the steps to follow:
Download the image file
Find and download the pre-built image file for your chosen operating system. The image file is a compressed file that contains everything you need to install the operating system.
Write the image file to an SD card
Next, you’ll need to write the image file to an SD card. This is because the ODROID-N2+ uses an SD card as its primary storage device. You can use software like balenaEtcher or Rufus to write the image file to the SD card. Head over to our step-by-step guide on using Balena Etcher to prepare your SD card.
Insert the SD card into the ODROID-N2+
Once you’ve written the image file to the SD card, insert the card into the appropriate slot on the ODROID-N2+ (labeled “M” in the below picture)
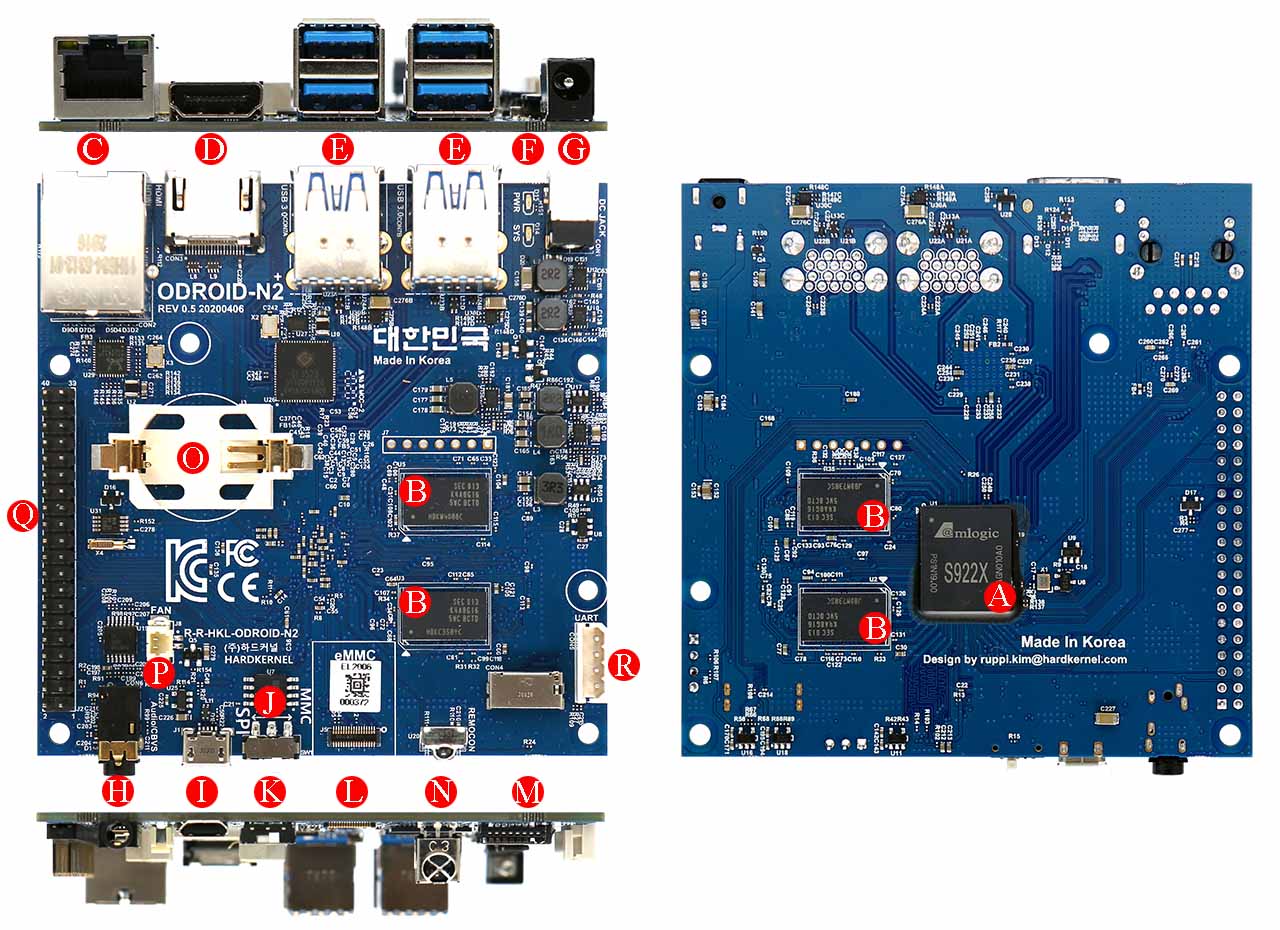
Odroid N2+ Pins and Ports
Power up the device
With the SD card inserted, plug in the power supply that came with the package into port “G” of your ODROID-N2+ and turn it on. The device should boot from the SD card and start the installation process.
Follow the installation prompts
The installation process may vary depending on the operating system you’re installing, but in general, you’ll need to follow the prompts to set up your device, including selecting your language, creating a user account, and configuring your network settings.
And that’s it! Once the installation process is complete, you should have a fully functional ODROID-N2+ with your chosen operating system installed. Remember to keep your device up to date with the latest software updates and security patches to ensure it runs smoothly and securely.
Connect your peripherals
Next, you’ll need to connect your peripherals to your ODROID-N2+. This includes things like a keyboard, mouse, and monitor. Make sure you choose peripherals that are compatible with the ODROID-N2+ and connect them to the appropriate ports on the device.
Power up your ODROID-N2+
With your operating system installed and your peripherals connected, it’s time to power up your ODROID-N2+. You can do this by plugging in the power supply that comes with the device.
Configure your settings
Once your ODROID-N2+ is up and running, you’ll need to configure a few settings to get it working the way you want. This includes things like setting up your Wi-Fi connection, updating your software, and adjusting your display settings.
Pinout Chart
Refer to our detailed guide showing the pinout details. The Odroid N2+ pinout chart is a valuable tool for building and tinkering with the Odroid N2+ single-board computer. With the information provided on that pinout chart, you can connect external components to the board and create custom projects and interfaces that meet your specific needs.
Odroid N2+ beginner project ideas
Here are three beginner projects that you can build using the Odroid N2+ and the pinout chart:
1. LED Blink
The classic “Hello World” project for microcontrollers is to blink an LED. Using the GPIO pins, you can connect an LED to the board and use a simple Python script to toggle the state of the LED on and off. This project is a great introduction to the GPIO pins and basic programming concepts.
2. Button Press
Another simple project that can be built using the GPIO pins is to detect button presses. By connecting a button to one of the GPIO pins, you can write a Python script to detect when the button is pressed and perform an action, such as turning an LED on or off. This project is a great way to learn how to detect inputs using GPIO pins and how to write simple Python scripts.
3. Temperature Sensor
The Odroid N2+ can be used to read data from temperature sensors, such as the DS18B20. By connecting the sensor to one of the GPIO pins, you can use a Python library to read the temperature data and display it on the console or send it to a remote server. This project is a great way to learn how to connect and use sensors with the GPIO pins and how to write Python scripts to process data.
These are just a few beginner projects that you can build using the Odroid N2+ and the pinout chart. As you gain more experience, you can move on to more advanced projects that make use of the various communication and interface pins on the board. The important thing is to start small and build your knowledge and skills gradually.
Conclusion
And that’s it! You’re now ready to start using your ODROID-N2+. Of course, there’s a lot more you can do with this powerful little device, from running software and applications to controlling hardware and electronics. But for now, you’ve taken the first step and set up your device.
If you’re looking for more information on how to get the most out of your ODROID-N2+, there are plenty of resources available online, including forums, tutorials, and user communities. So don’t be afraid to dive in and start exploring all that this versatile little computer has to offer!