
Single Board Computers (SBCs) have become increasingly popular for a wide range of applications, ranging from simple home automation projects to complex robotics and artificial intelligence projects. One of the most critical steps in setting up an SBC is preparing the SD card. Balena Etcher is a popular tool that makes the process of flashing images to SD cards incredibly easy. In this article, we will provide a step-by-step guide on how to use Balena Etcher to prepare your SD card for use on an SBC.
Before we hop into how to use Balena Etcher, let me explain a bit more about this flashing utility.
What is Balena Etcher?
Balena Etcher is an awesome tool that makes it really easy to flash images to SD cards, USB drives, and other storage media. It doesn’t matter if you’re a seasoned developer or just starting out, Balena Etcher is super user-friendly and has a bunch of cool features that make it easy to prepare your devices for use.
Cross-Platform Compatibility
One of the things that’s really great about Balena Etcher is that it works on a whole bunch of different operating systems, like Windows, macOS, and Linux. This means you can use it no matter what kind of computer you’re working on, which is super convenient.
User-Friendly Interface
Another thing that makes Balena Etcher stand out is its super-simple interface. It’s really easy to select the storage device and image file you want to flash, and the whole process is really straightforward. Even if you’re not a tech wizard, you’ll find it easy to use.
Support for a Wide Range of Image Formats
Balena Etcher also supports a whole bunch of different image formats, like .img, .iso, and .zip files. This means you can use it for just about anything, which is really handy.
Fast and Reliable Flashing and Image Verification
But what really sets Balena Etcher apart is how fast and reliable it is. It uses a special flashing algorithm that gets your images written to your storage media really quickly, which means you don’t have to wait around forever for it to finish. Plus, it includes a built-in image verification feature that ensures the image you’ve written to your storage media is exactly the same as the original file. That way, you can be sure that your device is set up correctly.
Multi-Device Support
Finally, Balena Etcher also supports flashing images to multiple devices at once. This is great if you need to set up a bunch of devices at the same time, like if you’re an IT professional or developer. You can select multiple storage devices and flash them all at once, which is a huge time-saver.
Now that you know a tad about the utility, here is how to download and use it.
Using Balena Etcher to flash an OS image onto an SD card
Step 1: Download and Install Balena Etcher
The first step is to download and install Balena Etcher. It is available for Windows, macOS, and Linux, and it’s free to download from the official website. Once you have downloaded the installer, run it, and follow the installation instructions to set it on your computer.
Step 2: Choose the SD card
Insert the SD card you wish to prepare into your computer’s SD card slot. Balena Etcher will automatically detect it and display it in the app’s interface. Ensure that you choose the correct SD card. This step is important because if you select the wrong card, you could end up erasing important data.
Step 3: Choose the Image
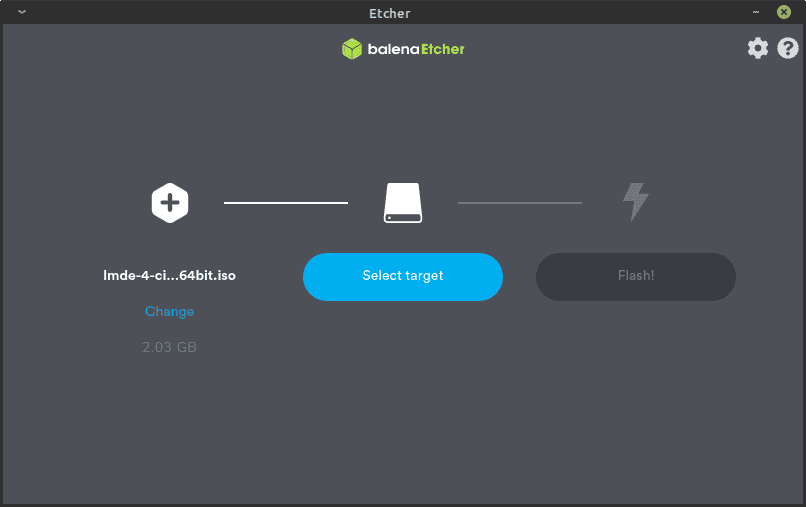
Balena Etcher User Interface
The next step is to choose the image that you want to flash onto the SD card. You can download the image from the official website of the SBC manufacturer or any other reputable source. The image file format is usually in .img, .iso, or .zip format. Ensure that you have downloaded the correct image for the SBC you intend to use.
Step 4: Flash the Image
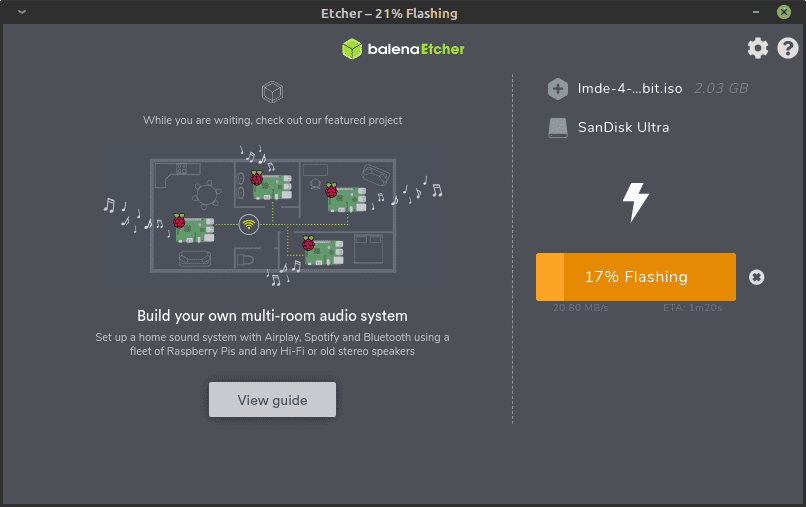
Flashing in Progress
Once you have selected the SD card and image, click on the “Flash” button. Balena Etcher will start to flash the image to the SD card. The process may take a few minutes depending on the size of the image and the speed of your computer. During the process, the app will show you the progress and estimated time remaining.
Step 5: Verify the Image
Once the flashing process is complete, Balena Etcher will automatically verify the image’s integrity. This step is essential because it ensures that the image was successfully written to the SD card. If the verification process fails, it means that there was an error in the flashing process, and you should repeat the process.
Step 6: Eject the SD card
Once the image has been successfully flashed and verified, you can now eject the SD card from your computer. To do this, click on the “Eject” button in Balena Etcher or use your computer’s operating system to eject the SD card. Once you have ejected the SD card, it’s ready for use in your SBC.
Conclusion
Preparing an SD card for use on an SBC can be a daunting task, especially for beginners. However, with Balena Etcher, the process is incredibly easy and straightforward. By following the above steps, you can easily prepare your SD card for use on your SBC in just a few minutes. Remember to choose the correct SD card and image, and always verify the image’s integrity to ensure that it was successfully written to the SD card.