
Do you have a Raspberry Pi that lays idle most of the day? Well, do you know you can donate some of this CPU power to Science through BOINC?
Berkeley Open Infrastructure for Network Computing (BOINC) is a program that enables individuals to donate spare computing power to Science project that requires massive computational resources with the goal of Curing diseases, studying global climate change, discovering pulsars, finding more efficient energy cells, analyzing radio signals, searching for signs of extraterrestrial intelligence and many other types of scientific research.
This project supports many computing hardware devices ranging from Android smartphones, PCs, Small Board Computers like the Raspberry Pi, AEON Graphics processing unit, and much more. Your contribution can accelerate the pace of many important research projects.
To start contributing to science through BOINC, we will follow the three simple steps below:
- Install BOINC
- Select a project you wish to contribute to.
- Leave your device to work on the project.
In this post, our computational device of choice is a Raspberry Pi. Let’s dive in!
Requirements (A must-have)
- A Raspberry Pi board
- Micro SD Card (At least 8GB)
- An active internet connection
- Reliable power supply
Optional
- A USB Mouse and Keyboard
- An HDMI
- A display monitor
Tip: We have listed some of these requirements as optional since you don’t necessarily need them to work on your Raspberry Pi. For example, instead of struggling to get a display monitor, you can connect to your Pi via SSH for command-line access or via VNC for graphical access. Please look at these two posts: How to SSH into Raspberry Pi and Set up VNC Server on Raspberry Pi. Also, did you know if you don’t have an ethernet cable or monitor, you can still connect your Raspberry Pi to a wireless network (WIFI)? Please look at our post Connecting to Wi-Fi & Enabling SSH Without Monitor on Raspberry Pi.
Set up BOINC on your Raspberry Pi
Step 1: Install the Official Raspberry Pi OS
The BOINC can run on several platforms, including Windows, Linux, and macOS. Even though you can install any other Linux distribution on your PI and go ahead to run BOINC, we will use the official Raspberry PI OS for this post. Please look at our post on Installing the Official Raspberry PI OS on your Pi.
Note: When selecting a Raspberry Pi for running BOINC tasks, ensure it stays ON most of the time since some of these projects can take time to complete. Therefore, a Pi acting like a File server, Media server, home automation, thermostat, etc., can be a great choice. Remember also, these additional computational tasks on your Pi mean a little more electricity being used.
Step 2: Install BOINC
Installing BOINC on a Raspberry Pi is easy since the package is already included in its repositories. However, update and upgrade your system to ensure you have the latest packages as a rule of thumb. Execute the command below.
sudo apt update
sudo apt upgrade
Once done, you can now proceed to install BOINC. This program is available in both the GUI and Command-Line packages for running the program in headless mode. However, the BOINC GUI interface is easier to use than the command-line utility.
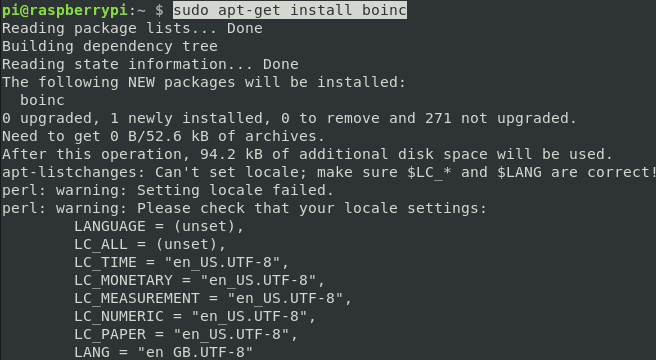
To install the BOINC GUI interface, execute the command below.
sudo apt-get install boinc
Install BOINC
To install the BOINC command-line client, execute the command below.
sudo apt install boinc-client
Step 3: Launch the BOIC Application
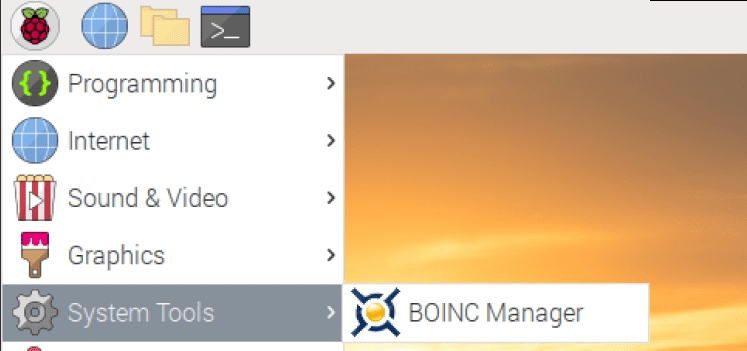
After successfully installing BOINC, we can now select a project to start working on. First, launch the application from the Menu -> System tools -> BOINC manager on your Raspberry Pi Desktop.
That action will open the BOINC manager window, where you can see all your running projects. If you don’t have any projects, you will see the message, “You don’t have any projects. Please add a project.” See the image below.
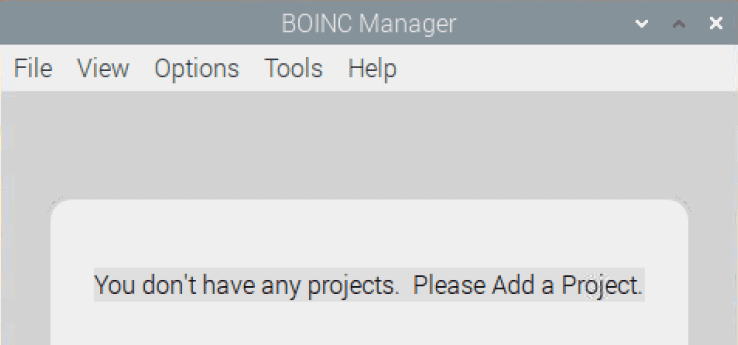
BOINC Manager window
Click on the ‘Tools’ menu and select the ‘Add Project’ option to add a project.
Note: One of the most popular BOINC projects was SETI@Home, first released on May 17. 1999. This project involved analyzing radio signals and searching for any signs of extraterrestrial intelligence. Unfortunately, from March 2020, the SET@Home project is no longer distributing tasks to users. After a quick lookup on their official website, we found that the team now plans to start analyzing all the data accumulated over the 20 years of research. However, they insisted the SETI@Home project is not entirely halted, and they can resume and send users data from other telescopes such as MeerKAT and FAST.
With that in mind, we now know SETI@Home is not among the projects we can select. When you click on the Add Project option, you will see a list of several projects you can pick from. However, not all these projects can run on the Pi-ARM hardware. Luckily, the app will notify you if any selected projects are not compatible with your hardware.
In this post, we will select the World Community Grid project. Think of World Community Grid as a virtual supercomputer that utilizes power from volunteer computational devices (e.g., your Raspberry Pi) to address a whole range of humanitarian concerns. That involves analyzing data for the human genome, HIV, cancer, Covid-19, rice crop yields, and many more.
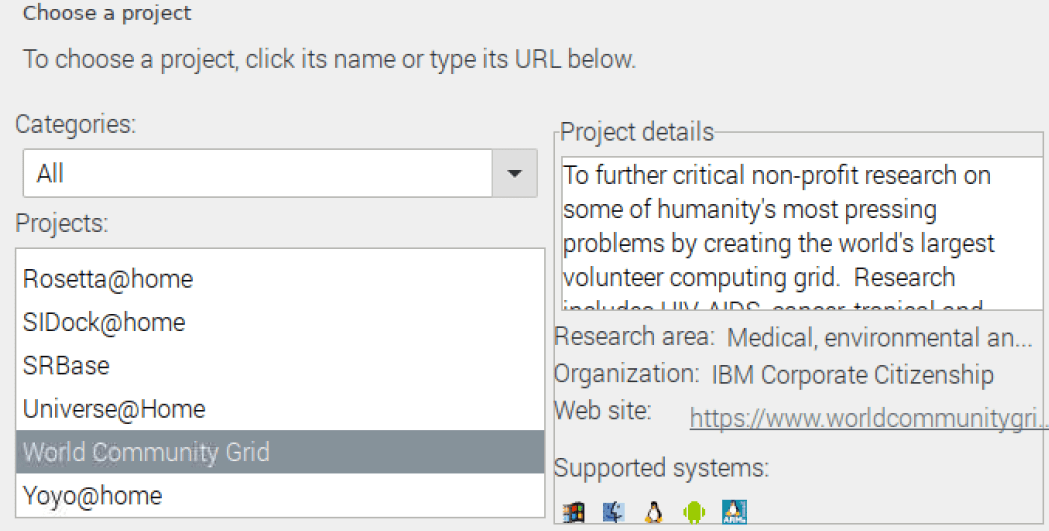
World Community Grid
After selecting the project, click ‘Next’ at the bottom of the window.
You will see the Terms of Use on the new screen that appears. Select the ‘I Agree’ option and click ‘Next.’

Terms of use
Next, you will need to set up an account with World Community Grid. If you already have an account, select the option ‘Yes, existing user’ and log in with your email and password. Select the ‘No, new user’ option and sign up with your email and password if you are a new user. You will also need to verify your email and update some information on their website.
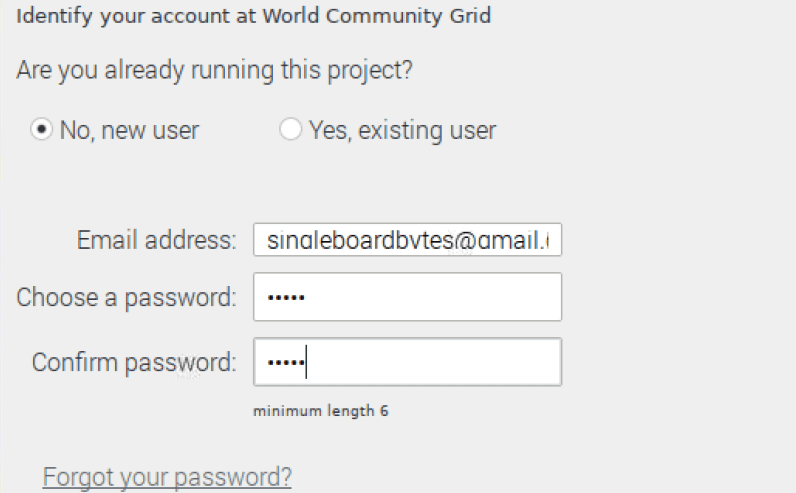
World Community Grid Account
After successfully adding the project, click the ‘Finish’ button. That will take you back to the BOINC Manager window, where you will see the running projects and even an option to add a new project. See the image below.
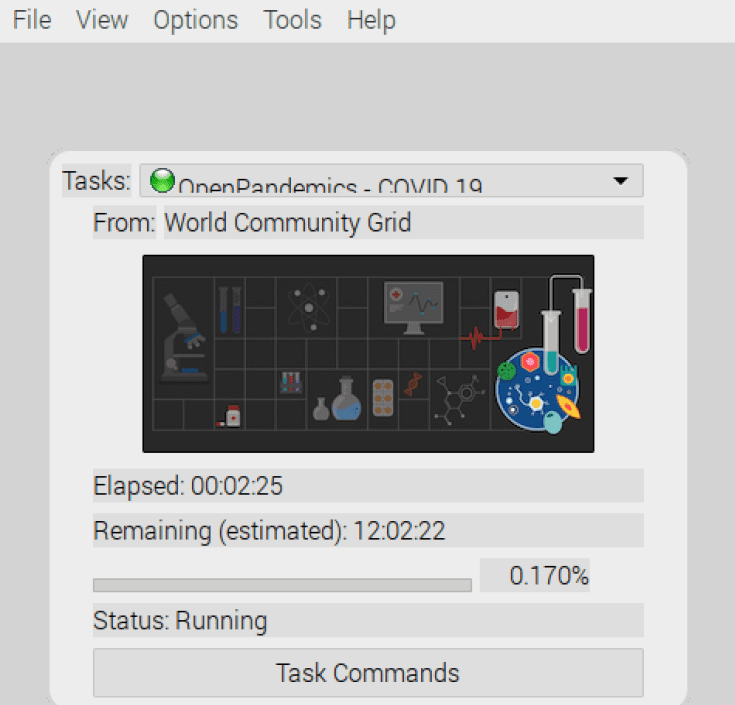
Running Tasks
Configuring BOINC via the GUI Interface
If the BOINC manager window you see on your screen is similar to mine, as shown on the image above, you are using the ‘Simple View.’ To configure BOINC, you will need to switch to the ‘Advanced View’ lists all the configuration tabs. Click the ‘View’ menu and select the ‘Advanced View’ option. You should see a window similar to the image below.
Projects
Let’s look at the various Tabs on this window.
Notices
This screen shows you the current news regarding the project you are running. For example, we are handling the World Community Grid projects in our case. The image below shows that the notices we are getting are only related to World Community Grid.
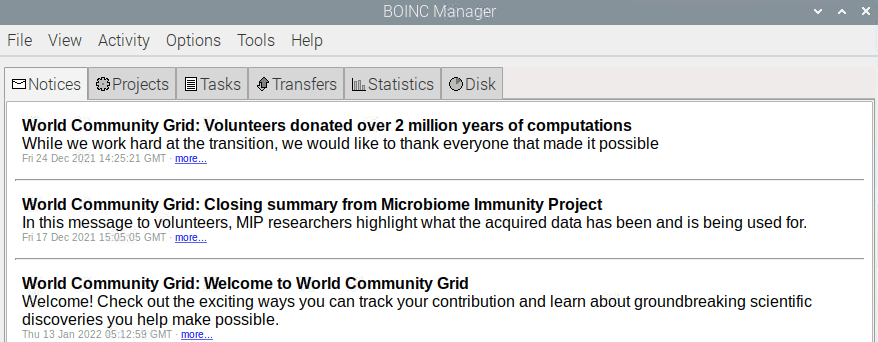
Notices
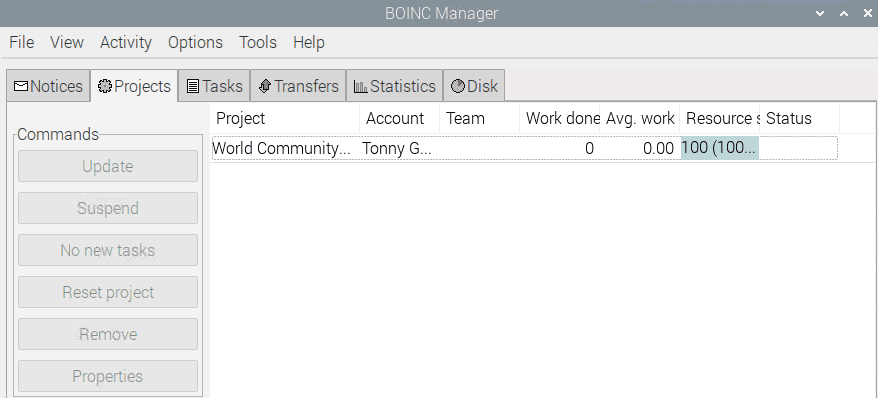
Projects
This screen lists all the projects you are currently running. When you select a project here, there is a panel that you can use to manage several aspects of your project on the left side. Some of them include:
- Update: Report all completed tasks, get the latest credit, get the latest preferences and possibly get new tasks.
- Suspend: Suspend tasks for this project
- No new tasks: Don’t fetch new tasks for this project
- Reset Project: Delete all files and tasks associated with this project and get new tasks. You can update first to report any completed projects.
- Remove: Remove this project. Tasks in progress will be lost.
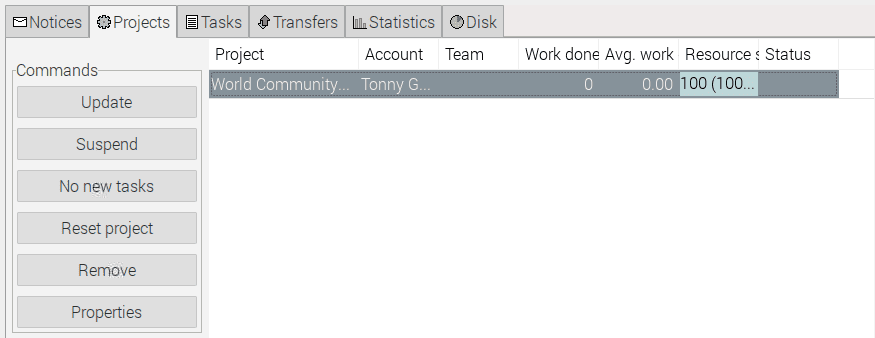
Projects
Tasks
In this window, you can view all the running tasks of your projects. You can decide to suspend or even abort any of the running tasks. Additionally, this window gives you information such as the elapsed time, the remaining time to complete a task, and the deadline date for each task.
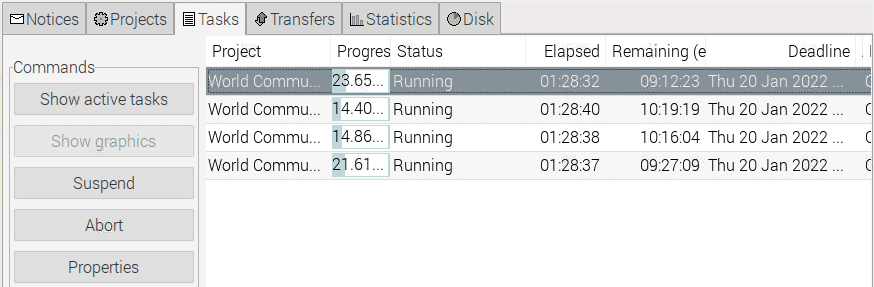
Tasks
Transfers
This screen shows all the downloads and uploads that are completed, in progress, or ready to start. If you don’t wish to download or upload anything, you can suspend or abort it using the panel on the left.
Statistics
Just as the name suggests, this screen shows statistics about the projects you are running on your device. The value on the left (Y-axis) indicates the number of credits you have received, while the values at the bottom (X-axis) show the dates each project was carried out. Credits are awarded depending on how much CPU time a user has contributed to a particular project.
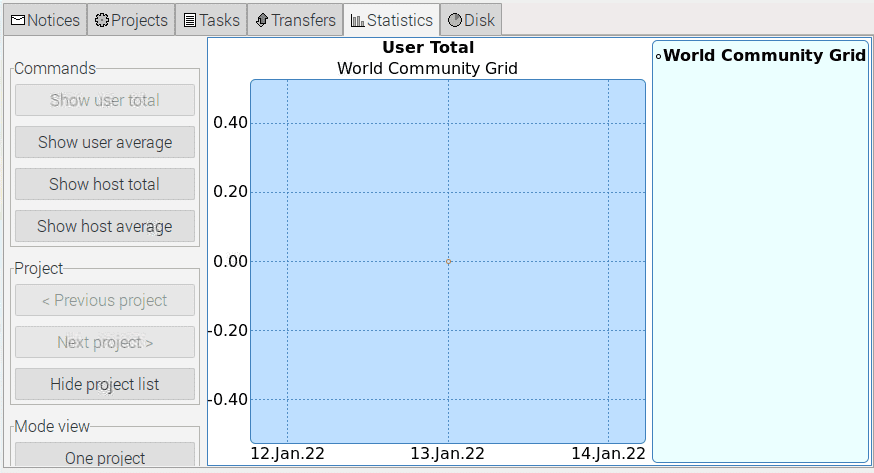
Statistics
Disk
This screen shows you the total disk usage by BOINC, the freely available storage for abuse by BOINC, free storage but not available for BOINC, and the overall storage taken up by other programs.
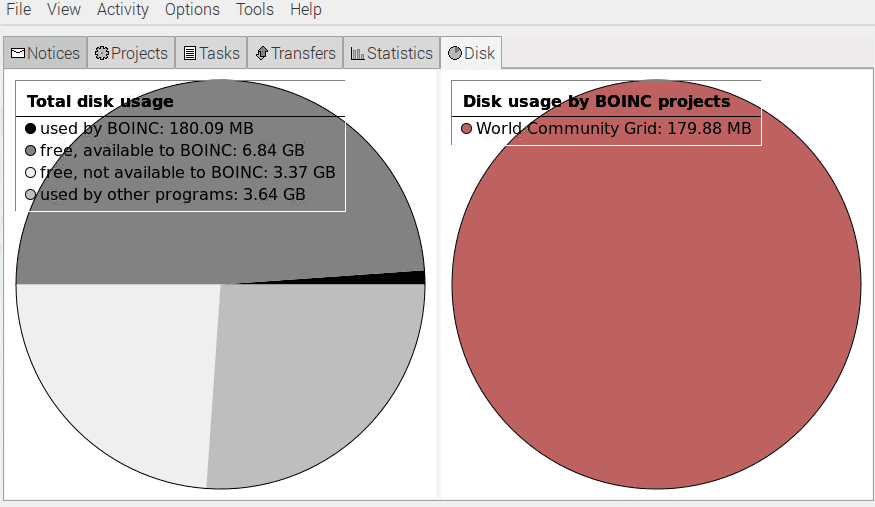
Disk
Conclusion
Of course, the PI might not be very fast in crunching BOIC projects compared to other computational devices like the PC, but it has one significant advantage over the others. You can leave it running overnight without worrying about the amount of power used. In our case, we will leave this Pi up and running just like the Pi running our Plex Media server. Do you have any questions regarding this topic? If yes, please feel free to the comments below.
1 comment
Which RasPi is sufficient if it were only for the use of BOINC?