
The Raspberry Pi is one of the most common SBC (Single Board Computer). You can use it to learn computer programming, carry out your hardware projects, set it up as a full Desktop computer, use it as NAS (Network Attached Storage), and so much more. The only limitation of these small devices is the lack of a monitor. Even though you can still connect one through the HDMI port, there are situations where you might not have access to one. Or maybe you don’t have an extra monitor/TV screen to use as a monitor for your Raspberry Pi.
You might decide to access your Raspberry Pi via SSH in such a situation. Even though that is possible, it also poses one more challenge: how will you enable SSH and even connect to a WIFI network (assuming you don’t have an ethernet connection) on your Raspberry Pi without a monitor?
If you have ever found yourself in such a situation, this article is for you. We will look at how to connect to Wi-Fi and enable SSH without the monitor on Raspberry Pi. Let’s get started.
Connecting Raspberry Pi to Wi-Fi without a monitor
I will assume you already have installed an operating system on your Pi SD card. There are different operating systems available to run on your Pi. In case you get confused, please read our guide on Which Operating System to use for your Rasberry Pi. In this post, we will work with the official Raspberry Pi OS (Raspbian). You can read our post on How to Install Raspbian on Raspberry Pi.
Step 1. Insert your Raspberry Pi SD Card on your computer.
If your PC doesn’t support an SD card slot, you can use the SD card reader or SD card USB adapter. Ensure this is the card having the Raspbian OS.
Step 2. Navigate to the boot directory.
On your PC’s file manager, locate the SD card and navigate the boot directory/folder.
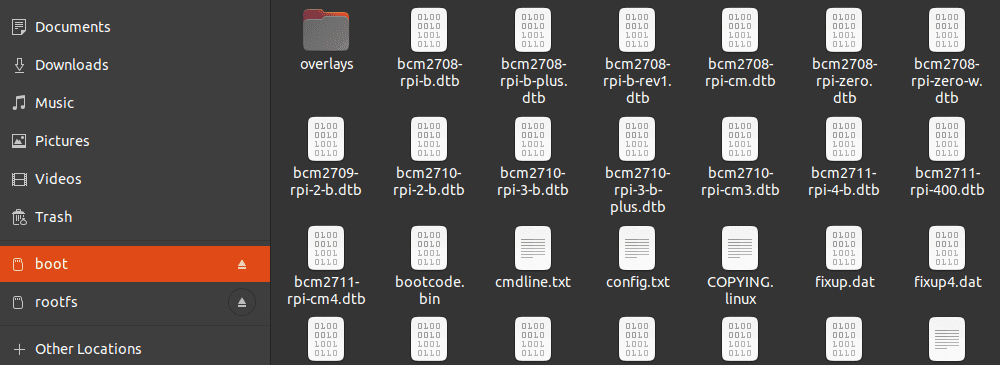
Raspberry Boot folder
Step 3. Add the wpa_supplicant.conf file
Once in the boot directory, you will see lots of files. We will need to create a new file called wpa_supplicant.conf, which will hold the necessary credentials required to connect to the WIFI network.
Connect to secured networks
Open a new file with your text editor and paste the contents below. If you are on Windows, you can use notepad, and Linux users can opt for gedit, vim, or the nano editor (my favorite).
country=US # Replace US with your 2-digit country code
ctrl_interface=DIR=/var/run/wpa_supplicant GROUP=netdev
network={
ssid="Enter_YOUR_NETWORK_NAME"
psk="Enter_YOUR_PASSWORD"
key_mgmt=WPA-PSK
}
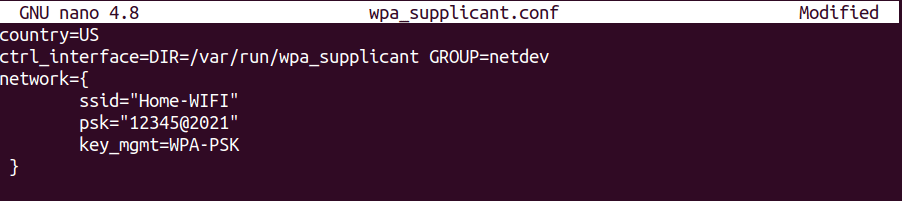
Secure networks conf file
Note: Replace ‘US‘ with your country’s 2-digit code, replace Enter_YOUR_NETWORK_NAME with your WIFI name, replace Enter_YOUR_PASSWORD with your WIFI password. Please ensure both the WIFI name and password are enclosed in double-quotes as shown in the code above.
If you are running an older version of Raspbian OS, say Raspbian Jessie or older, use the code below instead.
network={
ssid="Enter_YOUR_NETWORK_NAME"
psk="Enter_YOUR_PASSWORD"
key_mgmt=WPA-PSK
}

Older Raspbian OS conf file
Remember to replace the said text accordingly.
Once done, save the file and rename it as wpa_supplicant.conf (please delete any additional extension like .txt). If you are using a text editor on Windows and MAC, remember to select “save as Plain Text” format.
Connect to unsecured networks
If you want to connect to an open WIFI network, use the code below. Please open a new file with your text editor, paste the contents below and save it as wpa_supplicant.conf without any additional extension such as .txt.
country=US # Your 2-digit country code
ctrl_interface=DIR=/var/run/wpa_supplicant GROUP=netdev # Include this line for Stretch
network={
  ssid="Enter_YOUR_NETWORK_NAME"
  key_mgmt=NONE
}
If you are on Raspbian Stretch, be sure to include the second line as indicated in the code.
Now, you are good to go. When you power and start your Pi, the wpa_supplicant.conf the file will be moved to /etc/wpa_suplicant/ directory.
However, before starting your Pi, it would be great to enable SSH. That would enable you to connect to your Pi remotely on boot.
Enable SSH on your Raspberry Pi without a monitor
Enabling SSH on your Pi is quite easy.
Step 1. Insert your SD card on your PC.
Step 2. Navigate to the boot directory.
Step 3. Create an empty text file and rename it to ssh without any additional extension like .txt.
If you are on Linux, you can open the terminal on your boot directory and execute the command:
touch ssh
Note: You don’t need to enter any text or code in the ssh file. It should be Empty.
Boot your Raspberry Pi
Once you have everything set up, insert the SD card on your Pi and boot it up. The Pi should automatically connect to your WIFI network. To get SSH access, you might need to login into your router and see the IP-address assigned to your Raspberry Pi.
Troubleshooting
If your Raspberry Pi doesn’t connect to WIFI automatically, check out the tips below:
1. Ensure the wpa_supplicant.conf the file was written in plaintext and didn’t have any additional extension. Please, don’t create this file using a Word processor like MS Office.
2. Check and ensure that the wpa_supplicant.conf file disappeared on the Boot directory when you booted your Pi.
3. Most WIFI networks around are either 2.4 GHz or 5GHz. Unfortunately, some devices are only fitted with the 2.4GHz NIC(Network Interface Card). Ensure you are not trying to connect to a 5GHz network, and your Pi doesn’t have that hardware capability. To solve this, you can check the specifications of your Pi.
4. If you are using Raspberry Pi Zero, it won’t work as this Pi model doesn’t support WIFI and Bluetooth. However, it should work for Raspberry Pi Zero W, which supports wireless connections.
If you come across any problem while creating any of the files above or connecting to WIFI and SSH, feel free to leave a comment below.