One of the best ways to access the Raspberry Pi over a network on your PC is by remote access- commonly referred to as Remote Desktop Access. There are several applications that you can use to get Remote Desktop Access. They include Team viewer, AnyDesk, VNC, Windows Remote Desktop, and many more.
For this particular post, we will look at how to set up a VNC server on your Raspberry Pi. To make it more interesting, we will do that remotely over an SSH connection. If you have a monitor setup, execute the commands on Pi’s Terminal.
A VNC (Virtual Network Computing) is a desktop sharing system that enables you to connect remotely to another computer. It makes use of the Frame Buffer protocol (RFB), which allows you to transmit the keyboard and mouse events from your PC (thin client) to the remote computer (thick client), which relays back the graphical-screen updates.
Installing VNC Server on Raspberry Pi
With that necessary background information, let’s dive in and get started.
Step 1. Login remotely to your Pi via SSH
If you have not yet enabled SSH on your Pi, read our post on connecting to Wi-Fi and allowing SSH without the monitor on Raspberry. To connect via SSH, you will need to know your Raspberry’s IP-address. You can log in to your router and list the connected devices. Once done, execute the command below on your PC. If you are on Linux, use the Terminal, Windows users can opt for Putty.
syntax:
ssh [Pi-user-account]@[1p-address]
e.g
ssh pi@192.168.1.36
Alternatively, if you don’t have access to the router, use the commands below:
ssh-keygen -R raspberrypi.local
ssh pi@raspberrypi.local
Note: In the above commands pi is my user account, while raspberry is the hostname. In case you are using different names, then replace them accordingly.
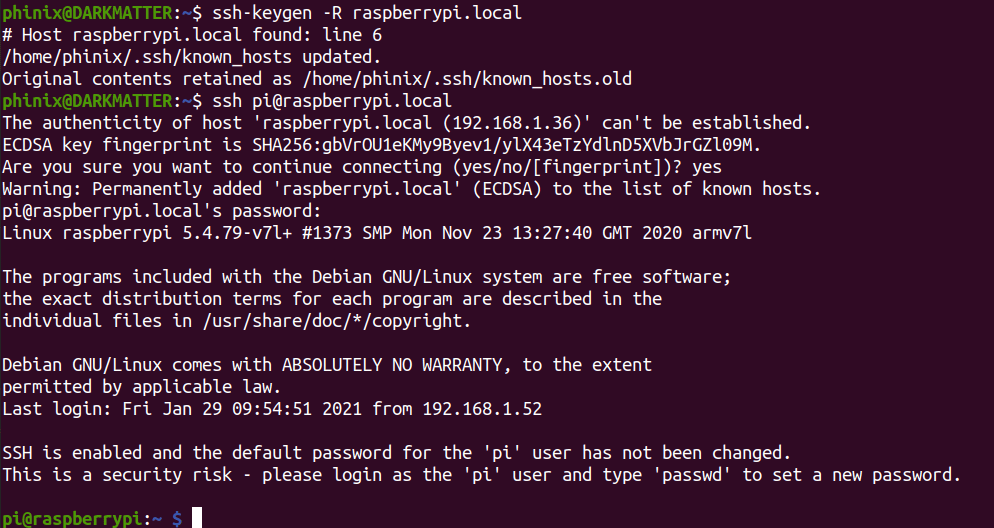
Remotely access Pi
Step 2. Update your Raspberry Pi
Once you establish a successful SSH connection, you will notice the Terminal prompt change to your Pi’s user and hostname. Execute the commands below to get the latest updates.
sudo apt-get update -y
sudo apt-get upgrade -y
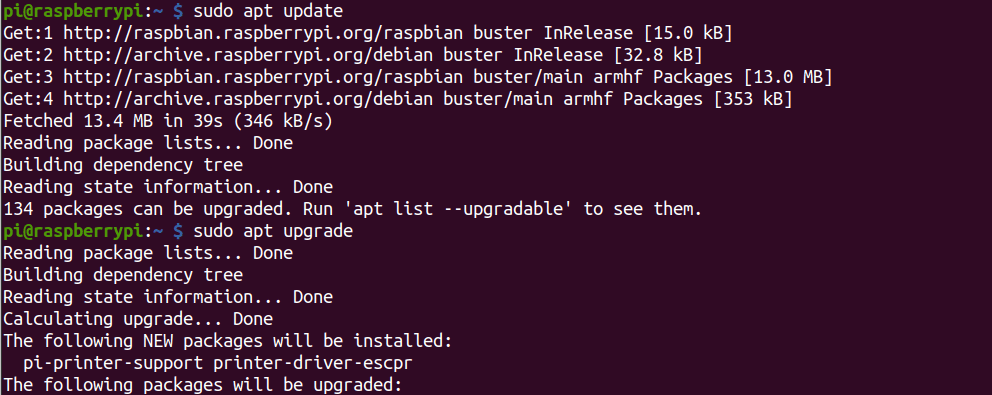
Update Raspberry
Step 3. Enable VNC
By default, the VNC server is disabled on Raspberry. To enable it, execute the command below:
sudo raspi-config

raspi-config
A window will pop-up on your Terminal, Select the option Interfacing Options. Use the Arrow keys to scroll between the different options.
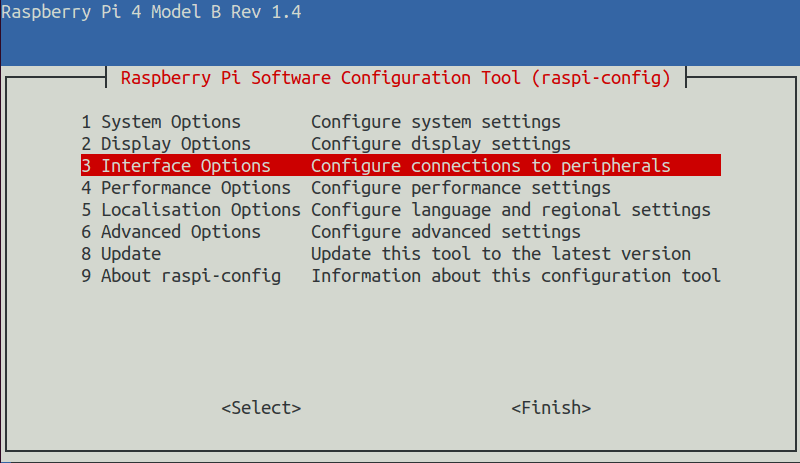
Interface Options
On the window that appears, select VNC and hit Enter.
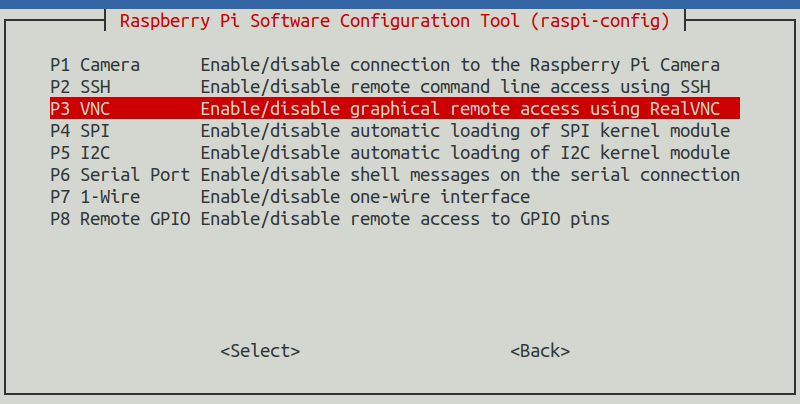
Enable VNC
You will get a prompt on whether you want to enable VNC, select Yes, and hit Enter.
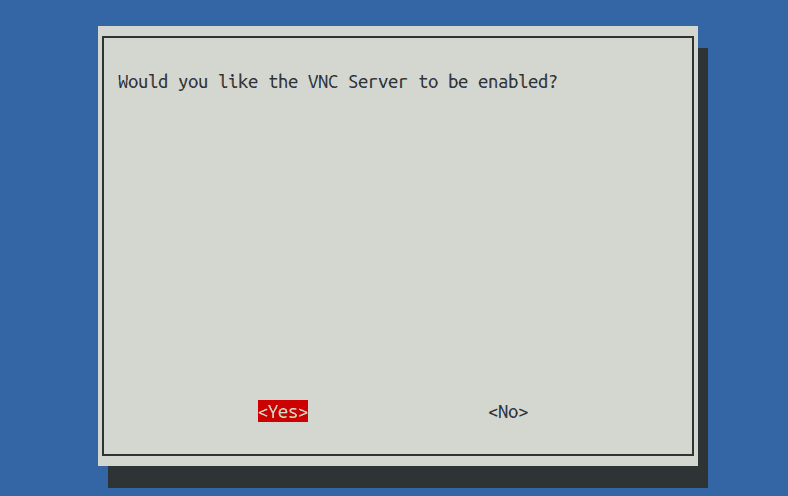
Enable VNC -Yes
Now, we have our VNC server setup. However, we will need to change the default screen resolution; otherwise, you will get the error “Cannot currently show the desktop” on your VNC client.
Step 4. Change the Default Screen resolution.
Execute the raspi-config command again if you had closed the graphical pop-up screen.
sudo raspi-config
Select Display Options and hit Enter.
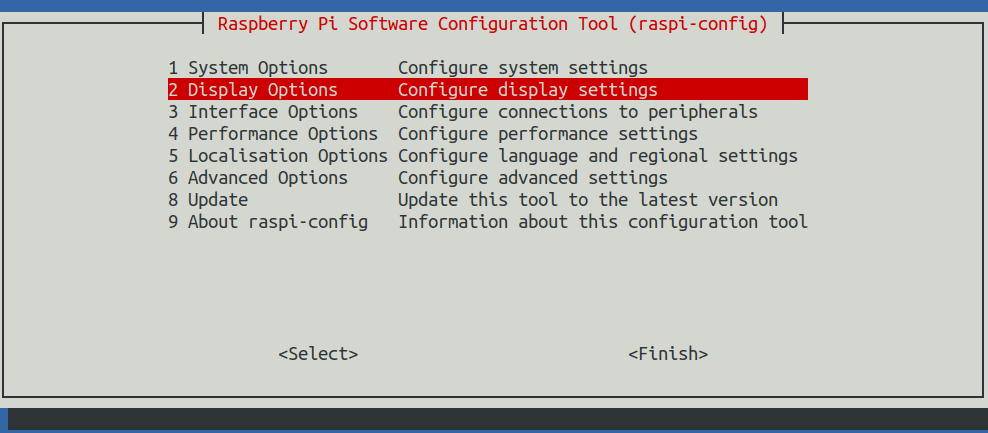
Display Options
On the next screen that appears, select Resolution and press Enter.
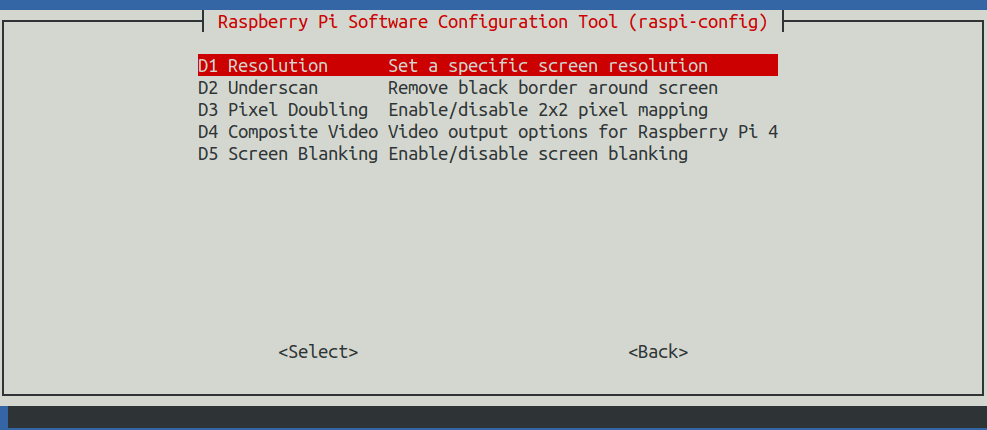
Resolution
Select the screen resolution you want to use from the options below. The default is (1024×768). Press Enter when done.
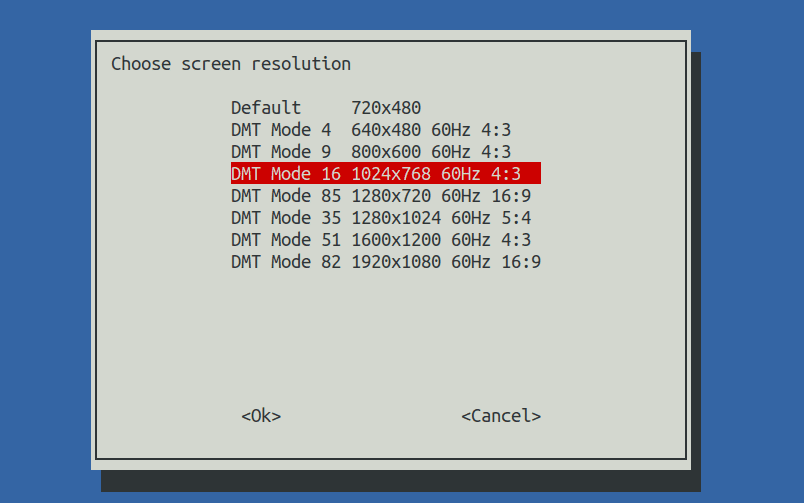
Default Resolution
You will get a prompt to reboot your Raspberry; select yes.
Step 5. Connect over VNC
Now that we have enabled the VNC server on our Pi, we can access it from our PC. First, we will need to install a VNC client application that will communicate with the VNC server. You can use some of the available VNC client applications, including VNC Connect, Remmina, TigerVNC, Vinagre, TightVNC, etc. This post will use VNC Viewer installed on my Ubuntu Linux system.
Launch the VNC viewer application and enter the Raspberry’s IP-address to connect. You will see a pop-up window where you will be required to enter the Username and Password of your Raspberry Pi. Press Ok.
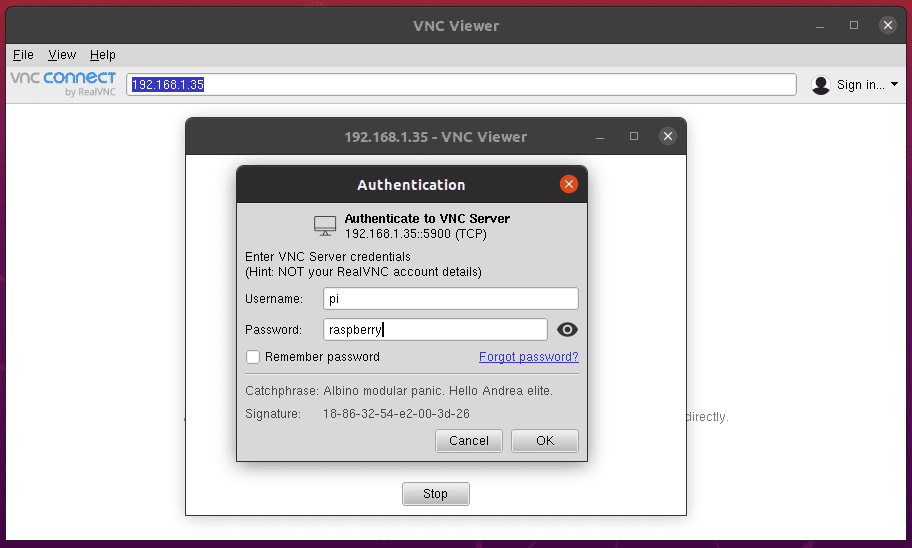
VNC Viewer
If the credentials are correct, you should see your Raspberry Graphical Desktop.
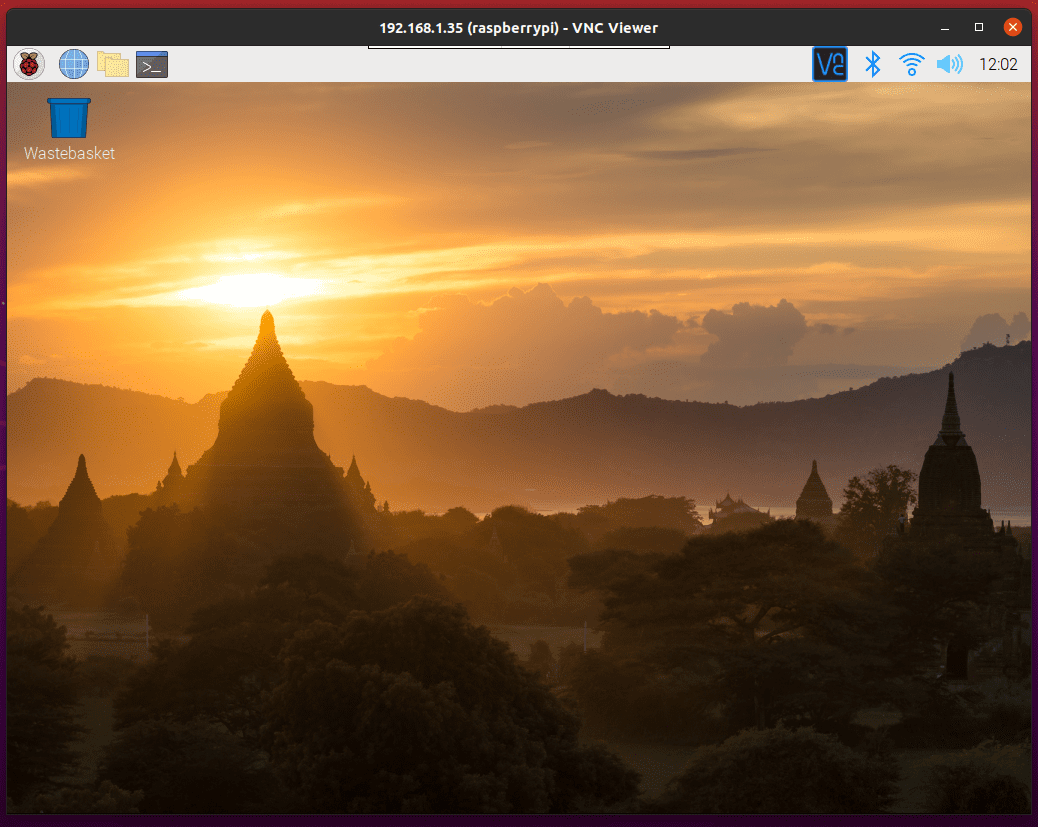
VNC Viewer
Congratulations! you have set up a VNC connection for your Raspberry successfully. In case you have any trouble carrying out any of the Steps described above, feel free to leave a comment below.
