
Windows network, also known as Server Message Block (SMB), is a standard client-server used by Windows to share files over a local network. A standard client-server is a relationship whereby one program (the client) requests a service or a resource from another program (the server).
SMB is the most common network protocol to access content on a NAS or other external remote hardware. It is an outstanding network protocol for its unmatched versatility, as many different operating systems can use it.
On the other hand, Kodi is a software that aims to manage the customers’ collection of content like music, pictures, TV shows, and movies.
Having talked of SMB, let us go deeper and outline the steps needed to connect to your network storage in Kodi.
How to access the network storage in Kodi and add SMB videos to the library
Step 1: Go to the “settings menu.”
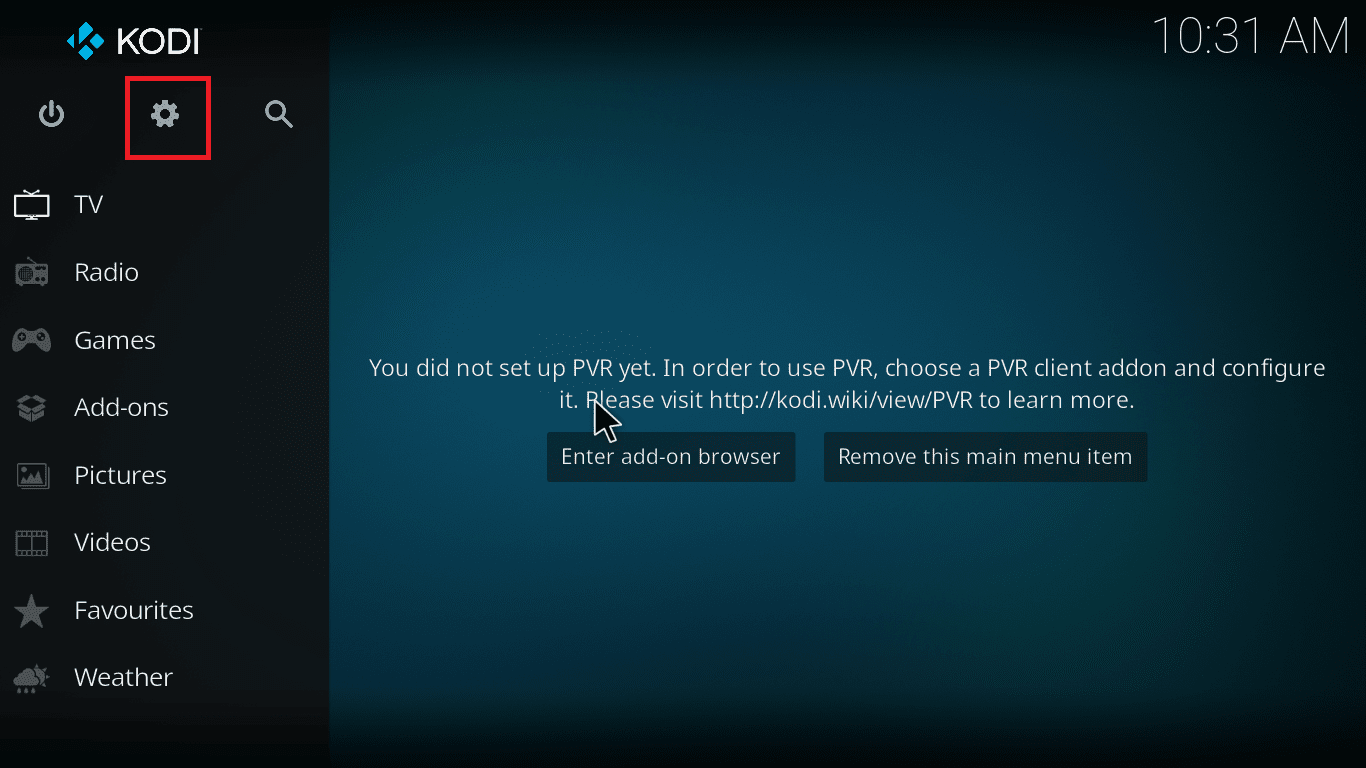
select settings
Step 2: Click on “Add-ons.”
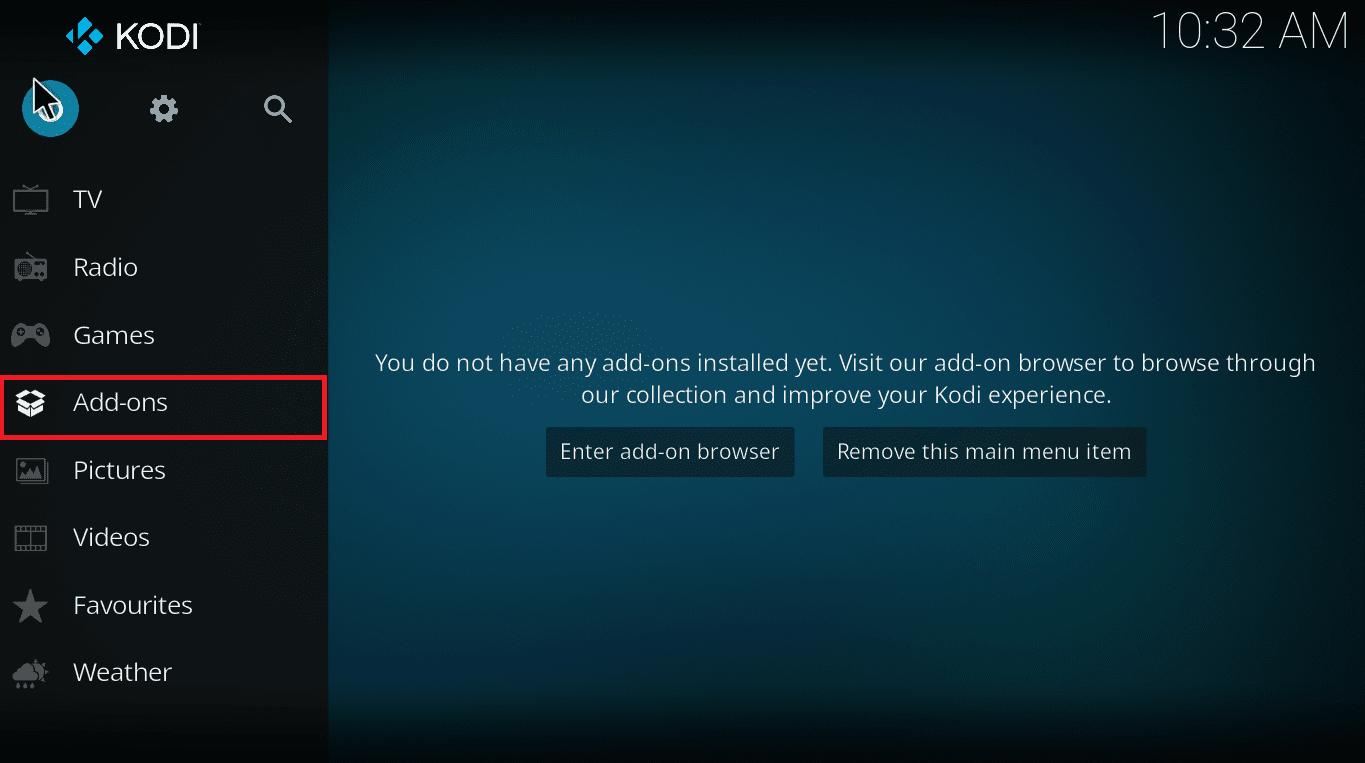
select add-ons
Step 3: Navigate to the “Downloads folder.”

Go to Downloads
Step 4: Go to the “Virtual filesystem.”
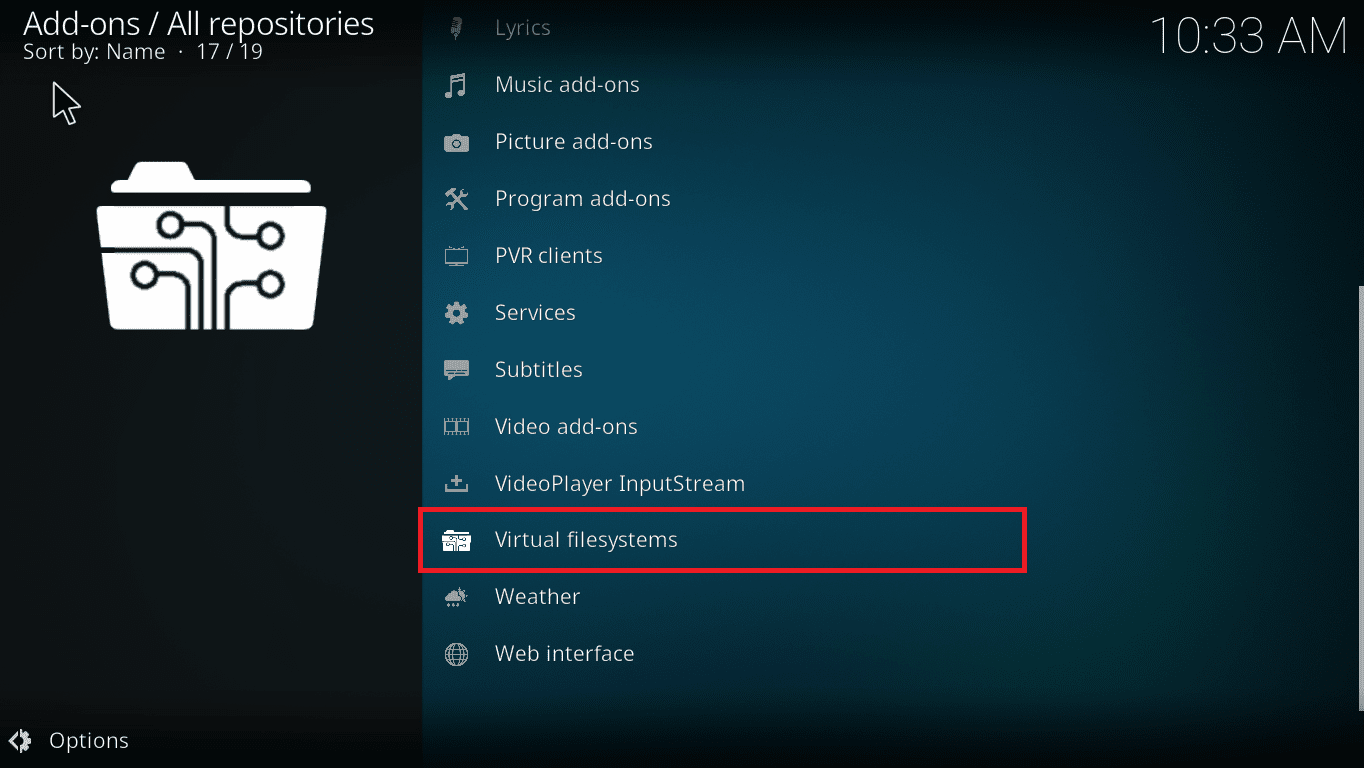
select virtual systems
Scroll down to “SMB support,” then hit the enable button.
Step 5: After that, go to “Video add-ons.”
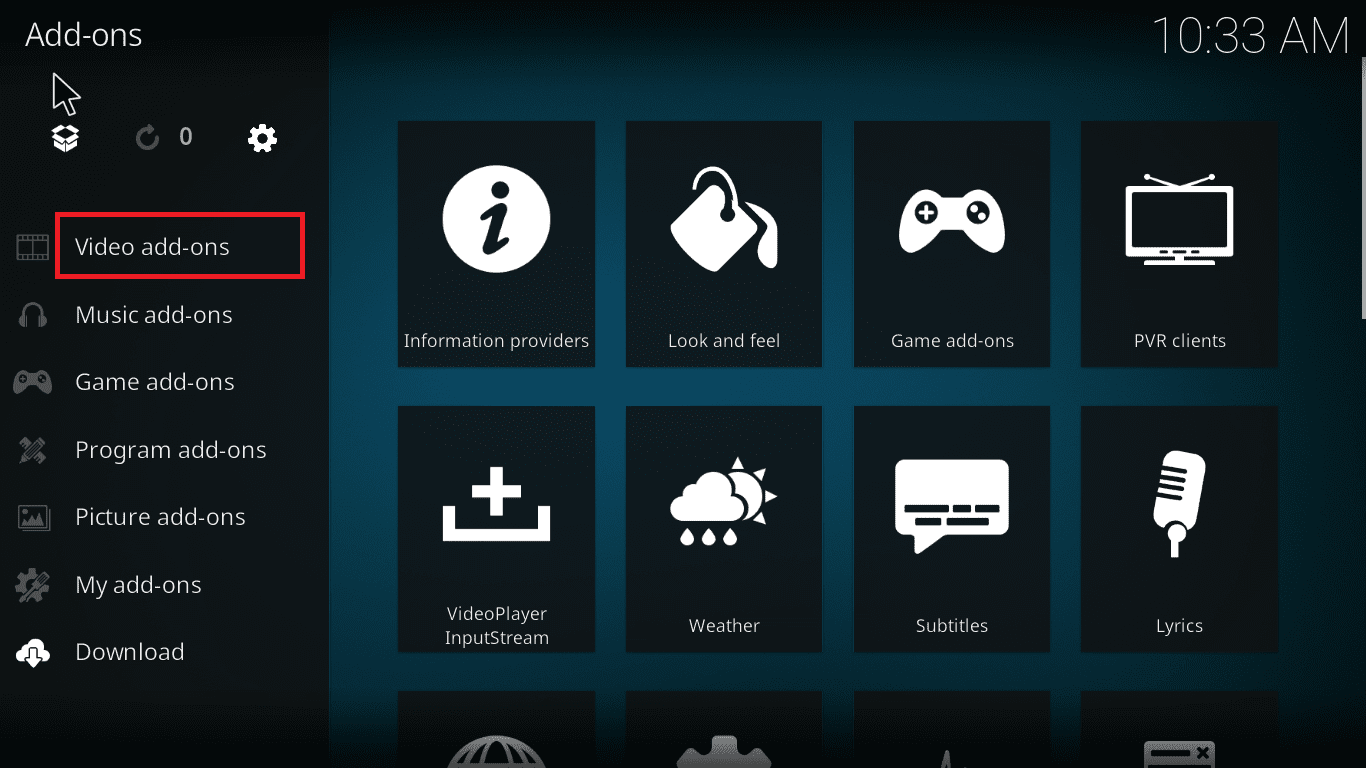
Go to Video-addons
Step 6: Then select the “two dots.”
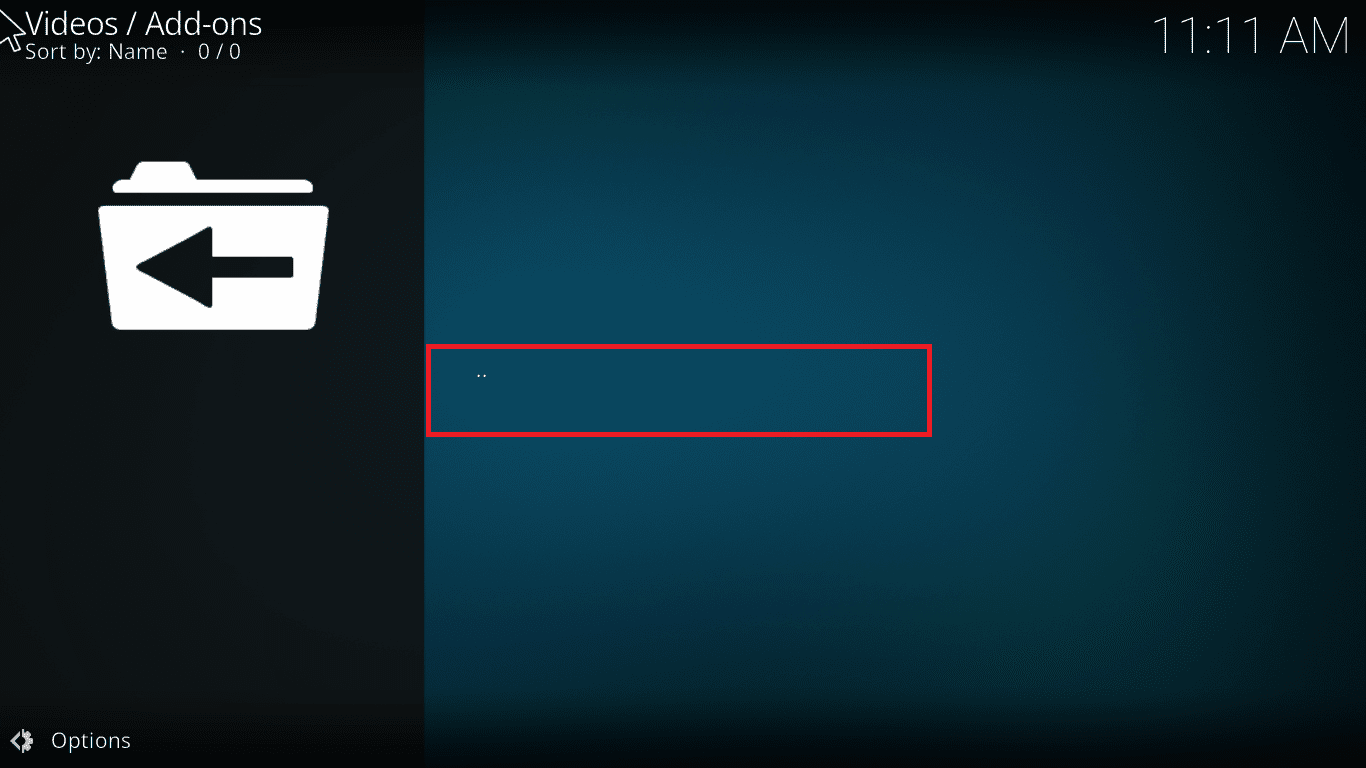
select the two dots
Step 7: After that, proceed to “files.”
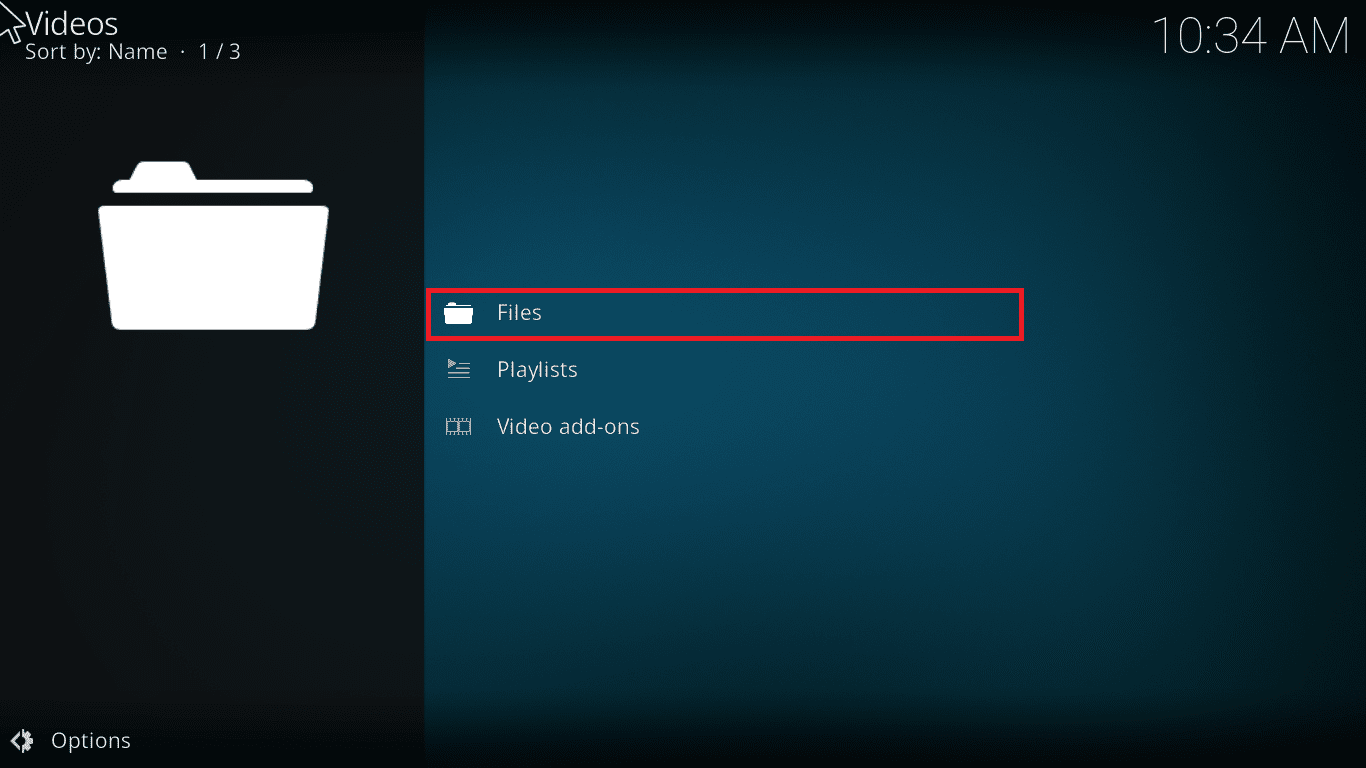
Go to files
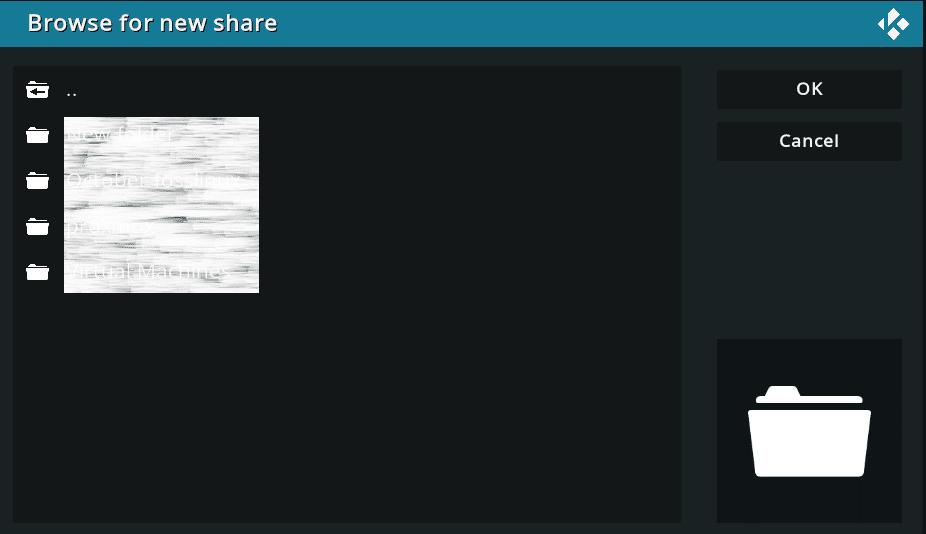
Step 8: Select “browse”
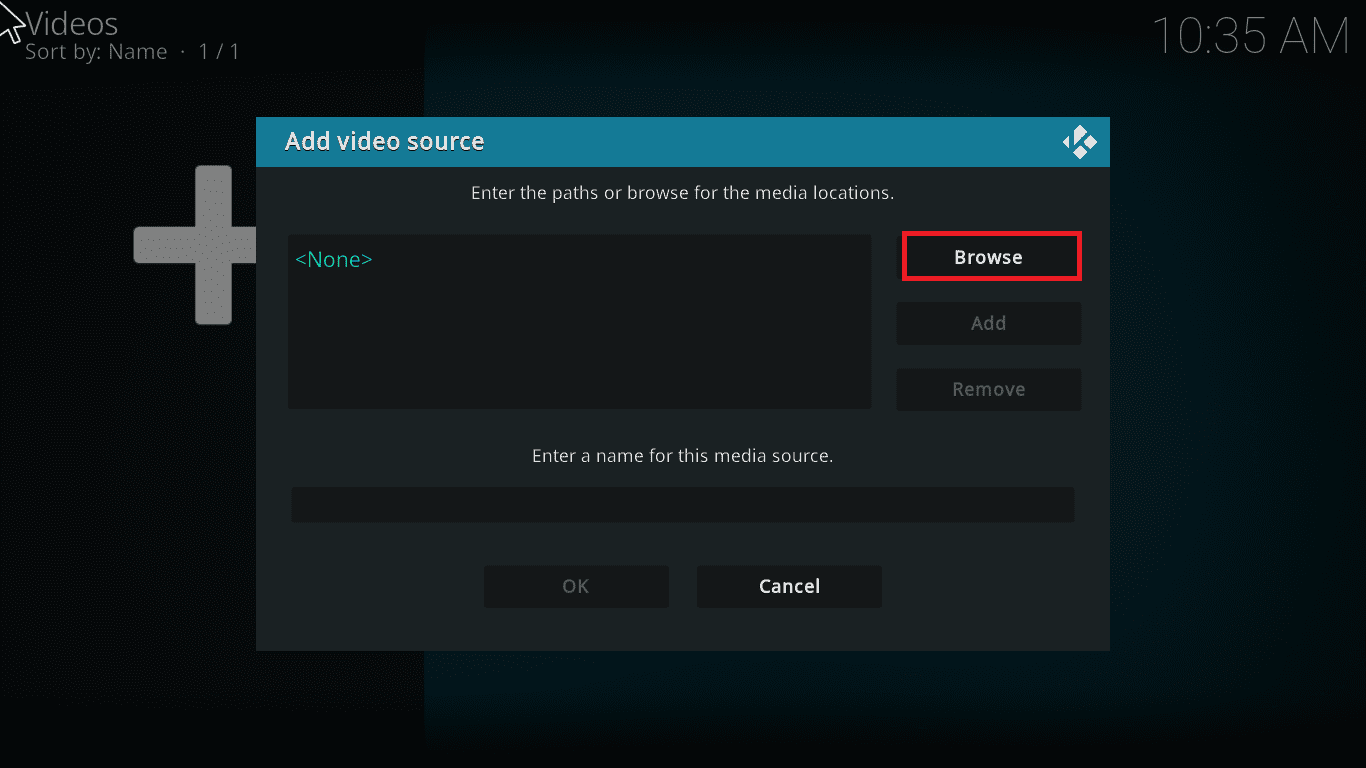
select browse
Step 9: Go to the “network location.”
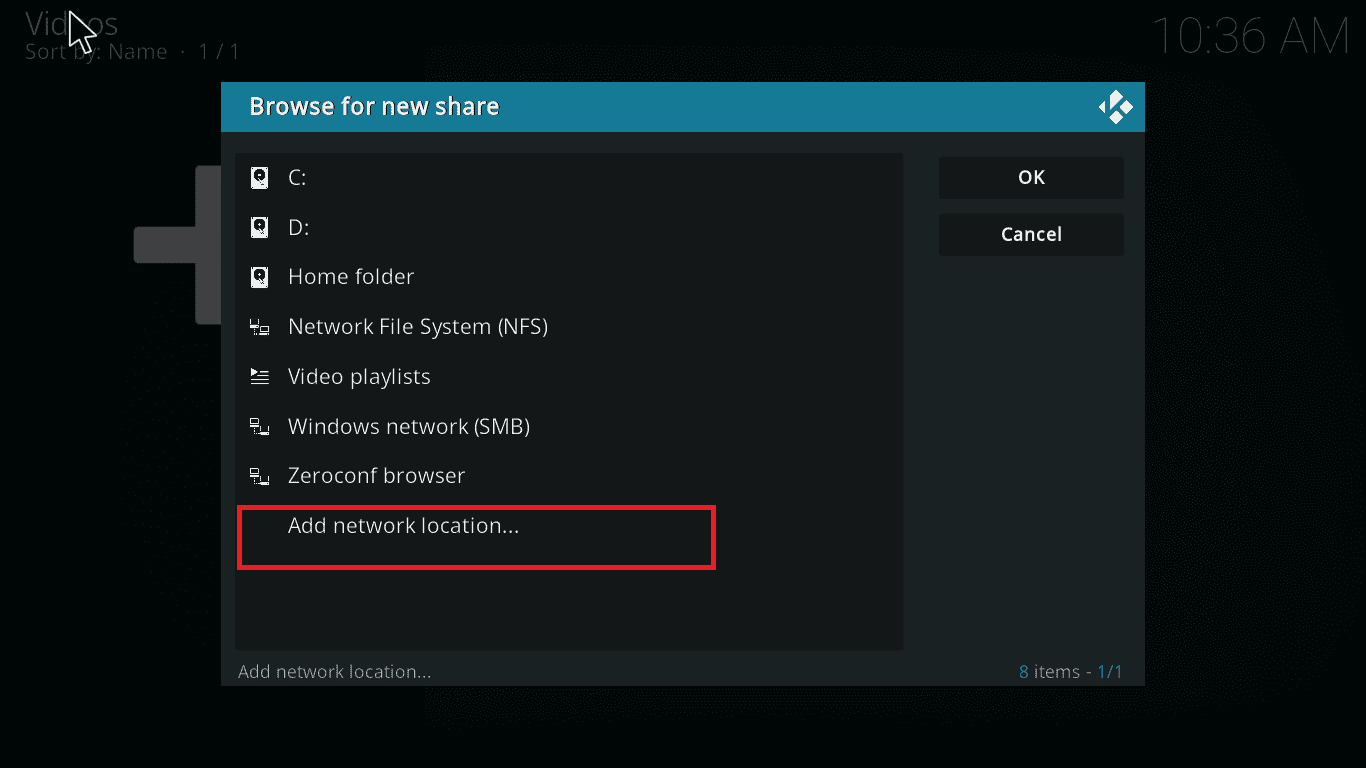
select add-network location
Step 10: Select the “protocol section” as Windows network (SMB) and type your IP address, username, and password to access your storage.
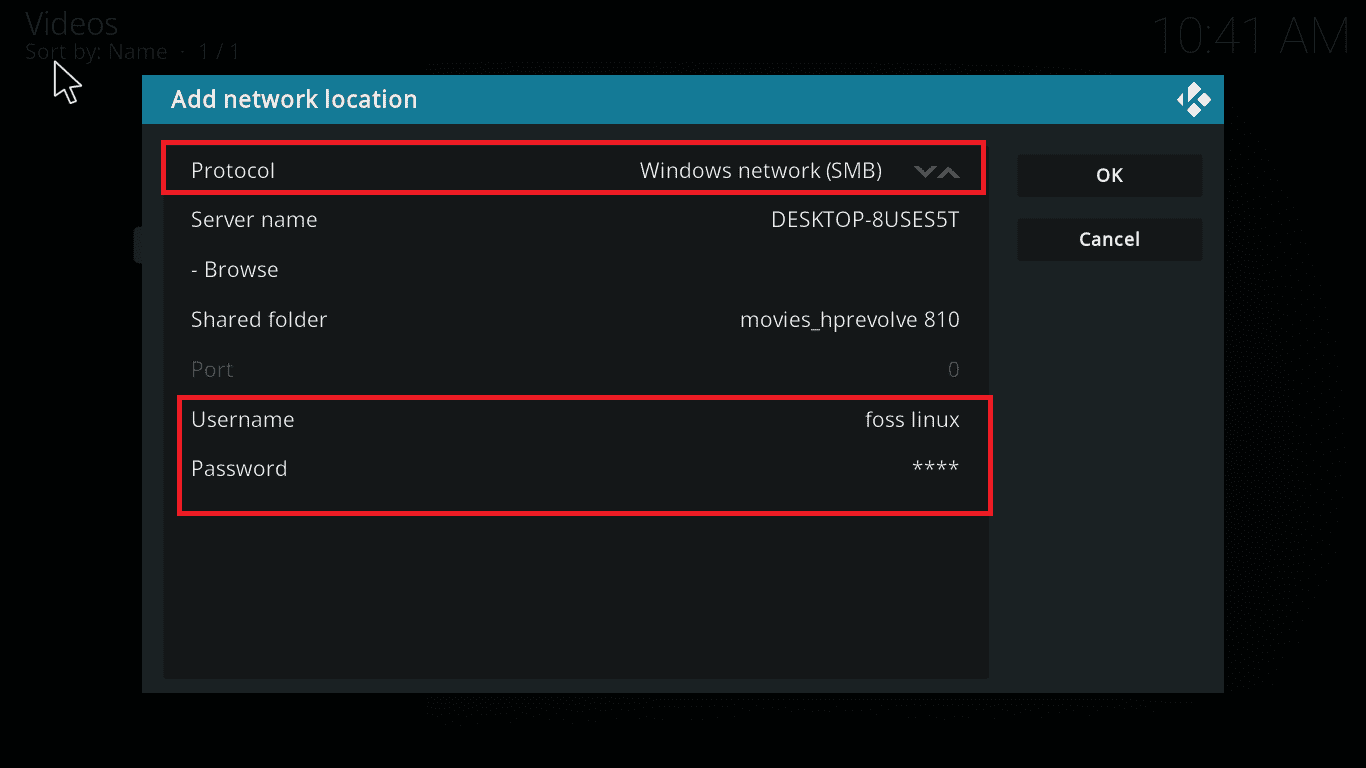
Fill data
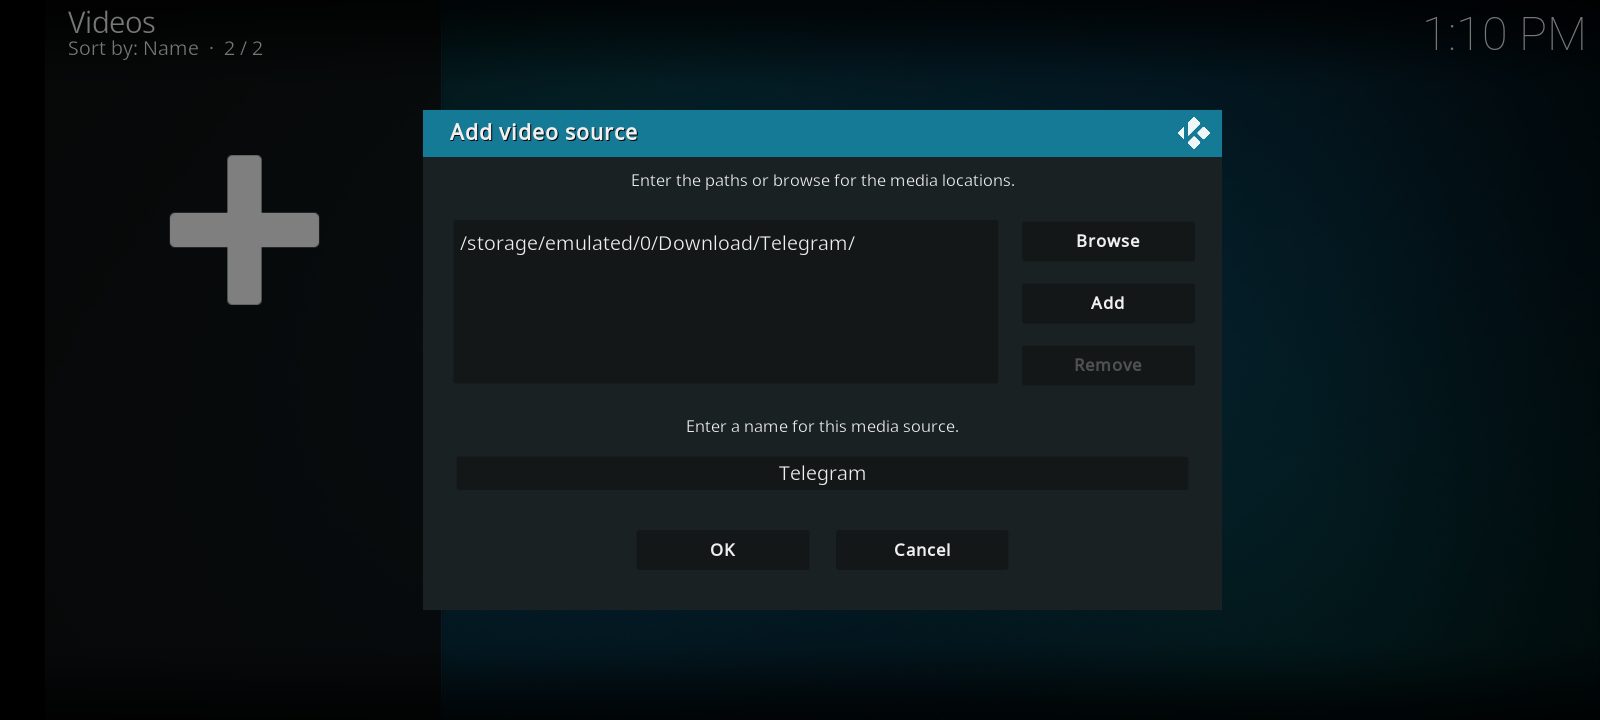
Step 11: Your Video files should appear at this point as shown below:
videos shown
Step 12: Then proceed and enter the name of the library
 Step 13: Set up the content scanning options to your preference by playing around with the toggle buttons and clicking on “OK.”
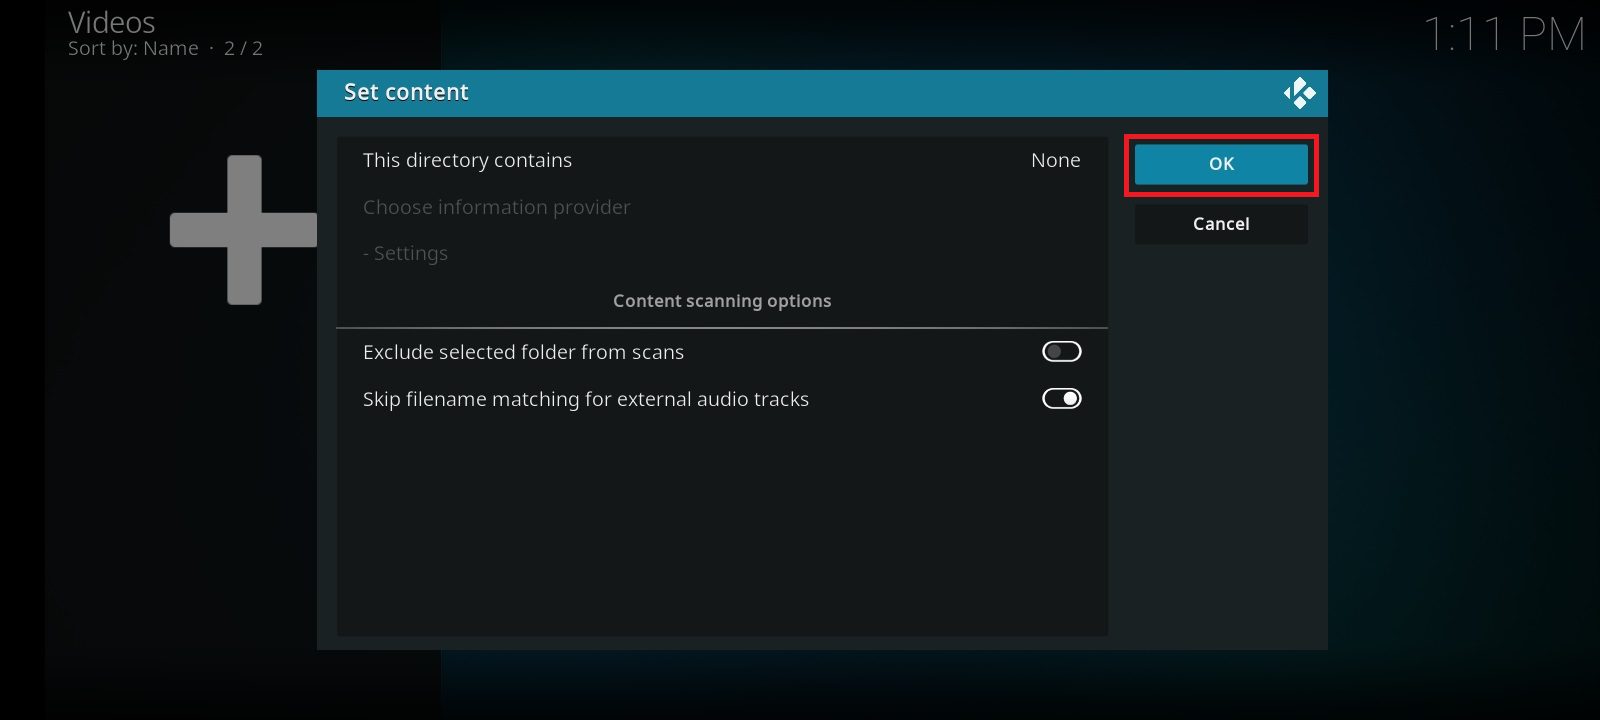
Select some options, then click “OK.”
And that is it, guys!
Now that you have grasped how to connect to your network storage, it is time to explore probable fixes of fixing the Kodi software if it does not connect to a network server.
How to fix Kodi if it does not connect to a network server
Most Kodi users experience network-related problems even if they have active connections. This error commonly occurs when adding a file source or installing a Kodi add-on. But don’t worry yourself since the following steps will bail you out.
Step 1. Check the internet connection.
Always ensure that you have no problem with your internet connection. We also suggest that you run the Windows Network Diagnostics utility to help check for any faults within the network configuration by troubleshooting problems and detecting errors.
Step 2. Recheck the URL.
This is brought about by mistyped and misspelled URLs. You are always advised to recheck the URL repeatedly to avoid any typographical errors. Also, avoid accidentally putting a hyphen, extra space, or typing “http” instead of “HTTP” on your URLs. But to completely deal with this issue, we recommend that you copy and paste the URL to the Kodi software.
Step 3: Check and see if the source runs appropriately.
At times, you may have already added the URL, but you aren’t sure if it is still working or not. This may limit you from connecting to the network server. When a domain is shut down, Kodi changes the URLs in most cases. You must be aware of the new URL for the add-ons you want to install. You can check the status of the URL by pasting the link on the web browser to see if it’s still working. If the source is down or closed, a page containing an error message will appear, telling you that the source is no longer functional.
Step 4: Use VPN
Failure to use a VPN can give an internet service provider access to your activity log, and they may block your traffic directed to the specific IP address. Therefore, it is best practice if you use a VPN while connected to the network using your Kodi software. Talking about VPNs, there are many great VPNs available for Kodi and Rasberry Pi for you. For instance, you can check out IPVanish, a tried and tested VPN due to its unmatched zero log policy and blazing fast speed.
Step 5: Update the Kodi Add-ons
The version currently running on Kodi may be another cause for Kodi connection issues. If the running version is not the latest release, you might have problems connecting to your network server. Kodi usually installs new updates automatically. However, this might not be the case at all times. As such, it does not hurt to check for pending updates using the following steps manually:
1. Go to Kodi on the home page and click on “Add-ons.”

select add-ons
2. Select “My add-ons.”
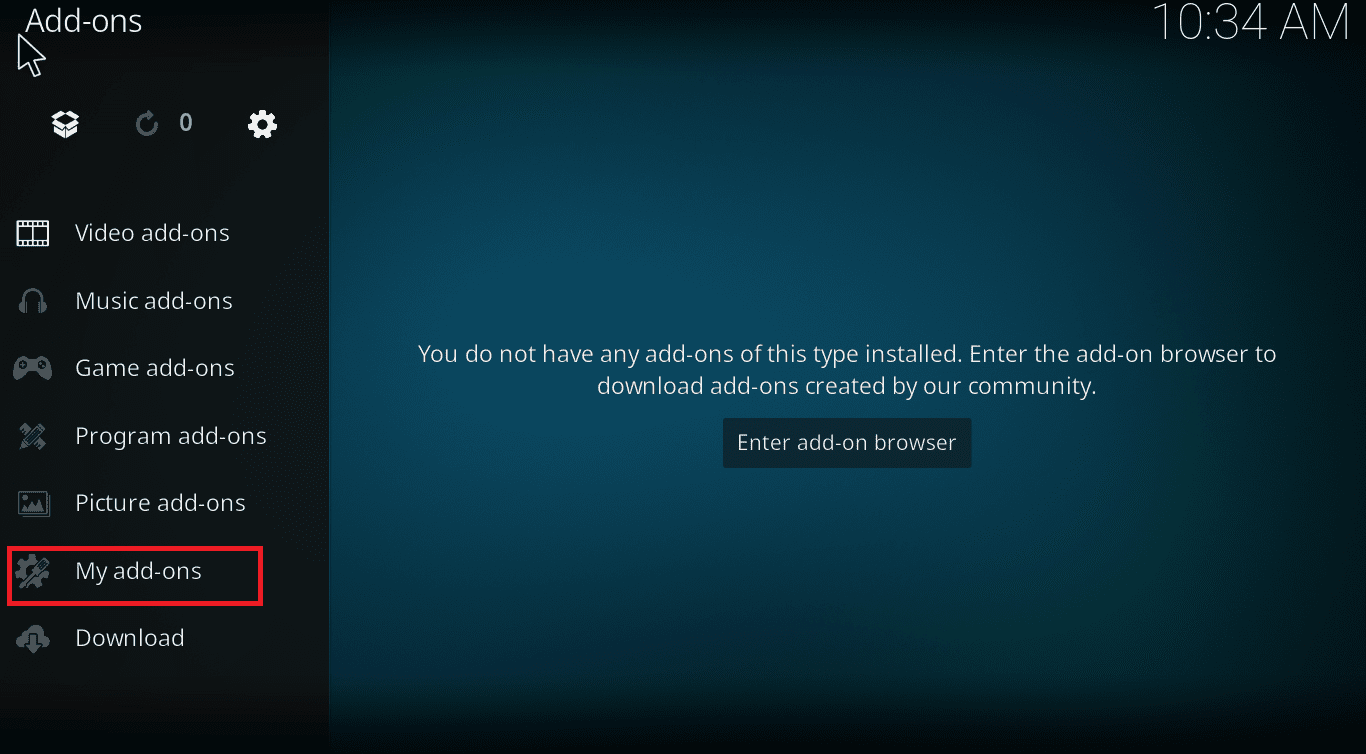
select my-addons
3. Select “services.”
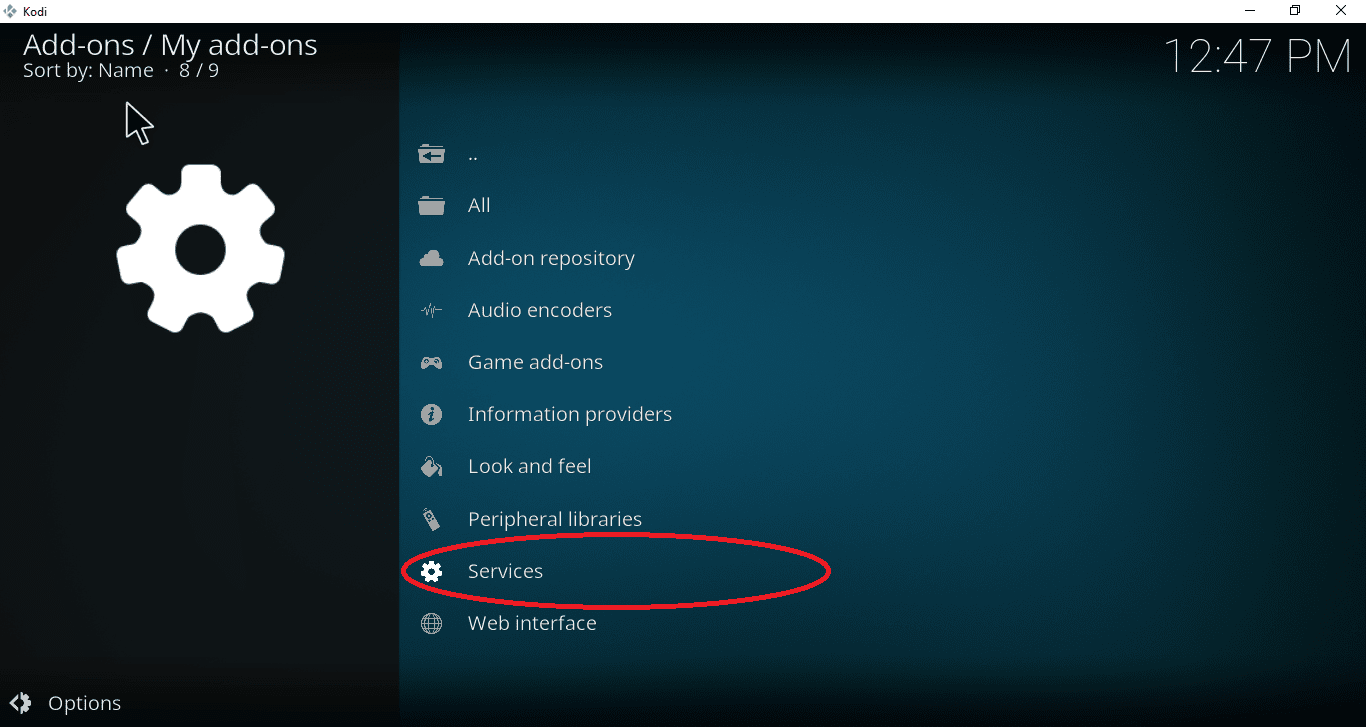
select services
4. Then check on the version to see if it is the latest.
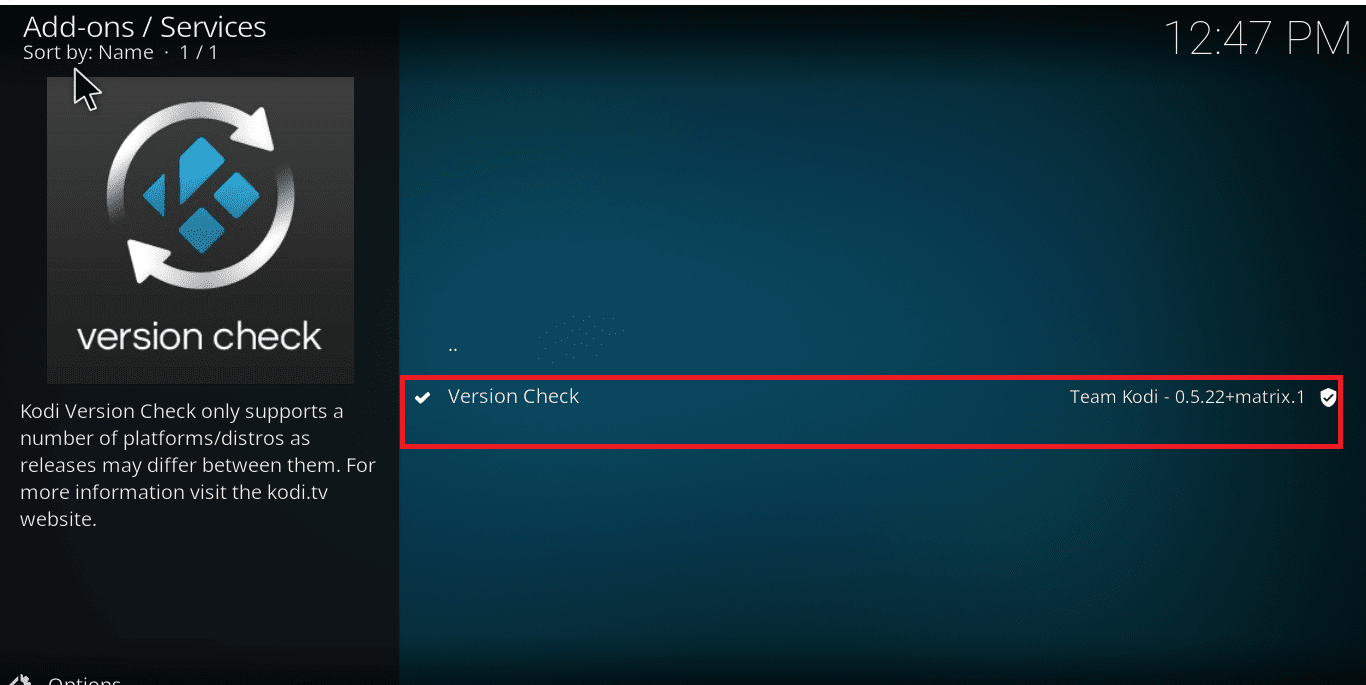
select version check
5. If it is not, ensure you switch on the auto-update toggle button, and Kodi will automatically install the latest version.
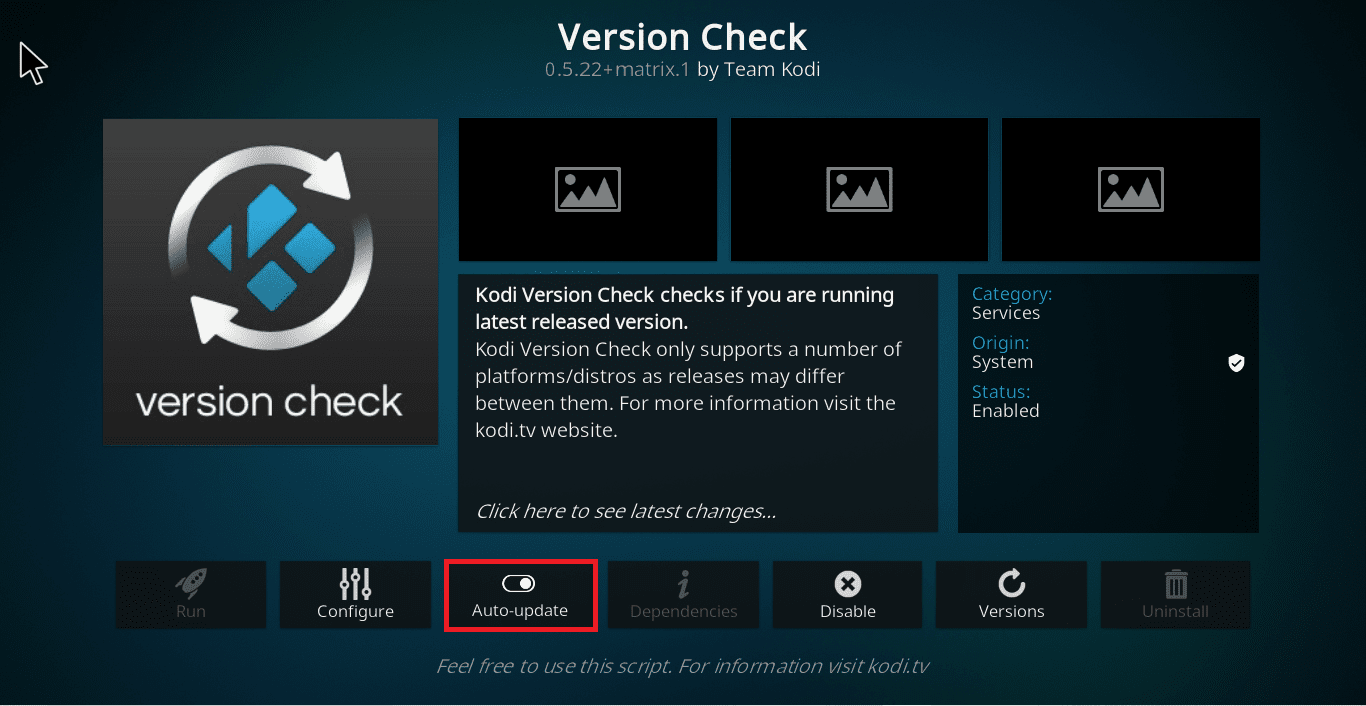
auto-update option
After that, restart your Kodi software.
Step 6: Reinstall Kodi
You can uninstall and reinstall Kodi to check if the problem has been resolved. While uninstalling, ensure you delete all the Kodi configuration files to ensure no old files are left on your machine.
Click on this link to download another version.
We believe that the above solutions helped solve most of your Kodi-related problems.
FAQs
Can someone use SMB or NFS?
Remember that both SMB and NFS are network protocols that you can use to access files on a network. SMB uses user-based authentication, which separates multiple users from a single authenticated machine and enables printer and file sharing to all users at once. Whereas, with NFS, every user on an authenticated system can access a specific share because it uses the host-based authentication system. Having known that, the ideal solution for Windows servers is SMB. While NFS is the best choice, you can go for it when using a Linux OS.
What can I do to avoid Kodi’s Wi-Fi connection issues?
If you have trouble connecting Kodi to Wi-Fi, then you should check out the following solutions to help you out with this issue:
- Make sure that the network isn’t hidden.
- Ensure there are no strange spaces or characters in the network’s name.
- Check if you have not plugged in an ethernet cable.
- Check if the network has a MAC address and, if it has, ensure it is listed.
- Finally, crosscheck the issued IP address to ensure that you’ve connected to your Wi-Fi network and no one else’s
Conclusion
Accessing network storage in Kodi is relatively easy, as discussed in this article. We believe this article was educative and informative enough. Keep following single Board Bytes for more Raspberry Pi articles and tips.
1 comment
How would you add an external drive? I tried to add the drive letter in front of the shared folder name? Eg: D://shared_folder_name_here but that didn’t work. I have no problem getting to “Video” default library folder on C but can’t seem to get externals to show?