
Kodi is a highly customizable media player for Raspberry Pi that supports various add-ons and plugins, allowing users to access a wide range of streaming services, including YouTube, Netflix, Amazon Prime, and many more. Unfortunately, recent updates to YouTube’s API access requirements have hindered users from watching YouTube videos directly on Kodi without using the YouTube API.
Previously, users could watch a couple of videos before encountering the error “you have exceeded the daily limit or quota.” Now, you cannot watch even a single video without integrating the YouTube API.
Tip: This change was necessary due to YouTube’s increased focus on API access control and usage limits. By requiring an API key, YouTube can better manage and monitor access to its data, ensuring compliance with its terms of service and providing a more secure and stable experience for users.
This post will provide you with a step-by-step guide on how to add YouTube API keys to Kodi and use them with the YouTube add-on to stream videos.
How to set up and configure YouTube API keys on Kodi
Pre-requisites
Here are some of the requirements you need for this project.
- A Raspberry Pi with the Kodi media player installed. If you have to yet installed Kodi, you can check out our article – How to install Kodi on a Raspberry Pi for a comprehensive guide.
- An active internet connection.
- A Google account (Gmail)
Understanding APIs and API Keys
An API, or Application Programming Interface, is like a digital bridge that allows different software applications to communicate and work together smoothly. Think of it as a set of rules and tools that enables one program to access features or data from another program. For example, when you use a weather app on your phone, it might be using an API to gather weather information from a service like Weather.com.
API Keys are like secret passwords that grant access to specific APIs. They serve as a way for the API provider to control who can use their services and track how they’re being used. When you want to use an API, you typically need to include your API key with your requests to prove that you’re allowed to access the API’s features or data.
Now, let’s talk about YouTube API keys in the context of Kodi. To watch YouTube videos through Kodi, you need to obtain a YouTube API key. This key acts as your permission slip to access YouTube’s vast library of videos. By adding this API key to Kodi, you’re essentially telling YouTube that you have the right to watch videos through their service via the Kodi platform.
Create a Personal YouTube API Key, Client ID, and Client Secret
Note: As stated above, you will need a Google account for this step. If you already have a Gmail account, you are good to go. If not, visit the official Gmail website and create one.
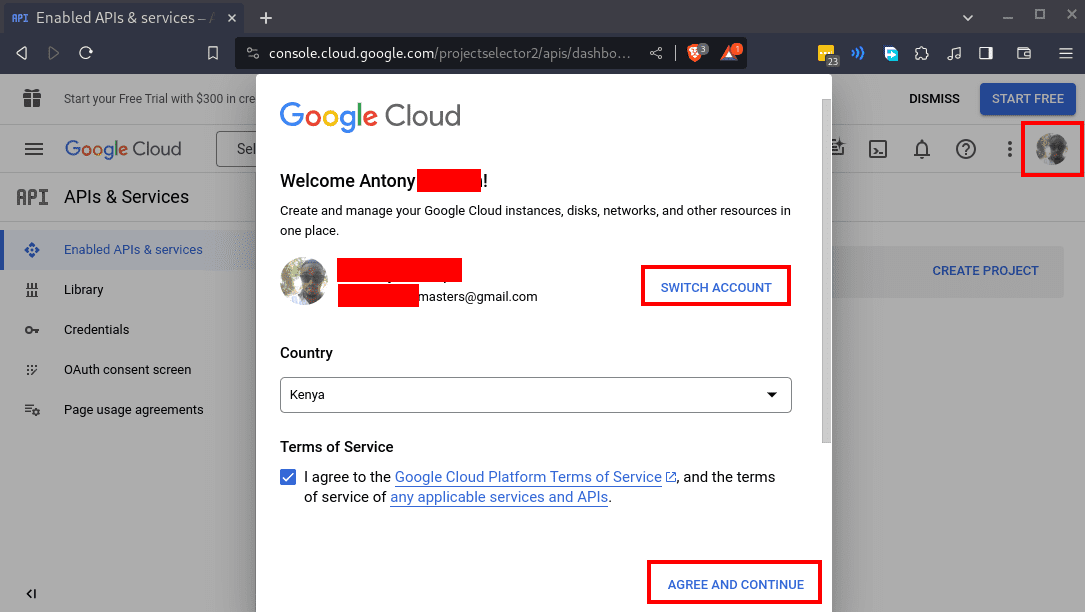
Launch your browser and navigate to console.developers.google.com. If it is your first time visiting this site, you will need to accept the Terms and Conditions on the pop-up window that appears on your screen. Also, if you are logged in with a Google account that you don’t want to use, you can click “Switch Account” on the pop-up window or click your profile icon on the top right for more options.
Google developer console
Google Developer Console
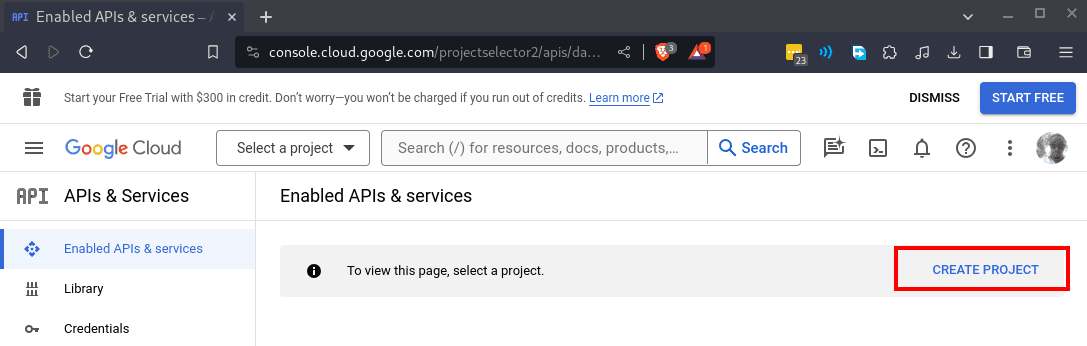
Next, you will need to create a new project. Click the “CREATE PROJECT” button under the “Enabled API and Services section.”
Create project
Create Project
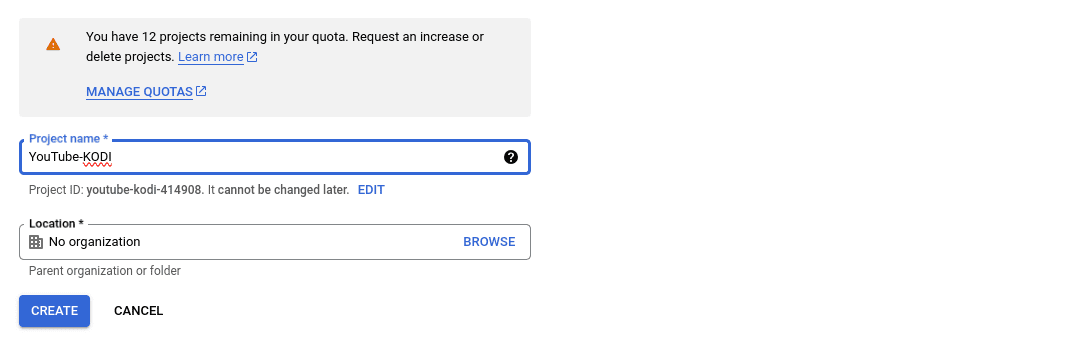
You will see a new screen where you need to enter your project details, such as “Project Name” and “Location.” If this is your first time interacting with the developer console, leave the location as default “No Organisation.” Once done, click the “Create” button at the bottom of the window.
Project details
Project Details
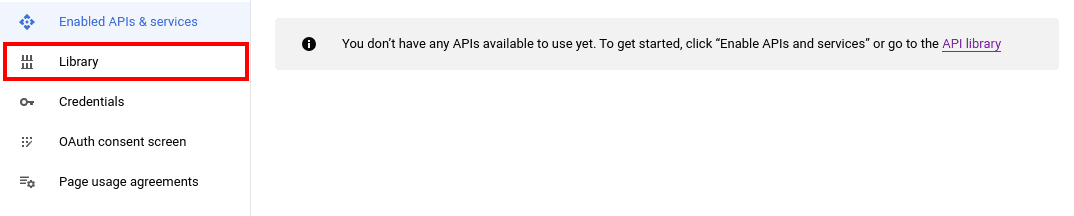
After successfully creating a new project, click on “Library,” which is located on the left-hand side panel, as shown below.
Library
Library
The Library section serves as a catalog of available APIs and services provided by Google, each offering different functionalities and features that you can integrate into your applications. Here, you’ll find a wide range of Google APIs and services that you can enable and use in your project. They include:
- Google Maps API
- YouTube Data API
- Google Drive API
- Google Cloud Vision API
- Google Analytics API
In this post, we are interested in the YouTube Data API. Scroll down and look for – YouTube Data API v3.
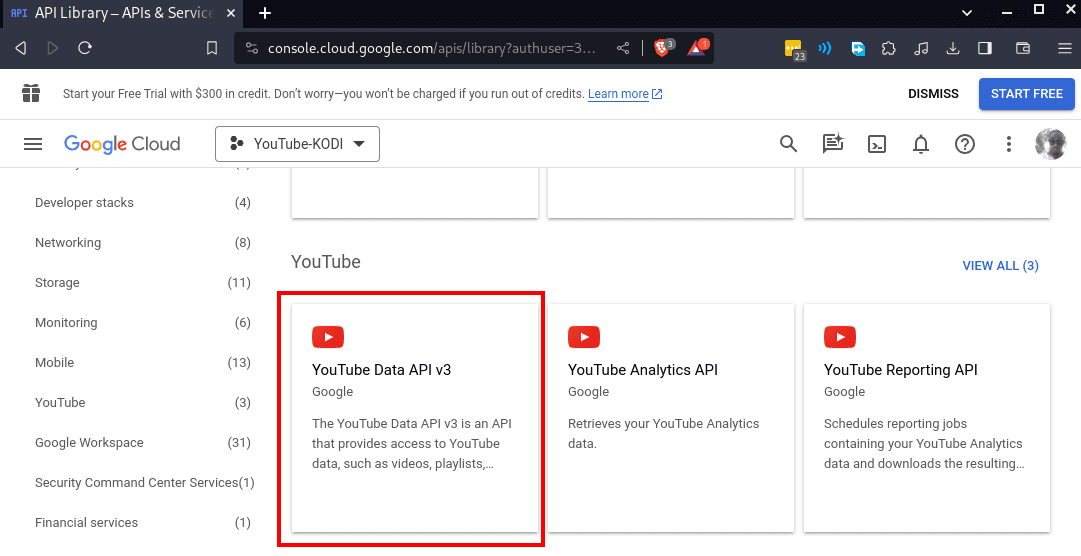
YouTube Data API V3
YouTube Data API V3
You will be redirected to the API page. Click the “Enable” button and wait for a few moments as Google configures the API for you.
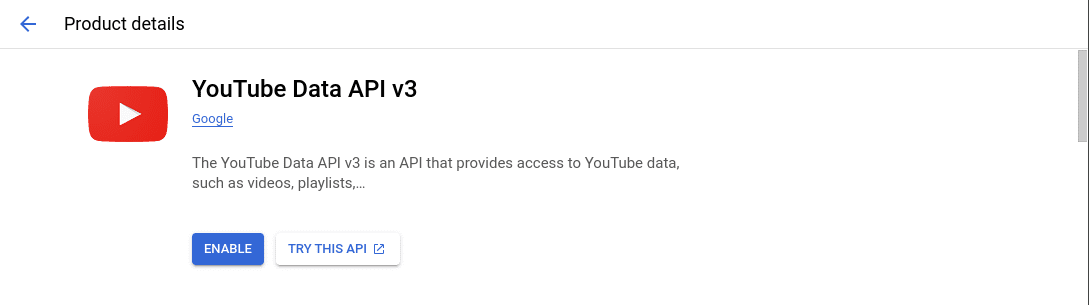
YouTube API
YouTube API
You will be redirected to the API details page to enter your credentials. Click the “CREATE CREDENTIALS” button at the top right.
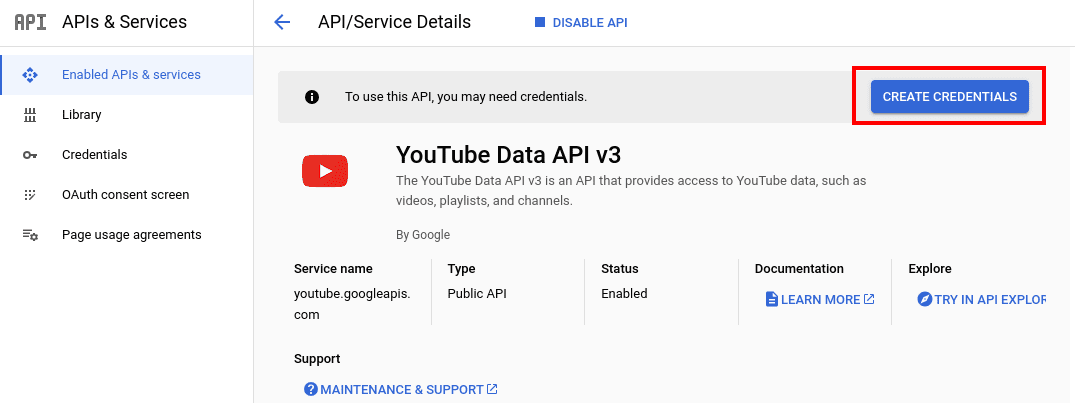
API details
API Details
Next, you will need to select the criteria you want to enter. The first prompt is the kind of API you are using. In the dropdown menu, select YouTube Data API V3. Next, you must choose the data type you want to access with the API. There are two options:
- User data
- Public data
In our case, we are accessing public data. Therefore, click the “public data” radio button. Click “Next” when done.
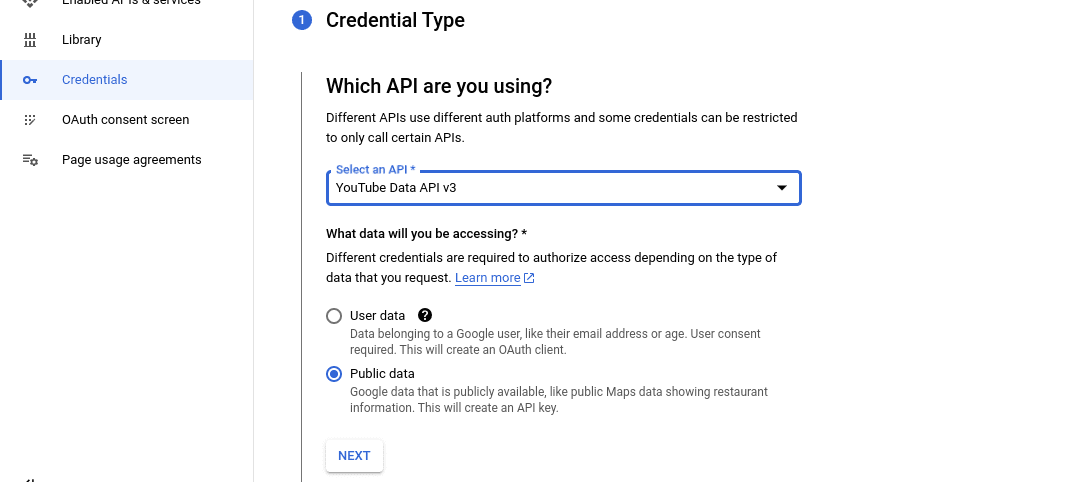
Credential type
Credential Type
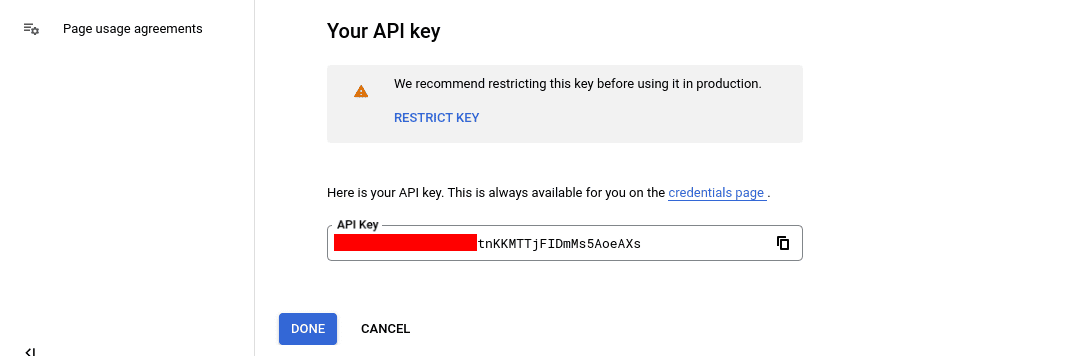
Be patient as YouTube generates your API key. When you are done, you will see a new screen displaying your YouTube API key. Copy this key and paste it somewhere in a text editor for flexibility and efficiency purposes. Ensure you save the file to easily access the key when needed instead of navigating the complex Google developer console.
API key
API Key
Click “Done” after you have saved your API key somewhere. You can always find your API keys in the “Credentials” menu on the left.

Credentials
Credentials
Next, we will need to create an API ID and API Secret that you will also need to authenticate the YouTube add-on on Kodi. To get started, click the OAuth consent screen menu on the left.
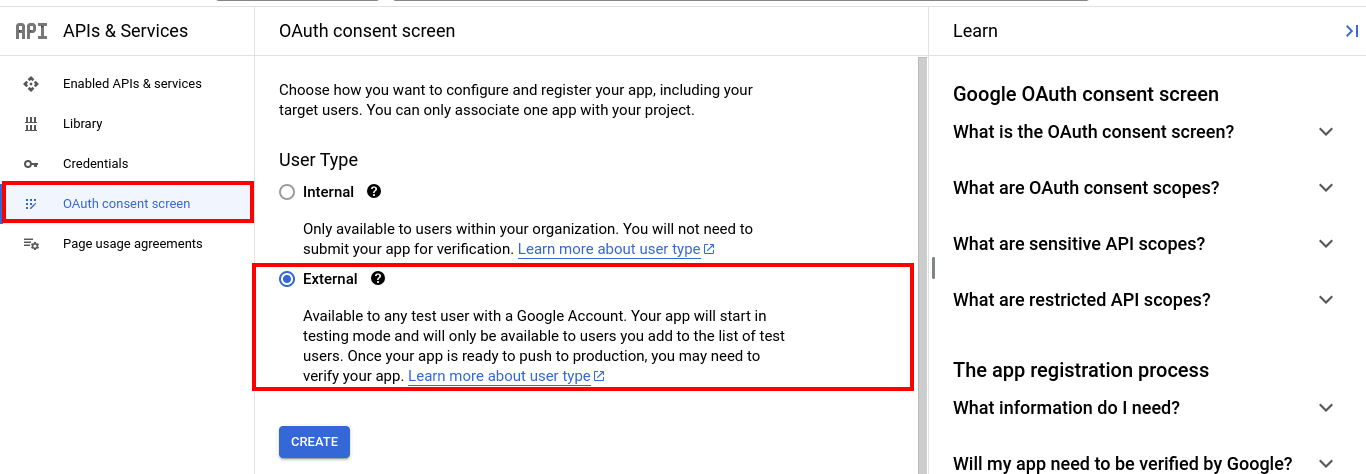
The OAuth consent screen is a vital component in OAuth 2.0 authentication, essential for applications interfacing with Google APIs. It facilitates the configuration and registration of apps by collecting details like app name, logo, and privacy policy URL. Users can select between two user types: “Internal” for organization-specific usage without requiring Google’s app verification and “External” for applications targeting users with Google accounts.
For this project, select “External” under the “User type.” Once done, click “CREATE” at the bottom of the window.
OAuth consent screen
OAuth Consent Screen
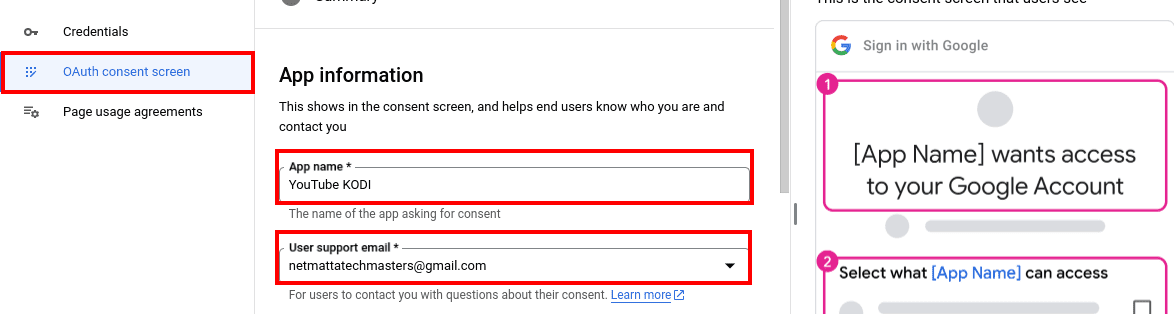
Now, you will be redirected to the “App details” screen, where you will need to fill in a couple of fields. Let’s look at some of the required fields.
- App name: This is the name of your application. You can use the same name that you used for your project. In our case, we used “YouTube KODI.”
- User support email: This is the email users can use to contact you. Use the same email you are using for your account. It is actually listed in the dropdown menu.
- Developer contact information: Use the same email you used in the “User support email” field.
App information
App Information
Click the “Save and Continue” button at the bottom when done.
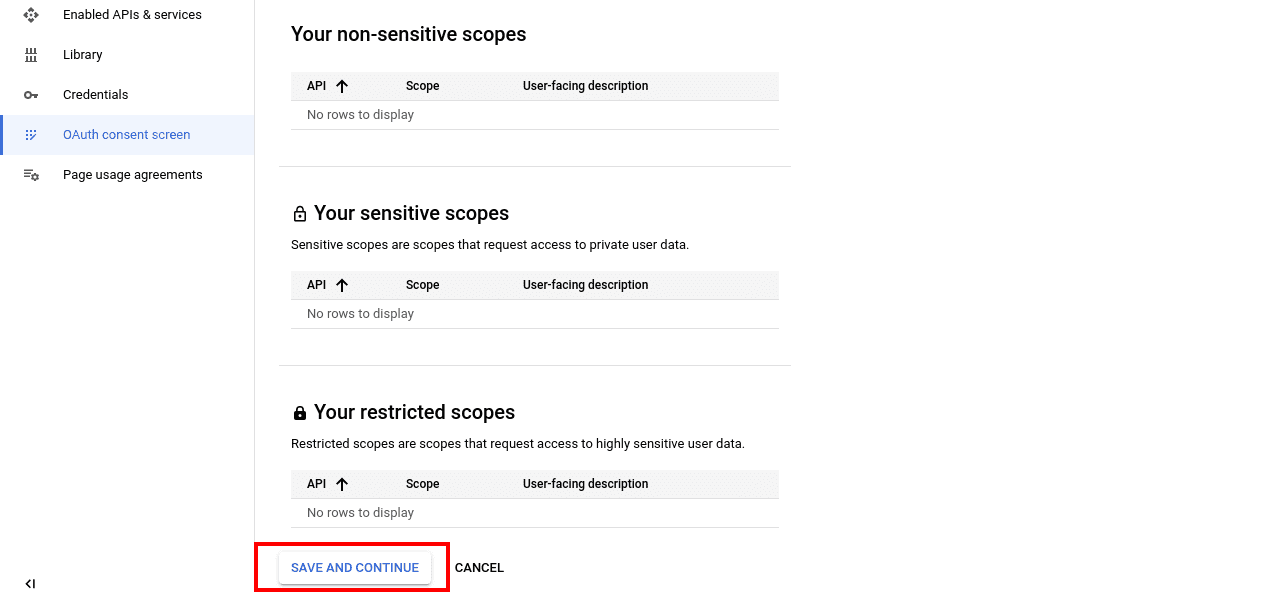
You will be immediately redirected to the “Scopes” page. Here, you have the option to manage your scopes – both sensitive and non-sensitive scopes. For this project, you don’t have to do anything here. Therefore, scroll to the bottom and click “Save and Continue.”
Scopes
Scopes
You will be redirected to the “Test Users” page. Don’t do anything here unless you are well-versed with the Google developer console. Click the “Save and Continue” button.

Test users
Test Users
You will be redirected to the “Summary” page, which will display all your “Settings.” Scroll to the bottom and click “Back to Dashboard.”
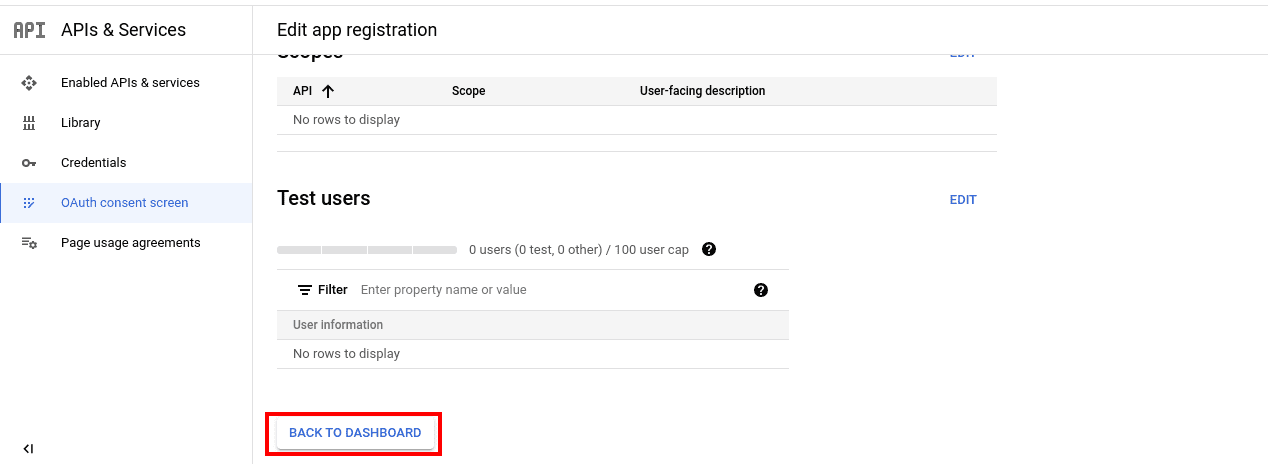
Dashboard
Dashboard
Next, click the “Credentials” menu on the left. Once on the “Credentials” page, click the “CREATE CREDENTIALS” button at the top of the window to open a drop-down menu. Select “OAuth client ID.”
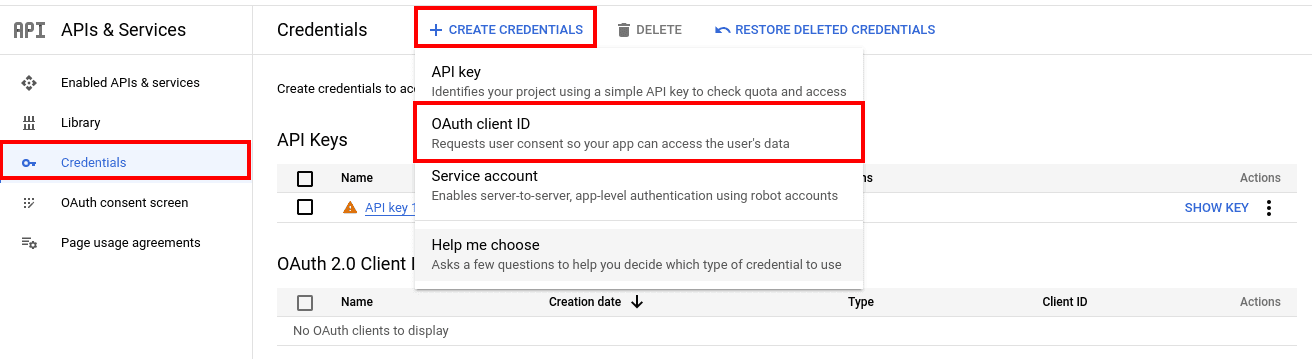
Create credentials
Create Credentials
On the next screen, you must select the “Application Type.” Click the dropdown menu and select “TVs and Limited Input devices.” You can leave the name “TV Client 1” as the default or set a new name. Click “CREATE” once done.
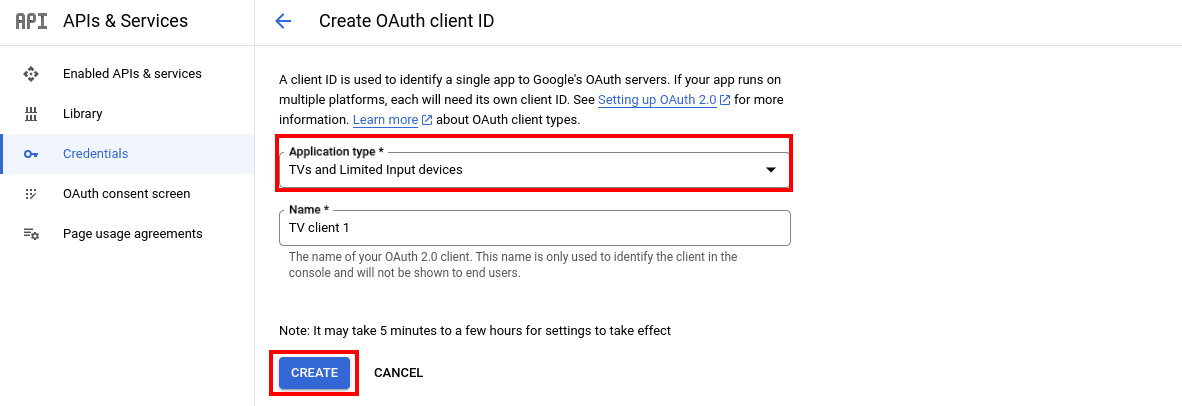
Application type
Application Type
You will see a pop-up window with a notification that your OAuth Client has been created. You will have both the Client ID and Client Secret. Copy these two keys and save them in the same file in which you saved the API key.
That’s it. You have successfully generated the YouTube API Key, Client ID, and Client Secret. We can now add them to the Kodi media player on our Raspberry Pi.
Set Up API Key, Client ID, and Secret on Kodi
Up to this point, we have looked at how to create three items from the Google developer console.
- API Key
- Client ID
- Client Secret
Now let’s have a look at how we are going to add these credentials to Kodi. Follow the steps below.
1. Launch the Kodi media player on your Raspberry Pi. Go to the add-ons section and launch the Kodi Youtube add-on. Click the “Settings” option.
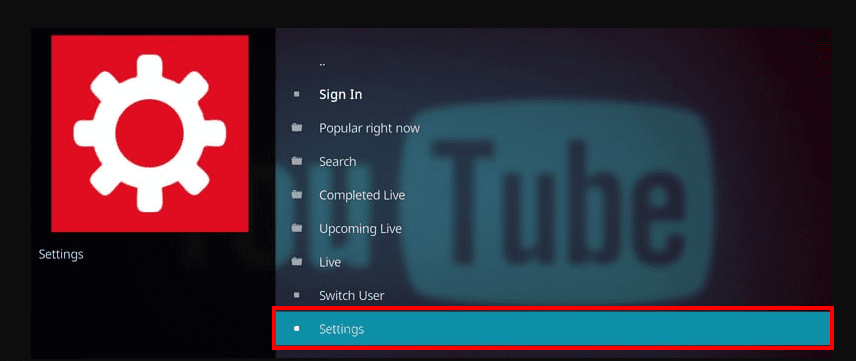
YouTube add-on settings
That will open the Settings window where you can configure your APIs.
2. Click on the API option on the left.
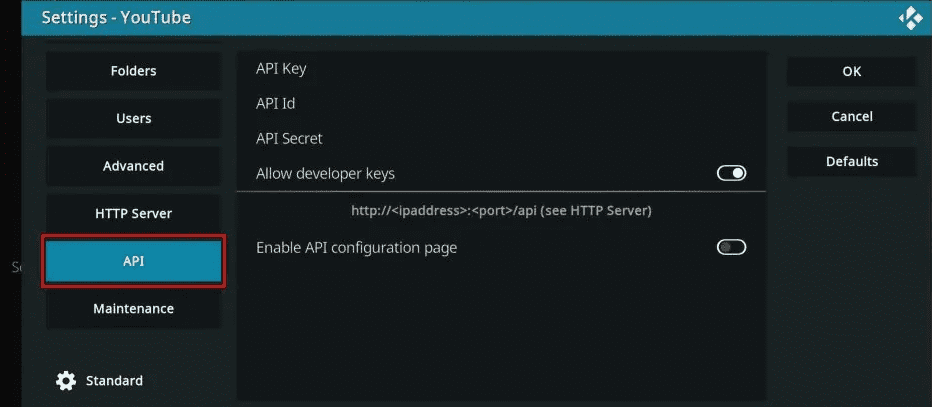
API
3. In the API settings screen, click on the highlighted fields below and fill in the required details you created in the Google developer console.
- API Key = API key
- API ID = Client ID
- API Secret = Client Secret

API settings
API Settings
Congratulations. You have successfully added YouTube API keys to the Kodi YouTube add-on. You can now start streaming your favorite YouTube videos without any issues.
Conclusion
This post has provided you with a step-by-step guide on adding YouTube API keys to the Kodi YouTube add-on. In case you lose your keys and need to access them, navigate to the “Credentials” section in the Google developer console. Did you encounter any issues? Don’t hesitate to let us know in the comments below.
1 comment
It worked, but I cannot login. I have an error message: the oauth was not found.