
The moment you connect your device to an active internet connection (especially public networks), several security questions might flow in your mind. How many websites track my current location, what I am doing and where I am headed to? Is there someone with malicious intent on this same network I am connected to? To overcome all these fears, why don’t you consider using a VPN.
A VPN – or Virtual Private Network enables you to establish a secure connection, especially on public networks. It enables you to browse anonymously by routing your traffic through a server that is not your point of origin. That way, a VPN disguises your online identity. That is like switching cars to shake off somebody following you.
When most of us hear of a VPN, we think of all the subscriptions we will be required to pay to get a secure connection. However, that’s not the only option if you got a Raspberry Pi board lying around. You can set up a Raspberry Pi VPN server and still be able to maneuver through the internet securely.
Note: Unlike the commercial VPN services available, a Raspberry Pi VPN server won’t spoof your location. Therefore, you can’t make your traffic appear to come from a different location while you are in another location. However, on the positive side, you will be able to connect your devices and connect to the internet securely via your home network or a public WIFI. You can also use it to securely access files and media on your computer over a secure network connection.
Talking of accessing files over a network, do you know you can also set up your Raspberry as a NAS (Network Attached Storage) or as a Media server? Feel free to check out these two posts. How to Build a Raspberry Pi NAS | How to set up Plex server on a Raspberry Pi.
Let’s dive in and look at how you can set up a Raspberry Pi VPN server.
Setting up a Raspberry Pi VPN server
Requirements
- Raspberry Pi board (Model 2 or higher highly recommended)
- Continous and available internet connection (preferably an Ethernet connection)
- Reliable power supply
- An external Keyboard (Optional)
- A USB Mouse (optional)
- Display monitor (optional)
Some of the items are listed as “optional,” as you won’t need them if you are planning to access your Pi via SSH.
Installing Raspberry Pi Operating System (Raspbian)
Luckily, we don’t need to download any complex operating to set up a VPN server on our Raspberry Pi. In this post, we will use the official Raspberry Pi OS (Raspbian). If you don’t have it installed already, look at our post – How to install Raspbian on Raspberry Pi. It will give you a step-by-step guide.
To ensure you are running the latest software and drivers, update and upgrade your Raspbian OS with the commands below:
sudo apt update
sudo apt upgrade
Enable SSH Access on Your Raspberry Pi
If you don’t have a monitor for the graphical display, you can easily set up SSH on your Pi. Take a look at our post – Connecting to Wi-Fi & Enabling SSH Without Monitor on Raspberry Pi. Alternatively, you can enable the VNC server on the PI and access the graphical display on your laptop via a VNC client. Take a look at our post – How to Set up VNC Server on Raspberry Pi without Monitor.
Change the Default Password
After enabling SSH, you need to change the default password as anyone on the same network with you can quickly gain access to the Pi. If you have just installed the Raspbian OS, you will see a prompt on the Desktop requesting you to change the password.
Alternatively, if you are connected to your Pi via SSH, you can use the passwd command to change the password. Use the syntax below:
passwd pi

Change Pi Password
You will see a prompt to enter your current password (raspberry) before setting a new password.
Note: If you have another user other than the default ‘pi,’ replace them on the command above accordingly.
Setting up a Static IP Address on Your Raspberry Pi
Any devices you want to connect to the network will find the VPN server on your Raspberry via an IP address. Therefore, to avoid performing configurations now and then, we will need to set up a static IP address on the Raspberry Pi. To get started, connect your Pi to an active internet connection (preferably via Ethernet).
On the Terminal or Putty (if you connected via SSH), execute the ifconfig command. You will see a bunch of information displayed. Please focus on the interface connected to the internet. If you are on Ethernet, it’s probably the eth0, and if you are connected to Wi-Fi, it is perhaps called Wlan0. In my case, it’s eth0.

Ifconfig
On the output you get after running the ifconfig command, I want you to copy the information highlighted in the image above. That is:
network interface: eth0
IPv4 (inet): 192.168.1.43
IPv6 (inet6): fe80::1656:fcbd:c840:e500
Next, we will need to know our Gateway. Execute the command below:
sudo route -n

Find Gateway
From the image above, you can see my gateway is 192.168.1.21. Copy this information somewhere too. Now we will assign the Raspberry a static IP address using the DHCPD. First, check whether DHCPD is running. Use the command below:
sudo service dhcpcd status

Check DHCPD status
From the image above, you can see the dhcpd is already running on my system. If yours shows otherwise, start it with the commands below:
sudo service dhcpcd start
sudo systemctl enable dhcpcd
Once it’s up and running, we will proceed to tweak the dhcpd.conf file. Execute the command below to open the dhcpd configuration file with the nano editor.
sudo nano /etc/dhcpcd.conf
Now copy the information below and paste it at the bottom of the file. Please, remember to replace the italicized words with the data from the ifconfig and route -n commands.
interface interface
static ip_address=your_ipv4-address/24
static ip6_address=your_ipv6_address
static routers=your_gateway
static domain_name_servers=your_gateway

Static IP Configuration
When done, save the file (Ctrl + O, then Enter) and Exit (Ctrl + X).
If you are on a busy network, you can also set up a static IP address with the router. That will prevent the router from issuing the IP address you set as static on your PI to another connected device. The overall procedure might differ from one router to another; however, the principle is the same – Link the MAC address of Raspberry Pi with your LAN’s IPv4 address via the manual IP configuration.
Installing OpenVPN With PiVPN
OpenVPN is an open-source Virtual Private Network (VPN) project which creates a secure connection via the SSL/TLS security protocols. There are two ways through which you can install and setup OpenVPN.
- Install the OpenVPN Linux server on your Pi and manually tweak the configurations file.
- Install OpenVPN with PiVPN
In this post, we will use the latter – Installing OpenVPN with PiVPN. PiVPN is a set of scripts that make the whole OpenVPN installation and configuration process a lot easier. To get started, execute the command below in your Terminal.
curl -L https://install.pivpn.io | bash
You will see some lines on the Terminal with information about what is taking place. After some time, you will see the screen below pop-up.

Install PiVPN
Once the script has retrieved and installed all the necessary files, you will see the window below. Click Ok to continue.
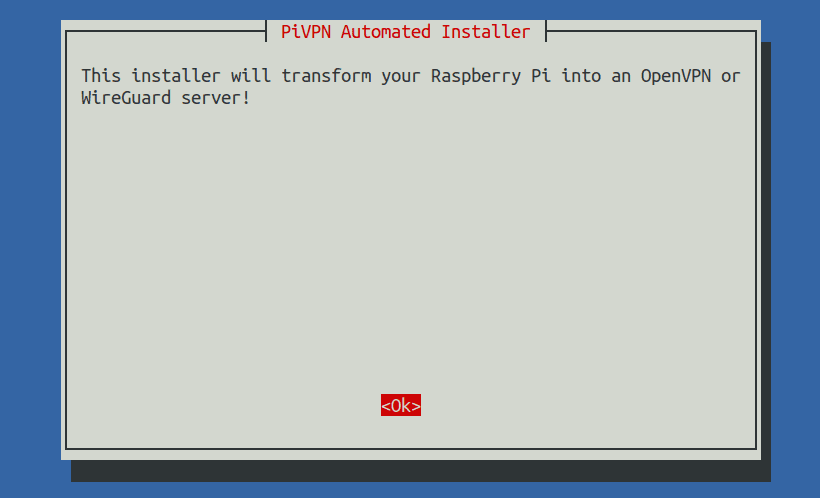
PiVPN Automated Installer
The next screen will give you a detailed explanation of why we need to use a static IP address. Luckily, we have already discussed how to set up a static IP address above. Click Ok.
The next window will give you information about DHCP Reservation. If you already set up a static IP address on your Raspberry Pi and set up a DHCP reservation on the router, select YES and hit Enter. Otherwise, select NO.
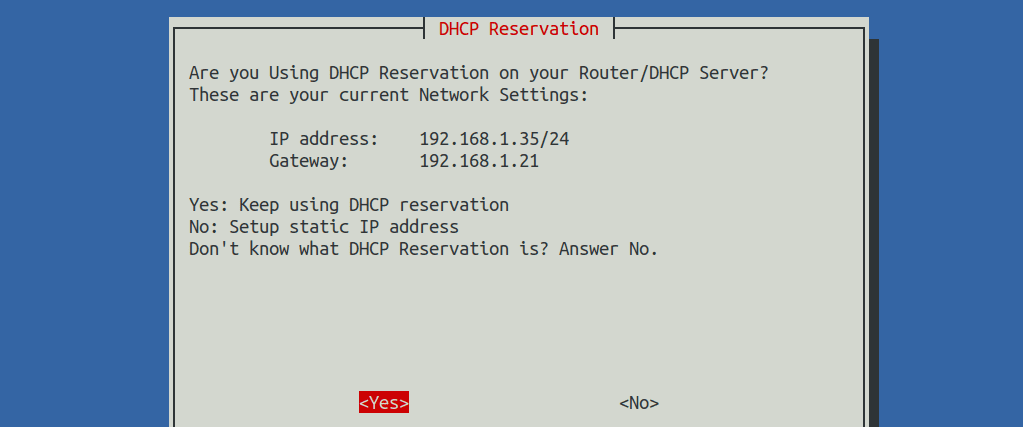
DHCP Reservation
You will see a message that you need to select a local user who will hold the ovpn configurations on the next window. Click OK. A new window will appear, and you will have to choose a user. If you have just installed Raspbian, then you will only the user ‘pi’ listed. Select a user and click OK.

Select User
A new window will open, and you will need to choose the type of VPN you want to install. You have two options: Wireguard and OpenVPN. in this post, we will use OpenVPN. Use the Arrow keys to navigate Up and Down, then select it using the Spacebar key. Click Ok.
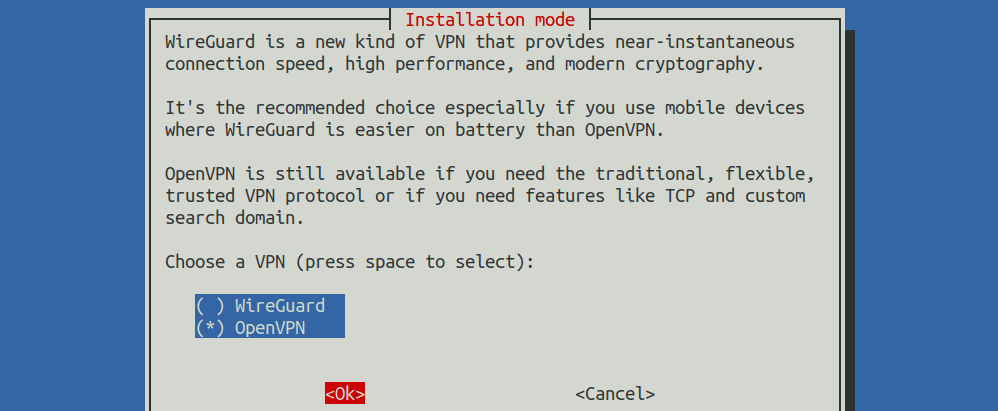
Choose a VPN
In the next window, you will need to select the installation mode. You are given an option to either customize PiVPN settings or use the defaults. For this post, we will use the default settings. Select NO and hit Enter.
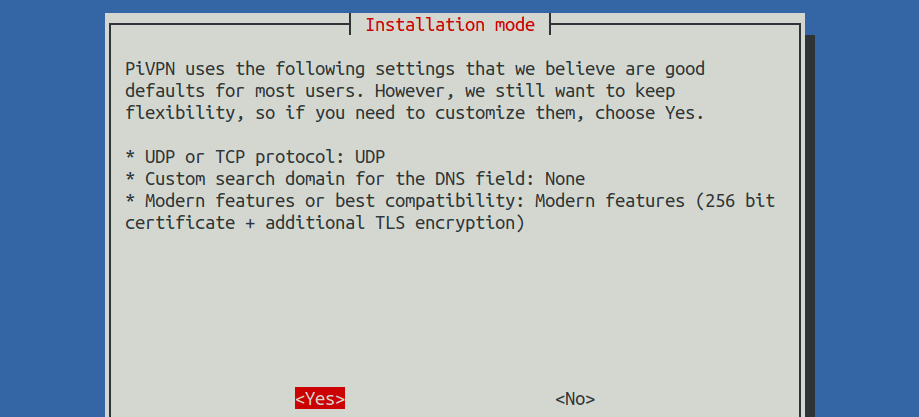
Use PiVPN default settings
In the next window, we will need to select the port that OpenVPN will use. In this case, we will leave it as default which is port 1194. Select Ok and hit Enter.
In the next window, we will need to select the port that OpenVPN will use. In this case, we will leave it as default which is port 1194. Select Ok and hit Enter.

Default OpenVPN port
In the next window, you will be asked to confirm the port you just selected. Select YES and hit Enter. The next screen will give you an option to select the DNS provider you wish to use. The work of DNS is to resolve a URL (e.g., singleboardbytes.com) to its IP address. In this post, I will opt for Cloudflare. Cloudflare does not track traffic sent by an IP address and deletes their logs after every 24 hours.
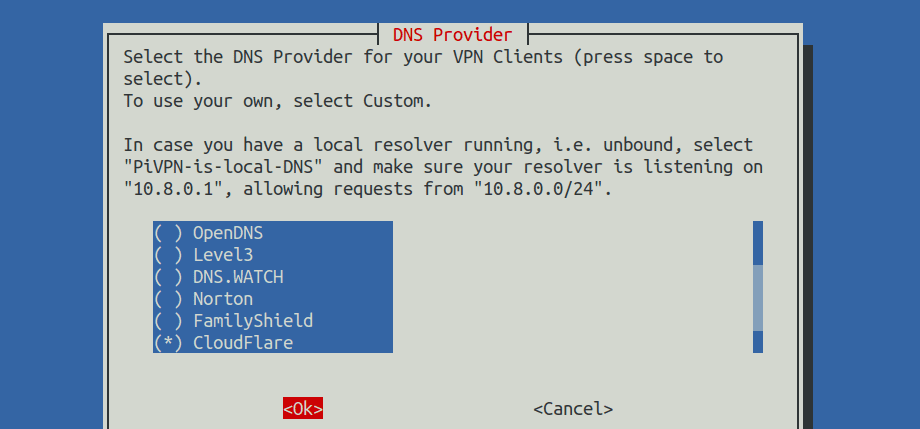
Select DNS provider
In the next window, you will need to select an option that clients will use to connect to the VPN server. Since we have set up a static IP, we will proceed to use the Public IP.

Use Public IP
The next window will notify you that the PiVPN script wants to generate the server and HMAC key necessary for encryption. Select Ok.

Gernerate Server and HMAC key
The next screen will give you information about system upgrades. Once you have installed OpenVPN, the security package will automatically check and install updates. However, some of these updates will require you to reboot the VPN server once in a while for them to take effect. Select Ok and hit Enter. In the next window, select YES to enable unattended-upgrades.

Upgrades
That’s it! We have successfully installed OpenVPN on our Raspberry Pi. You will see a window with the next couple of things that you need to do. Select Ok. On the next screen, you will see an option to Reboot your Pi and apply the configurations. Select YES and hit Enter.
Reboot Pi
Setting up Your OpenVPN Clients
If you went the manual way of setting up OpenVPN, you would have to generate individual certificates for every user and setup CA and PEM passphrases. Luckily, PiVPN does all the dirty work for us.
To get started with setting up our first client, execute the command below:
sudo pivpn add
You will be requested to Enter a name for your client. This name enables you to identify which device is connecting to the VPN uniquely. In my case, my first device is Chromebook_One. Next, you will be prompted to enter how many days you want that certificate to last. Leave it as default (1080 days). Lastly, you will need to set up a password for that particular client. Once done, PiVPN will generate a certificate for that particular client. All the certificates generated will be stored in the /home/pi/ovpns directory.

Generate client certificate
Now, we will need to copy this certificate to the target client. There are several ways you can do this:
- Use an FTP solution such as FileZilla
- Use the SCP (Secure Copy) command
- Copy the Certificate to external storage (such as a USB drive) and paste it into your target client.
In my case, I will use FileZilla to transfer the certificate (.ovpn file) to my target client.
Now that we have the certificate on our client machine, we will need a VPN client to establish a secure connection. We will use the official OpenVPN client. You can download the installation package from their official website.
Once you have installed the OpenVPN client, you can now establish a secure connection with the VPN. If you are on a Linux system, execute the command below:
openvpn /path/to/certificate.ovpn
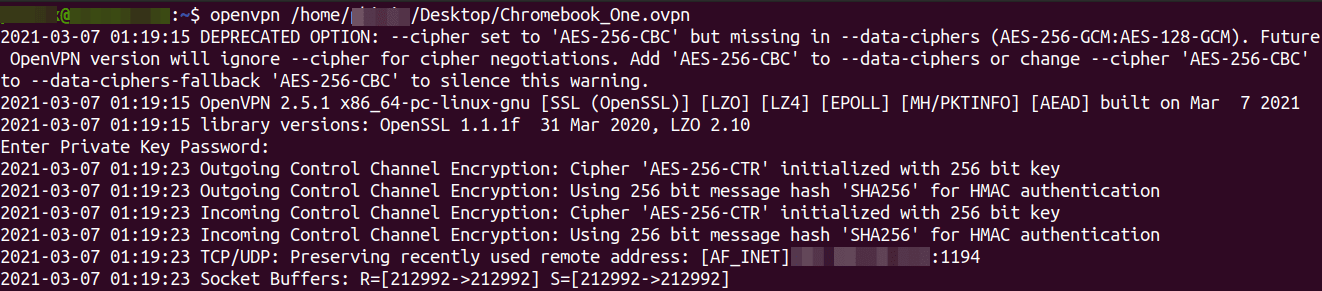
Establish connection with a VPN server
If there is an error and the connection is not successfully established, there is a high probability that there is a problem with port forwarding on your router. You can solve that by visiting your router’s official website and check the instruction given about port-forwarding. Additionally, some ISPs block specific ports. Please confirm that the port you set for OpenVPN is not blocked.
Congratulations! You have successfully set up a Raspberry Pi VPN server. To add another device, use the pivpn add command to generate a unique certificate.
Uninstall OpenVPN From Your Raspberry Pi
To remove OpenVPN from your Raspberry Pi, execute the command below:
sudo pivpn uninstall
Conclusion
I hope this tutorial has given you a step-by-step guide on installing and setting OpenVPN on your Raspberry Pi. In case you have an additional tip you wish to share with our readers, or you came across any issue, please feel free to hit the comments below.