Valheim is a game that’s taking the world by storm! It’s a video game that may not look like much at first glance, but it can become quite addictive. First released on 2nd February 2021, the game became a huge success by selling at least 5 million copies after the first month and hundreds of thousands of concurrent players on Steam.
The game itself has five simple rules to follow. The goal is to collect as many orbs as possible before time runs out. There are power-ups to help you along the way, but make sure you don’t collect any negative ones because they will slow you down, deplete your life meter, or even kill you! It’s all too easy to play Valheim for hours on end without realizing it because of how addicting it can be.
Even though you can play this game solo and still have a good time, playing with friends is the real deal! And here is where the Raspberry Pi comes in. Like the previous post on Setting up a Minecraft Server on a Raspberry Pi, this article will give you a step-by-step guide on setting up a Valheim Server on the Raspberry Pi. However, the method will be slightly different because of the two main challenges discussed below.
Challenges of running a Valheim dedicated server on Raspberry Pi
- The Valheim server is 64 bit. That shouldn’t be a challenge if you use a newer Raspberry Pi board like Raspberry Pi 4, which supports 64 bit operating systems and applications. Therefore, this tutorial won’t work for you if you own a 32-bit Raspberry Pi board. Some boards which support 64-bit OS include Pi 3, Pi 4, Pi Zero 2.
- Valheim Server is x86, while the Pi is ARM. That is one of the biggest challenges we will tackle in this post. Today, two significant architectures power most of the world’s computers: x86 and ARM. x86 is the more familiar architecture created by Intel, and it powers PCs and laptops. ARM processors were initially designed for mobile phones and tablets. It might sound impossible to run an x86 application on ARM architecture – but it’s not. Please read on.
Requirements
- A Raspberry Pi Board with support for a 64-bit operating system
- Micro SD Card
- A reliable power supply
- An active internet connection (we highly recommend using ethernet)
Set up your Raspberry Pi for Valheim Server
Before diving into the technical part, there are a few things that we need to set up.
- Install the official Raspberry Pi OS.
- We highly recommend running the Pi headless (without a monitor) for maximum resource utilization. To do so, you need to set up SSH access. Please take a look at our step-by-step guide on setting up SSH on your Raspberry Pi.
After doing everything detailed above, you can now dive into setting up Valheim Server on your Raspberry Pi.
Install x86 and x64 emulators
To install Valheim Server on our Pi, we will use a utility known as SteamCMD. SteamCMD is a command-line version of Steam, and it is used for installing and updating games on servers. It only works with servers that have been authorized, meaning you need to log in with a Steam account before it works.
SteamCMD requires us to install “box86” on our Raspberry Pi. Box86 is an emulator that enables users to run x86 packages on an ARM device like the Raspberry Pi. Follow the instructions below.
Install Box6 on Raspberry Pi
1. Update your system by running the commands below.
sudo apt update
sudo apt upgrade
2. Next, we need to install the necessary packages for compiling and building the box86 app. We will also install git, which will enable us to clone the box86 GitHub repository. Execute the command below to install cmake and build-essentials.
sudo apt install git build-essential cmake

Install Build-essentials
3. To clone the box86 GitHub repository, execute the command below.
git clone --branch "v0.2.2" https://github.com/ptitSeb/box86
Clone Box86 Repository
4. Since we are running a 64-bit operating system, we need to install the 32-bit ARM (armhf) and the required packages to run a multi-arch system. Execute the commands below.
sudo dpkg --add-architecture armhf
sudo apt update
sudo apt install gcc-arm-linux-gnueabihf libc6:armhf libncurses5:armhf libstdc++6:armhf
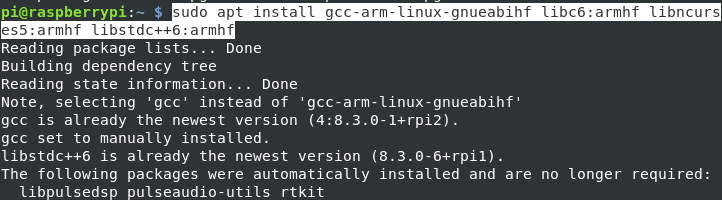
Install armhf packages
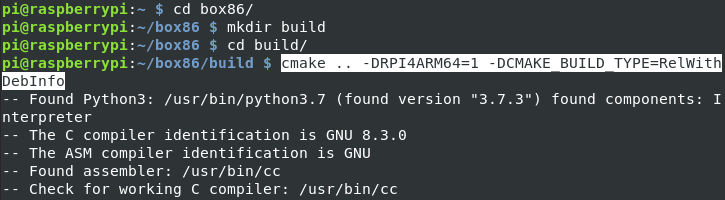
5. Up to this point, we are now ready to compile the box86 emulator. To get started, navigate into the cloned repository and create a new directory to put our x86 builds. Use the commands below.
cd box86
mkdir build
cd build
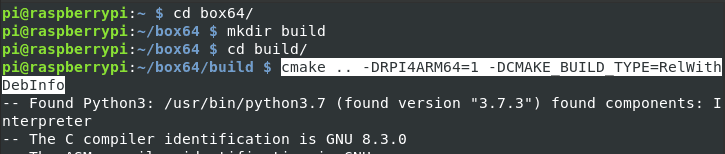
6. Execute the CMAKE command inside the build directory to start the building process.
– (For Raspberry Pi 4 64-Bit)
cmake .. -DRPI4ARM64=1 -DCMAKE_BUILD_TYPE=RelWithDebInfo
Compile box86
– (For Raspberry Pi 3)
cmake .. -DRPI3=1 -DCMAKE_BUILD_TYPE=RelWithDebInfo
– (For Raspberry Pi 2)
cmake .. -DRPI2=1 -DCMAKE_BUILD_TYPE=RelWithDebInfo
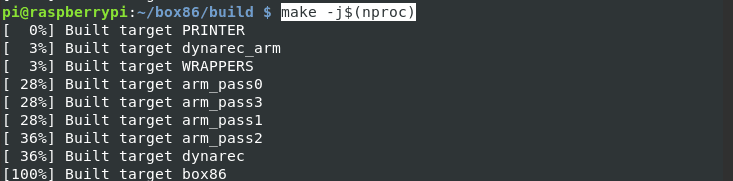
7. The above process might take a while to complete. When done, execute the command below to start the compilation process. Execute the command below.
make -j$(nproc)
Make Command
8. When done, execute the command below to install the box86 emulator.
cd
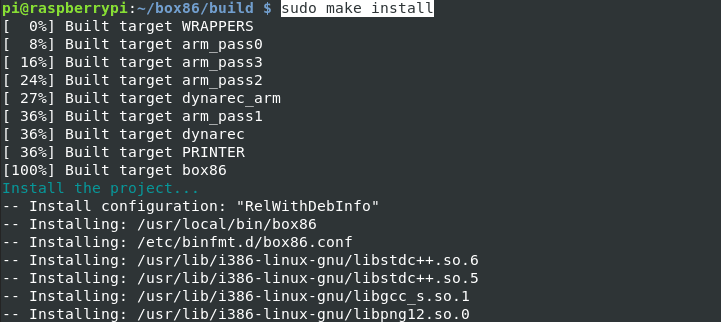
Install Box86
9. To finalize the setup, restart the systemd-binfmt service and reboot the system. That enables the system to know of the newly added binary formats. Execute the command below.
sudo systemctl restart systemd-binfmt
sudo reboot now
Restart the binfmt service
Install Box64 On Raspberry Pi
After successfully installing the box86 for SteamCMD, we need to install box64 required to run the Valheim server on the Raspberry Pi. Follow the steps below.
1. Install the necessary packages for compiling and building the box86 app. We will also install git, which will enable us to clone the box86 GitHub repository. Then, execute the command below to install cmake and build-essentials.
sudo apt install git build-essential cmake
Install Build-essentials
2. Next, clone the Box64 repository with the command below.
git clone https://github.com/ptitSeb/box64.git
3. To start the building process, navigate to the newly created box64 directory and create a new folder called build to hold our build files. Execute the commands below.
cd box64
mkdir build
cd build
cmake .. -DRPI4ARM64=1 -DCMAKE_BUILD_TYPE=RelWithDebInfo
Build box64
4. When done, execute the make command below to compile and install the box64 package
make -j4
sudo make install
After successfully installing Box64 and Box86 on your Pi, we can now install the Valheim server.
Set up SteamCMD on Raspberry Pi
As stated above, we will use SteamCMD to set up and install Valheim on our system. To get started, create a directory to store the SteamCMD package, and we will call it “SteamCMD” for this particular post. Execute the commands below.
cd ~
mkdir SteamCMD
cd SteamCMD

Setup Steam
Now that we have created our SteamCMD directory, we can download the SteamCMD package. We will use the wget command as shown below.
wget https://steamcdn-a.akamaihd.net/client/installer/steamcmd_linux.tar.gz
After a successful download, you will notice that the SteamCMD package is compressed in a tar.gz format. To extract it, execute the command below.
tar -xzvf steamcmd_linux.tar.gz
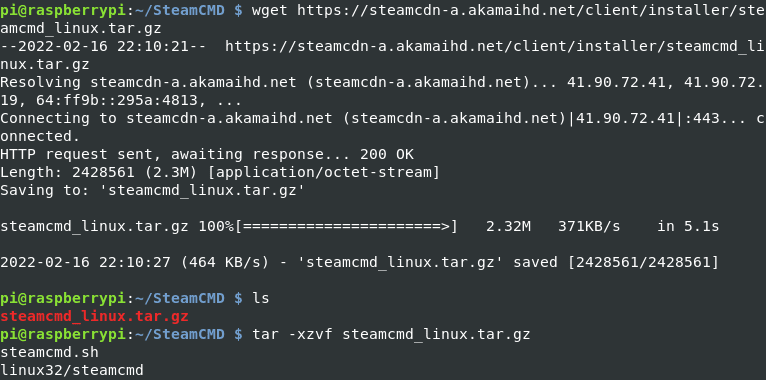
Download SteamCMD
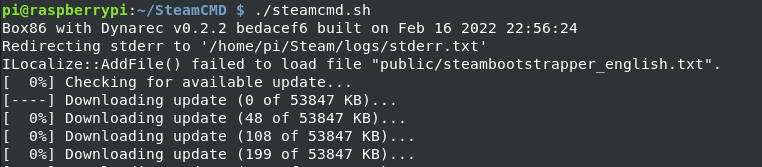
When you run the ls command after extracting the files, you will see a new file called “steamcmd.sh.” Execute this script as shown below to verify whether the SteamCMD package is working correctly.
chmod +x steamcmd.sh
./steamcmd.sh
The SteamCMD package will update and install any additional dependencies.
Verify SteamCMD
Note: If you come across like “steamcmd.sh: line 37: /opt/steamcmd/linux32/steamcmd: cannot execute binary file: Exec format error,” you need to check your Box86 installation. As of writing this post, the latest release of Box86 master version code has some issues running on Raspberry Pi 4. We highly recommend cloning an earlier version from a different branch, as we did for this post.
Install Valheim Dedicated Server
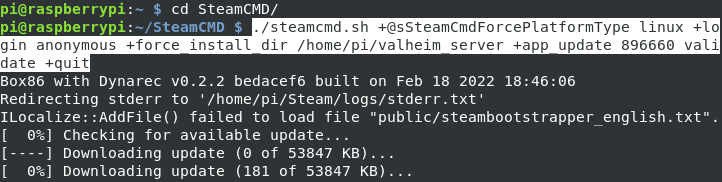
Up to this point, you are all set and ready to install the Valheim server on your Raspberry Pi. Next, we will use the SteamCMD tool to download the Valheim server from the Steam library. Follow the steps below.
1. Navigate to the directory where you downloaded the Steam package. If you followed this post to the latter, that should be the “SteamCMD” directory we created on our home directory.
cd /home/pi/SteamCMD/
2. Execute the command below to download the Valheim server using the SteamCMD tool.
./steamcmd.sh +@sSteamCmdForcePlatformType linux +login anonymous +force_install_dir /home/pi/valheim_server +app_update 896660 validate +quit
Download Valheim Server
Let’s go through all the arguments in this command:
-
./steamcmd.sh: Here, we are invoking the SteamCMD tool that we will use to download Valhei from the Steam library.+@sSteamCmdForcePlatformType linux: Even though this parameter looks confusing, it simply means we are downloading a package that will run on Linux and not other operating systems like Windows or macOS.+login anonymous: This parameter allows us to login into the Steam library without as an anonymous user. Therefore, we don’t need to provide a password or username.+force_install_dir /home/pi/valheim_server: Here, we specify the directory where we want to install the Valheim server. In our case, it’s the/home/pi/valheim_serverfolder.+app_update 896660: This parameter enables us to select the right package to download from the Steam library. In our case, the Valheim server has an App ID of 896660.
Running Valheim Dedicated Server
You could now set up and run the Valheim server if the download was successful. To get started, navigate to the /home/pi/valheim_server directory where we download the file. When you run the ls command, you will see the file with the name start_server.sh. We need to edit one particular line in this file that determines how we run the Valheim server.
Open the file using the nano editor (sudo nano start_server.sh) and look for the line below.
./valheim_server.x86_64 -name "My server" -port 2456 -world "Dedicated" -password "secret"Replace the line with the one below.
./valheim_server.x86_64 -nographics -batchmode -port 5656 -public 0 -name "My Valheim Server" -world "MyFirstWorld" -password "MySecretPassword" -savedir "/home/pi/valheim_data"
Before saving the file, there are some arguments that you can change on this line. Let’s look at some of them.
-port 5656: Here, you can specify a different port number, say 5555, 8088, and so on. Ensure you don’t put a number greater than 65535.-name "My Valheim Server": Here, you can give a different name for your server. Don’t add any extensions like .db or .fwl to the name.-world "MyFirstWorld": Here, you can set a different name for your world.-password "Password123": Here, set a password that users will use to access the server. Ensure the password is more than five characters. However, you can also decide not to set a password by omitting this parameter./home/pi/valheim_data: This argument specifies the path where you want to save the Valheim world data.
When done, save the file (Ctrl + S) and exit (Ctrl + X).
To start the server, execute the command below.
.start_server.sh
The startup process might take a few minutes since the game needs to generate the game world, locations, etc. When done, launch the game on your PC and type the IP address of your PI under the “Join by IP” option. Click Connect. If you don’t know the IP address of the PI, execute the command below on the Terminal.
hostname -I

Valheim Game Play
Conclusion
That’s it! You have successfully set up Valheim Server on your Raspberry Pi. Even though the Pi might not have enough resources to carry out resource-intensive tasks, it can support the Valheim Server pretty well without any glitches. If you encounter any issues during the setup process, please do not hesitate to hit the comments below.
10 comments
Breaks at step 4.
E: Failed to fetch http://us-sanjose-1-ad-1.clouds.ports.ubuntu.com/ubuntu-ports/dists/focal/main/binary-i386/Packages 404 Not Found [IP: 185.125.190.36 80]
E: Failed to fetch http://ports.ubuntu.com/ubuntu-ports/dists/focal-security/main/binary-i386/Packages 404 Not Found [IP: 185.125.190.36 80]
E: Failed to fetch http://us-sanjose-1-ad-1.clouds.ports.ubuntu.com/ubuntu-ports/dists/focal-updates/main/binary-i386/Packages 404 Not Found [IP: 185.125.190.36 80]
E: Failed to fetch http://us-sanjose-1-ad-1.clouds.ports.ubuntu.com/ubuntu-ports/dists/focal-backports/main/binary-i386/Packages 404 Not Found [IP: 185.125.190.36 80]
E: Some index files failed to download. They have been ignored, or old ones used instead.
Ign:36 http://us-sanjose-1-ad-1.clouds.ports.ubuntu.com/ubuntu-ports focal-backports/universe i386 Packages
Fetched 343 kB in 3s (109 kB/s)
Reading package lists… Done
E: Failed to fetch http://us-sanjose-1-ad-1.clouds.ports.ubuntu.com/ubuntu-ports/dists/focal/main/binary-i386/Packages 404 Not Found [IP: 185.125.190.36 80]
E: Failed to fetch http://ports.ubuntu.com/ubuntu-ports/dists/focal-security/main/binary-i386/Packages 404 Not Found [IP: 185.125.190.36 80]
E: Failed to fetch http://us-sanjose-1-ad-1.clouds.ports.ubuntu.com/ubuntu-ports/dists/focal-updates/main/binary-i386/Packages 404 Not Found [IP: 185.125.190.36 80]
E: Failed to fetch http://us-sanjose-1-ad-1.clouds.ports.ubuntu.com/ubuntu-ports/dists/focal-backports/main/binary-i386/Packages 404 Not Found [IP: 185.125.190.36 80]
E: Some index files failed to download. They have been ignored, or old ones used instead.
ubuntu@Foundry:~$ sudo apt install gcc-arm-linux-gnueabihf libc6:armhf libncurses5:armhf libstdc++6:armhf
Reading package lists… Done
Building dependency tree
Reading state information… Done
Package libc6:armhf is not available, but is referred to by another package.
This may mean that the package is missing, has been obsoleted, or
is only available from another source
However the following packages replace it:
libdb1-compat libcrypt1
Package libstdc++6:armhf is not available, but is referred to by another package.
This may mean that the package is missing, has been obsoleted, or
is only available from another source
E: Package ‘libc6:armhf’ has no installation candidate
E: Unable to locate package libncurses5:armhf
E: Package ‘libstdc++6:armhf’ has no installation candidate
Cannot start the server because of this: start_server.sh: line 11: ./valheim_server.x86_64: cannot execute binary file: Exec format error
i installed everything like you said
I fixed it but now i get the segmentation fault error
how did you fix the error?
Had a problem at step 7 of “Install Box86”:
/usr/lib/gcc-cross/arm-linux-gnueabihf/11/../../../../arm-linux-gnueabihf/bin/ld: CMakeFiles/box86.dir/src/libtools/threads.c.o: in function `my__pthread_cleanup_push_defer’:
/home/jj/docker/valheim-pi/box86/src/libtools/threads.c:631: undefined reference to `_pthread_cleanup_push_defer’
/usr/lib/gcc-cross/arm-linux-gnueabihf/11/../../../../arm-linux-gnueabihf/bin/ld: CMakeFiles/box86.dir/src/libtools/threads.c.o: in function `my__pthread_cleanup_pop_restore’:
/home/jj/docker/valheim-pi/box86/src/libtools/threads.c:641: undefined reference to `_pthread_cleanup_pop_restore’
collect2: error: ld returned 1 exit status
make[2]: *** [CMakeFiles/box86.dir/build.make:3195: box86] Error 1
make[1]: *** [CMakeFiles/Makefile2:312: CMakeFiles/box86.dir/all] Error 2
make: *** [Makefile:146: all] Error 2
Anybody had this error?
How you fix cannot execute binary file: Exec format error ?
Hi you have to delete and reinstall box64
cd box64
delete the build folder
mkdir build
cd build
cmake .. -DRPI4ARM64=1 -DCMAKE_BUILD_TYPE=RelWithDebInfo
and after that.
make -j4
sudo make install
lib.so.2 get lost sometimes then you make an update.
i mean x86 😉
Got everything working, but on starting up the server several errors occur. Maybe the most are not significant. But at the end the server stops with an Segmentation fault.
At the start:
Error: Symbol pa_stream_connect_playback not found, cannot apply R_X86_64_JUMP_SLOT @0x7fa3fea880 (0x9726d6) in /home/evilscytheman/valheim_server/valheim_server_Data/Plugins/libpa
This shouldn’t even be an issue, because it is started with “-nographics”
ERROR: Shader Sprites/Mask shader is not supported on this GPU (none of subshaders/fallbacks are suitable)
Probably also not important:
Couldn’t create a Convex Mesh from source mesh “default” within the maximum polygons limit (256). The partial hull will be used. Consider simplifying your mesh.
Then several of these occur:
MethodAccessException: Method `System.Collections.HashHelpers.GetPrime(int)’ is inaccessible from method `System.Collections.Generic.HashSet`1[UnityEngine.UI.MaskableGraphic].Initialize(int)’
Then several “background job” “syscall errors” at the box64:
Backtrace stopped: previous frame inner to this frame (corrupt stack?)
Then a SIGSEGV
Got a SIGSEGV while executing native code. This usually indicates a fatal error in the mono runtime or one of the native libraries used by your application.
Then it cannot load some libs
Error loading needed lib libSDL2-2.0.so.0
Then it cannot place some special locations, like:
Failed to place all TarPit2, placed 21 out of 100
After it is done with generating locations, it sais that some Shaders and Imageeffects are not supported – again, this is a nographics server?!
But then it sais:
01/05/2023 12:57:26: Game – OnApplicationQuit
01/05/2023 12:57:26: Shuting down
01/05/2023 12:57:26: ZNet Shutdown
01/05/2023 12:57:26: clone 37
After that it will make an autobackup. After this is done:
01/05/2023 12:57:27: Sending disconnect msg
01/05/2023 12:57:27: Disposing socket
01/05/2023 12:57:27: Stopping listening socket
01/05/2023 12:57:27: Last socket, unregistering callback
01/05/2023 12:57:27: ZSteamSocket UnregisterGlobalCallbacks, existing sockets:0
Thread 0x7f4540e000 may have been prematurely finalized
Setting up 2 worker threads for Enlighten.
Thread -> id: 7efa7fc000 -> priority: 1
Thread -> id: 7ef9cfb000 -> priority: 1
01/05/2023 12:57:39: ZNet OnDestroy
01/05/2023 12:57:39: Net scene destroyed
01/05/2023 12:57:39: Steam manager on destroy
Then it ends with a SIGSEGV with several HEX numbers and:
./start_server.sh: line 11: 1021 Segmentation fault ./valheim_server.x86_64 -nographics -batchmode -public 0 -name “Servername” -port 2456 -world “Testworld” -password “secret” -savedir “/home/pi/valheim_data”
So what is the problem? Can someone help? Thanks in advance!