
The Raspberry Pi is one of the most common Single Board Computers (SBCs) currently available in the market. It can be used to perform a wide range of tasks, including learning computer programming, IoT (Internet of Things) development with Windows 10 IoT Core and other Operating systems, use it as Network Attached Storage, a media server, and so much more.
One limitation with the Raspberry Pi board is the lack of a monitor/screen for graphical display. However, that doesn’t mean there is no provision for that. You can decide to connect the Raspberry Pi 7″ Touch Screen Display (which is bought separately) or use the micro HDMI port on the board to connect to an external monitor or TV. But think of this, what if you don’t have a monitor or screen to connect your Raspberry Pi? How will you gain access to your Pi? That is where SSH (Secure Shell Protocol) comes in.
SSH into Raspberry Pi
Secure Shell (SSH) is a network protocol that allows two computers to communicate securely over a network connection. In our case here, the Raspberry Pi will be the remote device, and we will access using our local computer over SSH. However, this will only give you command-line access. If you want a full Remote Desktop Access, read our post on VNC.
1. Set up your local network and wireless connectivity
Before getting started with an SSH connection, we need to ensure our Raspberry Pi is connected to a network. You can either do this via the Desktop User Interface, Ethernet cable, or via command-line.
When connecting to a network via the Desktop User Interface, the process might differ from one Operating System to another due to Desktop Environments’ differences. But you can always find this option on the Taskbar or in the Settings window. For example, if you are using the default Raspberry Pi OS (Raspbian), you should find this option at the top-right corner, as shown below.
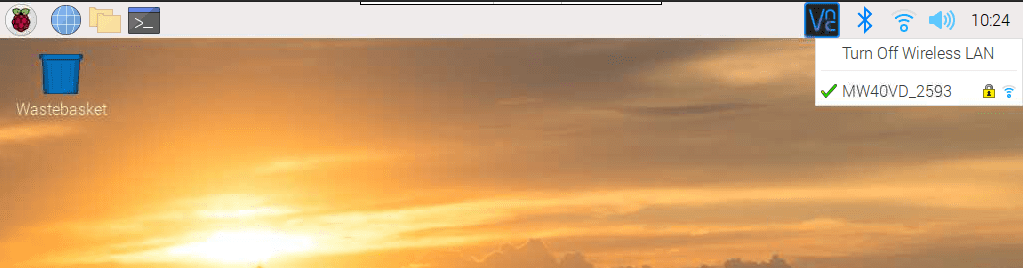
Connect Raspbian to WiFi
For Terminal lovers, you can also connect to your Wi-FiWi-Fi via the console. To get started, first execute the command below to get Wi-FiWi-Fi details.
sudo iwlist wlan0 scan
You will see a list of all the Wi-FiWi-Fi networks available, along with any useful information about them. Take note of ‘ESSID’ (name of the WIFI network) and the ‘IE’ (the mode of authentication used.) Alternatively, if you know all the details of your network (password and SSID), you don’t need to go through that step. Once done, we need to add these details to our Raspberry Pi. Execute the command below to create a wpa_supplicant.conf file in the /etc/wpa_supplicant/ directory.
sudo nano /etc/wpa_supplicant/wpa_supplicant.conf
Go to the bottom of the file and enter the details below:
Note: Remember to replace the text in bold with the correct information.
network={
ssid="my-wifi-name"
psk="my-wifi-password"
}
if your network has no password (unsecured), enter the details below:
network={
ssid="my-wifi-name"
key_mgmt=NONE
}
Save the file (Ctrl + O, then Enter) and exit (Ctrl + X).
Tip: Do you know you can add all these details even before booting your Raspberry Pi making the whole process even faster. See the procedure below.
Remove the SD card from your Rasberry Pi and put it on your PC. Navigate to the boot directory and create a file called wpa_supplicant.conf without any extension like ‘.txt.’ Paste the details below in the file if you connect to a secured network.
country=US # Replace US with your 2-digit country code
ctrl_interface=DIR=/var/run/wpa_supplicant GROUP=netdev
network={
ssid="Enter_YOUR_NETWORK_NAME"
psk="Enter_YOUR_PASSWORD"
key_mgmt=WPA-PSK
}
If the wifi network is unsecured (has no password), paste the details below:
country=US # Your 2-digit country code
ctrl_interface=DIR=/var/run/wpa_supplicant GROUP=netdev # Include this line for Stretch
network={
ssid="Enter_YOUR_NETWORK_NAME"
key_mgmt=NONE
}
Save the file and now put the SD card in your Raspberry Pi. When you boot it, it will automatically connect to the Wi-FiWi-Fi network selected. Refer to our post Connecting to Wi-Fi & Enabling SSH Without Monitor on Raspberry Pi. For more details.
2. Enable SSH
In this post, we will show you two ways you can enable SSH on Raspberry Pi. Using the Desktop User Interface and the command-line. The procedure might differ depending on the operating system you are running on your Raspberry Pi. For this particular tutorial, we will use the official Raspberry Pi operating system (Raspbian). Let’s get started.
-
Enable SSH via the Desktop User Interface
1. Click the Berry (Home button) icon at the top-left, select Preferences, then Raspberry Pi Configuration.
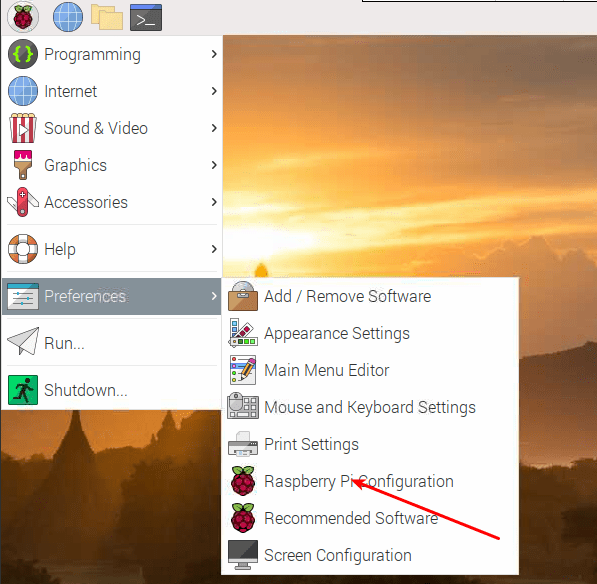
Raspberry Pi Prefernces
2. That will open the Raspberry Pi Configuration window. Click on the Interfaces tab to see the various services and interfaces enabled on your Pi. From the image below, you can see SSH is already enabled on my Pi. Make your selection and click OK.
That’s it; you have successfully enabled SSH on your Raspberry Pi. Now let’s look at the Terminal method.
-
Enabling SSH via Terminal
Step 1. Launch the Terminal and execute the command below:
sudo raspi-config
That will open the Raspberry Pi Software Configuration Tool. Select the Interface Options and hit Enter.
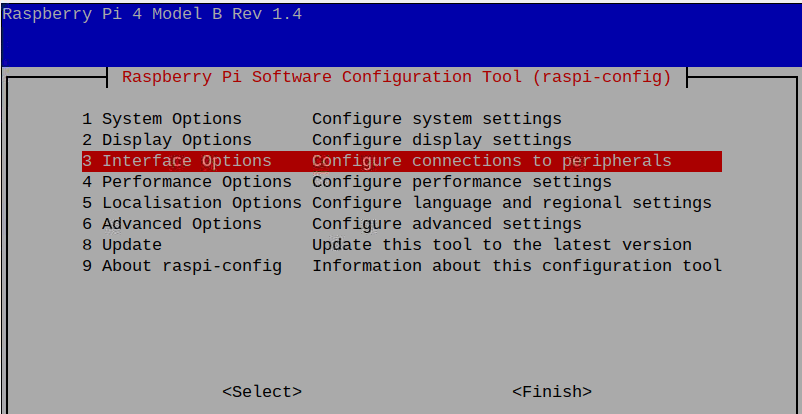
Interface Options
Step 2. On the new window that appears, select SSH and hit Enter.
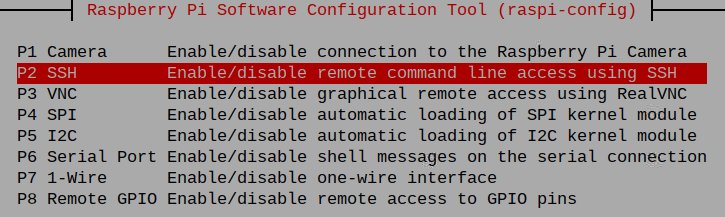
SSH Option
You will see a prompt if you want to enable SSH. Select Yes (use the tab key to navigate) and hit Enter.
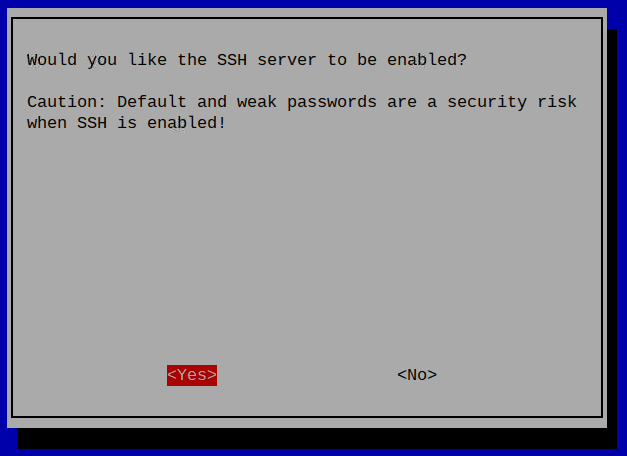
Enable SSH
Once done, select Finish and hit Enter. You have now enabled SSH on your Raspberry Pi.
If you are running other Linux distributions, you can easily enable and start SSH using systemctl. Run the commands below:
sudo systemctl enable ssh
sudo systemctl start ssh
Now that we have enabled SSH, we need to connect to it remotely from our computer via a network.
3. Connecting to Raspberry Pi via SSH
Depending on the Operating system running on your PC, there are different ways of connecting to your Pi via SSH. Linux users can easily do so via the Terminal. For Windows users, I will recommend installing an application like Putty.
To connect to your Raspberry via SSH, you will need to know the IP address (not necessary), username, and password.
You can know the IP address by running the commands ifconfig or IP link on the Raspberry Pi Terminal.
Tip: Most Linux distros have been using the ifconfig command to get network interface information for a very long time, but it’s slowly becoming deprecated and replaced by the IP command.
Alternatively, you can get the IP address from your Router’s homepage. You can access it by entering the Router’s IP on your browser and checking the connected devices.
If all these fail and you still can get the Raspberry Pi, don’t worry; we will use the raspberrypi.local address.
To create a connection via the Terminal, use the syntax below:
ssh [user]@[ip-address]
e.g
ssh pi@192.168.1.54
If you don’t know the Pi’s IP address, use raspberrypi.local address
ssh pi@raspberrypi.local
<raspberrypi.local>
For windows users, launch Putty and use the Pi’s IP address or raspberrypi.local address. See the image below.
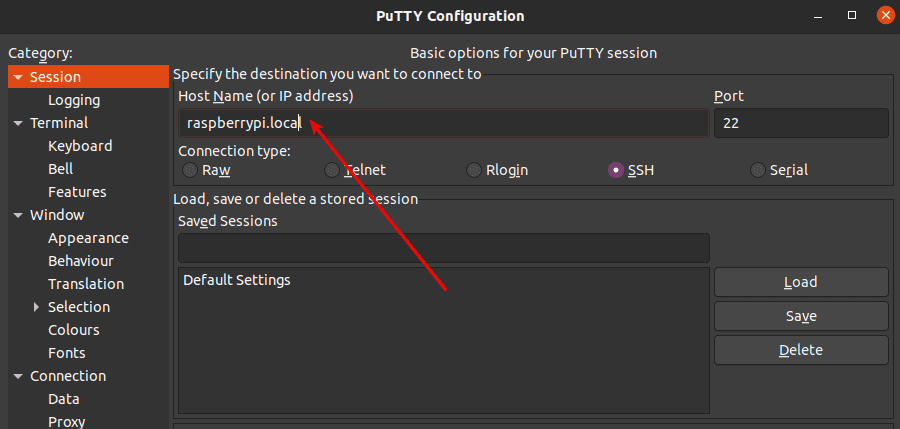
Putty
Once you have established a connection, you will be prompted to enter the Pi’s password to start an SSH session.
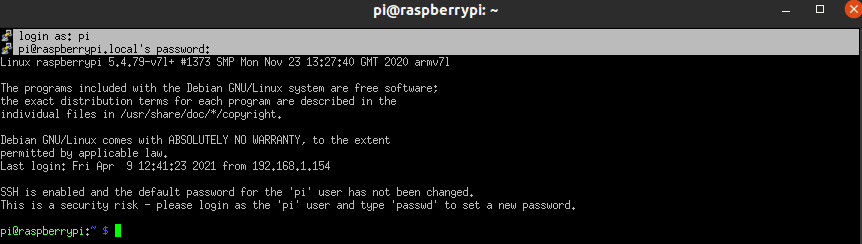
Putty Connection
If you want to access the PI from your Android or iOS device, download the Termius – SSH client application from the links below:
Termius for Android
Termius for iOS
Conclusion
I believe you now know how to enable and connect to your Raspberry Pi via SSH. If you have any issues performing any procedure discussed above, please leave a comment below, and don’t forget to say which operating system you are running on your Pi.