
When Google first launched the Chromebooks, it was a surprise to many since these devices only came with simple operating systems – the Chrome OS, a file manager, and several web applications which you can run on the Chrome web browser. However, with time, users have come to appreciate the reliability of Chrome OS due to its fast computation making it an excellent option for handling lightweight tasks.
Unfortunately, you can install the same version of Chrome OS available on Chromebooks on any other devices. Luckily, there is an open-source version called Chromium OS. Developers took the code for this open-source project and developed various versions of Chrome OS, which you can install on the Raspberry Pi, PC, and Virtual Machines. This post will give you a master guide on installing the Chromium OS (the equivalent of the Chrome OS) on the Raspberry Pi.
However, let’s look at the Chrome OS, Chromium OS, and Chrome OS Flex.
Chromium OS vs. Chrome OS vs. Chrome OS Flex
The Chromium OS and Chrome OS can be considered close cousins with a few different features but are essential. They are both based on the Linux kernel, but each features a specific user interface. The Chrome OS uses the Chrome web browser, while the Chromium OS uses the Chromium web browser. Chrome OS comes packed with lots of features that make the whole experience of working with Chromebooks much simple and more interactive. On the other hand, the Chromium OS has one key element – free and open-source. Unlike the Chrome OS code, which is closed-source, developers can tweak the Chromium OS code to their liking. That is one of the main reasons why Chromium OS is available for several platforms, including Linux distributions, Virtual Machines, Mac, AMD, and Raspberry Pi.
The other significant difference between Chrome OS and Chromium OS is the support for Adobe Flash player. Since Adobe Flash is proprietary, it isn’t available for Chromium OS. However, since the adoption of HTML 5, most developers argue that Adobe Flash should be necessary. Additionally, Adobe no longer supports Flash players as of December 31st, 2020. Other packages available on Chrome OS but not available for Chromium OS include:
- Android (ARC ++) that enables running Android apps
- Support for HTML5 EMW via Widevine CDM plugin
- 3D cellular support
- DisplayLink manager
Chrome OS Flex is the new child on the block. It is a fast and lightweight Linux-based operating system developed by Google to run on your PCs and Macs. The Chromium OS is a web-first system, meaning it focuses on working with web applications, primarily the Google Chrome web browser. When writing this post, Chrome OS Flex is available for Intel or AMD x86-64-bit. Therefore, we can install it n the Raspberry Pi, which uses an ARM-based processor.
With that in mind, let’s install Chrome OS on the Raspberry Pi.
Installing Chrome OS on Raspberry Pi
Project Requirements
- A Raspberry Pi 4 board
- At least 8 GB Micro SD card
- A display monitor
Follow the steps below.
Step 1. Download the Chrome OS Image
We cannot install Chrome OS or the Chrome OS Flex on the Raspberry Pi. Chrome OS is only available for Chromebooks, while the Chrome OS Flex can only run on AMD and Intel x86-64 processors. The only choice we are left with is the free and open-source Chromium OS.
The Chromium OS that we will use in this project is the one from Fyde OS. It is a Chinese-based team of developers who work on the Chromium OS to make it available for various platforms, including PC, VMware, and Raspberry Pi. It was previously known as Flint OS. Use the link to download Chromium OS for the Raspberry Pi 4.
Download FydeOS for Raspberry Pi.
Step 2. Flash the Chromium OS on the SD Card
You can use different applications to create a bootable SD card. We recommend using Balena Etcher or the Raspberry Pi Imager for this post. Let’s go with Balena Etcher. You can download Etcher from their official website. When done, install and launch the application.
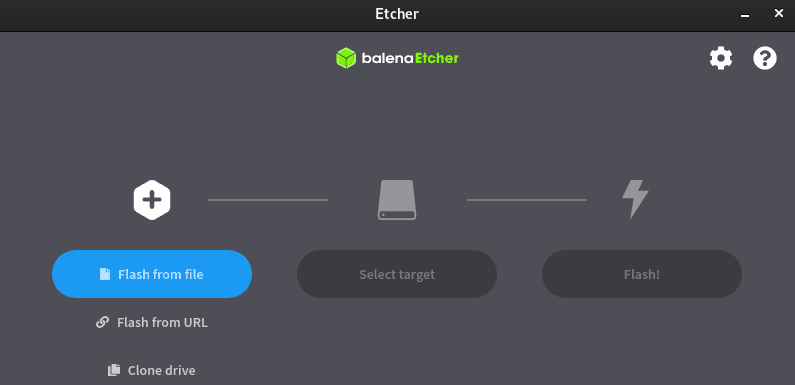
Balena Etcher
Follow the steps below.
- Flash from File: Click on this option and select the Chromium OS image downloaded on your system.
- Select target: Use this option to select the SD card you want o use on the Raspberry Pi.
- Flash: Click this button to start writing the OS image on the SD card.
When done, remove the Micro SD card from your PC and insert it into the Raspberry Pi. Connect the power supply to boot it up.
Step 3. Chromium OS First Boot
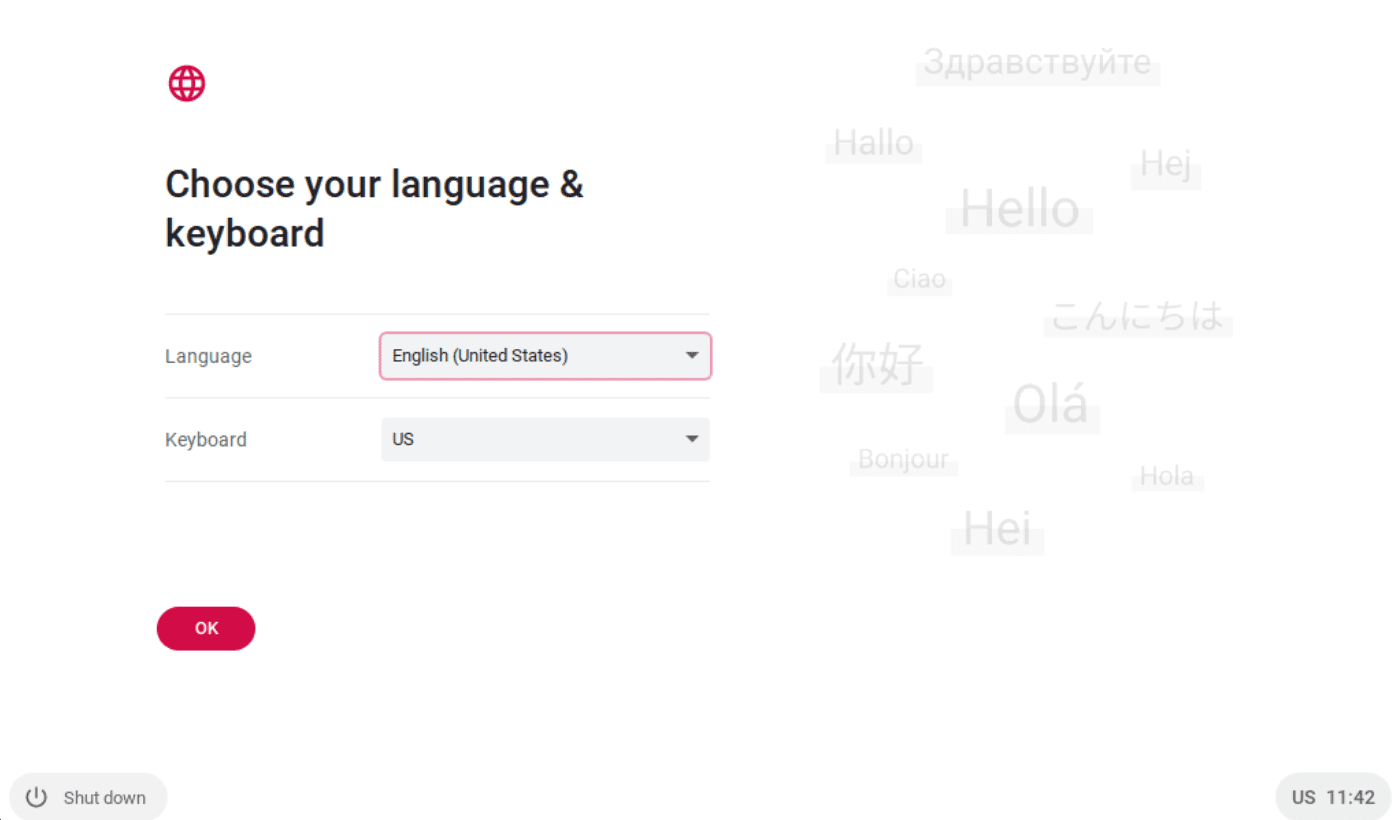
After booting up your Raspberry Pi, the Chromium OS will start immediately. You might see nothing for the first few seconds, but you should see the ‘Welcome’ screen after a while. Here, you will need to set the language you wish to use to install the system and the keyboard layout. Click ‘OK‘ to continue.
Welcome Screen
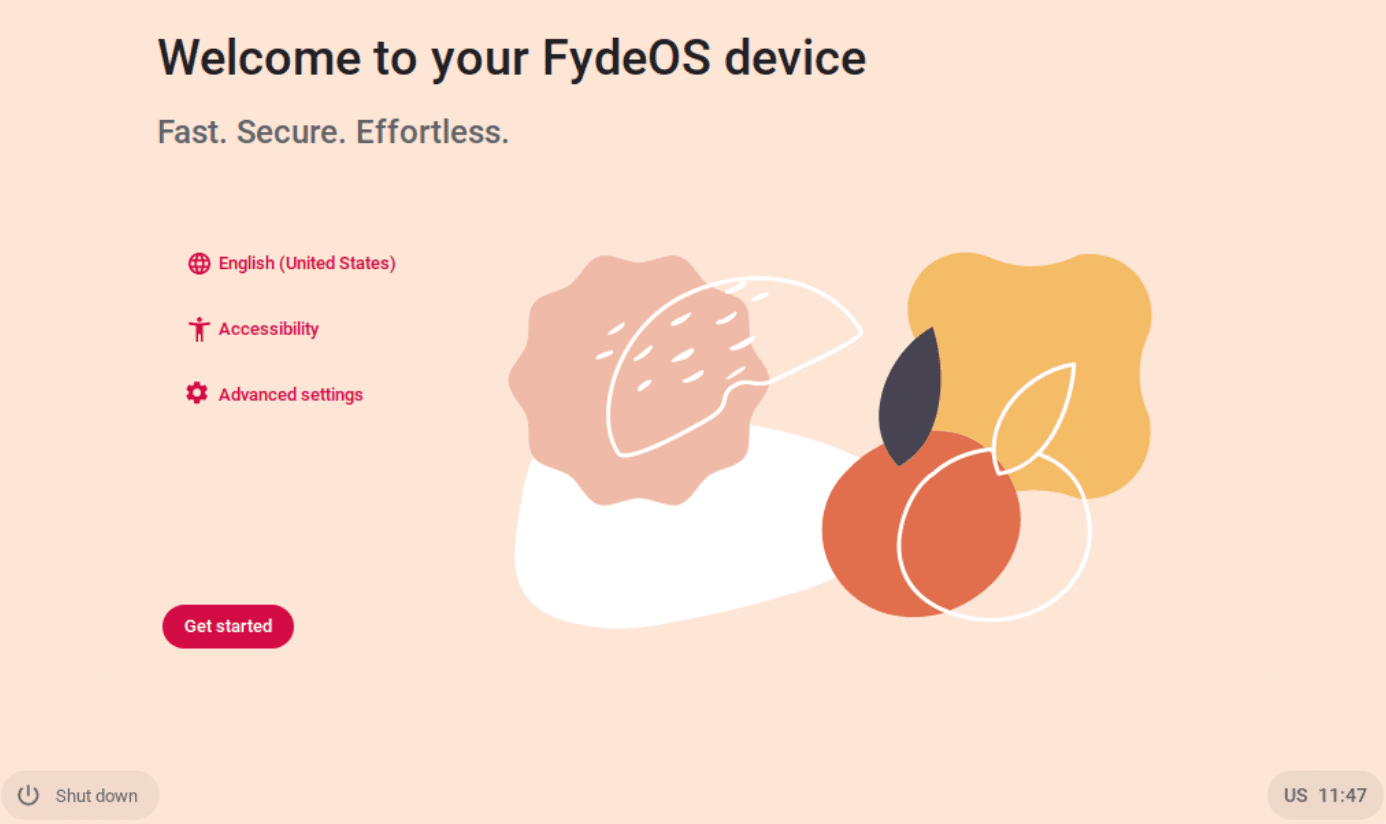
You will see language, accessibility, and Advanced settings on the next screen. The accessibility options enable features like ChromeVox, mouse cursor size, high contrast mode, on-screen keyboard, etc. Click ‘Get started‘ to continue.
Additional Settings
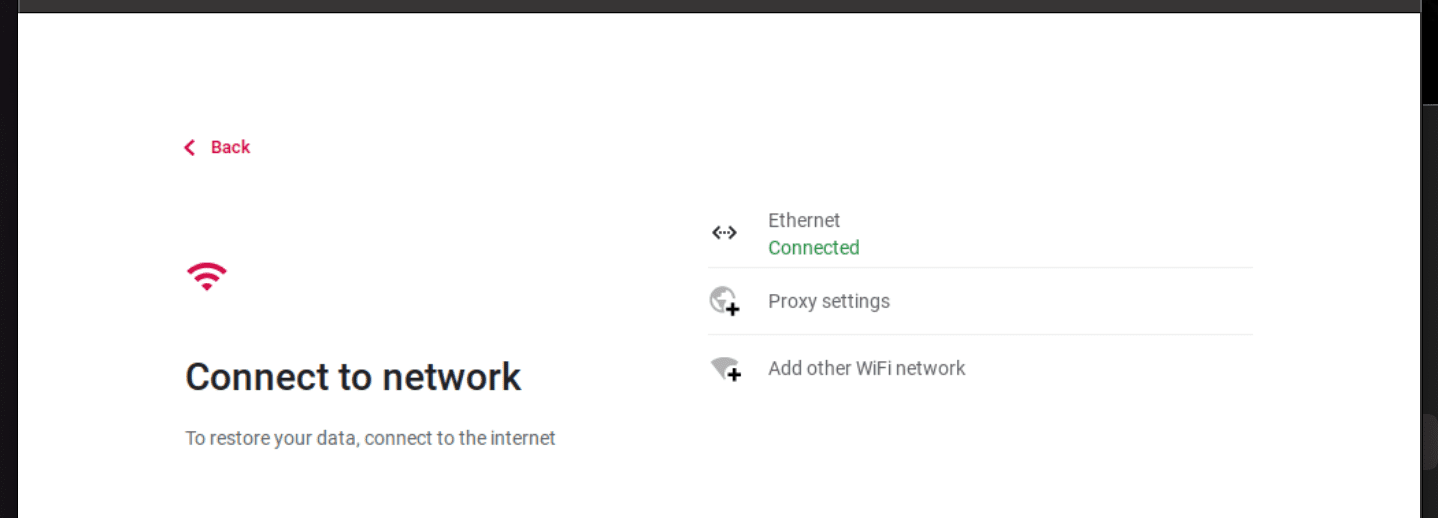
On the next screen, you will have an option to connect to a network. In our case, we are already connected to Ethernet. Click ‘Next‘ to continue.
Connect to a Network
On the next screen, you will see the FydeOS End-User License Agreement. Click ‘Accept and Continue to proceed to the next screen.

FydeOS EULA
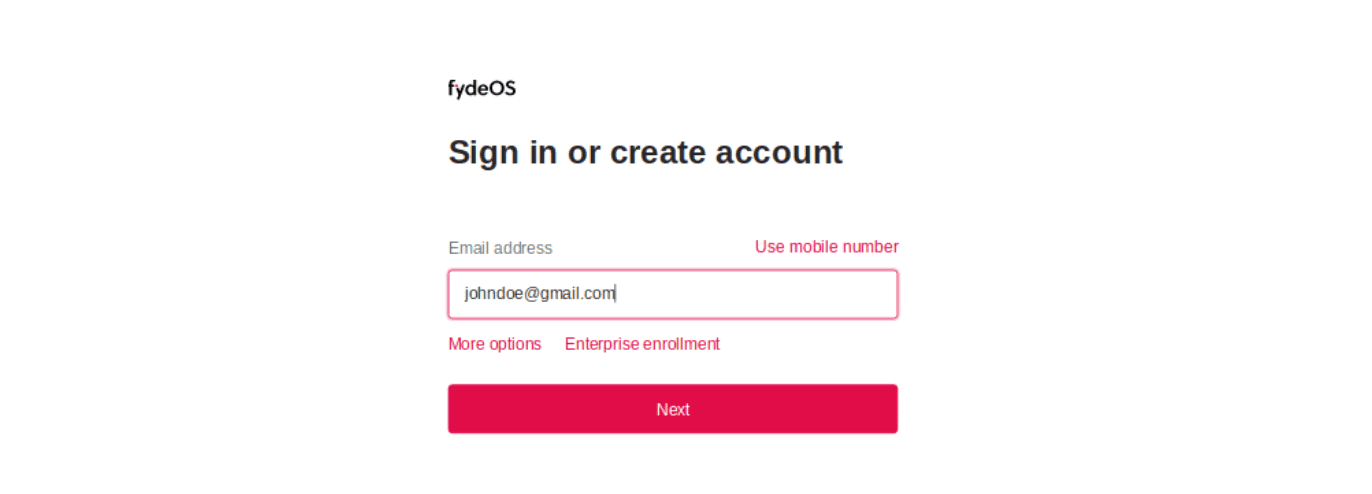
On the next screen, you will need to create your user account. You have two options for registration – register with a phone number or register with the email address. Select the Email option. Enter your Gmail address and click Next.
Note: You are creating an online account that enables you to sync data across FydeOS devices and log into web apps on the Chromium browser. If you want to use a local account instead, click ‘use local account‘ at the bottom.
Setup Account
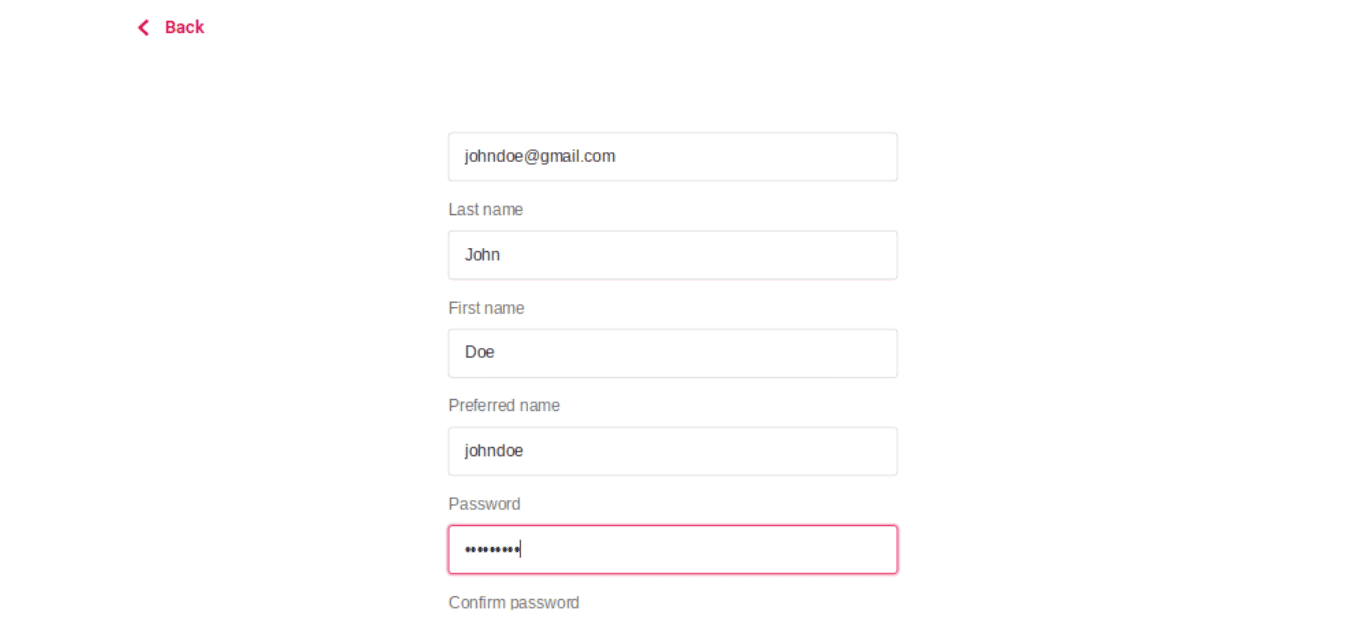
You will need to complete the account setup process on the next screen by entering your first name, last name, username, and password. Click Next when done.
Enter account details
When done, you should see the Chromium Desktop as shown below.
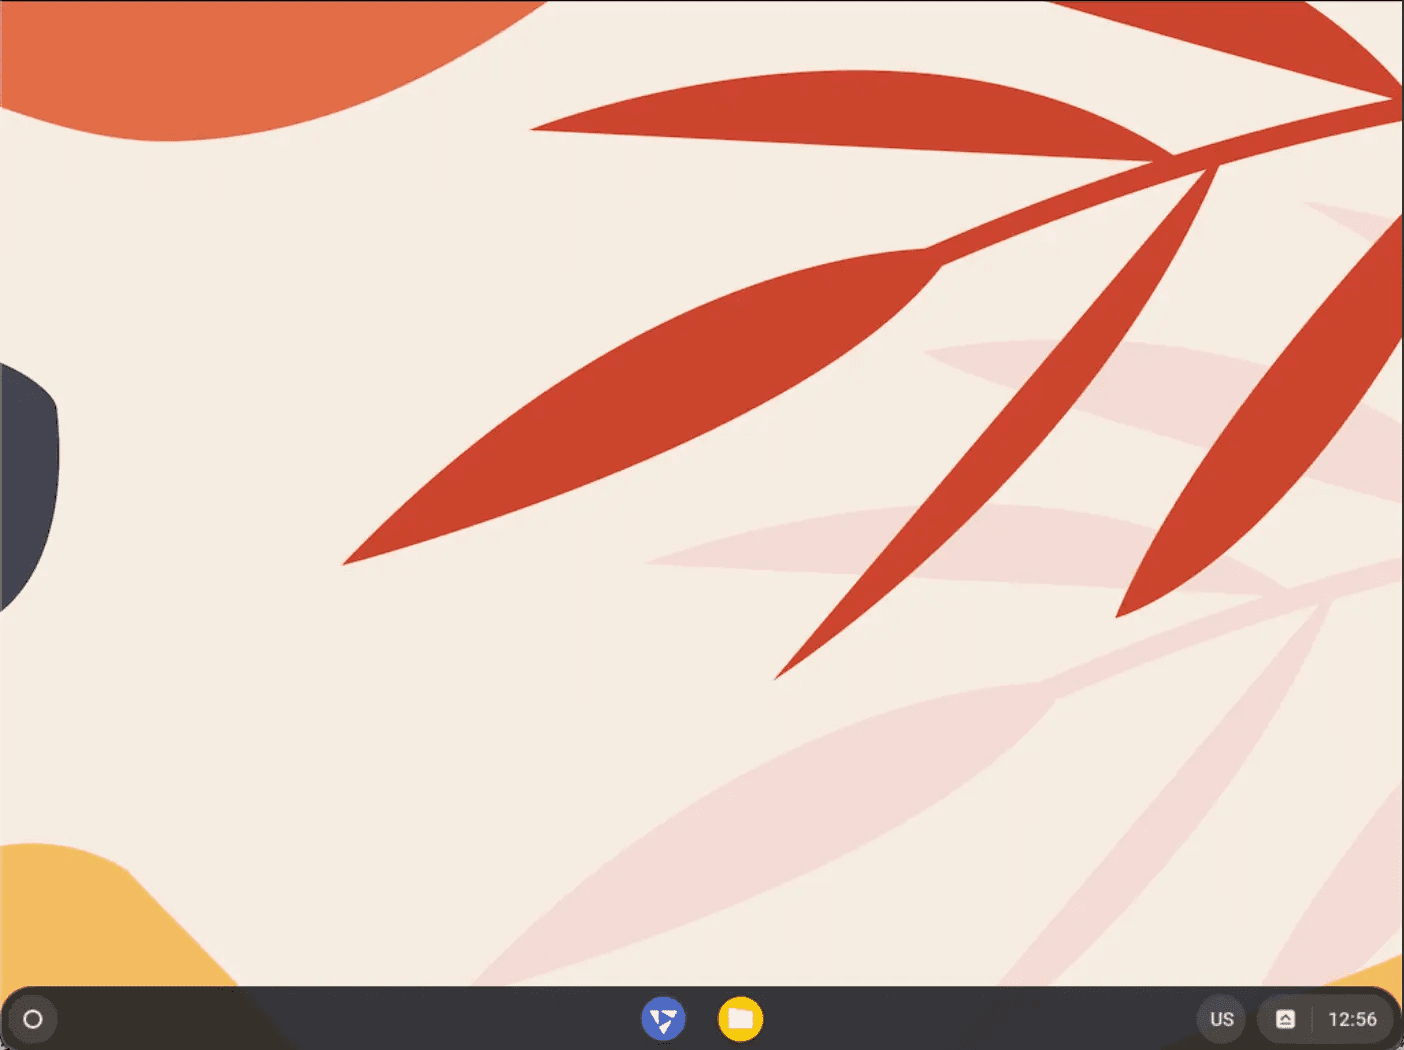
Chromium Desktop
Conclusion
That’s it! We have successfully installed Chrome OS on our Raspberry Pi. You will notice that this OS is lightweight and extremely fast. It doesn’t have many pre-installed applications, but you can install web apps from the Chrome web store. Please let us know in the comments below if you encountered any issues during the installation process.