
SQLite is system software that serves as a relational database management system. It is a software library defined under the C programming language. It is distinctively unique from other database management systems because of its noticeable features. It is serverless, transactional, self-contained, and requires zero configurations to implement it successfully. The Lite is SQLite relates to its lightweight nature.
SQLite is lightweight as a database, and the Raspberry Pi board is also a lightweight minicomputer. The lightweight match between these two guarantees that Raspberry Pi’s performance spectrum does not scale down but rather compliments the light nature of the SQLite library. Also, since SQLite’s source-code resides in the public domain, it is an opportunity for the Raspberry Pi users to explore the Ins and Outs of their database-driven projects without being limited to their options. SQLite holds a world record of being the most popularly deployed database. The latter statement implies that its support community is mature with enough user experience to sort any database-related turmoils that might face the beginners or new learners in its domain.
On the other hand, the Raspberry Pi minicomputer is another powerful hardware tool to use with your software-driven projects. Its support community is also wide enough, and you won’t miss a hint or a clue for every question or query you pose.
Getting Started
This article seeks to explore the Ins and Outs of setting up Raspberry Pi with the famed SQLite database library. Some prerequisites to keep in mind include your setup of Raspberry Pi. It needs to have a running operating system that will create an environment for you to use the SQLite library. Many users or Raspberry Pi enthusiasts are limited to using the Raspbian operating system for their Raspberry Pi projects. You should note that you have more than this one OS option to go with when working with Raspberry Pi. We have a compiled list of Raspberry Pi OS alternatives for you to make a pick based on their selling features.
As for the SQLite database setup and usage, the only thing you need to know right now is that its serverless status makes it an ideal module to merge with your Raspberry Pi projects. This feature transforms SQLite into a plug-and-play database, making it flexibly portable. The Reads and Writes SQLite queries and operations interact directly with a local disk file storage. With SQLite, you have both local and direct storage of your database files populated by multiple views, tables, triggers, and indices.
As we go deeper into this tutorial, we will explore how such powerful features make SQLite unique. To make this tutorial setup of Raspberry Pi and SQLite database library interesting, we will take the approach where we need to create a data logging application. This application’s main objective will be to cater to the storage of temperature and humidity data. Since we will not fully explore this application, we want to build an exciting foundation for you to explore more SQLite and Raspberry Pi-related projects.
SQLite Installation on the Raspberry Pi Board
Since you are now aware of the flexibility of OS choices to go with your Raspberry Pi board, you should have made a pick from the provided link. For this tutorial, and since most Raspberry Pi users are still attached to the Raspbian operating system, the Raspberry Pi board we are using will go with this popularity vote. If you need help installing the Raspbian operating system on your Raspberry Pi board, consider the resourcefulness of this tutorial article we also created.
After you have everything set up, open your Raspbian OS terminal or command-line interface and run the following SQLite installation command.
$ sudo apt install sqlite3
The Raspbian terminal interface will prompt you to confirm this SQLite database library’s installation. Type Y to confirm and hit Enter on your keyboard.
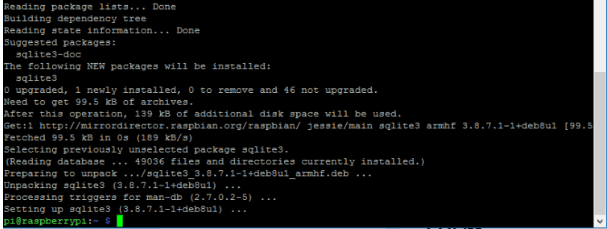
Installing SQLite on Raspberry Pi’s Raspbian Operating System
Be patient for the installation to complete. The installed SQLite library is also inclusive of an SQLite shell as part of its module. This shell is useful in invoking commands like the ones needed to create a database. The following is the SQLite syntax for creating a database file.
$ sqlite3 <Database File Name>
The created Database File Name should end with a .db extension.
As for the data logging application walk-through we promised, we can create a sensor database file to cater to the temperature and humidity data. Run the following command on your terminal.
$ sqlite3 mysensor_data.db
The above command creates a database file called mysensor_data.db. This command’s successful execution will open an SQLite shell that you can use to interact with other database entities. They can be the database tables you will create and the DB relationships that link them. There are two types of command categories to employ within the SQLite shell environment; the ones that start with a period (.) and the ones used to manipulate various database records in the created database file. The commands that start with a period (.) include the .help and the .quit commands.
sqlite> .help
sqlite> .quit
Make use of the .help SQLite command when you are stuck and need help familiarizing yourself with the respective usage of the available SQLite commands. The .quit command provides an exit from the SQLite shell when you are done with your database transactions.
Accessing Your SQLite Database Through SQL Command Statements
Since SQLite is a database library, interacting with this library needs some form of protocol or tool implementation. In our case, SQL commands are the perfect way of communicating with the SQLite database library. SQL is an abbreviation for Structured Query Language. It is a useful database tool when you need to create or delete database tables. You will also need to insert, update, search, or delete data linked with these database tables.
You should also note that this SQL database tool is not strictly tied to the SQLite database library alone. Other database management systems solutions like MySQL also make use of it. As a rule of thumb, each of the SQL statements you create should always end with a semicolon (;). Another point to note as you journey into the usage of SQL command statements is that it is not mandatory or against any syntax rules to have your SQL commands in Small Case letters. The use of Upper Case or Capitalized letters in SQL commands only feeds the necessity of readability, so you can choose to go either way. Now that we have made these important points clear, it is time to move on to this tutorial article’s next section.
SQL CREATE TABLE
The SQL command for creating a database table should follow the following syntax rule.
CREATE TABLE <table_name> (<Field 1 field_name>, <Field 2 field_name>...<field x field_name>);
We promised to unravel the temperature and humidity logging application. First, we need to create a database table to host the various table fields linked to these temperature and humidity data. On my end, I implemented the SQL table with the following command sequences.
sqlite> BEGIN;
sqlite> CREATE TABLE th_readings(id INTEGER PRIMARY KEY AUTOINCREMENT, temperature_data NUMERIC, humidity_data NUMERIC, current_date DATE, current_time TIME, device TEXT);
sqlite> COMMIT;
From the above SQL command for creating a database table, each table field definition goes with a datatype entry to specify the type of data it is supposed to hold. As you can see, we have used INTEGER, NUMERIC, DATE, TIME, and TEXT data types. You can proceed to create more tables if you want. It is a good approach to practicing and mastering the SQL database tool’s syntax rules and command usage.
If you have more than one table on your SQLite database, you can list them from the SQLite shell with the following command.
sqlite> .tables

th_readings
In our case, the output will be the single database table we created called th_readings. To view this DB tables’ full schema, use the SQL command. It outputs the DB schema of all available or created database tables.
sqlite> .fullschema
You should get an output similar to the following:
CREATE TABLE th_readings(id INTEGER PRIMARY KEY AUTOINCREMENT, temperature_data NUMERIC, humidity_data NUMERIC, current_date DATE, current_time TIME, device TEXT);
SQL INSERT
Now that we have the database table ready and setup, we need to populate it with some useful data. The SQL INSERT command is effective in meeting this objective. The syntax for using this command is as follows:
INSERT INTO <table_name> (<field_one>, <field_two>,...<field_n>) VALUES (<value_one>, <value_two>,...<value_n>);
We can now add a sample temperature and humidity reading into our DB table.
sqlite> BEGIN;
sqlite> INSERT INTO th_readings(temperature_data, humidity_data, current_date, current_time, device) VALUES (20.4, 44, date(‘now’), time(‘now’), “manual”);
sqlite> COMMIT;
This sample table data implementation or insertion on an SQLite database through the Raspberry Pi platform should give you an idea of how you can approach your database-driven Raspberry Pi projects. A case example lets your Raspberry Pi communicate with the ESP8266 Wi-Fi microchip to send such temperature and humidity readings to a hosted Python web server. You will have created a system that automates the reading of data and inserts the same data into an existing SQLite database table.
SQL SELECT
Now that you have some data to brag about on your SQLite database table, the next question is how to access and view this data properly. The effective command to use here is the SQL SELECT statement. Its syntax usage is as follows.
SELECT * FROM <table_name>;
To access the table data we just added to the SQLite database, we will implement this SQL SELECT command syntax in the following manner.
sqlite> SELECT * FROM th_readings;
You will get an output on your SQLite shell similar to the following:
1|20.4|44|2021-02-06|22:42:0|manual
The SQL SELECT statement outputs all the data recorded on the database table. You can add one more entry to your DB table to see how it will behave with two sets of table data.
sqlite> BEGIN;
sqlite> INSERT INTO th_readings(temperature_data, humidity_data, current_date, current_time, device) VALUES (22.4, 48, date(‘now’), time(‘now’), “manual”);
sqlite> COMMIT;
Now that we have two data entries recorded on the DB table querying these stored data through the SQL SELECT statement should give you an expected preview when dealing with many table entries, especially when your Raspberry Pi project automates the storage of these table data readings.
sqlite> SELECT * FROM th_readings;
The output will now have two rows.
1|20.4|44|2021-02-06|22:42:0|manual

2|22.4|44|2021-02-06|23:10:0|manual
SQL DROP
We are assuming that you managed to configure your Raspberry Pi project to automate temperature and humidity data readings. Since this is the case, we won’t be needing an SQL Statement to update this table data as the information collected is accurate enough. On the other hand, one command you will need to master is the SQL DROP statement. It is useful when you want to delete redundant DB tables. The main reason to use this command is to get rid of DB tables that are no longer relevant or useful on the SQLite database file. Its syntax is as follows:
DROP TABLE IF EXISTS <table_name>;
We can implement this SQL DROP syntax to eliminate our populated database table.
sqlite> DROP TABLE IF EXISTS th_readings;
Executing this command will take you to an empty shell instance.
sqlite>
To ensure that the th_readingstable is completely removed from our SQLite database file, we will use the SQLite command to display all the active DB tables.
sqlite> .tables
Nothing will happen from running the above command as there are no tables on the SQLite database file. If you had other existing tables created on the DB file, those tables would be displayed except for the deleted one.
SQL EXIT
Assuming that you are done with the SQL shell, you will need a technical way of backtracking to the Raspbian terminal or command-line interface without manually closing the terminal. It is as easy as using the .quit or .exit command.
sqlite> .exit
After you press enter on your keyboard, you will be taken to the normal terminal interface.
pi@raspberrypi:~$
Final Note
With this article, you managed to install the SQLite database on your Raspberry Pi board. You also took the needed baby steps to understand the syntax rules involving different SQL commands. Adding the SQLite database on your Raspberry Pi projects effectively automates the collection and storage of useful field data. It is a paperless and dynamic database making it easy to handle and configure the DB commands related to its operation. You now have the power, initiative, and a few ideas to propel the database needs of your Raspberry Pi projects, thanks to the SQLite database.