
Since the first release of Bitcoin in 2009, we have had a steady rise of many other cryptocurrencies in the market. One of these cryptos is the Magi Coin (XMG). Coin Magi (XMG) is an online payment system, enabling instant payments to anyone in the world without using an intermediary.
Like many other cryptocurrencies, XMG can be mined using computational devices, including personal computers, Small Board Computers (Raspberry PI, etc.), and portable devices through mPoW, and more. The Magi Coin wallet is used to store mined Magi Coins (XMG).
Installing Magi Coin wallet on Raspberry Pi 4
This post will give you a detailed guide on installing the Magi Coin wallet on your Raspberry Pi. Follow along every step, and if you come across any issue, please ask in the comments section, and we will respond as soon as possible.
Requirements
- A reliable internet connection
- A steady power supply
- An SD card at least 8GB
Tip: For this particular task, you don’t really need a monitor as all the processes can be run over a remote connection such as SSH, as you will see below.
Flash Raspberry Pi OS Lite on the SD card
As stated above, we don’t need a Graphical desktop interface. I, therefore, recommend using Raspberry Pi OS Lite, which doesn’t support a Desktop Interface. However, don’t worry if you only have access to the Raspberry Pi OS with a desktop. Just continue with the installation, but there is no need to connect to a display.
To flash the OS on our SD card, we will use Balena Etcher. I find it very reliable and easy to use due to its intuitive user interface. If this is your first time flashing Raspberry Pi OS on the SD card, please check our post –Installing Raspberry Pi OS, which will give you a step-by-step guide.
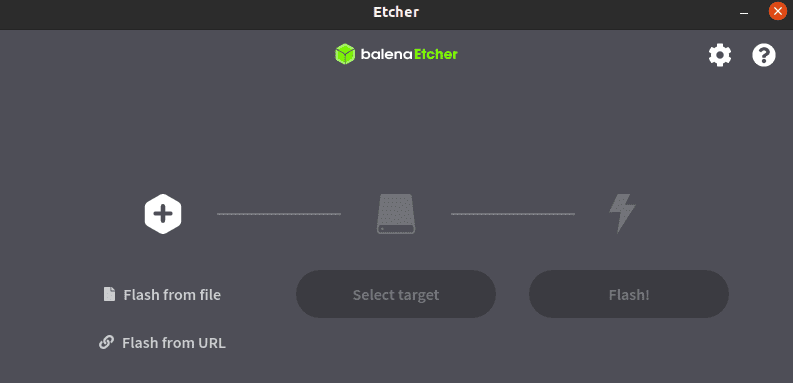
Balena Etcher
Set Up SSH and Wifi to a Headless Raspberry Pi 4
Since we don’t have a Graphical desktop to enable SSH or connect to a wifi network, we will do all this via console. We will need to carry out these two tasks before inserting the SD card on our Raspberry Pi.
- We will need to create an empty file called
sshon the /boot directory for SSH connection. If you are on Linux, you can easily use the touch command or the nano editor. Windows users can use a notepad or any other available text editor.
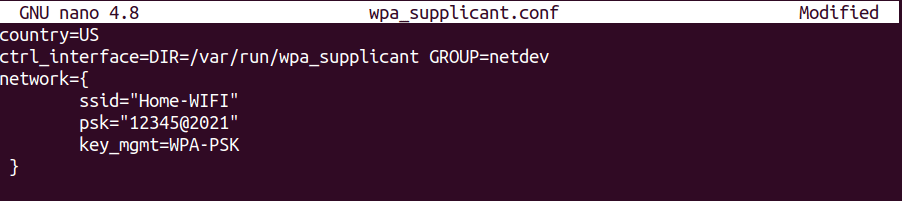
Note: This file should be empty and shouldn’t have any extension to its name – whether a ‘.txt’ or any other extension. - To connect to WIFI automatically, we will need to add the
wpa_supplicant.conffile to the boot directory. However, unlike the ssh file, this one will contain some commands. If you are on a secure network, paste the contents below and replace the highlighted text accordingly. If you are using a wired connection (Ethernet), you can skip this step.country=US # Replace US with your 2-digit country code ctrl_interface=DIR=/var/run/wpa_supplicant GROUP=netdev network={ ssid="Enter_YOUR_NETWORK_NAME" psk="Enter_YOUR_PASSWORD" key_mgmt=WPA-PSK }
Secure networks conf file
If you are on an open network, paste the contents below:
network={
ssid="Enter_YOUR_NETWORK_NAME"
psk="Enter_YOUR_PASSWORD"
key_mgmt=WPA-PSK
}
Then, you can check out our post – Connecting to Wi-Fi & Enabling SSH without Monitor on Raspberry Pi, which will give you detailed instructions on carrying out the steps discussed above. After successfully creating the two files, insert the SD card on your PI and power it on.
Establish an SSH Connection and Set Up Your Pi
If you carried out the step above correctly, your PI will automatically connect to the WIFI network and enable the SSH service on the system. To connect via SSH, we will use either Terminal (Linux) or Putty (Windows). For putty users, you will need to know the IP address of your PI. If you are on a Linux system, you can use the command below;
ssh pi@raspberrypi.local
Tip: The default username is pi and the default password is raspberry.
You can check out our post – How to SSH into Raspberry Pi, which will give you a step-by-step guide. After successfully establishing an SSH connection, we can start setting up our PI. To get started, update the system to ensure you are running the latest packages. Execute the commands below:
sudo apt update
sudo apt upgrade
The time taken by this process is dependent on your internet speed. Execute the command below to launch the Raspberry PI configuration tool.
sudo raspi-config
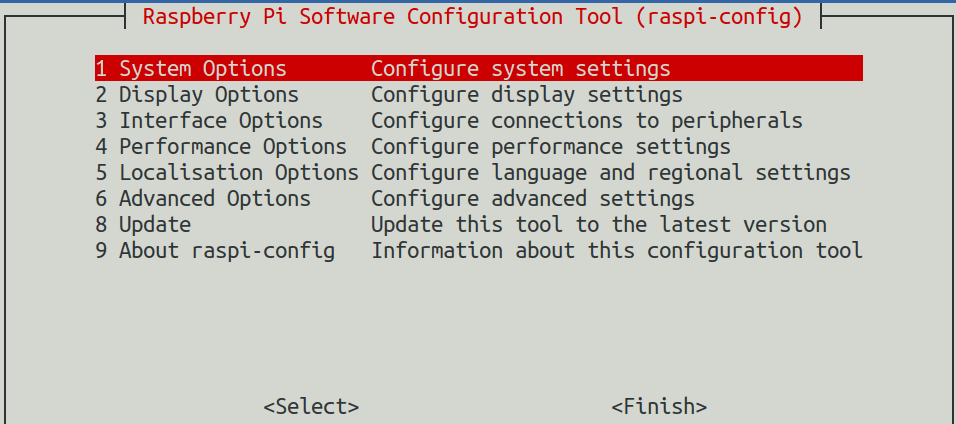
Raspi-config
- Change the default password from the System Options. Using a default password poses a security risk to the system.
- Expand the file system to use all the available space on the SD card. You can do this from Advanced Options.
- Configure language and regional settings from Localisation Options.
Once done, click Finish and Reboot the system.
Increase the Swap Memory
Compiling the Magi Coin wallet is a resource-intensive process that may not be carried successfully using the memory (RAM) alone. To counter this, we will increase our Swap space which is sometimes called Virtual Memory. We will therefore need to edit the swap config file. Execute the command below to edit the swap file with the nano editor.
sudo nano /etc/dphys-swapfile
You will see a line like CONF_SWAPSIZE=100. You need to edit the value and set it to 2048 as shown below:

Increase Swap Space
Save the file (Ctrl + O, then Enter) and Exit (Ctrl + X). Apply the changes by executing the command below:
sudo dphys-swapfile setup && sudo dphys-swapfile swapon

Apply Swap Changes
Install the Required Dependencies
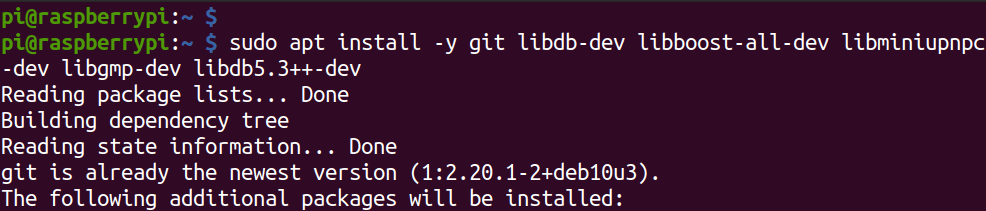
Execute the commands below to install the libraries needed to compile the Magi Coin wallet.
sudo apt install build-essential git libgmp-dev libboost-all-dev libdb-dev libdb5.3++-dev libminiupnpc-dev
Install Libraries
If the command execution is completed successfully, we can proceed to download and compile Magi Coin wallet.
Install the Required Libssl-Dev Version
Now, this is the most tricky part with installing Magi Coin wallet. It doesn’t seem to work well with libssl-dev version 1.1 and above. To install an older version of this library, we first need to check which are available in the repository. Execute the command below:
sudo apt-cache policy libssl-dev
The output of this command might be different from yours. Mine is shown below.
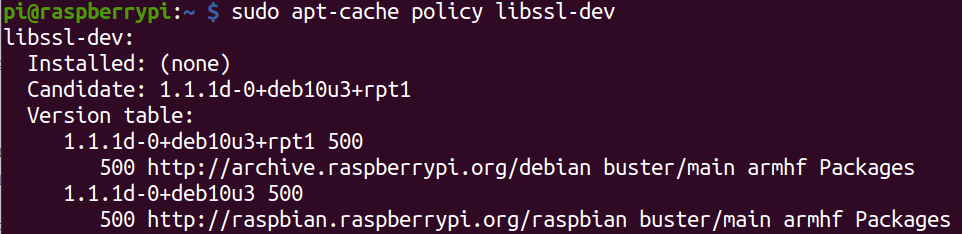
Check version
Take note of “Installed” and the one marked with “***,” which shows the currently installed package version. From the image, you can see I don’t have an older version of libssl.dev the library. To get the older version, we will need to add the Raspbian Jessie release to your sources.list file. Execute the command below.
sudo echo "deb http://ftp.debian.org/debian/ jessie main contrib non-free" >> /etc/apt/sources.list
Update the system to synchronize the changes
sudo apt update
Now run the apt-cache policy command again. From the image below, you can see I have the older version listed. I can proceed to install it using the command below:
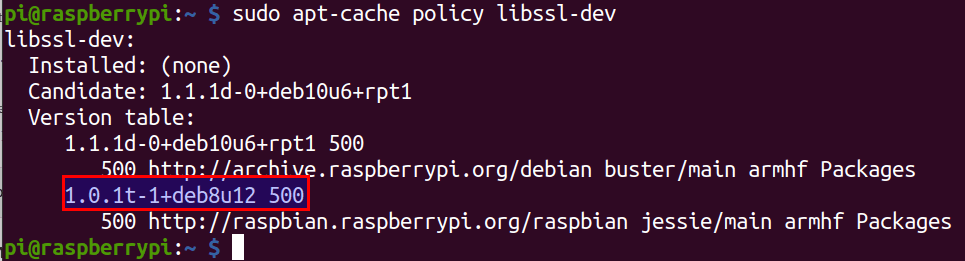
Check Libssl-dev library version
sudo apt install libssl-dev=1.0.1t-1+deb8u12
Hold the Older Version of Libssl-Dev on Your System
With every new update of Magi Coin wallet, you will be required to use this old version of libssl-dev. To avoid future errors, you can hold it to prevent the system from updating it to the latest version. Execute the command below.
sudo apt-mark hold libssl-devYou can also remove the Jessie repository we just added to our sources.list file with the command below:
sudo sed -i '$d' /etc/apt/sources.list
Remember to update the system.
sudo apt update
Download and Compile Magi Coin wallet
Unlike other applications you may have installed before, which come with a setup file, for Magi Coin wallet, we will need to download the source code and compile it ourselves. Execute the command below to download the Magi Coin wallet source code.
cd ~ && git clone https://github.com/magi-project/magi.git
As of writing this post, the wallet was around 83 MB. Once the source code is successfully downloaded, it time to compile it.
Tip: The compilation process might be quite long, and you might disconnect your PC to other things, or it might Sleep, thus cutting the established SSH connection. Therefore, I recommend using the Screen utility so that you can still go back and see the progress if the session is disconnected.
To install the screen utility on your Pi, execute the command below:
sudo apt install screen
Compile Magi Coin wallet
To get started, execute the command below to create a new screen to hold the compilation process.
screen
Check your architecture using the command below:
uname -a

Confirm Architecture
From the image above, you can see I am running armv7l. Now execute the commands below and replace the italicized text accordingly.
cd ~/magi/src
make -f makefile.unix xCPUARCH=armv7l

Compile Magi Coin wallet
This process might take quite some time. After successful completion, execute the command below to download the binary file.
cd ~/magi/src
sudo install -m 755 magid /usr/bin/magid
Make the Wallet Available System-Wide
Up to this point, we can execute and run the wallet from the source folder (~/magi/src). For convenience purposes, you can make the wallet available system-wide. Execute the command below.
sudo cp magid /usr/local/bin
Configure Magi Coin wallet
All our configurations will be in the magi.conf file, is stored in the ~/.magi directory. Execute the command below to create the file.
touch ~/.magi/magi.conf
If you don’t put the magi.conf file in the ~/.magi directory, you will need to provide the path when launching Magi as shown in the command below:
magid -conf=PATH-TO-CONFIG
Now, we will need to add our configuration in the magi.conf file. I will not go over every available option, but I will show you how to create a configuration that does the following:
- Run Magi Coin wallet as a daemon
- Enable solo mining
- Enable coin stacking
Paste the configuration below in the magi.conf file.
#Run Magi Coin wallet as a daemon
daemon=1
#Set the username used for solo mining
rpcuser=USER
#Set the password used in solo mining
rpcpassword=PASS
#Use any port above 8000 but not more than 65535
rpcport=PORT
#Start the server and listen for any incoming connnections
server=1
listen=1
#Allow incoming connections from miner on address 127.0.0.1 which specifes the device
#on which its installed. I added 192.168.1.* to allow incoming connections from my
#subnet. Please change this depending on your network.
rpcallowip=127.0.0.1
rpcallowip=192.168.1.*
#Enable Stacking
posii=1
Download Blockchain
Blockchain is a common term you will always hear every time you dive into cryptocurrency. Basically, it keeps track of all transactions that took place on the network. These transactions are definitely many, and the records can be quite huge in size. For example, as of writing this post, the Magi Coin blockchain is around 1.8GB.
To download the blockchain, execute the commands below:
cd ~
wget http://coinmagi.org/bin/block-chain/m-block-chain.tar.gz
tar xvf m-block-chain.tar.gz
mv m-block-chain/* .
rm -r m-block-chain.tar.gz m-block-chain
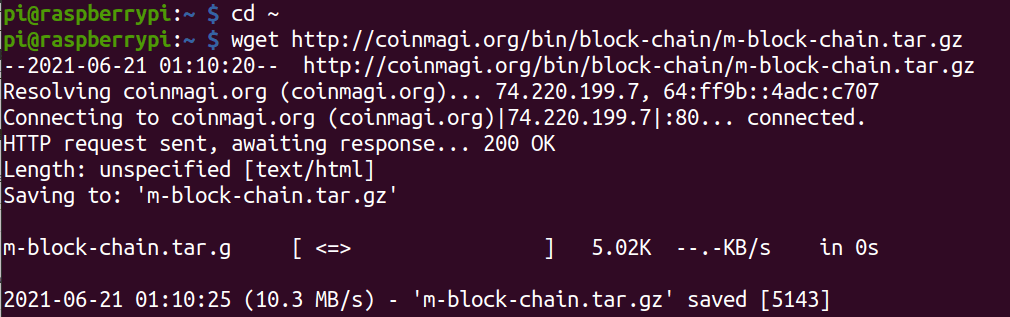
Download Blockchain
Set Up Magi Coin wallet as a Service
When you reboot your Pi, you realize that the Magi daemon doesn’t start automatically, and you have to start it manually. We can avoid this hustle by setting it up as a service. To achieve this, we need to create a file with a .service extension and store it in the /etc/systemd/system directory. In this post, I will name mine as magid.service.
Execute the command below:
sudo nano /etc/systemd/system/magid.service
Paste the contents below.
[Unit]
Description=Coin Magi Service
After=multi-user.target

[Service]
ExecStart=/usr/local/bin/magid
RemainAfterExit=yes
Restart=on-failure
RestartSec=60

[Install]
WantedBy=multi-user.target
Save the file (Ctrl + O, then Enter) and Exit (Ctrl + X). Now, you need to enable and start the service using the commands below.
sudo systemctl enable magid.service
service magid start
You can confirm the status of the wallet daemon using the command below.
service magid status
Conclusion
That’s it! I hope this comprehensive post has got you started running Magi Coin wallet on Raspberry Pi. If you face any compilation error, please first ensure you run an earlier version of the libssl-dev package. Please feel free to share additional tips about installing Magi Coin wallet on Pi with our readers in the comments below.