
By default, newer Raspberry Pi 4 boards support USB boot. Earlier boards require that you update the Bootloader, or you have to select alternative boot modes. In this Raspberry Pi article, we will take you through the steps needed to successfully boot your operating system from a USB drive instead of the microSD card.
Why boot from a USB drive
Raspberry Pi 4 has two USB 3.0 ports which makes USB mass storage faster than MicroSD cards. The other reason you might want to boot from USB is that USB drives are relatively cheaper than microSD cards. You might have noticed that some Pi 4 cases include M.2 SSD adapter, which connects via USB.
Prerequisite
- A Raspberry Pi 3, 4 single-board computers.
- Wifi or Ethernet network connectivity.
- MicroSD card, preferably with 32 GB capacity.
- USB storage device.
- A power supply adapter.
Boot Raspberry Pi from USB
We will demonstrate how to boot the Raspberry Pi operating system from USB in Raspberry Pi. To get started, you have to boot into your Raspberry Pi from a microSD card. If you do not have a Raspberry Pi installation, you will have to install it.
1: Install updates
After installing the Raspian operating system, update your OS and firmware through the following command.
sudo apt update
sudo apt full-upgrade
sudo rpi-update
Reboot your Raspberry Pi.
2: Enable USB boot mode
To enable USB boot mode, you will first need to add a config option and reboot your Pi. The config option will set the USB host boot mode bit Raspberry Pi’s One Time Programmable (OTP) memory to allow your Pi to boot from a USB storage device.
To enable USB boot, open the command-line and type the following command to update the configuration file.
echo program_usb_boot_mode=1 | sudo tee -a /boot/config.txt
The command will add the option; program_usb_boot_mode=1 to the boot/config.txt configuration file. The option will only enable USB host boot mode.
The next step is to reboot your Pi through the terminal command or your user interface.
sudo reboot
3: Verify if the boot mode is enabled.
When your system has completed its reboot, you can check if the boot mode has been enabled or that the OTP has been successfully programmed with the following terminal command.
$ vcgencmd otp_dump | grep 17:
17:3020000a
When OTP has been successfully programmed into your Pi, the output will be 3020000a. Else, the OTP bit has failed, and you will need to repeat the programming procedure. If you run the command several times and OTP is not set, it might be an issue with your Pi’s hardware.
Disable USB boot
In some cases, you might want to disable the USB boot. Removing the configuration is helpful if you do not wish the configuration to be replicated in another Raspberry Pi. You can remove the program_usb_boot_mode=1 configuration line from the config.txt file. You can open and edit the configuration file config.txt using your preferred text editor through the following command.
sudo nano /boot/config.txt
Note: Make sure you do not leave a blank line at the end of the config.txt.
You can also remove the line in your config file using the following terminal command.
sudo sed -i 's/program_usb_boot_mode=1//g' /boot/config.txt
The command above will achieve similar results to editing the text file through a text file editor like nano or vim.
You can now successfully boot from a USB storage device.
Boot your Raspberry Pi from a USB storage device
The next step is to install Raspbian OS into your USB device. The procedure is similar to installing Raspbian to an SD Card. We are going to highlight how to write to your USB using Etcher.
1: Download a preferred version of Raspbian.
You can access and download your favorite RaspbianOS from the official Raspbian OS download page.
2: Download Etcher to write the image to your USB device.
You can download Etcher from the Official Etcher Download page. Etcher is a versatile and lightweight tool to write images into USB devices.
3: Install and launch Etcher
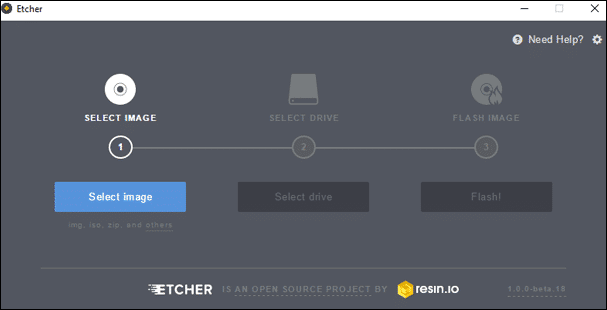
Launch Etcher
Once your Etcher download is complete, install and launch it. Next, click the select image button.
Within the Etcher menu, browse through your system and select the downloaded copy of your Raspbian OS.
4: Select a USB drive.
The next step is to click on the select drive button to find your USB storage device. Once you locate the USB device you want to use, select it and press the “CONTINUE” button.
5: Complete installation
Finally, to complete your installation, click the flash button to begin the process of writing your Raspbian image into the USB drive. Give it some time to complete.
When the writing process is complete, take the USB drive and place it into a USB port on your Raspberry Pi.
6: Boot from USB drive
You can now remove the SD card so that the Raspberry Pi can automatically detect and utilize your USB as the default boot device.
Before you power up your Pi, be aware of the external drive’s extra USB power requirements.
When you power up, it can take up between five to ten seconds for your Raspberry Pi to detect the USB drive and begin the boot process. In other cases, the boot times might be longer. In such a case, be patient, and the booting process will begin.
Note: Make sure you have ejected the SD card from your Raspberry Pi to avoid Pi from booting from it.
Configurations for Raspberry Pi 4B and Raspberry Pi 400
If you are using Raspberry Pi 400 and newer Raspberry Pi 4B boards support, you can skip this guide as these boards support USB boot by default. However, if you use an older version of Raspberry Pi 4B boards, or want to select an alternative boot mode, then you will have to update your Bootloader.
Using Imager to update Raspberry Pi bootloader
You can use the Raspberry Pi Imager, which provides a graphical method to update the Bootloader. Using the Pi Imager is the recommended method to update your Pi’s Bootloader.
1: Download Raspberry Pi Imager from the official Raspberry Pi Imager website.
2: When the download is complete, select another SD card to use for the next steps.
3: Launch the Raspberry Pi Imager and select the Misc utility images from the Operating System option.
4: Next, select Bootloader, then select USB.
5: Select the storage you prefer to use and then write to it.
Using raspi-config to update Raspberry Pi bootloader
You can also successfully change the boot order in your Raspberry Pi through the raspi-config terminal command.
1: Open the terminal and run the following command.
sudo raspi-config
The command will launch raspi-config, which will allow you to select or change the boot order.
2: Under the raspi-config, select “Advanced Options.”
3: Next, select “Boot Order.”
4: Choose USB to make it your preferred boot option.
5: Finally, reboot your Raspberry Pi OS for the changes to take effect.
I hope this article has demonstrated how easy it is to boot your Raspberry Pi from a USB device instead of the MicroSD card. USB drives offer an alternative way to boot your Raspberry Pi, but you can also explore and use SSD to boot your Raspberry Pi if you need better performance with sequential transfers.