
The Raspberry pi is a tiny, single-board computer that is great for hosting web servers. This is because of these three reasons:
- First, Raspberry Pi is a low-spec system that can run a web server.
- The Raspberry Pi does not consume a lot of energy watts
- Since the Raspberry Pi computers are tiny (almost the size of a credit card), they can be mounted in many places as long as one has access to power and other necessary peripherals.
A Raspberry Pi is majorly used as a web server. To get your Pi to work as a web server, you will connect it to your local network and ensure running the latest Raspbian operating system version.
Using a Raspberry Pi as a web server
Below is a step-by-step procedure on how to use a Raspberry Pi as an IoT webserver.
1. Power your Raspberry Pi and connect it to the internet.
The first thing to do is power your Raspberry Pi, then make sure you use the latest Raspbian Operating System version. Additionally, the Pi has to be connected to the internet to be accessed over the local network. After a connection has been created, you will need to use a secure shell to gain access over the Pi using putty.
In putty, begin a remote connection to the Raspberry Pi in which you will use its IP address on port 22 and log in. By default, the login details for the Raspberry Pi are “pi” as the username and “raspberry” as the password.
2. Install Apache and PHP.
Next, you will install Apache and PHP on your Raspbian operating system. To begin the installation process, follow the steps mentioned below:
Open your terminal, then execute the following command line:
sudo apt-get update

sudo apt-get update
The command above will update the system and let the Raspberry Pi download the most recent software version. After successfully executing the update command, run the following command in the console:
sudo apt-get install apache2 -y
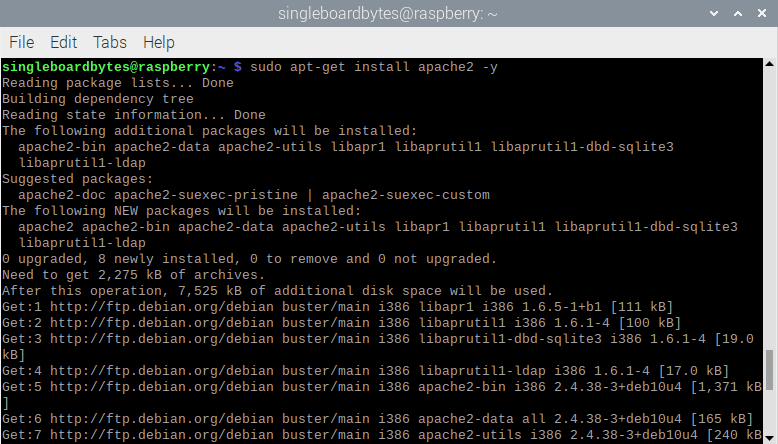
install Apache
As soon as Apache has downloaded, the server will start automatically. Now we can test whether the website is up and running. After confirming that Apache is indeed running, we will then go ahead and install the most recent version of PHP by running the following command in the console:
sudo apt-get install php libapache2-mod-php -y
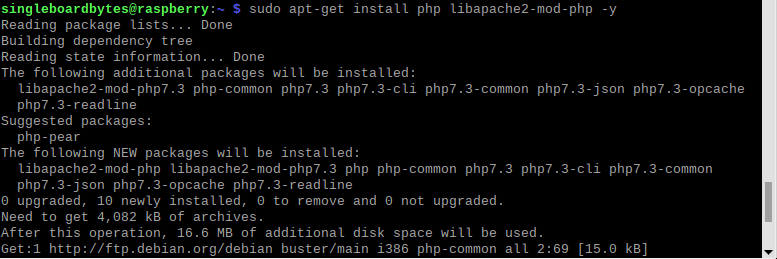
install PHP
Now that we have the Apache software and PHP both installed and running correctly, we will go ahead and move our files to the website directory. By default, the Apache software that we have just installed uses the following default directory as the default location for website files: /var/www/html.
However, you should note that this error only contains read permissions, meaning you cannot change the folder. Therefore, to take ownership of the folder, we shall execute the following command on our terminal:
sudo chown pi:pi -R /var/www/html
Note: “pi:pi” should be your username. For instance, I will use my username. Therefore it will resemble the syntax below:
sudo chown singleboardbytes:singleboardbytes -R /var/www/html
grant read and write privileges
Once the folder’s permission has been changed from read-only to read and write, we can now proceed and move our IoT dashboard files into the directory. This is done via WinSCP, which lets us drag and drop files onto the Raspberry Pi. You can have a look at this article, “How to create a simple FTP server with a Raspberry Pi,” to learn how to use the WinSCP tool and other file transfer tools covered.
Lastly, after successfully loading the website and making sure it is ready for use, there is another thing that we need to adjust before the process begins to work. The PHP code seen above uses a function that is currently depreciated and has to be replaced. All instances of the function “split()” have to be replaced with “explode().” Otherwise, the website will fail and not work as supposed to.
If everything goes according to plan, you should be able to input the Raspberry Pi’s IP address into your browser, after which a login page should appear. Log in to the site, and from here on, you should be able to use the website as usual.
ALTERNATIVELY: If the above steps seem a little too complex to follow, here is a much more straightforward and broken-down procedure to follow.
1. Go to the command prompt or terminal.
You can do this by clicking CTRL+ALT+T from the Raspbian desktop, or you can remotely connect to it using SSH if you have already configured it. However, some users prefer to configure the Raspberry Pi to boot to the command prompt directly.
2. Update the packages that you are using.
You can do so by keying in:
sudo apt-get update.
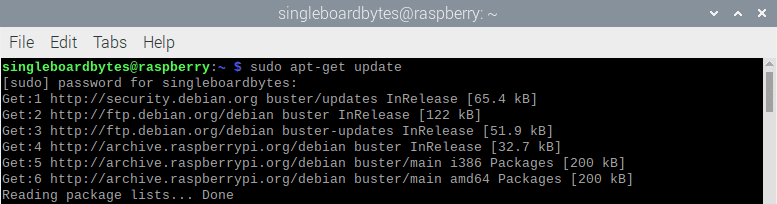
sudo apt-get update
This is done to get the most recent version of every file that you download from here onwards.
3. Install Apache 2.
You can do this using the command:
sudo apt-get install apache2 -y

install Apache
4. Install PHP for your server.
You can do this by keying in:
sudo apt-get install php libapache2-mod-php -y
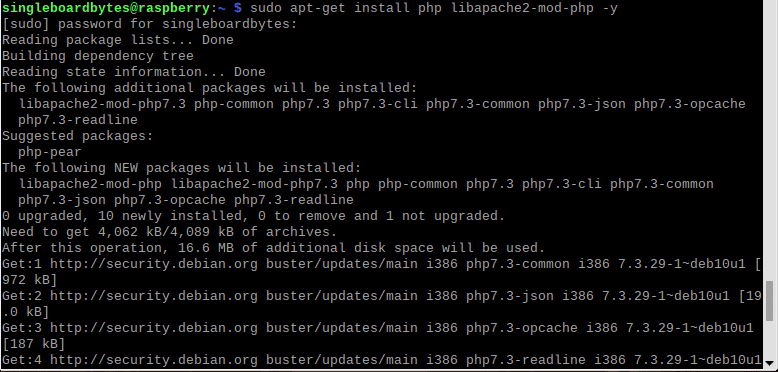
sudo install PHP
5. Install MariaDB.
To install MariaDB on your Raspberry Pi, run the following command:
sudo apt install mariadb-server
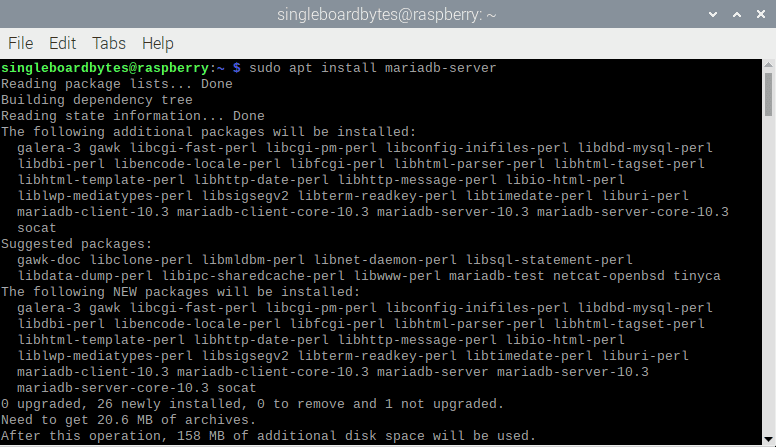
install mariadb server
MariaDB is installed to help you use a MySQL database with your website. First off, you key in:
sudo mysql_secure_installation.
You will be asked for a root password, but you can choose to leave it blank or input something you are sure you will remember.
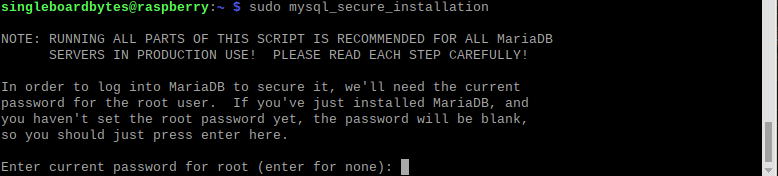
setup MySQL installation
6. Install the PHP-MySQL connector.
This is done to allow the PHP pages access to the database. You install it using the following command:
sudo apt install php-mysql
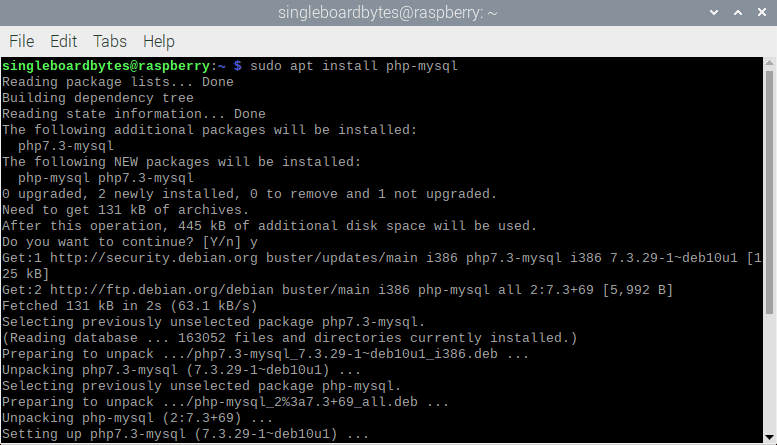
sudo install PHP MySQL
7. Restart Apache 2
This is meant to ensure that all the changes that you have made take effect. You can use the code below.
sudo service apache2 restart

sudo restart apache service
8. Test your server.
Go to “http://localhost” on your Raspberry Pi and see a test page.

apache successful setup (localhost)
To use another computer on the same network, you should be able to get there by logging into “http://raspberrypi.local or http://raspberrypi,” as long as your Raspberry Pi’s hostname is raspberrypi.
9. Create your website.
You can do this by putting HTML or PHP files in the /var/www/html directory.
Changing Your Server’s Hostname
The Raspberry Pi’s hostname is by default “raspberrypi.” Besides being a bland address for a website, it also bears limitations if you are using multiple Pis on your network. Fortunately, it is pretty simple to change the hostname to your preference.
1. The first step is to input the Raspberry Pi configuration tool by keying in:
sudo raspi-config.
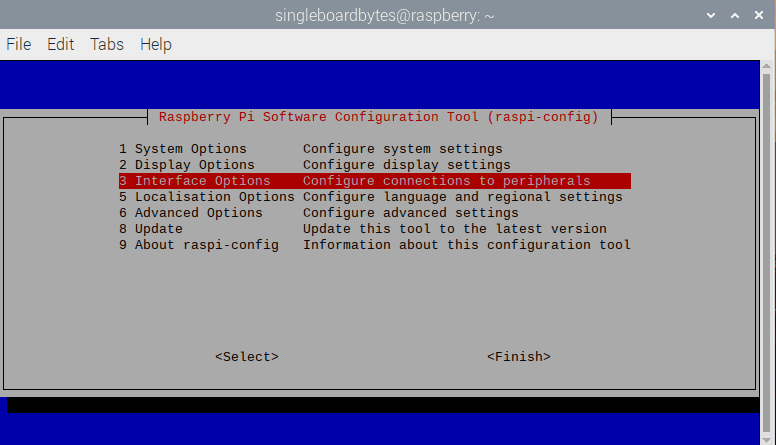
raspi config software configuration
Or you can launch the version that has windows by navigating to preferences->Raspberry Pi Configuration from the Start menu.
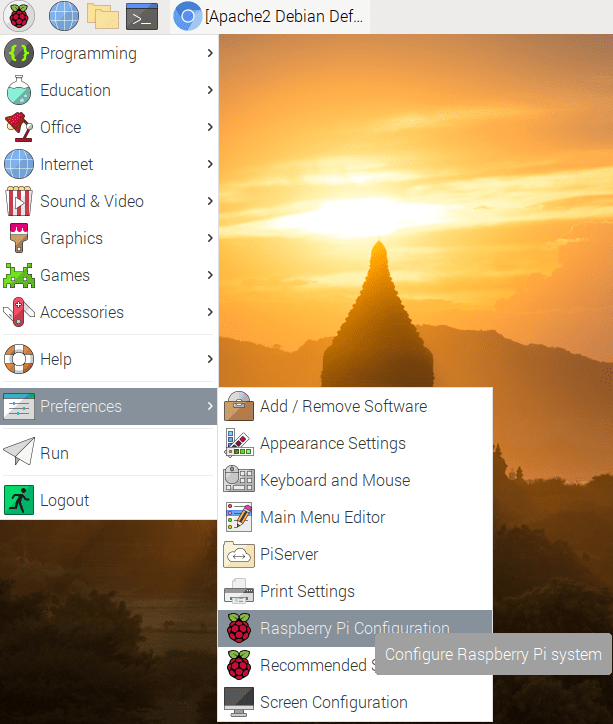
Raspberry Pi Configuration
2. Choose system.
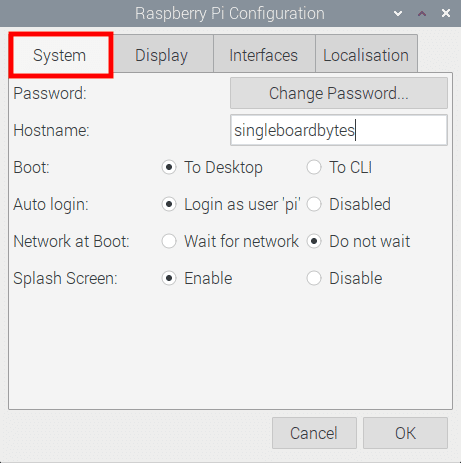
Select System
3. Choose Hostname.
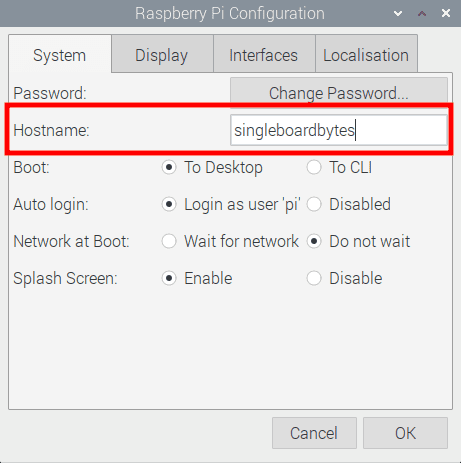
Change hostname from raspberry to singleboardbytes
Note: Click “Ok” to bypass a warning about not using characters other than letters, numbers, or a hyphen (but it must be in the middle of the name).
4. Input your hostname and click “Ok.”
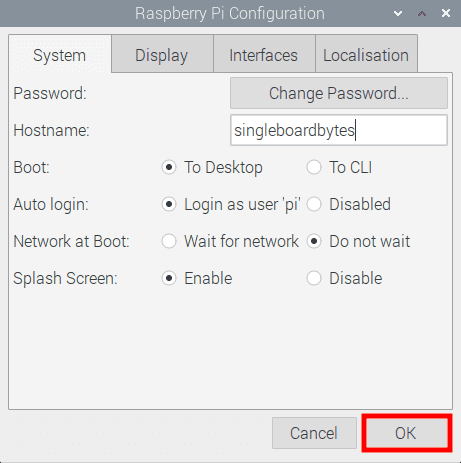
Click ok to finish
6. Click yes when a prompt to reboot appears.

reboot prompt, select yes
After the reboot, you will have successfully changed your Pi’s name
How to set up FTP on Your Pi Web Server
There is not much to go on as a web server if you don’t have some web pages and media files in the /var/www/html folder. So while you are presented with the option of carrying out all your web development on the Pi, most users opt to write the code on their primary PCs and later on copy it over via FTP. Here is how:
1. Enable SSH on your Raspberry Pi if it is not already enabled. This can be executed by traversing to the interfacing options->SSH menu from rasp-config. Alternatively, if you are already on the desktop, you can head to the preferences->Raspberry Pi configuration and tap on the interfaces tab.
2. Alter the permissions for the /var/www/ folder (along with all the folders housed in it) to enable you to write files to it. Enter the command below to do this.
sudo chown pi /var/www/html
For my sake, I changed the username to singleboardbytes; therefore, my syntax will be:
sudo chown singleboardbytes /var/www/html
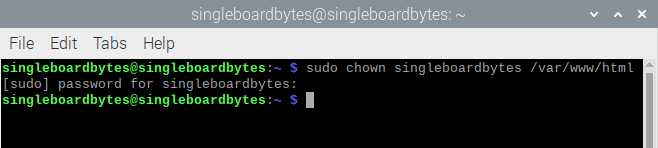
Alter folder permissions
3. Use an FTP client on your computer and set it to use FTP protocol. Keep in mind that it is not just plain FTP, more so if you are using Windows. In this case, we recommend Filezilla, a leading and free-to-use FTP app.
By default, the username is “pi,” and the password is “raspberry,” as they commonly are for SSH. However, for me, I will use my username “singleboardbytes” and the password I set.
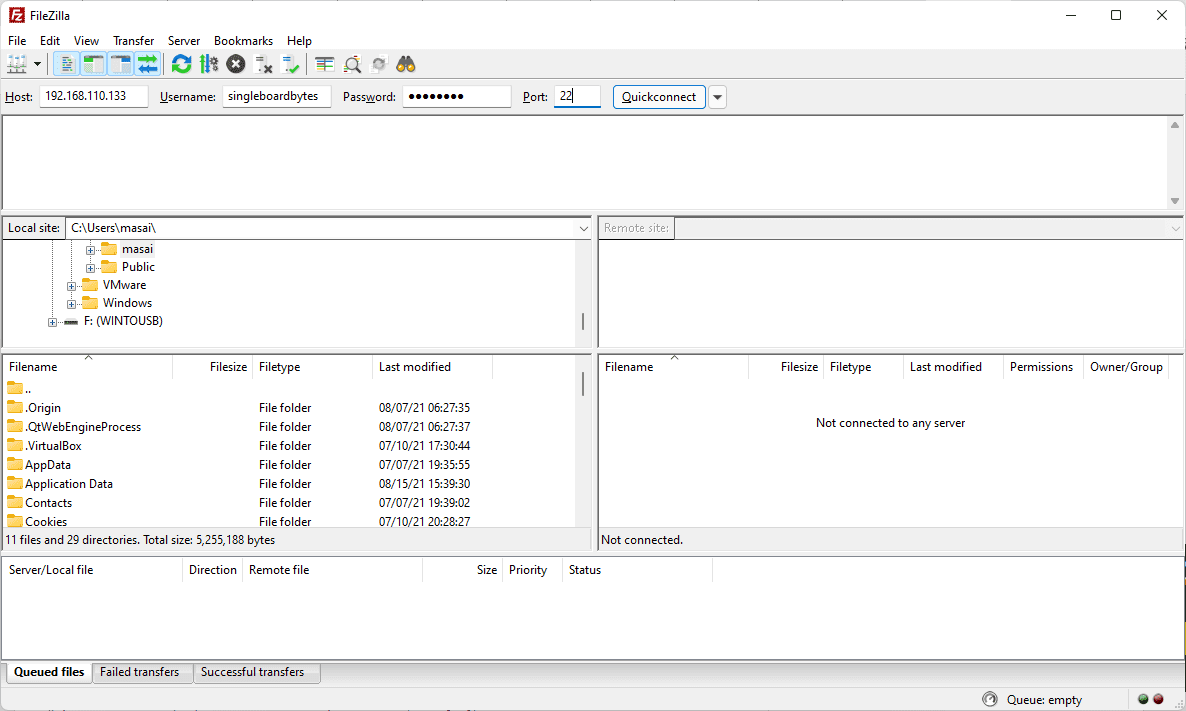
Filezilla connection
Click this link to check out a comprehensive article on setting up an FTP server on Raspberry Pi.
In summary, using the Raspberry Pi as a server has many advantages compared to using a usual computer. To begin with, the GPIO on the Raspberry Pi enables us to make a nicely customized server with hardware interfaces like buttons, displays, LEDs, and many more. The server can run a Python program in the background and change GPIO as required. This can be used to show display messages, errors, or act as a device in its way and further have relays that can be controlled and LEDs.
While this article tutorial mainly majors on using Raspberry Pi 4 as a web server, it can also be used with all Raspberry Pi’s since the process is similar in the different versions. However, the Pi 4 has a bigger RAM size, a much faster processor, and a greater speed internet connection making it a better choice as a web server.
Conclusion
This article offers two alternative methods that can be used to learn how to use the Raspberry Pi as a web server. I hope that you find either of them useful. In case of any challenges, reach out via the comments section.