
An Arduino board is an open-source electronics platform that uses both Sofware and Hardware to implement tasks. It takes input in various formats. From a fingerprint sensor, light sensor, text message from Twitter or SMS, sound sensors, and much more. It comes very much in handy if you are carrying out an IoT-related project.
To upload source code to your Arduino board, you need to connect it to your PC. But that doesn’t mean you can’t make use of other hardware platforms. For example, do you have a Raspberry Pi lying around? Then, you can use it to upload code to your Arduino board. As a matter of fact, there are very cool projects that you can carry out with both the Arduino and Raspberry pi boards.
This post will give you a step-by-step guide on installing the Arduino IDE on your Raspberry Pi and even uploading code to your Arduino board.
Requirements
- Raspberry Pi: For this post, we will use the Raspberry Pi 4 board.
- Arduino board: I am using Arduino UNO R3
- An active internet connection.
- To experience the full thrill of running Arduino IDe on your Pi, an external display (Monitor) would come in handy. If you don’t have a monitor, you can enable VNC, as you will see below.
Install the Official Raspberry Pi OS
For this post, we will use the official Raspberry Pi OS. You can download the image from the official Raspberry Pi website and flash it on your SD card using Balena Etcher. Check out our post – How to install the Official Raspberry OS on Raspberry Pi. For easy access, you can proceed to enable SSH and VNC. Check out our post – Connecting to Wi-Fi & Enabling SSH Without Monitor on Raspberry Pi.
Installing Arduino IDE
After booting your Raspberry Pi, launch the Terminal and execute the commands below to update your system.
sudo apt update
sudo apt upgrade
Once done, execute the command below to install Arduino IDE.
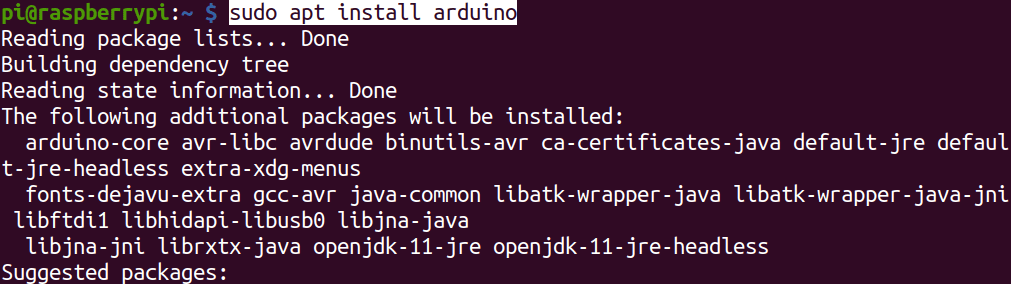
Install Arduino
After a successful install, you should find the Arduino IDE listed under the Programming menu, as shown below.
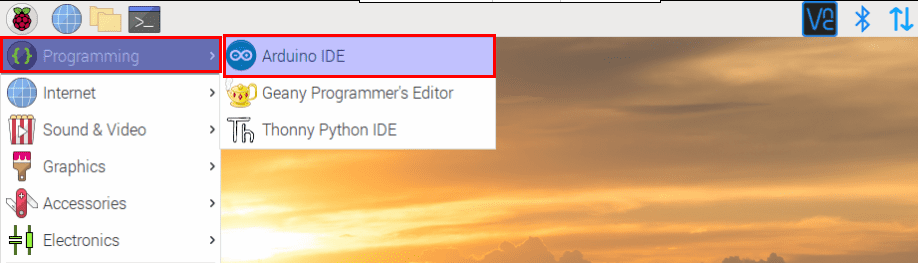
Launch Arduino IDE
Testing
We have successfully installed Arduino IDE on our Raspberry Pi. Let’s do a test by uploading a simple code. Launch the Arduino IDE from the Programming menu and paste the code below.
/*
  This code Turns on an LED on for one second, then off for one second, repeatedly.

  Most Arduinos have an on-board LED you can control. On the UNO, MEGA and ZERO
  it is attached to digital pin 13, on MKR1000 on pin 6. LED_BUILTIN takes care  of using the correct LED pin whatever is the board used. If you want to know what pin the on-board LED is connected to on your Arduino model, check the Technical Specs of your board  at https://www.arduino.cc/en/Main/Products This example code is in the public domain.
  modified 8 May 2014
  by Scott Fitzgerald

  modified 2 Sep 2016
  by Arturo Guadalupi
*/
// the setup function runs once when you press reset or power the board
void setup() {
  // initialize digital pin LED_BUILTIN as an output.
  pinMode(LED_BUILTIN, OUTPUT);
}

// the loop function runs over and over again forever
void loop() {
  digitalWrite(LED_BUILTIN, HIGH);   // turn the LED on (HIGH is the voltage level)
  delay(1000);                       // wait for a second
  digitalWrite(LED_BUILTIN, LOW);    // turn the LED off by making the voltage LOW
  delay(1000);                       // wait for a second
}
Save the source code. To upload it to your Arduino board, click on the Tools menu at the top of the IDE the select Boards. You will see a long list of all Arduino boards available. Select your board from the dropdown menu, then click Upload. In my case, I am using Arduino Uno.
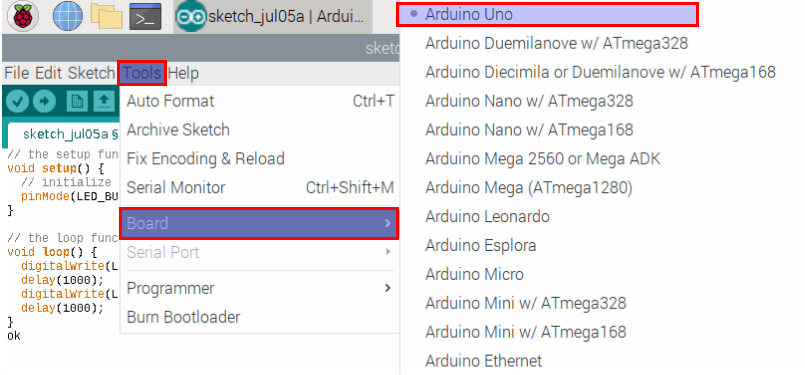
Upload Code to Arduino board
Conclusion
That’s it! We can now write code and operate our Arduino board from our Raspberry Pi. Feel free to ask any questions regarding the whole installation process or share any additional information with our readers below.
1 comment
Thank you for the clear instructions for uploading Arduino IDE. Unfortunately it downloads v 1.8, and not v2.04.
How do I update to the latest version. Thanks.