The Raspberry Pi is arguably one of the most popular small board computers (SBC) we have in the market today. It’s affordable, has large support from various Software developers, and it’s versatile. You can use it to carry out small personal projects like IoT, Software development, Media server, or even set it up as a Desktop PC. If you decide to replace your Desktop setup with the Raspberry Pi, you will need to select a suitable Operating System.
Currently, there are many Linux-based operating systems that you can run on your Pi. Ranging from the official Raspberry Pi OS (formerly Raspbian), Ubuntu, Arch Linux, Manjaro Linux, Kali Linux, and more. However, one of the most beautiful Linux distributions you can run on your Pi is the elementary OS. This post will give you a step-by-step guide on installing elementary OS on your Raspberry Pi.
What is elementary OS?
elementary OS is a Ubuntu-based Linux distribution that prides itself on being fast, ensures user privacy, a beautiful desktop environment, and a gorgeous Graphical User Interface (GUI). It’s one of the best Linux distributions for anyone switching from Linux or macOS to Linux systems.
The user interface makes it easy to navigate the whole system comfortably, whether you want to launch applications or use the file menu. It also comes with a Software Center called AppCenter, which you can use to install applications graphically. If you are a command-line person, you can still install applications via the Terminal.
Installing elementary OS on Raspberry Pi 4
What you will need
- Raspberry pi 4
- A Display Screen/Monitor
- Keyboard and Mouse
- A reliable power supply
- An SD card (At least 8GB)
- An HDMI cable
Download elementary OS for Raspberry Pi 4
In this post, I will show you two ways which you can use to download elementary OS for Raspberry Pi 4.
One, you can download the Raspberry Pi 4 image from the official elementary OS website. Unfortunately, experimental elementary OS builds can only be accessed using a verified GitHub account and a $10/month, $20/month, or $50/month sponsorship fee. Most Linux distributions are available for free, including elementary. However, Elementry releases, which are still in development (Early Access), can only be accessed by sponsors of the program. You can become a sponsor by selecting any of the plans listed on their website.
The second method you can use to install elementary OS on your Pi is downloading the UNOFFICIAL build by Marius Meisenzahl, available for free on GitHub. On a Reddit conversation regarding installing elementary on the Raspberry Pi, Meisenzahl clearly stated, “⚠️ Please be aware that the builds are not officially supported by the elementary project ⚠️.” Therefore these builds might lack certain features which might be available on the official elementary images.
Flash the elementary OS image to your SD Card
After downloading the elementary OS image, we need to burn it on our SD card. First, we will use the Balena Etcher tool. The tool is quite easy to use and comes with an intuitive user interface. Balena Etcher features three main options:
- Flash from file: This allows you to select the OS image you downloaded
- Select Target: Here, select your target storage drive. In our case, the SD card
- Flash: Click this button to start burning the OS on your SD card
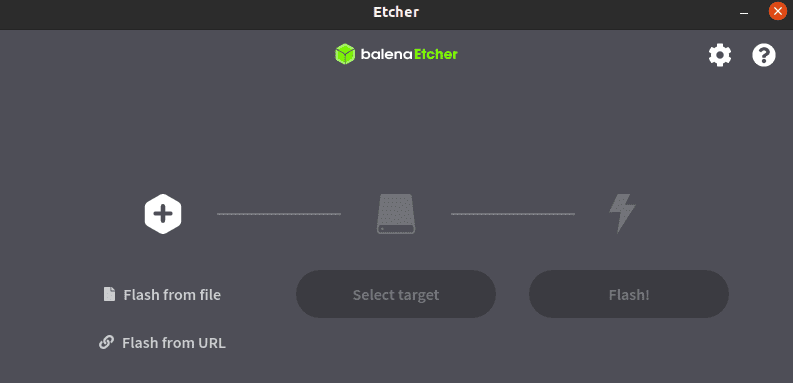
Balena Etcher
After successfully flashing the image onto the SD card, eject the SD from your PC and insert it to the Pi. Next, connect any other necessary devices like a mouse, keyboard, and monitor. Once done, connect the power source and boot the Pi.
Installing elementary OS on Raspberry Pi
After booting your Pi, you will get to the initial configuration process. A window will open, and you will need to select the language you wish to use during installation. Choose your language of choice from the list and click Select.

select language
On the next screen, you will be required to choose your keyboard layout of choice. When done, click select to open the Create an Account window. Next, you will be required to enter your Full Name, Username, and password. When done, click Finish Setup.
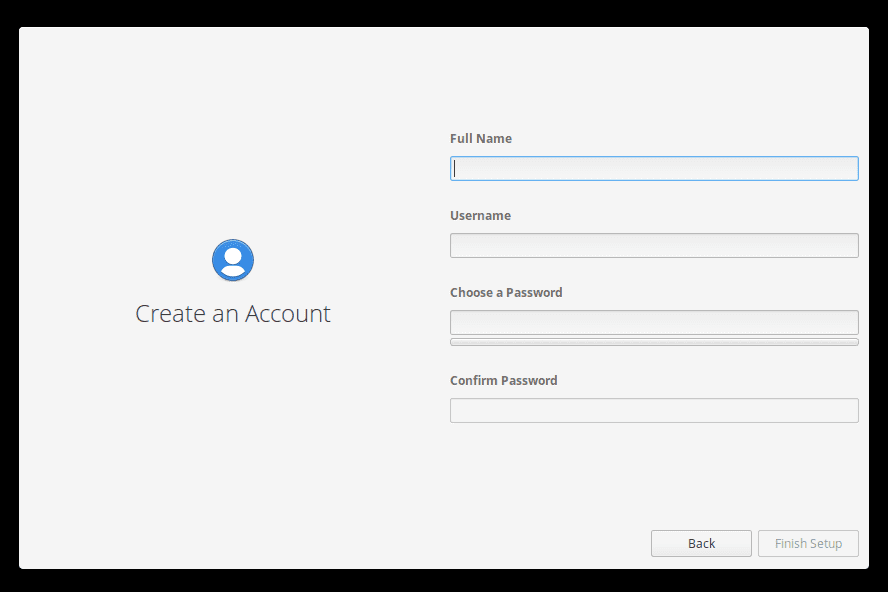
Create an Account
The system will perform some configuration for a few minutes before launching the Login Screen. Next, enter the password you set in the Create an Account screen to log in. Once logged in, you will be greeted by the beautiful elementary OS Desktop.
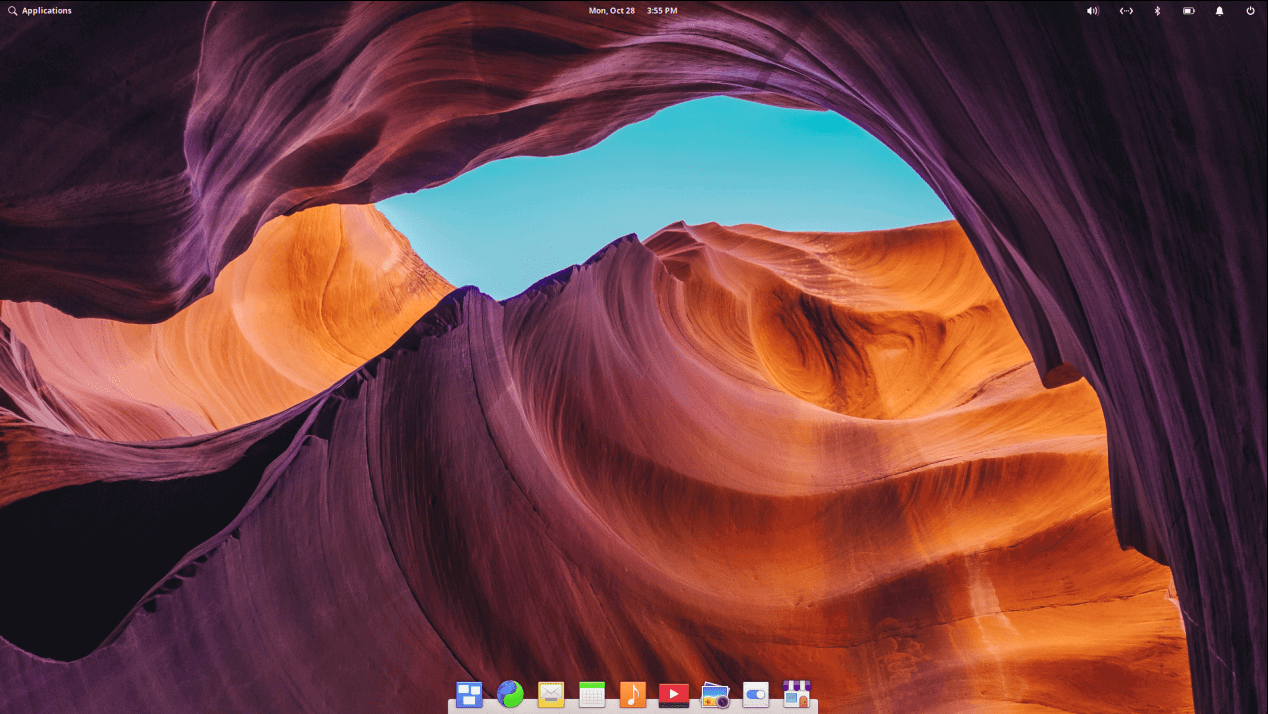
elementary OS desktop
That’s it! To enhance performance, you can try features like Overclocking the Pi -we already have a post for this – or expand the file system to make use of all the available space in the SD card. The latter can be done using the raspi-config tool.
Conclusion
Personally, after running the OS on my Pi, I am puzzled that it’s still in the experimental build stage. However, everything looked good and worked perfectly. It features a beautiful desktop, great performance, and I even installed several applications from their AppCenter. You should really give this operating system a try. Feel free to share your experience running elementary OS on Raspberry in the comments below.
1 comment
I also like elementary OS, so would like to add my two cents here. if you are a developer, you can clone the github repository from https://github.com/elementary/os
and run the script
$ docker run –privileged -i -v /proc:/proc \
-v ${PWD}:/working_dir \
-w /working_dir \
debian:unstable \
./build-rpi.sh
github readme file has all the necessary details. Finally you need to have docker installed.