
MobaXterm is an enhanced terminal for Windows Operating System used for remote computing. It has an X11 server, a tabbed SSH client, and other essential computer utilities that help ease the remote computing process (RDP, VNC, and rlogin). In addition, the MobaXterm terminal fetches all the useful UNIX commands and puts them in a single; and portable ‘exe’ file on the Windows desktop.
MobaXterm Features
- Remote terminal (SSH, telnet, Mosh, and rlogin
- X11- Forwarding
- The full X server and SSH support
- Plug-ins support
- Remote desktop (RDP, Xdmcp, and VNC)
- Full documentation
- Installer and Portable versions
- Has a maximum of 12 sessions.
One of the likable features and abilities of the MobaXterm application is its ability to have tabbed sessions that can be ‘detached’ into separate windows according to a user’s specifications. Its Pi terminal can be accessed remotely with minimal configurations required. There is also a portable application version that requires no installations. These features make MobaXterm a preferable choice to applications like Putty as it makes managing many sessions more manageable and straightforward.
Many users of Raspberry Pi prefer using MobaXterm because it can run multiple terminal sessions on the computer while still having the ability to drag-n-drop files on the Pi. This article will focus majorly on how to get remote access to a Raspberry Pi Using MobaXterm.
To install in Windows, download the software into your computer from here. It is advisable to download the free “Home Edition” rather than the paid “Professional Edition” if you plan on testing the MobaXterm software. Once the download is complete, extract and open it.
Go to your Downloads folder and locate the “MobaXterm_Installer_v21.2”.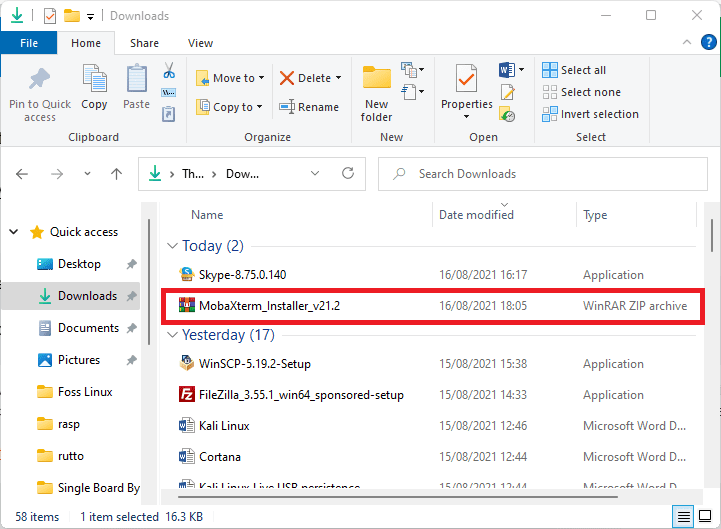 Right-click on the zipped folder and select “Extract to MobaXterm_Installer_v21.2”.
extract mobaxterm installer v21.2
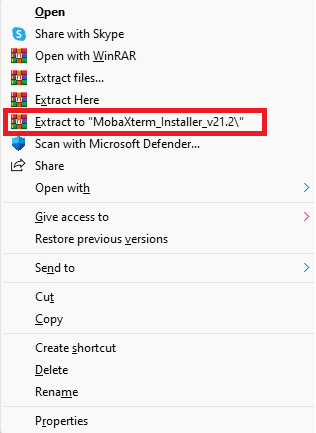
This will extract the files contained in the zipped folder to the same folder as the zipped one.
Note: If you double-click the zipped folder, it will open automatically from the unzip application. For instance, in our case, it will open in WinRAR, which we have installed on our PC. Therefore, remember to tick the checkbox behind ‘show extracted files’ to enable you to see the extracted files once the extraction process completes.
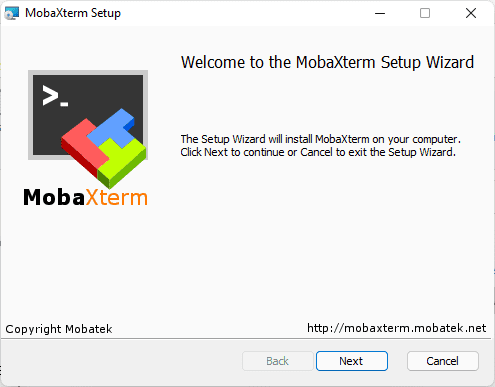
Locate the installer file and follow the onscreen prompts to install the MobaXterm into your Windows operating system.
mobaxterm installer setup
Once the installation process is done, a MobaXterm shortcut window will appear on the desktop—double-click on the desktop icon to open it.
MobaXterm Desktop Icon
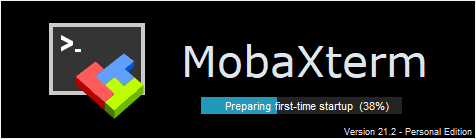
Be patient as the application opens up. It might take some time to prepare for a first-time start-up before launching the MobaXterm welcome screen.
mobaxterm setup preparation for first-time start-up
The welcome screen you will see once the application opens up should be similar to the one shown below:
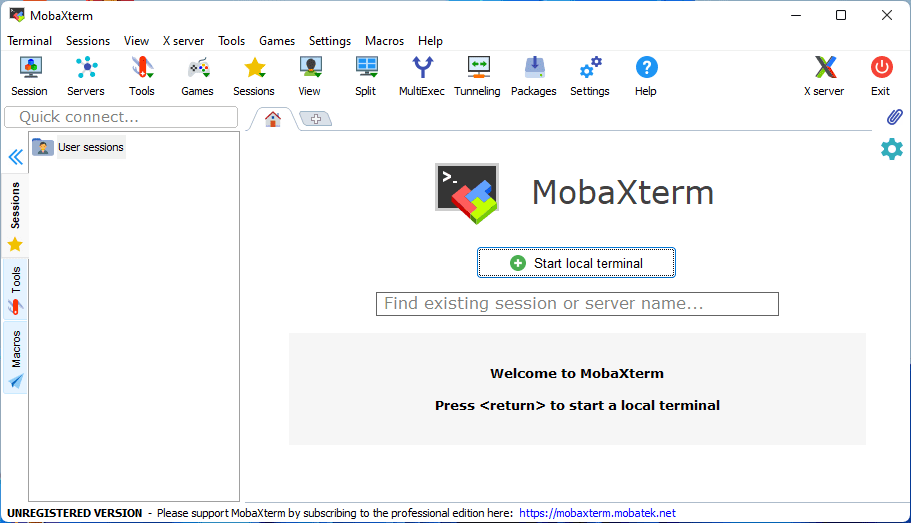
mobaxterm welcome screen
Creating a remote connection using MobaXterm
The next step after successful installation is to create a remote connection using the newly installed MobaXterm. Launch the installed MobaXterm by double-clicking the desktop icon. Now select the “Session” button on the top left corner of the MobaXterm screen, as shown in the image below:
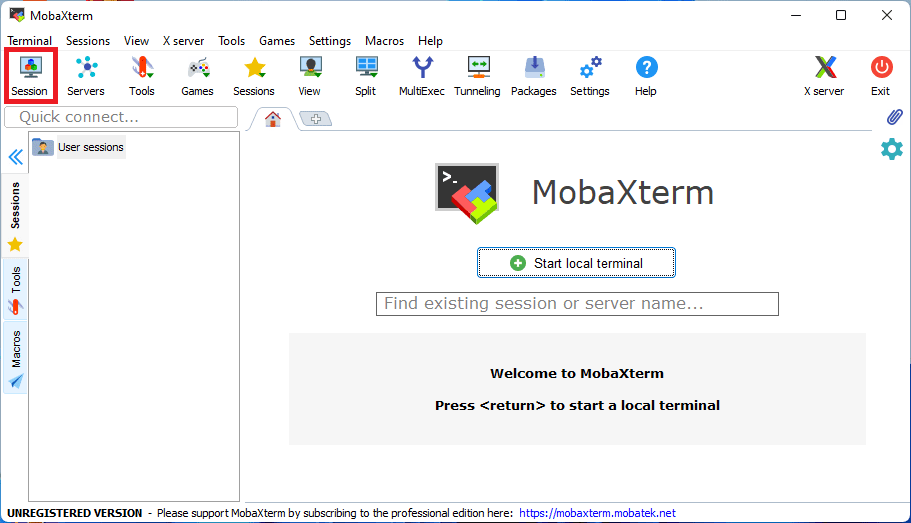
Select Session on the welcome screen
Next, select the first option, SSH, as displayed below:
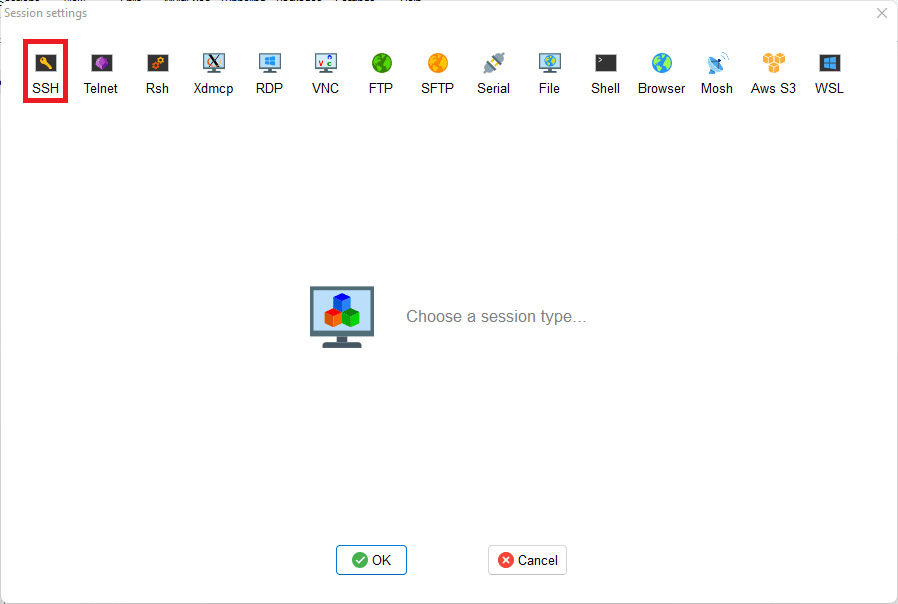
mobaxterm select ssh
Under “Basic SSH settings,” Input the Raspberry Pi address under the “Remote host. Next, tick the checkbox next to “Specify username” and input your Raspberry Pi Username. Leave the default port number to 22, then click the green “OK” button.
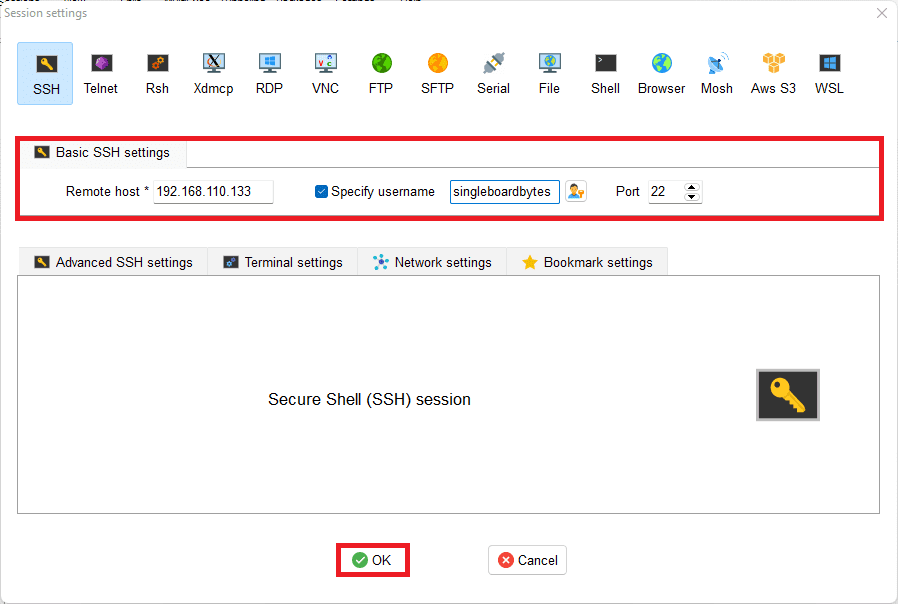
mobaxterm connection screen
A terminal screen will pop up once you click the green “OK” button asking for your password. Key in your Raspberry Pi Password and click “Enter” on your keyboard to create a remote connection. When the process is successful, you will see a screen similar to the one shown below:
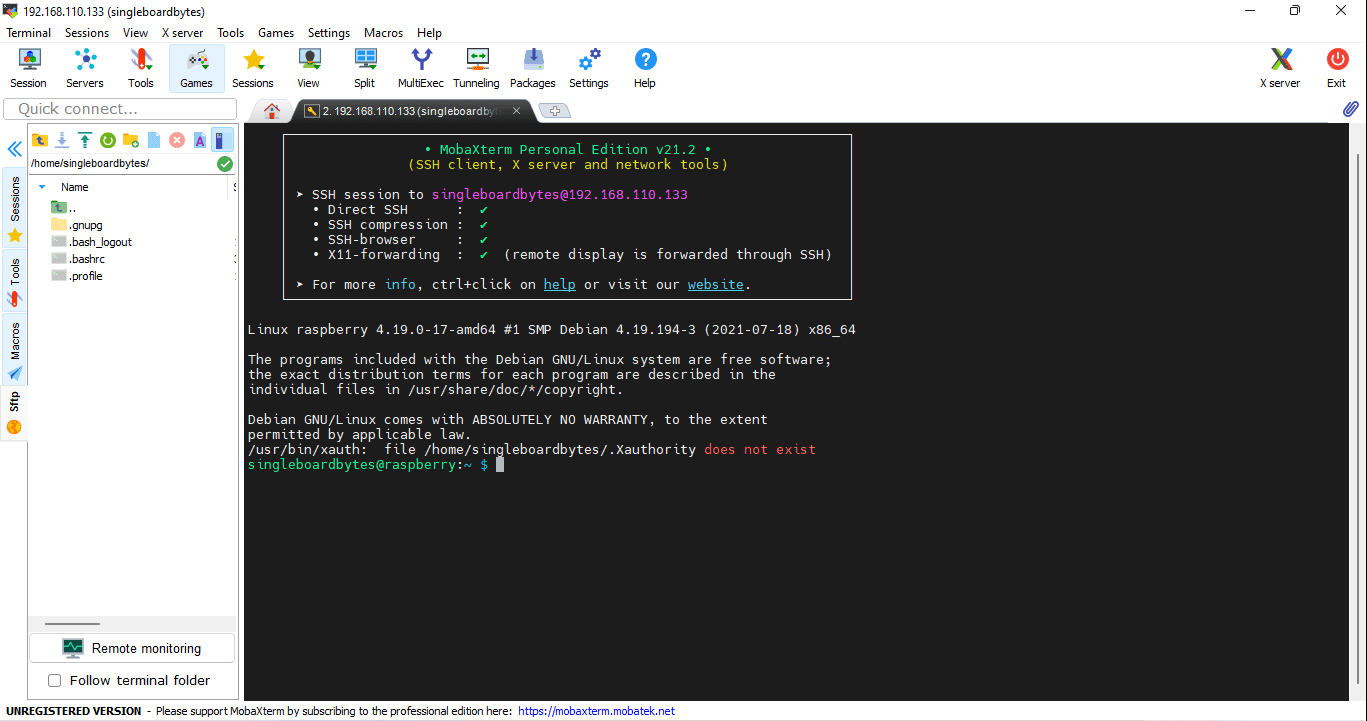
mobaxterm successfully connected to raspberry pi
You have successfully created a remote connection to your Raspberry Pi using MobaXterm.
How to get the IP address and remotely connect to your Raspberry Pi
Once you are done with setting up MobaXterm software on your Windows operating system, you will require the IP address of your Raspberry Pi to connect remotely. Finding the IP address is vital to enable remote connection of any devices. To know the IP address of the Raspberry device you use on your network, run this command on the command line:
ifconfig
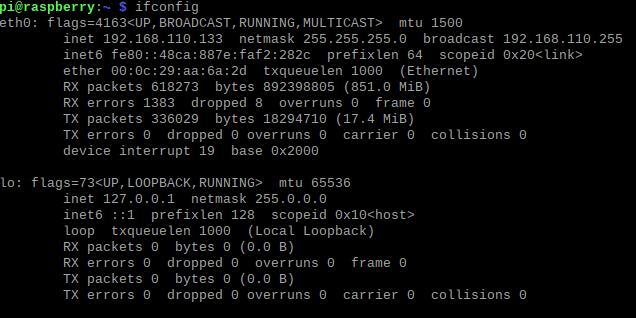
Raspberry Pi ifconfig
Once you find the IP address, then follow the steps below to connect to your Raspberry Pi using MobaXterm remotely:
Step 1: Click on the ‘session’ icon at the top left corner of your screen and select the ‘SSH’ icon; then fill in your ‘basic SSH settings.’ On this level, ‘remote host’ is the IP address of your Raspberry Pi and the default username usually used is ‘pi.’
Select Session on the welcome screen
Note: We shall use the username “singleboardbytes” for this tutorial’s sake, which we created earlier. If you haven’t made any username, stick to the defaults whereby the username is ‘pi,’ and the password is “raspberry.”
Step 2: On the ‘bookmark settings’ tab, change the ‘session name.’ This step is important. Remember to check on the ‘lock terminal title’ and choose the desired icon for your Raspberry Pi.
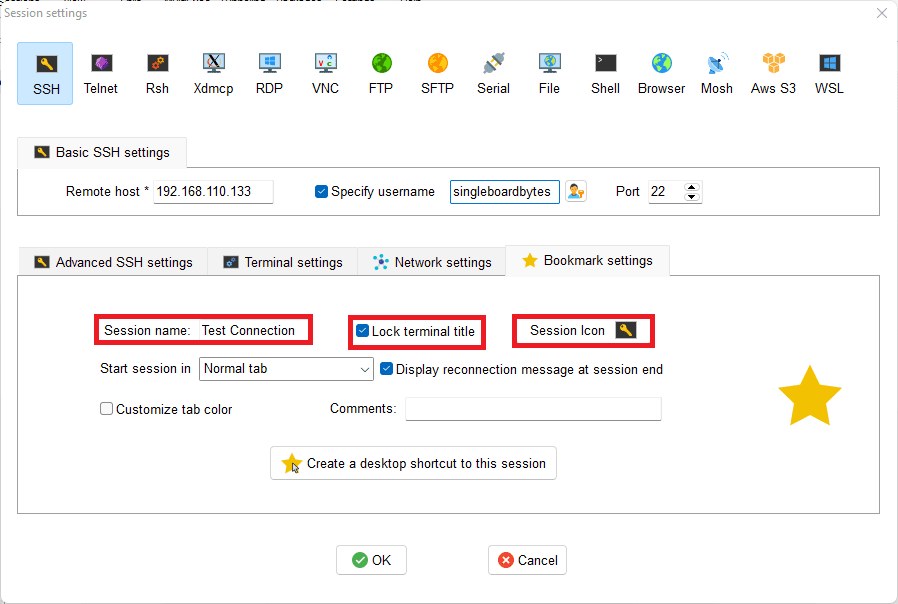
mobaxterm changing session name
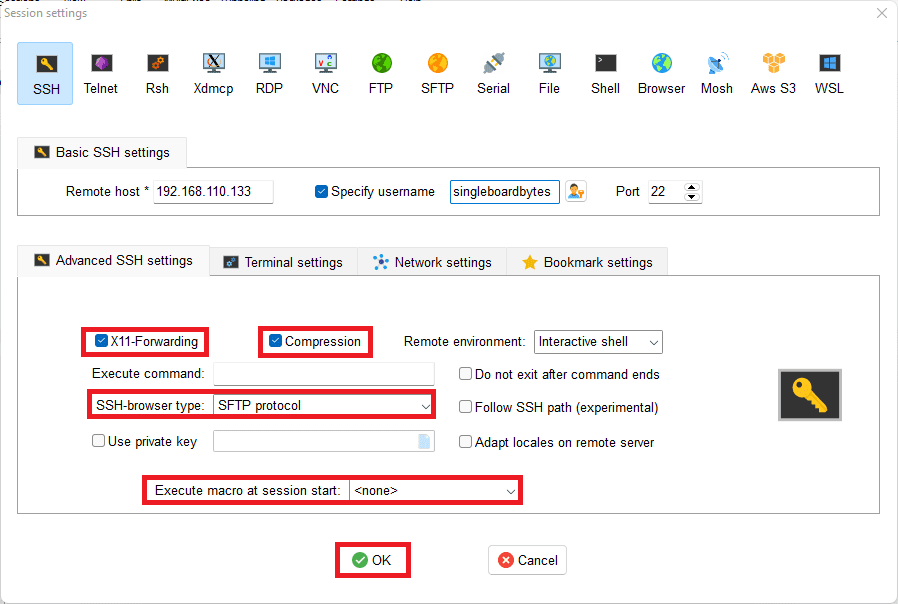
Step 3: On the ‘Advanced SSH settings’ tab, put a check on the ‘X11-Fowarding’ and ‘compression’ boxes. Ensure the SSH browser type is ‘SFTP protocol’ and ‘execute macro at session start’ is ‘none.’ Then click ‘OK’ to finish the setup and save.
mobaxterm advanced settings
Note: If you intend to send large files through the remote connection, choosing the ‘SCP’ option on the SSH browser type is preferable as this will be faster enough. Besides, if you want to add more than one session, it is recommended to try out the “Professional Edition” since the “Home Edition” allows up to twelve sessions only.
Finally, if you intend to edit, duplicate or delete one of the sessions, right-click the session on the session list and click on any of the mentioned actions.
Performing Tasks on your Raspberry Pi through the Remote Connection:
File management:
This action can be performed using the browse directory by double-clicking it. By ticking on the ‘follow terminal folder’ box, you will navigate through directories and update the folder tree situated on the left-hand side of your screen so it matches your directory.
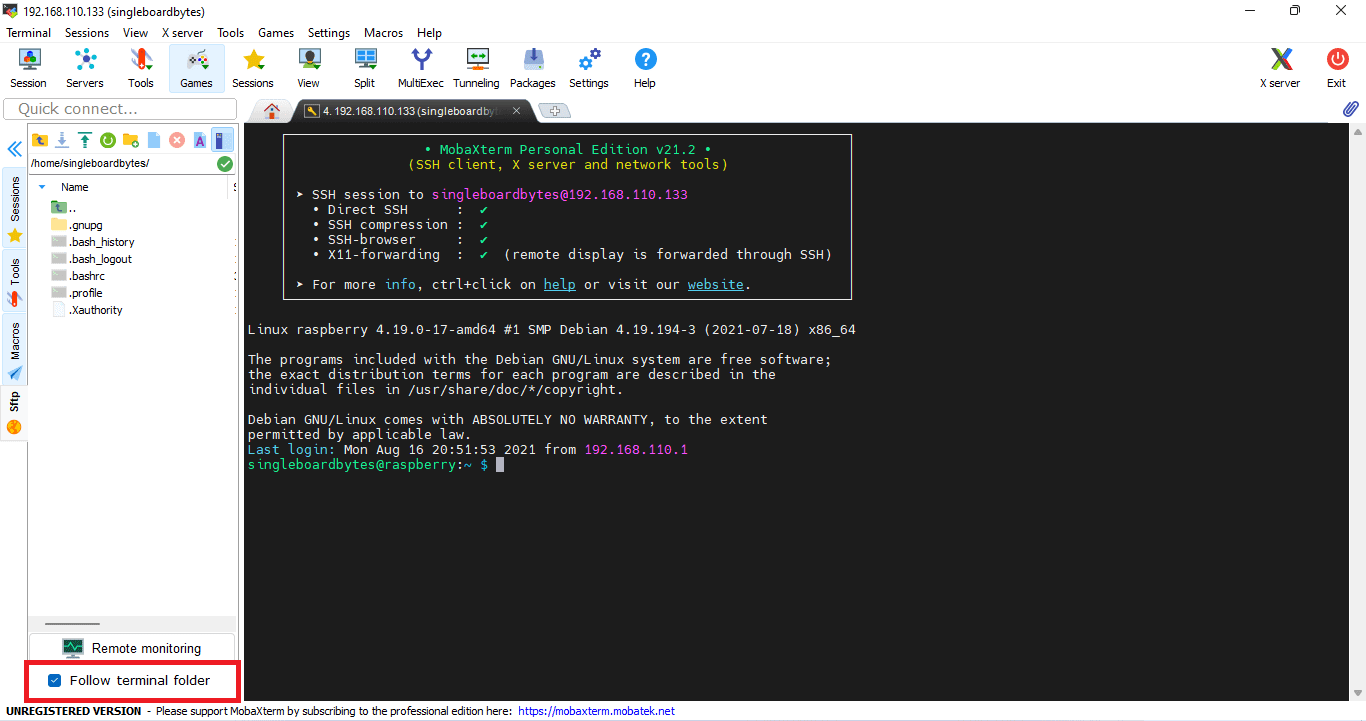
mobaxterm follow terminal folder
To manage files on your Raspberry Pi through the remote connection, drag them from the raspberry system and drop them into your computer. This is much better than dragging them from your computer into the Raspberry Pi. To create new items or delete them, right-click on this area and select the preferred option.
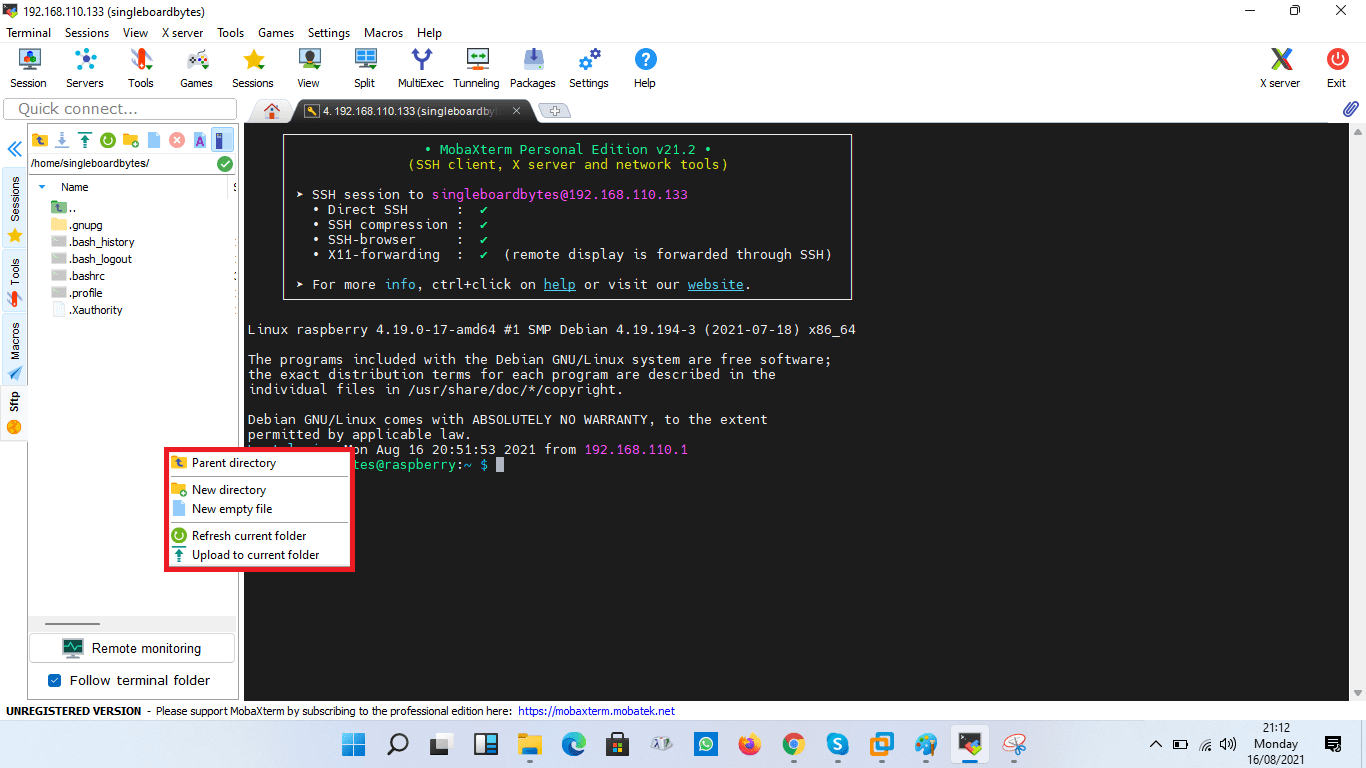
mobaxterm right-click options
Editing Text files:
To edit files, open the file browser and search for the specific file you want to edit. Then, please right-click on the file and launch it into the text editor. Using the ‘ open with ‘ function, you will need to choose the text editor you need to use, either MobaXterm or Windows.
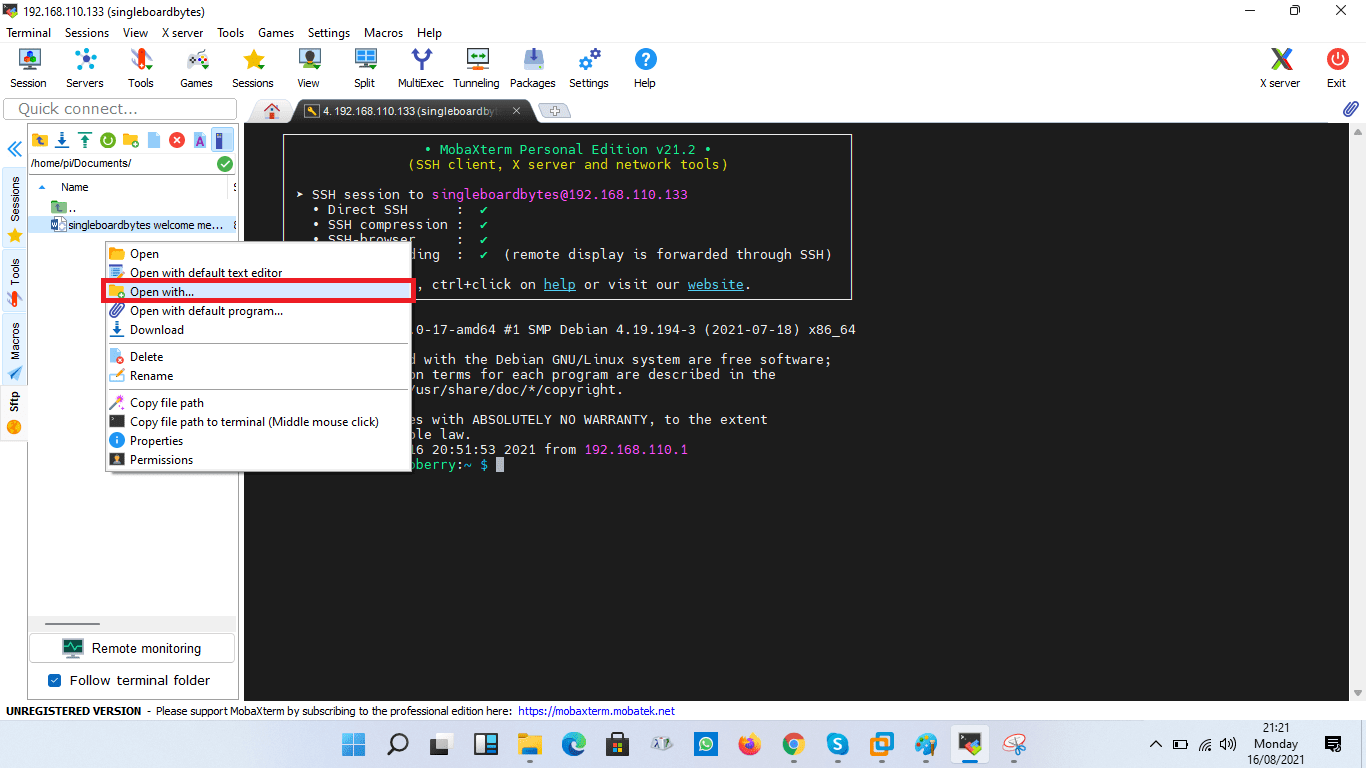
mobaxterm edit text using the open with function
After it has launched, it is now possible to edit it and make new changes directly on the Raspberry Pi. Through this method, editing complex projects can be much easier as you use the full power of your computer to cut and paste the manipulative text files. This process would be much slower when using your Raspberry Pi.
Rebooting and Reconnection of the Pi
To reboot the Raspberry Pi, on the MobaXterm’s command line, type the command
sudo reboot
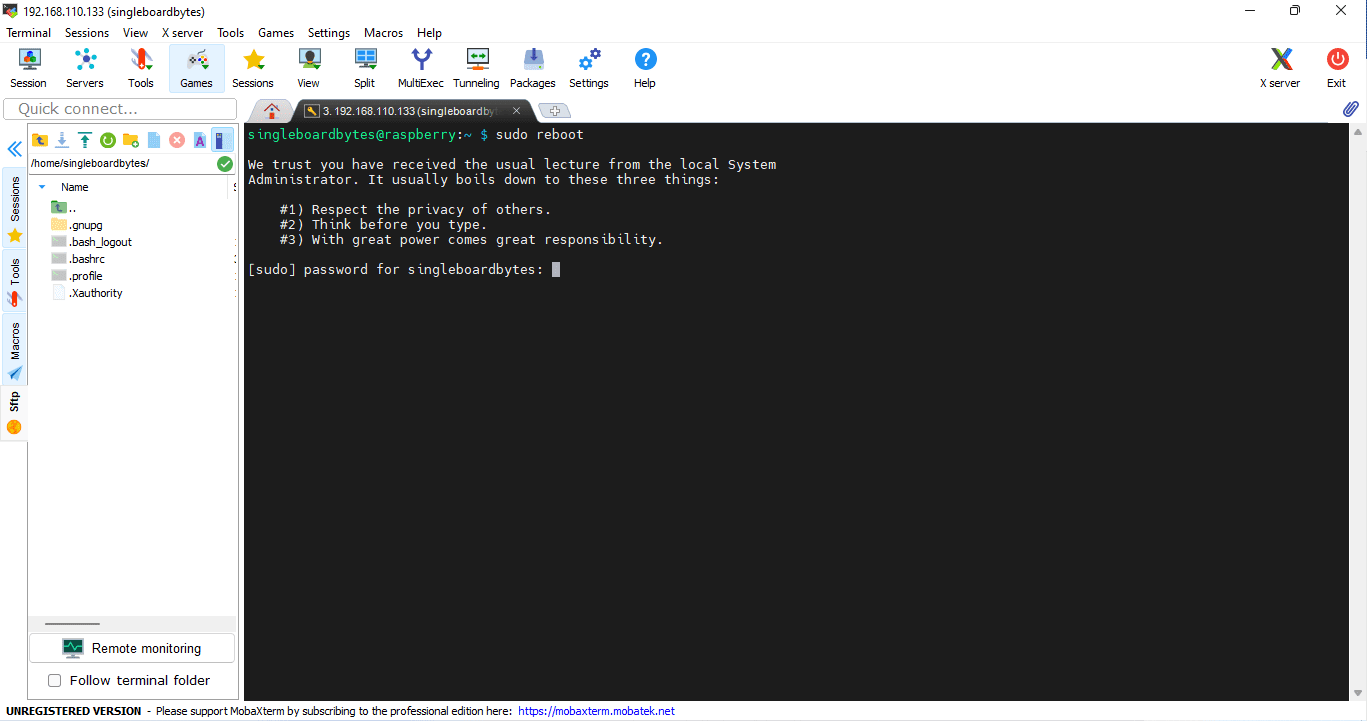
rebooting and reconnecting the raspberry pi using mobaxterm
This command immediately breaks the connection to the MobaXterm application, and it prompts a text saying ‘session stopped.’ To reconnect, you have to wait for the Raspberry Pi to power back on and then press the ‘R’ key in the MobaXterm. You can then go on with whatever process you intended to do.
If you have a Windows computer and needed to remotely access your Raspberry Pi, using the MobaXterm application would be preferable. Not only is this application’s interface clean and easy to use, but it also offers the ability to save your current sessions, access your Raspberry Pi’s files, and the ability to edit your files.
Conclusion
Connecting your Raspberry Pi remotely to your Windows operating system is much easier when you use MobaXterm. As shown in this article, all the essential details and processes have been reviewed. Therefore we hope you won’t experience any challenges when remotely connecting your Raspberry Pi using MobaXterm. Feel free to interact with us via the comment section if you encounter any challenges regarding the above subject matter.