
Sometimes instead of using your Raspberry Pi directly, you might need to use it remotely through another PC. Many programs enable you to do just that very easily. One of the most popular programs is PuTTY, and we will show you how to use it today.
Introduction
PuTTY enables remote connection to a Raspberry Pi and any device capable of using SSH or Telnet or raw rocket connections (the TTY is PuTTY probably stands for teletypewriter, which is significant in Linux history). The protocol that we will be using here is the SSH protocol, which stands for Secure SHell. The SSH protocol provides a terminal interface to your Raspberry Pi, and if you’re familiar with Linux by now, you know that the terminal interface can do almost anything.
Interface

PuTTY
The interface of Putty is quite simple. No flashy UI components at all, just straight to the point. There is a panel on the left that shows all the categories and sub-categories available to the user. On the right, depending on what category you have chosen, it shows the options that are made available.
Features
Components Available
PuTTY has multiple valuable components that can be used for different purposes. Knowing these will help you to understand just how much you can do with PuTTY. Some of the components are:
PuTTY
This is the component containing the Telnet, rlogin, raw socket, and SSH client. This component is used to gain command-line access to the device that we wish to connect to, much like a terminal open on your very own system.
PSCP
This is an SCP client which is used to copy files across the connection securely. It can also use SFTP to send files, which is a standard and helpful file transferring protocol.
PuTTYtel
This is a Telnet-only client. Telnet is a protocol that enables users to establish a two-way connection between two systems, which can exchange messages through the terminal.
Session Settings
This is the application’s main window, which takes in the information needed to connect to another system. It also holds the list of saved logins and settings.
Window Settings
The window configurations give you options regarding the appearance and behavior of the terminal window that will be provided to you once the connection is established. You can configure the size, scrollback capacity, colors, fonts, titles, and many other factors.
Other
Other settings, which include keyboard and connection settings, offer users a wide variety of options regarding the nature of the connection that will be established. You can add proxies, specify automatic usernames, and other minute details.
Setup
For PuTTY to work on the Raspberry Pi, there are two things necessary: first that you have to have SSH enabled on your Raspberry Pi, and second that you have to know the IP address of your Raspberry Pi. Ensure that the system you are using, PuTTY and the Raspberry Pi are connected to the same network. That is essential. For these initial setup requirements, you will need access to your Raspberry Pi OS through a display. Later on, you can use a headless (without a display) setup if you want to.
Enabling SSH
Go to the application menu, enter the category ‘Preferences’, and click on ‘Raspberry Pi Configuration’ to enable SSH. Here, go to the tab with the title ‘Interfaces’ and under the title of ‘SSH’, click on ‘Enable’, then ‘OK’.
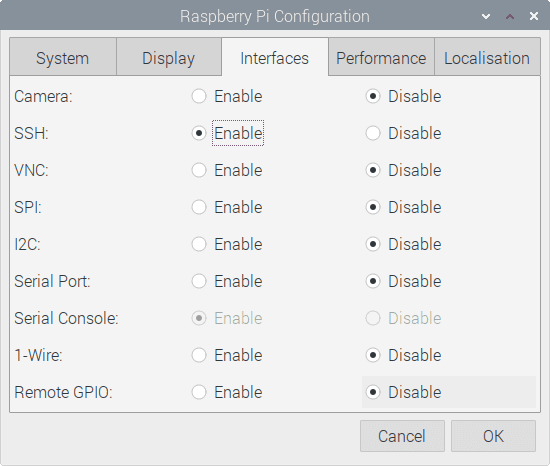
Enabling SSH
Obtaining IP Address
To know the IP address, enter the command:
hostname -I
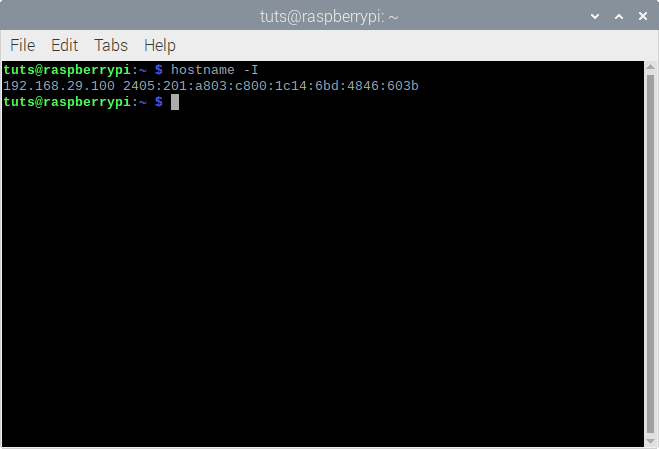
IP Address
The first section of the output is your IP address, like in this case, 192.168.29.100.
The issue with IP address is that it is dynamic. It constantly keeps changing, and the IP address that you find out the way mentioned above will remain only temporarily. If you require logging into your Raspberry Pi more than once using PuTTY, see the topic of static IP in the next section.
Setting Up Static IP Address
Resolving the issue of dynamic IP address, we will set up a static IP address for the Raspberry Pi. A few components of the network are necessary for setting up the static IP address, namely the DNS IP address, gateway IP address, and the choice of the static IP address.
Deciding the Static IP Address
To be on the safe side, use the IP address being used by the Raspberry Pi at the time of the setup as the static IP address. If you use some other IP address of your wish, there is a chance it might intersect another device that is already connected to the system. So to find the IP address, open up a terminal, and enter:
hostname -I
The first section of the output is the IP address being used.
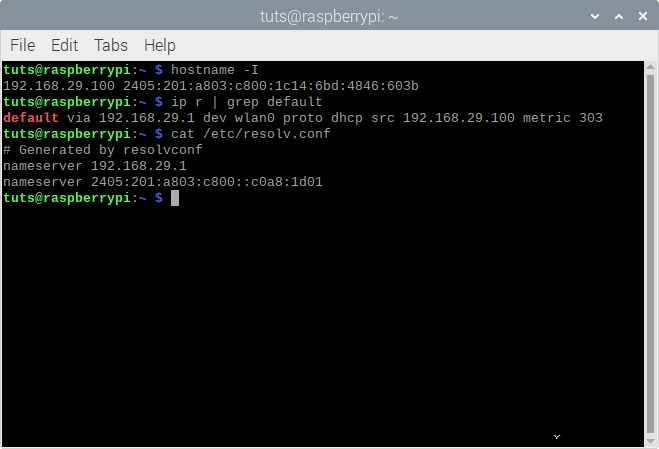
Finding Gateway IP Address
To find the gateway IP address, enter:
ip r | grep default
The number after ‘default via’ is the gateway IP address.
Finding DNS IP Address
To find the DNS IP address, enter:
cat /etc/resolv.confThe set of numbers next to ‘nameserver’, with four sections, is the DNS IP address.
Static IP Required Information
Static IP Configuration
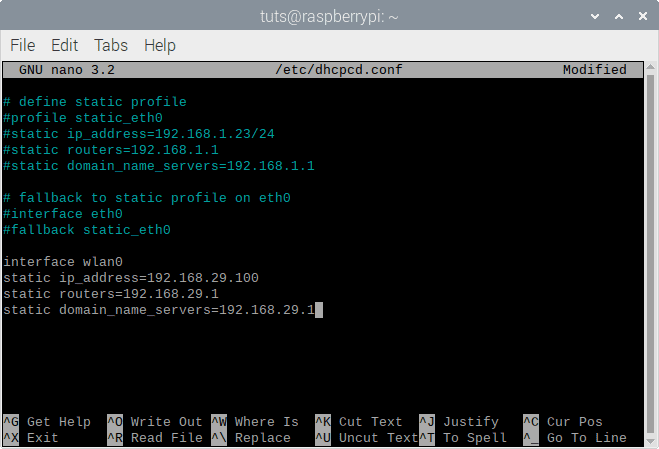
Finally, open up another terminal and enter:
sudo nano /etc/dhcpcd.conf
Scroll down with the arrow key until the end of the file and enter the text given below:
interface [Interface]
static ip_address=[IP Address]
static routers=[Gatway IP Address]
static domain_name_servers=[Static DNS Address]
Here, replace ‘Interface‘ with eth0 if you plan to use a wired connection or wlan0 if you plan to use a wireless one. Next, replace ‘IP Address‘ with the IP you found from the first command, replace ‘Gateway IP Address‘ with the one you found using the second command and finally replace ‘Static DNS Address‘ with the one you found using the third command.
Static IP Address Set Up
Please save the file by pressing Ctrl-X and then Y.
Reboot
Finally, reboot your Raspberry Pi to allow the static IP address configuration to take place. Enter:
sudo reboot
To check if the process worked, enter the command:
hostname -I
and see if the shown IP address is the same as the one that you set just now.
Connecting to your Raspberry Pi using PuTTY
To use PuTTY, open it up and enter the IP address that you just obtained from your Raspberry Pi, or set it up as the static IP address in the given space, and click on ‘Open‘. It is as simple as that.
PuTTY Connect
On the first login, you will be asked for confirmation to log into the system. Click on ‘Accept’.
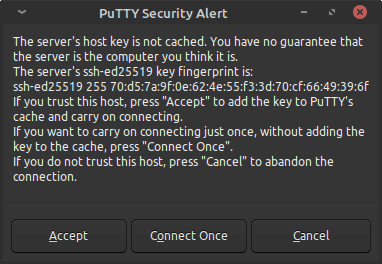
Confirmation
After that, you will be asked to provide the name of the user and the password. In most cases, the default user is used, which is pi. The password will be known by you, as set in the initial setup of your Raspberry Pi.
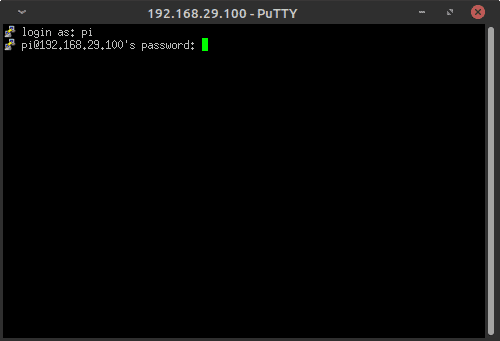
Credentials
Now you have access to the command line of your Raspberry Pi, and you can use it as you directly would use your system.
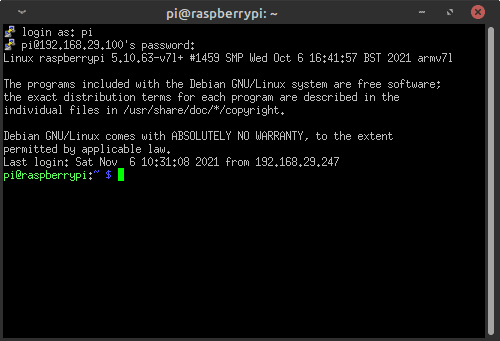
PuTTY Terminal Access
Installation
PuTTY is available in the repositories of all the major Linux distributions.
Ubuntu and Derivatives
To install PuTTY, enter:
sudo apt install putty
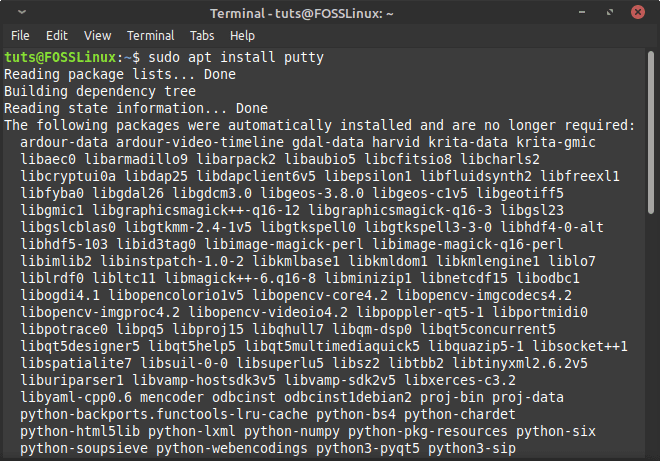
PuTTY Installation
Arch Linux
Enter:
sudo pacman -S putty
Fedora
On Fedora, enter:
sudo dnf install putty
Windows
For windows, you can get the installation file here.
Conclusion
PuTTY has been around quite a while and is a tried and tested SSH client. It works flawlessly and is reliable software. Once you get past the initial static IP address setup, it becomes straightforward to use PuTTY, opening up a new realm of possibility. The next time you need your Raspberry Pi, there’s no need to do a complete setup with a display, keyboard, and mouse. Instead, plug the power in, wait a few seconds, and log in through PuTTY. It is as easy as it gets. We hope you found this article helpful. Cheers!
1 comment
Hi,
I have followed same instruction, by creating static ip address. But not connecting using putty. connection time out error is showing.
kindly provide some solution.
Thanks