
Kubernetes is a known enterprise-grade orchestration system container designed to be cloud-native from the start. It has matured into the de-facto cloud container manifesto, continuing to develop as it has embraced innovative technologies, such as server-less computing and container-native virtualization.
Kubernetes manages containers from the micro-scale at the edge to the massive scale in public and private cloud environments. Running a local Kubernetes cluster on Raspberry pi hardware is a great way to gain experience managing and developing on an actual cloud technology giant.
Installing a Kubernetes cluster on Raspberry Pi
This tutorial will show you how to install a Kubernetes 1.18.2 cluster on three or more Raspberry Pi 4s running on Ubuntu 20.04. Ubuntu 20.04 offers a Raspberry Pi-focused 64-bit ARM (ARM64) image with a 64-bit kernel and userspace. Since the goal is to use the Raspberry Pis for running a Kubernetes cluster, running AArch64 container images is essential: it can be challenging to find 32-bit images for common software or even standard base images. Ubuntu 20.04 lets you use 64-bit container images with Kubernetes and its ARM64.
AArch64 vs ARM64; 64-bit vs32-bit; ARM vs x86
Although AArch64 and ARM64 are effectively the same, their different names arise from their use within diverse communities. Most container images labeled AArh64 will run on systems labeled ARM64. Systems with AArch64/ARM64 architecture can run 32-bit ARM images, but the opposite is not: 32-bit ARM systems cannot run 64-bit container images. This is why Ubuntu 20.04 ARM64 image is so helpful. It is worth observing that ARM64/AArch64 and x86_64 architecture differs, and Kubernetes nodes running on 64-bit ARM architecture cannot run container images built for x86_64.
Requirements
You will need the following requirements for this exercise:
• 3 (or more) Raspberry Pi 4s (preferably 4GB RAM models)
Installing Ubuntu 20.04 ARM64 on all the Raspberry Pis
Configuring the hosts
After Ubuntu is installed on the Raspberry Pis and accessible via SSH, you must make a few changes before installing Kubernetes. These changes are:
Install and configure Docker
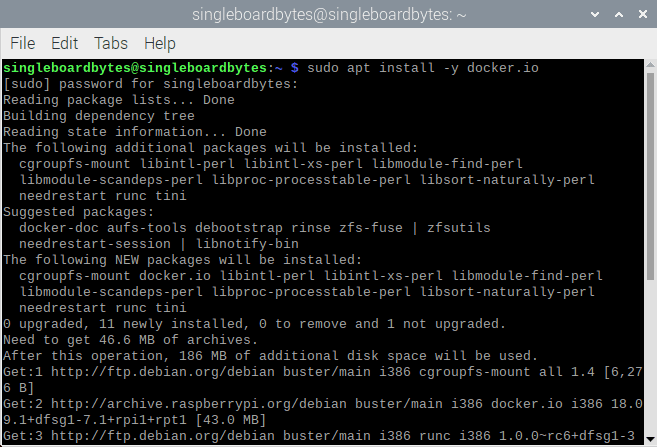
Ubuntu ships the most recent version of Docker, v19.03, in the base repositories and installed directly using the apt command. Do note that the package is named docker.io. Install the Docker on all Raspberry Pis by executing the following command:
sudo apt install -y docker.io
sudo apt install docker
After the package is installed, you will need to make changes to enable Control Groups (cgroups). Cgroups permit the Linux kernel to isolate and limit resources. This will allow Kubernetes to manage better resources used by the containers it runs and increase security by separating containers from one another.
Check the output of docker info before you make the following changes on all the Raspberry Pis:
#Check 'docker info.'
#Some output omitted
sudo docker info
(...)
Cgroup Driver: cgroups
(...)
WARNING: No memory limit support
WARNING: No swap limit support
WARNING: No kernel memory limit support
WARNING: No kernel memory TCP limit support
WARNING: No oom kill disable support
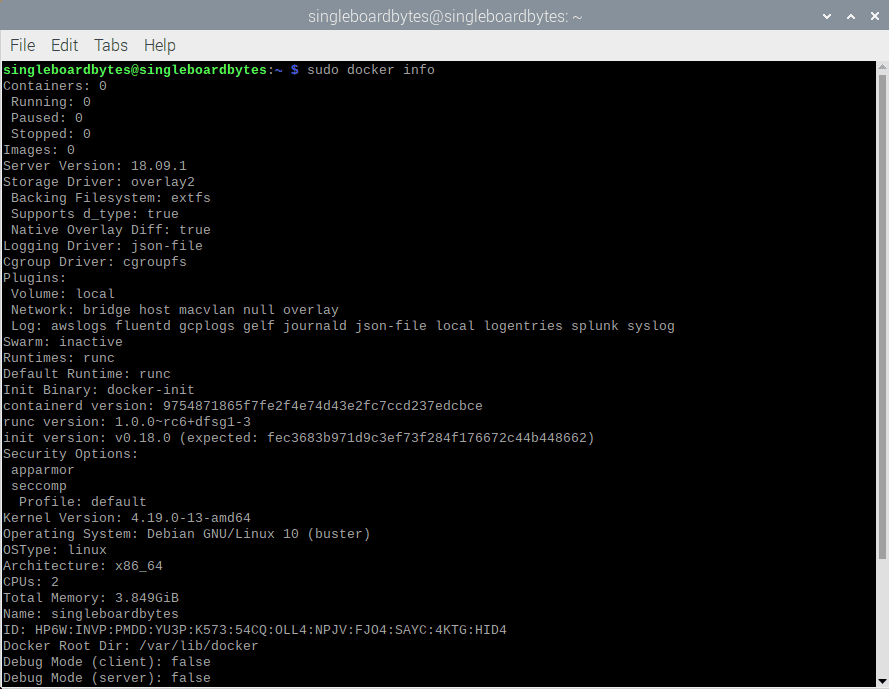
Docker info
The above output highlights the parts that need to be changed: the cgroup driver and limited support.
First, modify the default cgroups driver Docker uses from cgroups to sytemd to grant systemd to act as the cgroups manager. This will ensure there is only one cgroup manager in contention. Kubernetes endorses this method since it propagates for system stability. To do this, replace or create the /etc/docker/daemon.json file with:
sudo cat > /etc/docker/daemon.json <<EOF
{
"exec-opts": ["native.cgroupdriver=systemd"],
"log-driver": "json-file",
"log=opts": {
"max-size": "100m"
},
"storage-driver": "overlay2"
}
EOF
Enable cgroups limit support
Next, you should enable limit support, as shown by the warnings in the docker info output. You require to modify the kernel command to enable these options during boot. For the Raspberry pi 4, add these to the /boot/firmware/cmdline.txt file:
cgroup_enable=cpuset
cgroup_enable=memory
cgroup_memory=1
swapaccount=1
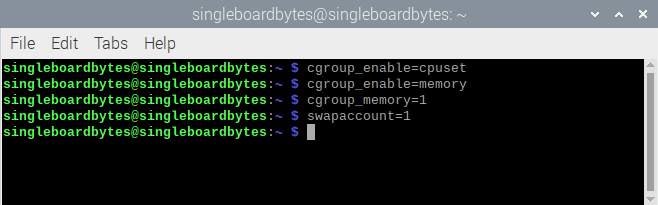
Enable cgroups limit support
You should ensure that they are added to the end in the cmdline.txt file. You can accomplish this in one line by using sed:
#Appending the cgroups and swap options to the kernel command line
#Note the space before "cgroup_enable=cpuset" is used to add a space after the last existing item on the line
$ sudo sed -i '$ s/$/ cgroup_enable=cpuset cgroup_enable=memory cgroup_memory=1 swapaccount=1/' /boot/firmware/cmdline.txt
The sed command matches the line termination (embodied by the first $) and should be replaced with the listed options since it effectively appeals to the strings options. After making these changes, Docker and the Kernel should now be configured as needed for Kubernetes. Reboot the Raspberry Pis. When they come back up, recheck the output of docker info. The cgroups driver will be systemd, and the warnings will be gone.
Allow iptables to see bridged traffic
According to the documentation, Kubernetes will need iptables to be configured to see bridged network traffic. You can do this by changing the systctl config:
#Enable net.bridge.bridge-nf-call-iptables and -iptables6
cat <<EOF | sudo tee /etc/sysctl.d/k8s.conf
net.bridge.bridge-nf-call-ip6tables = 1
net.bridge.bridge-nf-call-iptables = 1
EOF
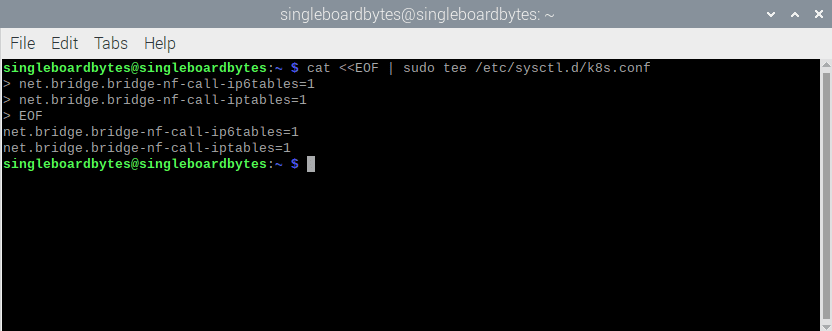
Allow iptables to see bridged traffic
$ sudo sysctl –system
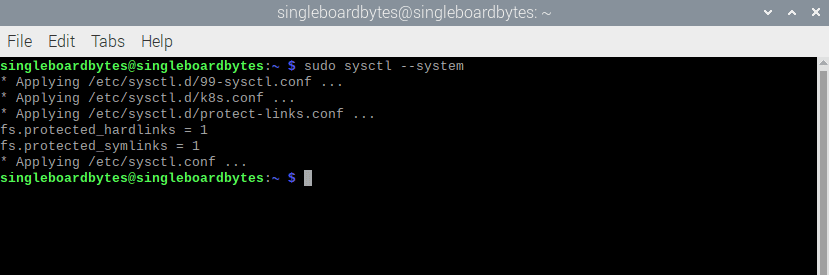
sysctl system
Install Kubernetes packages for Ubuntu
Since Ubuntu you are using, you can install the Kubernetes packages from the Kubernetes.io Apt repository. There isn’t currently a repository for Ubuntu 20.04, but Kubernetes 1.18.2 is available in the last Ubuntu LTS repository: Ubuntu 18.04. the up to date Kubernetes packages can be installed from that repository. Add the Kubernetes repository to Ubuntu’s sources:
#Add the packages.cloud.google.com atp key
$ curl -s https://packages.cloud.google.com/apt/doc/apt-key.gpg | apt-key add -
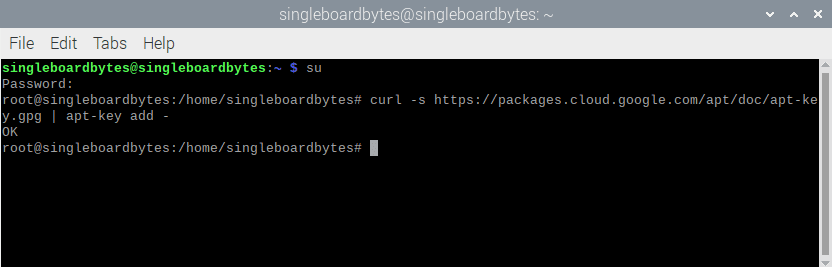
Add the packages.cloud.google.com atp key.
#Add the Kubernetes repo
cat <<EOF | sudo tee /etc/apt/sources.list.d/kubernetes.list
deb https://apt.kubernetes.io/ kubernetes-xenial main
EOF
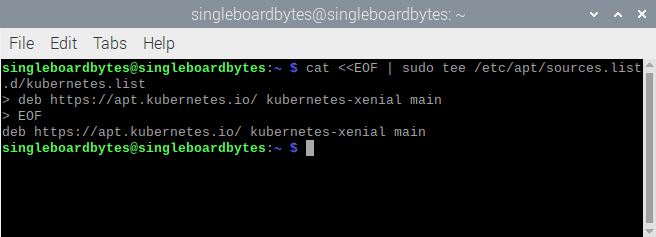
Add the Kubernetes repo.
When Kubernetes adds an Ubuntu 20.04 repository or the next Kubernetes version is released, make sure to switch to it.
After the repository is added to the sources list, install all three Kubernetes packages required: kubelet, kubeadm, and kubectl:
#Update the apt cache and install kubelet, kubeadm andkubectl
#(Output omitted)
$ sudo apt update && sudo apt install -y kubelet kubeadm kubectl
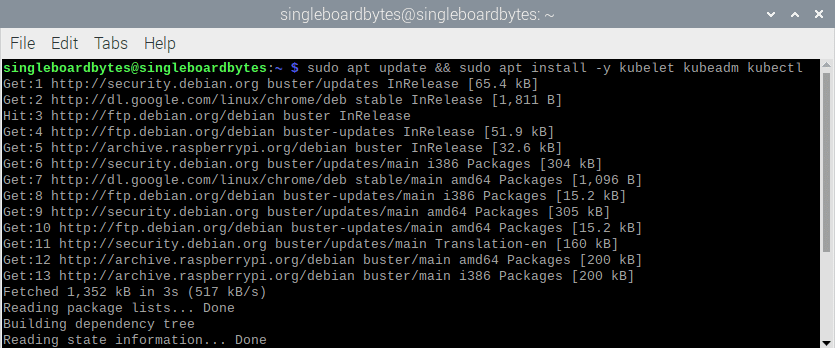
install kubelet kubeadm and kubectl
Finally, use the apt-mark hold command to disable all regular updates of the three packages. Upgrades to Kubernetes will demand manual attention and will require more hand-holding than is achievable with the general update process:
#Disable (mark as held) updates for the Kubernetes packages
$ sudo apt-mark hold kubelet kubeadm kubectl
kubelet set on hold
kubeadm set on hold
kubectl set on hold
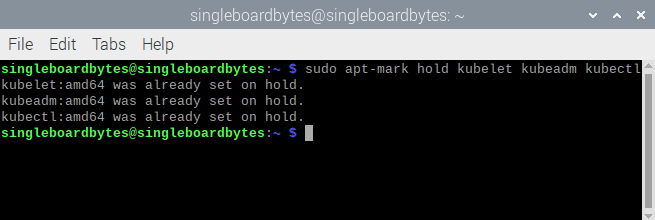
Disable updates for the Kubernetes packages
Now that you are done with the Host configuration, you can now move on to setting up Kubernetes itself.
Creating a Kubernetes cluster
With the Kubernetes packages installed, you can now continue with creating a cluster. Before starting the process, you will need to make some decisions. First, one of the Raspberry Pis will need to be designated the Control plane node. The remaining nodes will be assigned as compute nodes. You will also need to pick a network CIDR that you will use for pods in the Kubernetes cluster. Setting the pod-network-cidr during the cluster creation will ensure that the pod CIDR value is placed and utilized by the CNI (Container Network Interface) add-on later.
This exercise utilizes the Flannel CNI. The CIDR you pick shouldn’t overlap with any CIDR currently used within your home network or one managed by your router or DHCP server. Remember to use a subnet that is larger than you expect to need; there are always more pods than you initially plan for.
With those decisions made, you can initialize the Control Plane node.
Initializing the Control Plane
Kubernetes takes into account a bootstrap token to authenticate nodes that are to be joined to the cluster. This token requires to be passed to the kubeadm init command while initializing the Control Plane node. Create a token that you will use alongside the kubeadm token generate command code:
#generating a bootstrap token to authenticate nodes joining the cluster
$ Token=$(sudo kubeadm token generate)
$ echo $Token
d584.xupvwv7wllcpmwjy
You will now be ready to initialize the Control Plane using the kubeadm init command:
# initialize the Control Plane
#(output omitted)
$ sudo kubeadm init –token=${TOKEN} –kubernetes-version=v1.18.2 –pod-network- cidr=10.244.0.0/16
If the whole process is successful, you will see something similar to this:
Your Kubernetes control plane has initialized successfully.
Run the codes below as a regular user to use your cluster:
mkdir -p $HOME/.kube
sudo cp -i
/etc/kubernetes/admin.conf
$HOME/.kube/config
sudo chown $(id -u):$(id -g)
$HOME/.kube/config
It would be best if you now stationed a pod network onto the cluster.
Run the command “kubectl apply -f [podnetwork].yaml” with one of the following options listed:
https://kubernetes.io/docs/concepts/cluster-administration/addons/
At this point, you can join any number of worker nodes by running the following on each as root:
kubeadm join 192.168.2.114:6443 –token zqqoy7.9oi8dpkfmqkop2p5 /
--discovery-token -ca-cert-hash
sha256:71270ea137214422221319c1bdb9ba6d4b76abfa2506753703ed654a90c4982b
Remember two things; First, the Kubernetes kubectl connection information has been copied to /etc/kubernetes/admin.conf. This file(kubeconfig file) can be copied to ~/.kube/config for the root/a regular user on the master node or a remote machine. You may now use the kubectl command to manage your cluster. Second, the last line of the output, which begins with Kubernetes join, is a command that you can use to add additional nodes to the cluster.
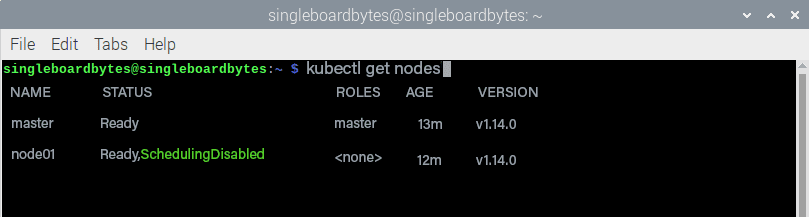
After copying the new kubeconfig to somewhere the user can use it, you can validate that the control plane has been installed with the kubectl get nodes command.
#show the nodes in the Kubernetes cluster
#your node name will vary
$ kubectl get nodes
NAME STATUS ROLES AGE VERSION
master Ready master 13m v1.14.0
node01 Ready,SchedulingDisabled <none> 12m v1.14.0

kubectl get nodes
Installing the CNI add-on
The CNI add-on handles configuration and cleanup of the pod networks. As mentioned earlier, this exercise will use the Flannel CNI add-on. Since the pod CIDR value is already set, you can download the Flannel YAML and use kubectl apply to install it into the cluster. To do this on one line, use kubectl apply -f – to take the data from standard input. This will create the ClusterRoles, ServiceAccounts, DaemonSets, etc., which are necessary to manage the pod networking.
#Downloading the flannel YAML data and apply it
#(Output is omitted)
$ curl -sSLhttps://raw.githubusercontent.com/coreos/flannel/v0.12.0/Documentation/kube- flannel.yml | kubectl apply -f -
Joining Compute nodes to the cluster
Now it is time to add compute nodes to the cluster since the CNI add-on is in place. You must run the kubeadm join command after the Kube init command to initialize the Control Plane node. Log into the host and run the following command to add the additional Raspberry Pis to your cluster:
#joining a node to the cluster. Your tokens and ca-cert-hash will vary.
$ sudo kubeadm join 192.168.2.114:6443 - -token zqqoy7.9oi8dpkfmqkop2p5 /
--discovery-token -ca-cert-hash
sha256:71270ea137214422221319c1bdb9ba6d4b76abfa2506753703ed654a90c4982b
After completing the join process on each node, you should be able to see the new nodes in the output of kubectl get nodes:
#showing the nodes in the Kubernetes cluster
#your node name will vary
$ kubectl get nodes
NAME STATUS ROLES AGE VERSION
master Ready master 13m v1.14.0
node01 Ready,SchedulingDisabled <none> 12m v1.14.0
kubectl get nodes
Validating the cluster
You’ll now have a fully functioning Kubernetes cluster. Create a new namespace, deployment, and service to test that the cluster is up and running. Make sure the pods are operating and the deployment is responding as intended. To create a namespace, use the following commands (the namespace is named kube-verify):
#Creating a new namespace
$ kubectl create namespace kube-verify
#List the namespaces
$kubectl get namespaces
NAME STATUS AGE
default Active 63m
kube-node-lease Active 63m
kube-public Active 63m
kube-system Active 63m
kube-verify Active 19s
Now you should create a deployment in the new namespace:
# building a new deployment
$ cat <<EOF | kubectl create -f -
apiVersion: apps/v1
kind: Deployment
metadata:
name: kube-verify
namespace: kube-verify
labels:
app: kube-verify
spec:
replicas: 3
selector:
matchLabels:
app: kube-verify
template:
metadata:
labels:
app: kube-verify
spec:
containers:
- name: nginx
image: quay.io/clcollins/kube-verify:01
ports:
- containerPort: 8080
EOF
deployment.apps/kube-verify created
Kubernetes will start creating the deployment, consisting of three pods, each running the quay.io/clcollins/kube-verify:01 image. The new pods should be running after a minute or so. You can see them with kubectl get all -n kube-verify to list all the resources created in the new namespace:
#Checking the resources that were created by the deployment
$ kubectl get all -n kube-verify
NAME READY STATUS RESTARTS AGE
pod/kube-verify-5f976b5474-25p5r 0/1 Running 0 46s
pod/kube-verify-5f976b5474-sc7zd 1/1 Running 0 46s
pod/kube-verify-5f976b5474-tvl7w 1/1 Running 0 46s
NAME READY UP-TO-DATE AVAILABLE AGE
deployment.apps/kube-verify 3/3 3 3 48s

NAME DESIRED CURRENT READY AGE
replicaset.apps/kube-verify-5f976b5474 3 3 3 48s
You can view the new deployment, a replicaset created by the deployment, and the three pods created by the replicaset to fulfill the replicas: 3 requests in the deployment. You can see the Kubernetes internals are working.
You need to create a service to expose the Nginx “application” (the Welcome page in this case) running in the three pods. The service will act as a single endpoint over which you can connect to the pods:
#creating a service for the deployment
$ cat <<EOF | kubectl create -f -
apiVersion: v1
kind: Service
metadata:
name: Kube-verify
namespace: kube-verify
spec:
selector:
app: kube-verify
ports:
- protocol: TCP
port: 80
targetPort: 8080
EOF
service/kube-verify created
Now since the service is created, you can examine it and get the IP address for your new service:
#Examining the new service
$ kubectl get -n kube-verify service/kube-verify

NAME TYPE CLUSTER-IP EXTERNAL-IP PORT(S) AGE
kube-verify ClusterIP 10.98.188.200 <none> 80/TCP 30s
The output above shows that the kube-verify service has been assigned a clusterIP of 10.98.188.200. This IP is accessible from any of your nodes but not from outside of the cluster. To verify the containers inside your deployment are working, connect them to this IP:
#using curl to connect to the ClusterIP:
#(output truncated for brevity)
$ curl 10.98.188.200
<!DOCTYPE html PUBLIC "-//W3C//DTD XHTML 1.0 Strict //EN"
"http://www.w3.org/TR/xhtml1/DTD/xhtml 1-strict.dtd">
<html
xmlns="http://www.w3.org/1999/xhtml"
xml:lang="en" lang="en">
<head>
Your service is now running, and Nginx inside the containers is responding to your requests.
Conclusion
By following this article, you will have a running Kubernetes cluster on your Raspberry Pis with a CNI add-on (Flannel) installed and a test deployment and service running an Nginx web server. If you have any inquiries, be free to reach out to us from the comment section, and we will be happy to assist you.