
The Raspberry Pi machine is one of the top-grade and low-budget single-board PCs. If you are a tech fanatic, it opens the door for almost everything, from building a simple, smart security camera to a solar-powered Pi and game console. With that being said, you require a separate monitor or display unit to set up the Raspberry Pi, which appends to the total cost. Nevertheless, there is a great way to utilize your Windows laptop as a display unit for your Pi machine board without spending extra money purchasing a new monitor.
If you have been wondering about connecting your Pi machine to a laptop or a desktop computer, you need not since this article has you well covered. The key objective of connecting your Raspberry machine to a desktop computer or laptop is to have portability abilities, so you won’t have to connect to your displays repeatedly.
How the setup works
Your Pi machine can be connected to the laptop using Wi-Fi or ethernet. In our case, we prefer Wi-Fi over Ethernet to make the connection less wireless as possible. Several applications enable users to set up connections between their Raspberry Pi and a laptop/desktop. The most known or trusted one is the VNC server.
In computing, Virtual Network Computing (VNC) is just a graphical desktop-sharing system that utilizes the Remote Frame Protocol to control another PC remotely. The software transmits the keyboard and mouse input from one PC to another, relaying the screen updates via a network.
As such, the VNC ideally allows you to view the Raspberry Pi desktop remotely. Due to this, you have the flexibility of keeping your Pi board anywhere in your house and controlling it while seated in another corner.
Prerequisites:
Hardware:
- A laptop or a PC
- Stable Wi-Fi connection
- SD card for Raspbian OS
- A Raspberry Pi
- A PC to create the USB drive installer
- Etcher/Win32 Disk Imager
How to connect Pi to your PC or laptop?
As said earlier, connecting a laptop to a Raspberry Pi is a long process. Because of this, we will be writing in steps to ease the procedure.
Step 1: Install Raspberry Pi OS
We need to install the Pi OS on the SD card to get the process underway. We suggest installing the well-known RaspberryOS with desktop and recommended software from this link. The Raspberry OS offers you a fully functional desktop condition and many programming tools and features. There are several available versions for the Raspberry Pi OS, but we suggest going with Raspbian Buster with a desktop for the complete-featured version. You can selectively download the Zipped file or go with the torrent version.
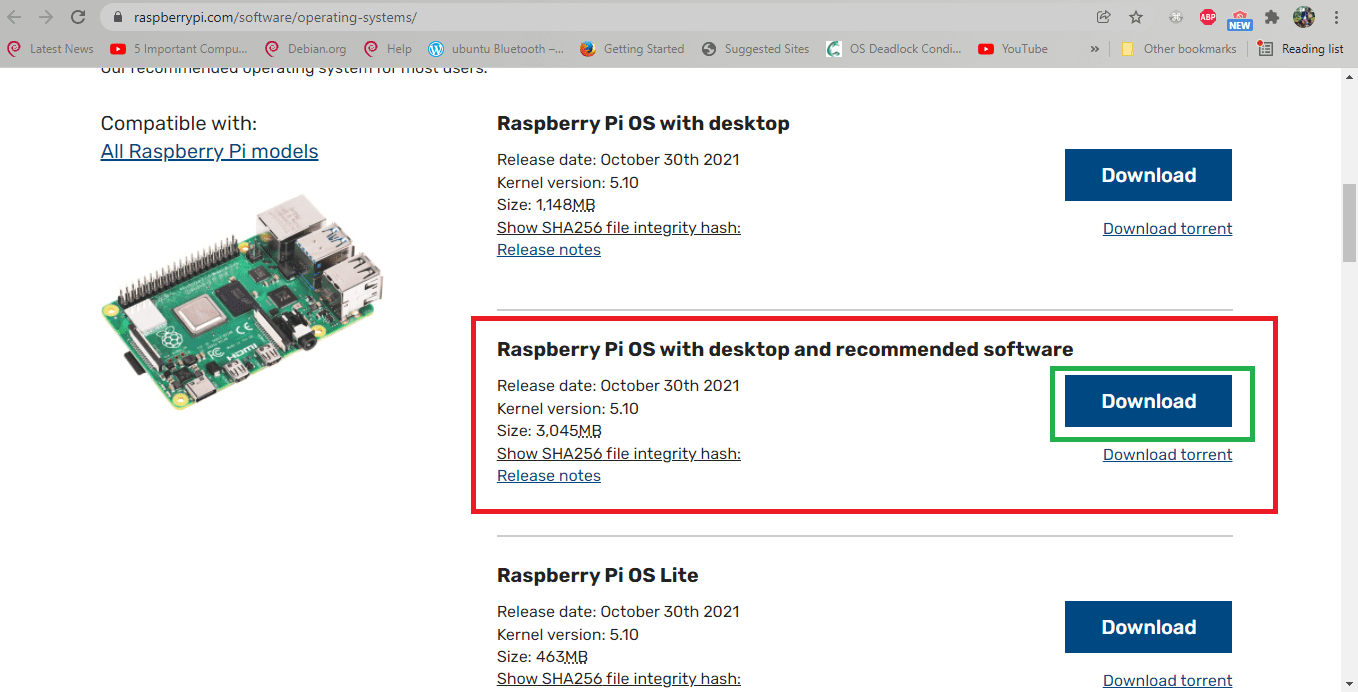
software download section
Next, extract the files of the operating system.
For writing a Raspbian image on the SD card, you must download Win32 Disk Imager or Etcher. In our course, we will go with the Win32 Disk Imager. So go ahead and download the software using the given links. After that, install and launch the application to select the downloaded Raspberry Pi OS as an image in the input box.
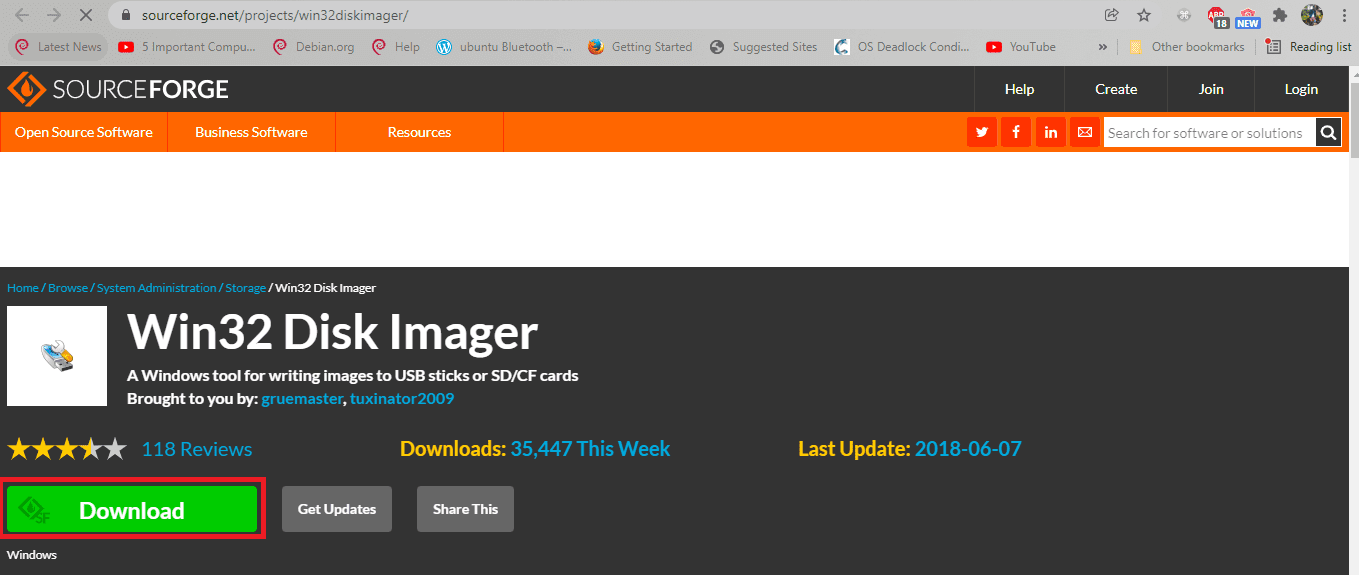
Disk imager download
After that, insert the SD card, and please ensure you flash to the correct SD card; otherwise, you will unknowingly lose all your data.
Next, select the RaspberryPi file with a .img extension you earlier downloaded:
Note: if you downloaded the file and it came with a .iso extension, you can rename the file extension to .img to import it to the Win32 Disk image writer app.
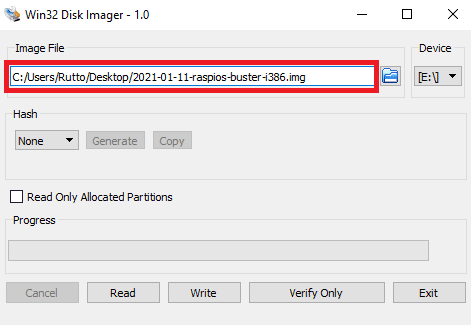
select file
After selecting the file, click on the Write button to initiate the writing process.

Click on write
The writing process should pick up immediately after hitting the “Write” button. Take a look at the writing progress in the snapshot below:
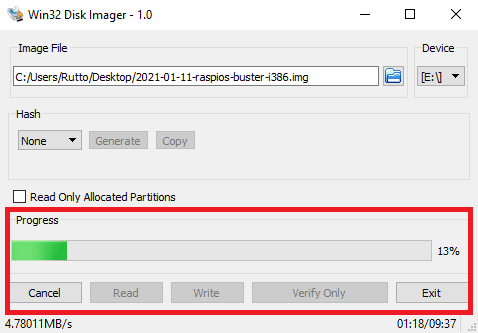
file writing progress
The complete writing process. After that, hit the “Exit” button:
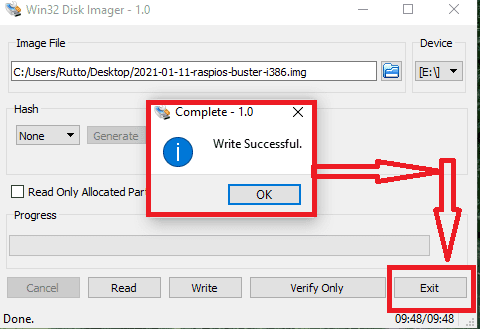
hit exit
Reboot your machine with the SD Card inserted, and your device should directly boot to the Raspberry Pi desktop.
How to format Pi SD cards using SD formatter
If you try re-using an SD card, you might find the usable capacity is less than expected. This can be because of the partitions previously configured, and some “format” software cannot do away with them.
Most Raspberry Pi SD cards will often appear to have a capacity of 56 MB in Windows, but that is only because they cannot see beyond the much larger Linux partition.
To ensure that SD cards are empty and no partitions concealed from Windows, you should always utilize the “SD Formatter” first. This is a tried and tested tool created by the SD Association. Download it from the Official SD Formatter website, as it is available for Windows and Mac.
1: Run
First, insert your SD card and run the SD Formatter app as shown in the snapshot below:
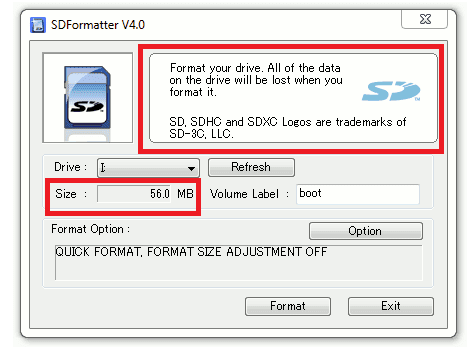
SD formatter
Note that the software only displays a capacity of 56MB despite the card being 4GB in size. Also, double-check so as not to format another partition accidentally.
2: Enable Size Adjustment
Since we are particularly interested in restoring the actual capacity of the card, we will attain this by clicking “Option” and turning “Format Size Adjustment” to “ON.”
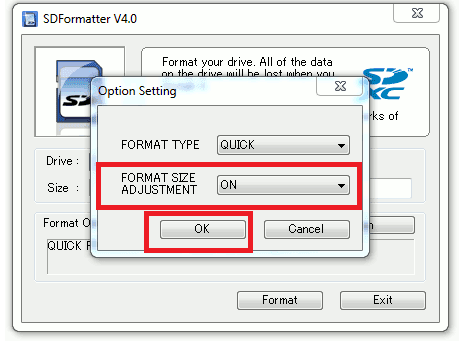
Enable adjustment
After that, click “OK” to proceed.
3: Format
Click “Format” to initiate the formatting process.
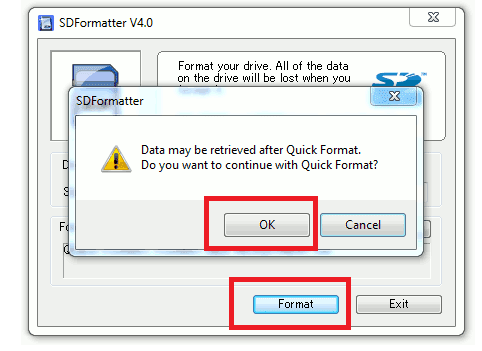
click format, then OK
After clicking the format button, a pop-up will appear asking you to affirm the continuation with Quick Format; click “OK” to proceed.
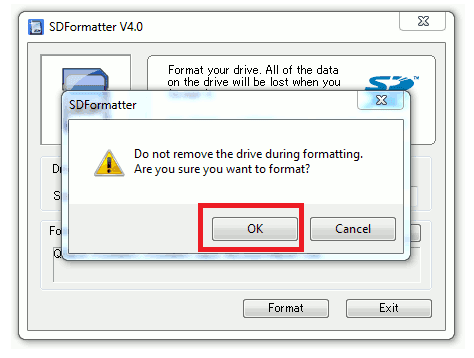
affirm the process
Then again, click “OK” to affirm the surety of formatting the card. After that, the process should begin, and it should only take a few seconds.
4: Finish
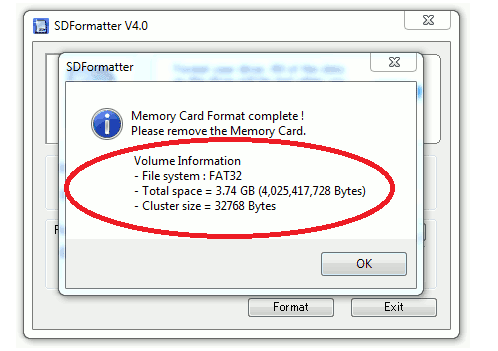
When the process finishes, it will offer a summary of the card’s capacity.
finish
In our case, the 4GB has restored a capacity of 3.74GB, which sounds right because it improves the 56 MB that appeared earlier.
click exit
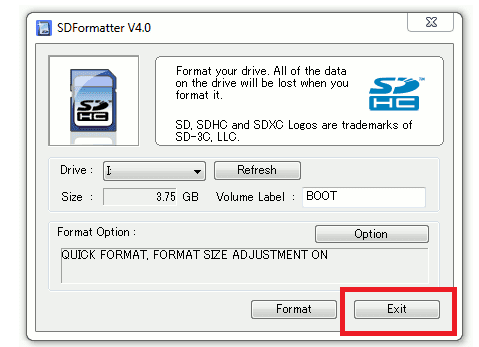
And your SD card is now ready to write a new Pi image to it. You can now click “Exit.” and eject your SD card as usual.
Step 2: Creating SSH file to configure Wi-Fi
After installing the Raspberry Pi OS, you need to append some additional files to enable SSH and connect Wi-Fi during boot. To begin with, you should see a /boot file folder after inserting your SD card into your laptop. Next, create a file called “wpa_supplicant.conf” in the /boot folder and copy-paste the following code, inputting your Wireless Fidelity(Wi-Fi) name, Password, and nation-state code on the country section.
ctrl_interface=DIR=/var/run/wpa_supplicant GROUP=netdev

update_config=1

country=PK #Your country code

network={

ssid="My_WiFi" #Your WiFi Name

psk="123456789" #Your WiFi password

key_mgmt=WPA-PSK

}
The first line in the file means “grant the group ‘netdev’ permission to configure network interfaces.” This ideally means that any user member of the netdev group can update the network configuration option. The ssid refers to your Wi-Fi network, while the psk should be your Wi-Fi password.
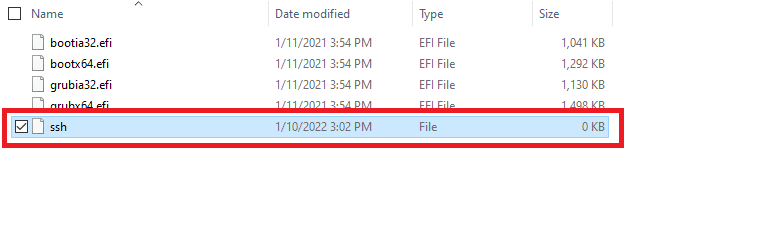
In the wake of creating and updating the wpa_supplicant.conf file, go ahead and create a void file and label it as “SSH” unaccompanied by any extension. This will allow SSH on the Pi, and when your Pi machine boots up, it will search for the SSH file. If it gets one like the one we created, SSH will be enabled spontaneously. In short, having this file tells your machine to “enable SSH on boot.” To generate this file, right-click on your desktop and select “New>Text Document.”

create new text document-min
After that, open the text file, save it as an ssh file, and ensure it has no extension. Then, select “All files” from the “Save as type” drop-down menu.
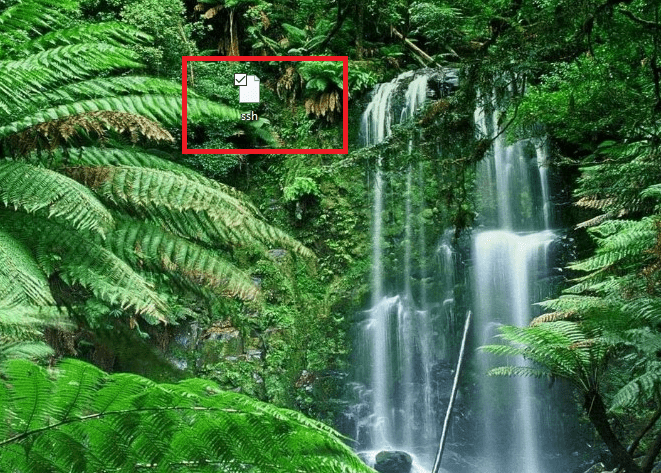
ssh file created
The final step is to move the ssh file to the root directory of the flashed SD card. After you are done with this phase, please take out your SD card from the PC, directly insert it into your Raspberry Pi board, and power it on.
move the file to the root directory
Step 3: Connect to Raspberry Pi with SSH
In this phase, you will connect your Pi machine and laptop with the same Wi-Fi network you entered in the file “wpa_supplicant.conf” we created previously. Next, you will need the Raspberry Pi’s IP address on the network. You can see all the interlinked devices with their corresponding IP and MAC addresses by running:
arp -a
Finally, you should see IP your Pi machine listed with its IP address.
Then run the “ssh Pi@[the Pi’s IP Address]” command to connect your Pi machine. If you have not configured the required credentials earlier, use “Pi” as the username and “raspberry” as the password.
Once the connection is made, you will access the Pi machine terminal.
Step 4: Install VNC server And Set Resolution
At least you now have access to your Pi machine terminal, but how do you see the Pi desktop? First, you will need to set up a VNC server on your Raspberry Pi to permit you to control your Pi machine desktop remotely on a laptop (the VNC viewer).
To install this server, use the following command:
sudo apt–get update
sudo apt–get install realvnc–vnc–server realvnc–vnc–viewer
After installing the server software, you will need to enable it. To launch the config tool, type in the command:
sudo raspi-config
After that, maneuver to the interface options:
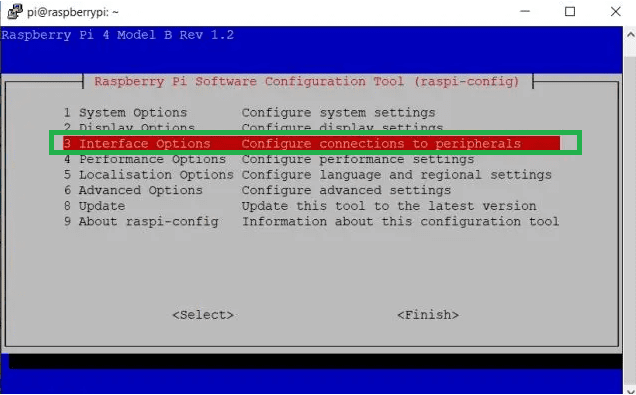
select interface options
and choose P3 VNC and enable it by hitting enter.
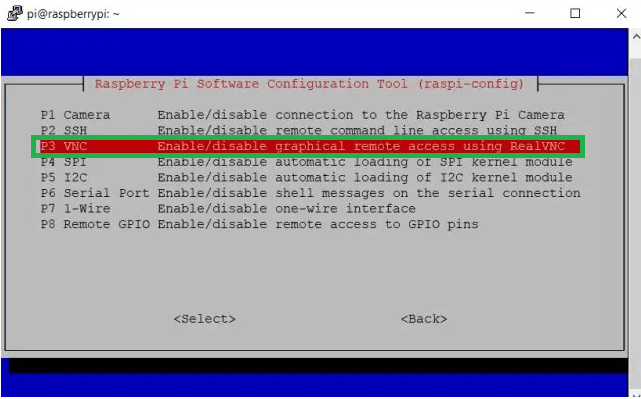
Select P3 VNC
Then select “Yes” and hit enter.

select yes
After that, open “System options and navigate to Boot/Auto Login.” Next, go to the Desktop option click “OK” to select.
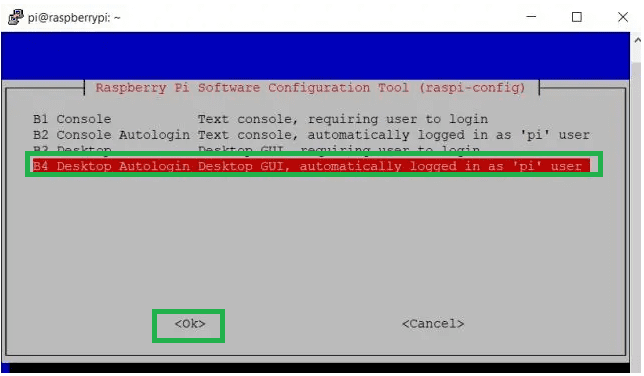
select desktop autologin
After selecting “OK,” hit the enter button to apply the changes. Next step, go to the Finish window by pressing Tab and hitting enter. It will then restart your PC, and the SSH session will end.
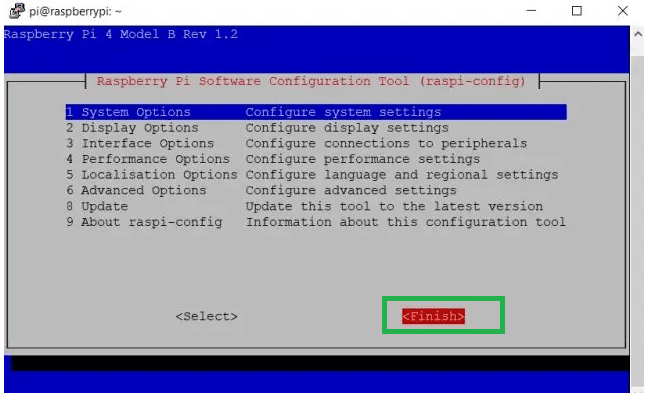
select finish
Step 5: Installing VNC Viewer on your Laptop
To view and take control of your Pi machine from your laptop, you need to download and install a VNC viewer.
After that, launch the VNC viewer when you are through with the installation. Then paste the IP address of your Pi machine and fill in the default user credentials needed. If you have not configured the credentials or altered the default credentials settings, use “Pi” as the default username and “raspberry” as the default password. After that, click the OK button, and your Pi board desktop will appear as a VNC window. You, at this point, should be able to access the Graphical User Interface (GUI) and execute tasks like a real Pi board mouse and keyboard.
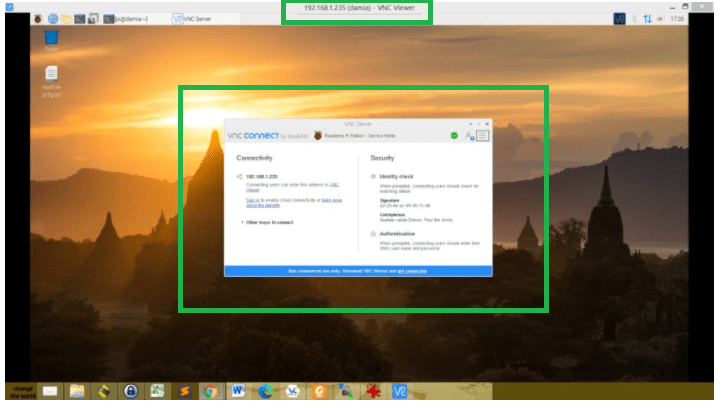
connected
Sometimes you might not be successful, and you may trip into some errors like cannot currently show the desktop or laptop. Below are some of the errors and how to fix them
How to fix the “Can’t Currently Show The Desktop” error on a laptop
Despite being rare, you might trip into this “Cannot currently show the desktop” error while connecting your Raspberry to your computer or desktop computer. Resolution issues sometimes cause this. You can quickly fix this issue by firing up the Putty app.
Then establish the connection to the Pi machine, inputting the IP address and default user credentials. After that, you need to open the configuration tool after setting up the connection. To achieve this, use the following command:
sudo raspi-config
Then move to the “display option and click on Resolution.” If you have an old version of the Pi board, you can find the resolution tab under Advanced options.
You can select any matching your desktop computer or laptop among the given resolutions. However, we recommend not selecting Default as it may cause issues again.
Then click on the “finish” button and shut down the putty application.
Now proceed to open the VNC viewer and cross-check if you are connecting to the Pi environment or not. Usually, the issue gets resolved.
Conclusion
When connecting the Raspberry Pi machine to either your computer desktop or laptop, you are required to be very careful about certain critical things. From having a well-formatted SD card to a suitable OS. Your Raspberry Pi and Laptop/desktop computer should be interlinked to the same network. Moving towards the IP addresses, they keep switching from time to time depending upon the connection with Wireless Fidelity (Wi-Fi) or ethernet. If you fail during the first trial, go ahead and try again by cross-checking the IP addresses.