
Canonical, the makers behind Ubuntu Linux, has released the Ubuntu 18.04.4 LTS operating system for Raspberry Pi 2 / 3 / 4 ARM single-board computers. The new version code-named ‘Bionic Beaver” comes with a host of new features such as Color emojis, GNOME desktop, better PPA support, and has faster boot speed.
Ubuntu 18.04 is a long term support release that will be supported with security updates and fixes until April 2023. Hence, it is a good reason to update your Raspberry Pi to this new version.
The official download images are available for Ubuntu 18.04.4 LTS (Bionic Beaver), and Ubuntu 19.10 (Eoan Ermine), and the latest Ubuntu 20.04 (Focal Fossa), which is still an experimental build.
In today’s tutorial, we are going to install Ubuntu 18.04 LTS that is rock-solid stable and one of the best OS for your Raspberry Pi after Raspbian.
Installing Ubuntu 18.04 LTS on Raspberry Pi 2/3/4
There are a couple of ways of getting the Bionic Beaver on your Raspberry Pi board.
Ubuntu Mate
This variant of Ubuntu is simplest to set up and is highly recommended if you want the light-weight OS on your Raspberry Pi. We recommend this OS for any Raspberry Pi boards that come with 2 GB or less RAM. Ubuntu Mate uses the MATE desktop environment (DE) instead of the Ubuntu’s default DE GNOME.
Ubuntu Server
Those who prefer to use another desktop environment should be straight-away installing the Ubuntu Server edition as you get to choose the DE you want.
We shall be covering the installation of both the variants of Ubuntu on your Raspberry Pi board. But let’s get ready with what you need before jumping on to the project.
Pre-requisites
- Raspberry Pi 2/3/4 board
- Download and install Etcher on your computer. This is a flashing utility available for free download and works on Linux, Windows, and macOS systems.
- SD card of minimum 4GB capacity to install Ubuntu
1. Installing Ubuntu MATE
Step 1) Download the latest Ubuntu 18.04 LTS image from the official servers.
Download Ubuntu Mate 18.04.04 LTS
Step 2) Insert the SD card to your computer’s port.
Step 3) Launch Etcher. You should see your SD card in the Etcher’s interface. Click on Select Image, browse and select the IMG file that you downloaded.
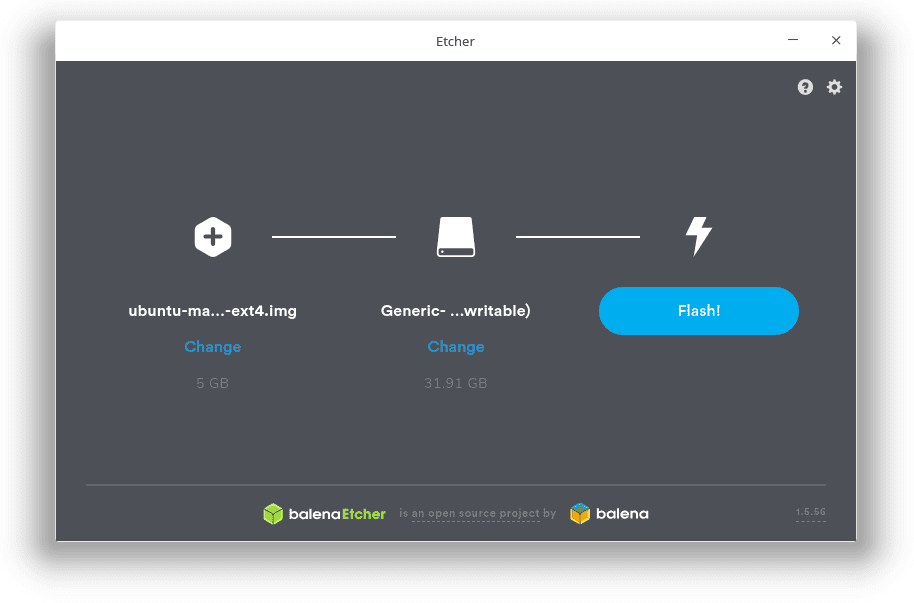
Step 4) Click Flash and wait for the writing process to finish. Etcher will also verify the SD card after the process is complete to make sure there are no SD card issues that plague your Raspberry Pi with problems while using it.
Step 5) Etcher should show that the SD card can be ejected safely. When prompted, do so.
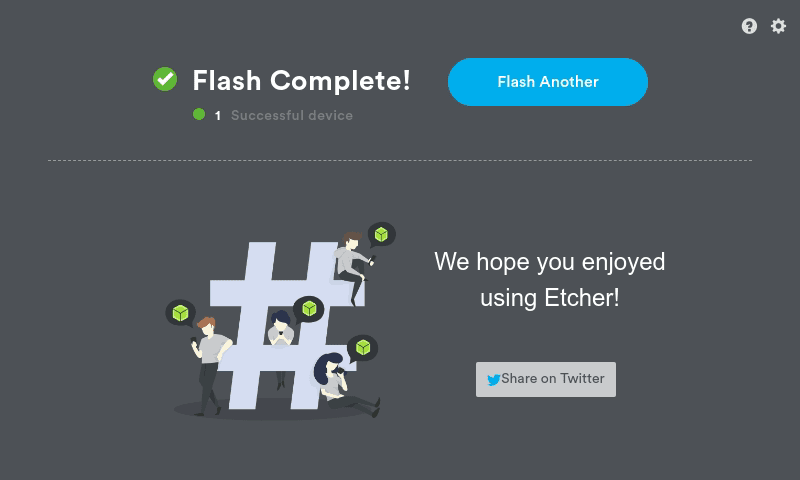
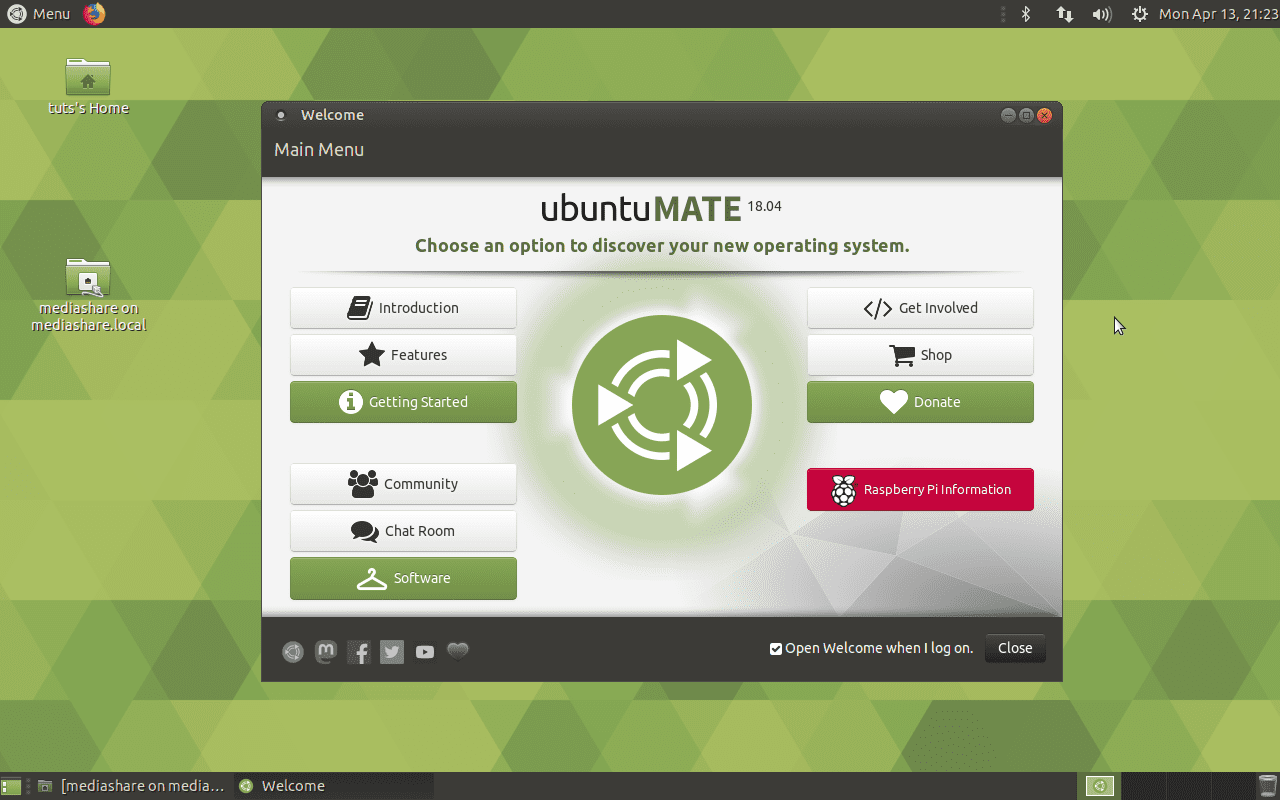
That’s it. Go ahead and insert the SD card into your Raspberry Pi and start enjoying Ubuntu MATE 18.04.04 LTS on it.
2. Installing Ubuntu Server 18.04 LTS
In the section of the tutorial, we shall show you how to install Ubuntu Server that’s nothing but bare-bone Ubuntu without any GUI. The advantage of doing this is you get a high-performance server if you are planning only to use your Pi just for this functionality.
Typically, a desktop environment consumes a lot of system resources. For example, in our first case scenario, Ubuntu Mate consumes around 400MB of RAM when idle. Most of this memory consumption is due to the MATE desktop environment. By installing the server version, you save that much of memory. However, your interaction with the Server will be command-line based since there is no GUI.
Step 1) Head over to the official Ubuntu website and download the 18.04.04 LTS server image based on the type of Raspberry Pi you have. There are server images available for Raspberry Pi 2,3, and 4. Raspberry Pi 2 users need to download the 32-bit only. Raspberry Pi 3 and 4 are 64-bit boards. There are not many benefits to using the 64-bit version for the Pi 3 as it only supports 1GB of memory; however, with the Pi 4, the 64-bit version should be faster.
Download Ubuntu Server for Raspberry Pi
Step 2) Insert your SD card into your computer’s port.
Step 3) Launch Etcher. You should see your SD card in the Etcher’s interface. Click on Select Image, browse and select the IMG file that you downloaded.
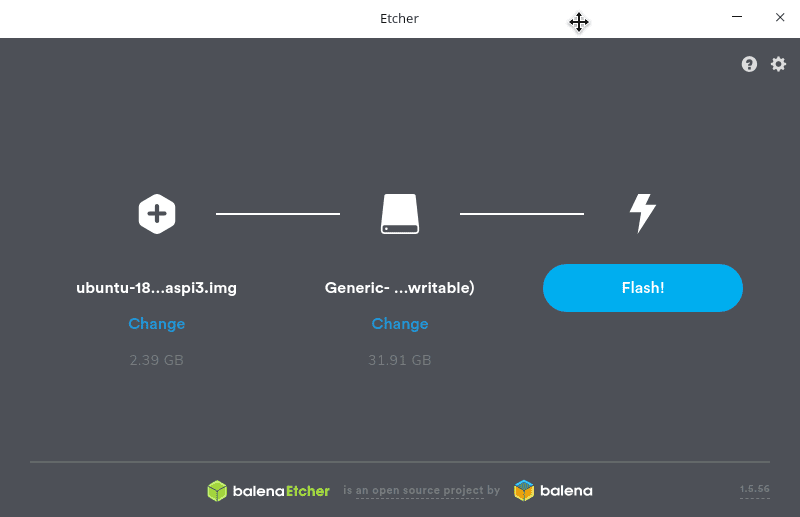
Step 4) Click Flash and wait for the writing process to finish. Etcher will also verify the SD card after the process is complete to make sure there are no SD card issues that plague your Raspberry Pi with problems while using it.
Step 5) Etcher should show that the SD card can be ejected safely. When prompted, do so.
Step 6) Go ahead and insert the SD card into your Raspberry Pi and boot it.
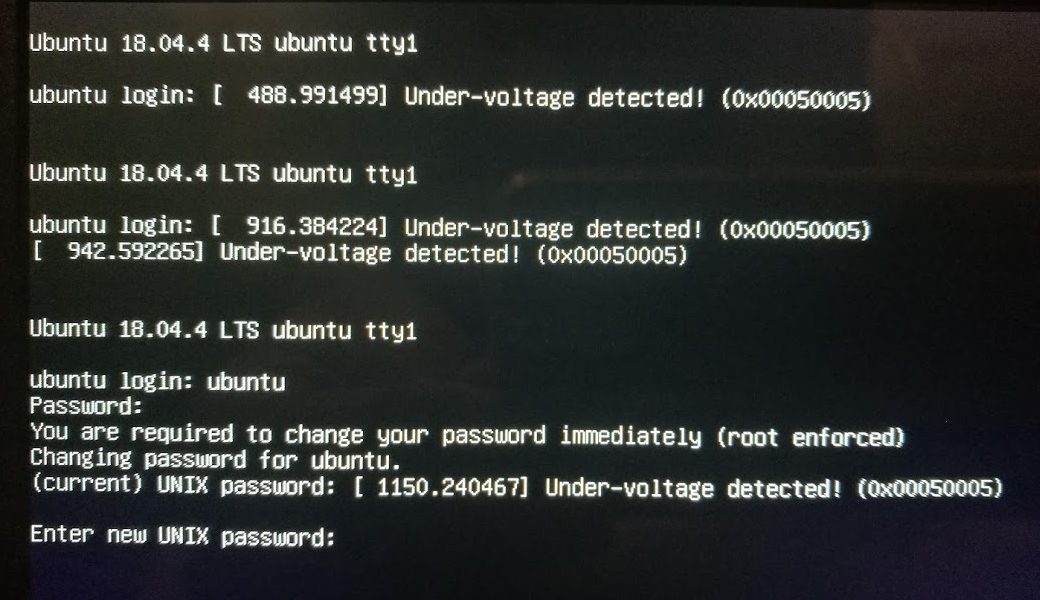
Step 7) Wait for the boot process to complete, and you should see the following message on the window.
Step 8) Press enter to view the login prompt. Enter the following default credentials.
login: ubuntu
password: ubuntu
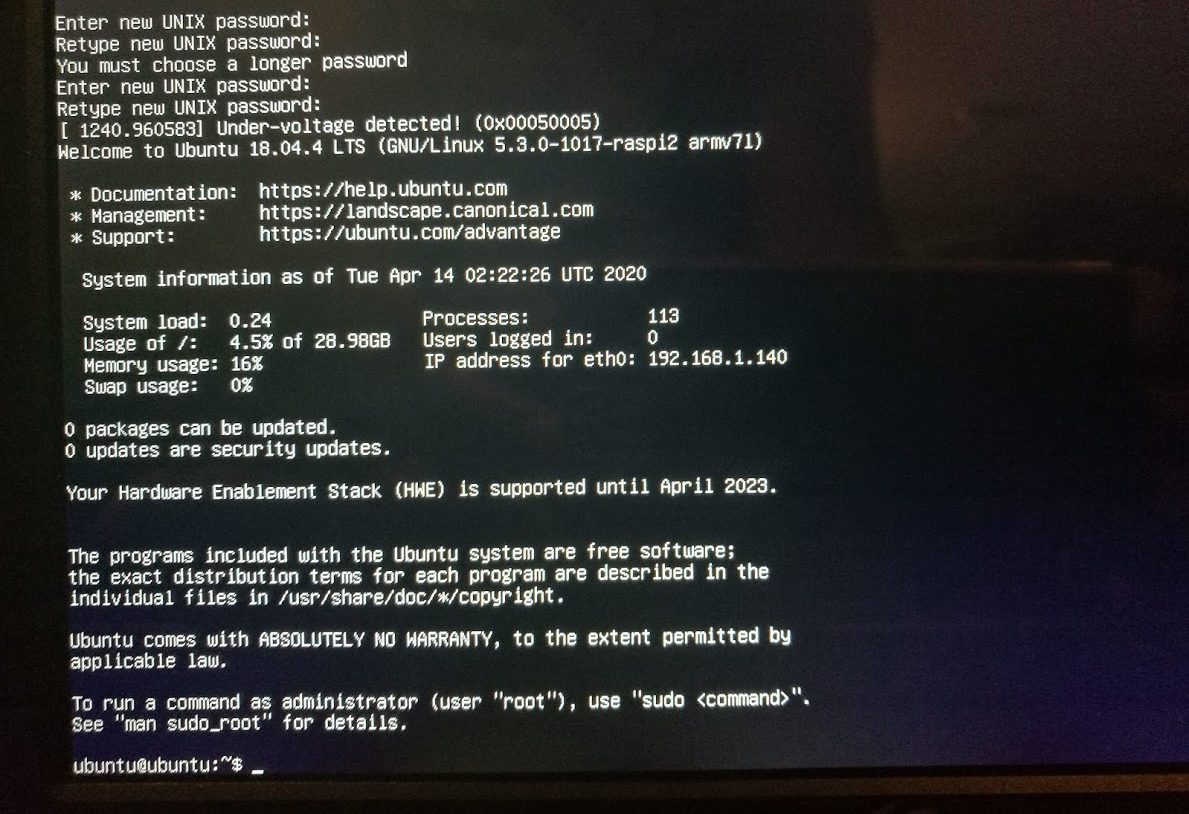
Step 9) After the first login, the system will prompt you to change the password. Do so.
Step 10) After changing the default password, you should see a welcome screen confirming that you are now on the Bionic Beaver.
Step 11) The first thing to do after logging in is to update your Ubuntu Server to the latest security fixes and updates. To do that, enter the following commands one at a time, followed by pressing the enter key.
sudo apt update
sudo apt upgrade
Conclusion
That’s all about various ways of installing Ubuntu Bionic Beaver on your Raspberry Pi. We hope this tutorial helped you with the start of your project. Further, we shall see how to configure wireless access, set up an external hard drive or USB drive to expand server storage capacity. Until then, stay tuned to SingleBoardBytes.