
There are a couple of reasons why advanced Raspberry Pi users may want to connect their Raspberry Pi remotely. One of these reasons is that the whole process of connecting a monitor, keyboard, mouse, and other peripherals is hectic. Additionally, you might lack a monitor and end up having to use your laptop as a monitor for the Pi.
Another reason some people may want to connect the Raspberry Pi remotely is the lack of space to strategically place/position the Raspberry Pi with all the connected peripherals. Lastly, if you are using your Pi as a server, it would be best to manage it remotely instead of connecting to a monitor.
This article will take you through step-by-step instructions on the five ways to connect to Raspberry Pi remotely.
5 methods to connect to your Raspberry Pi remotely
Below are five methods that you can use to connect to your Raspberry Pi remotely;
- SSH
- Teamviewer
- VNC
- Xrdp
- NoMachine
Tip: In this post, we assume you have already installed the official Raspberry Pi Operating System (Raspbian). If you haven’t, follow the instructions in this article to install the OS. How to install Raspbian on Raspberry Pi.
Method 1: Secure Shell (SSH)
SSH is one of the prominent and typical methods that you can use to connect your Raspberry Pi remotely. By itself, SSH is a network protocol that enables private communication between two computers via a network link.
Tip: SSH will give you command-line access to the Raspberry Pi. This method only allows you to execute commands on the Pi remotely. If you want graphical access to the Pi, use the other ways described below.
To establish an SSH connection, you must first ensure that you connect the Raspberry Pi to a network. There are two main ways that you can use to connect your Raspberry PI to a network.
- WIFI
- Ethernet
Ethernet is the most preferred connection type as it’s more reliable and fast than WIFI. You must physically insert your router’s ethernet cable into the Raspberry Pi’s ethernet port.
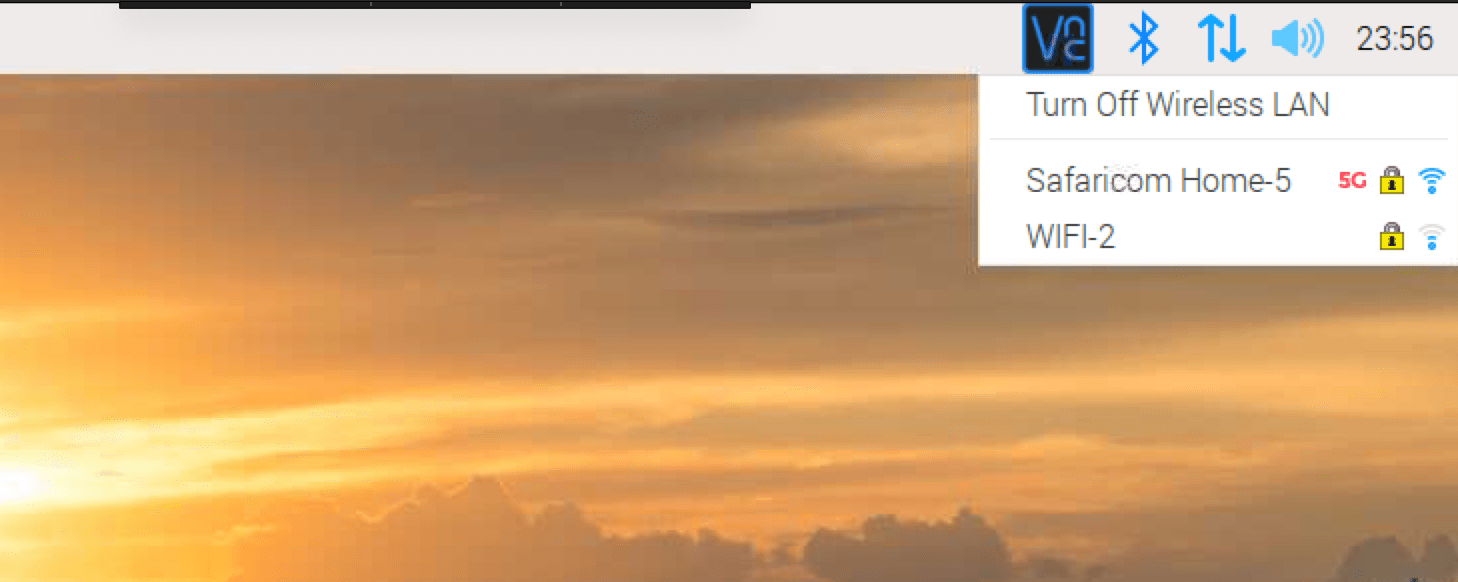
However, if you don’t have an ethernet connection, use WIFI. You can connect a Raspberry PI to a WIFI network in several ways. If you have access to the Pi graphical desktop, click on the WIFI icon at the top-right corner of the desktop and select the WIFI network you want to use.
Connect to WIFI
However, If you are running the Pi headless (without a monitor), you must create a file called wpa_supplicant.conf in the boot partition of the PI SD card containing the name of the WIFI and password as shown below.
wpa_supplicant.conffile contents for a secured network.
country=US
ctrl_interface=DIR=/var/run/wpa_supplicant GROUP=netdev
network={
ssid="Enter_YOUR_NETWORK_NAME_HERE"
psk="Enter_YOUR_PASSWORD_HERE"
key_mgmt=WPA-PSK
}
wpa_supplicant.conffile contents for unsecured (without password) WIFI network.
country=US
ctrl_interface=DIR=/var/run/wpa_supplicant GROUP=netdev # Include this line for Raspberry Pi Stretch
network={
ssid="Enter_YOUR_NETWORK_NAME"
key_mgmt=NONE
}
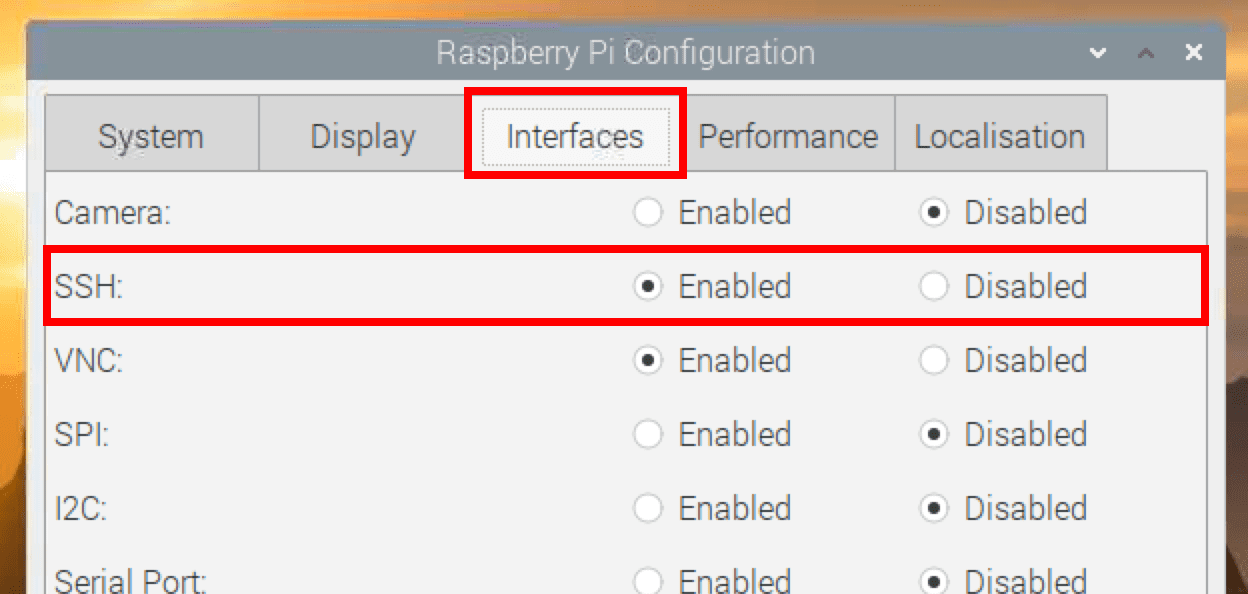
After successfully connecting the PI to a network, you need to enable SSH. If you can access the Pi Desktop, open the applications menu -> Preferences -> Raspberry Pi Configuration. That will open the Raspberry Pi configuration window, as shown below. Select the “Interface” tab and enable SSH.
Enable SSH
If you are running the Raspberry PI headless mode (without a monitor), create an empty file called ssh in the boot partition of the SD card. Please check out our post for a comprehensive guide – Connecting to Wi-Fi & Enabling SSH Without Monitor on Raspberry Pi.
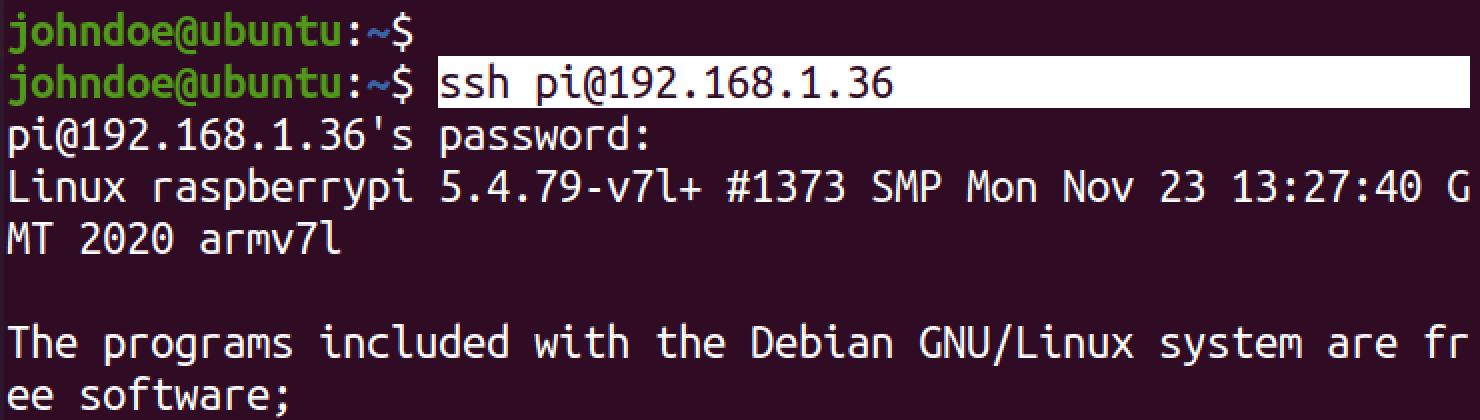
Once you have the Pi connected to a network and enabled SSH, you can establish an SSH connection.
If you are on Linux or macOS, use the syntax below
ssh pi@[IP-ADDRESS]
e.g
ssh pi@192.168.1.60
Connect to SSH
If you are on Windows, you will use an application like Putty.
Method 2: Teamviewer
Teamviewer is another alternative that you can use to connect your Raspberry Pi remotely. It is a desktop application that allows access to the graphical user interface of another device via a network.
A crucial thing to remember is that Teamviewer must be installed on both computers to establish a connection. To install Teamviewer on the Raspberry Pi, navigate to their official website and download the setup file. Please read our comprehensive post – How to install Teamviewer on Raspberry Pi as it will guide you on downloading the correct setup file (32-bit or 64-bit).
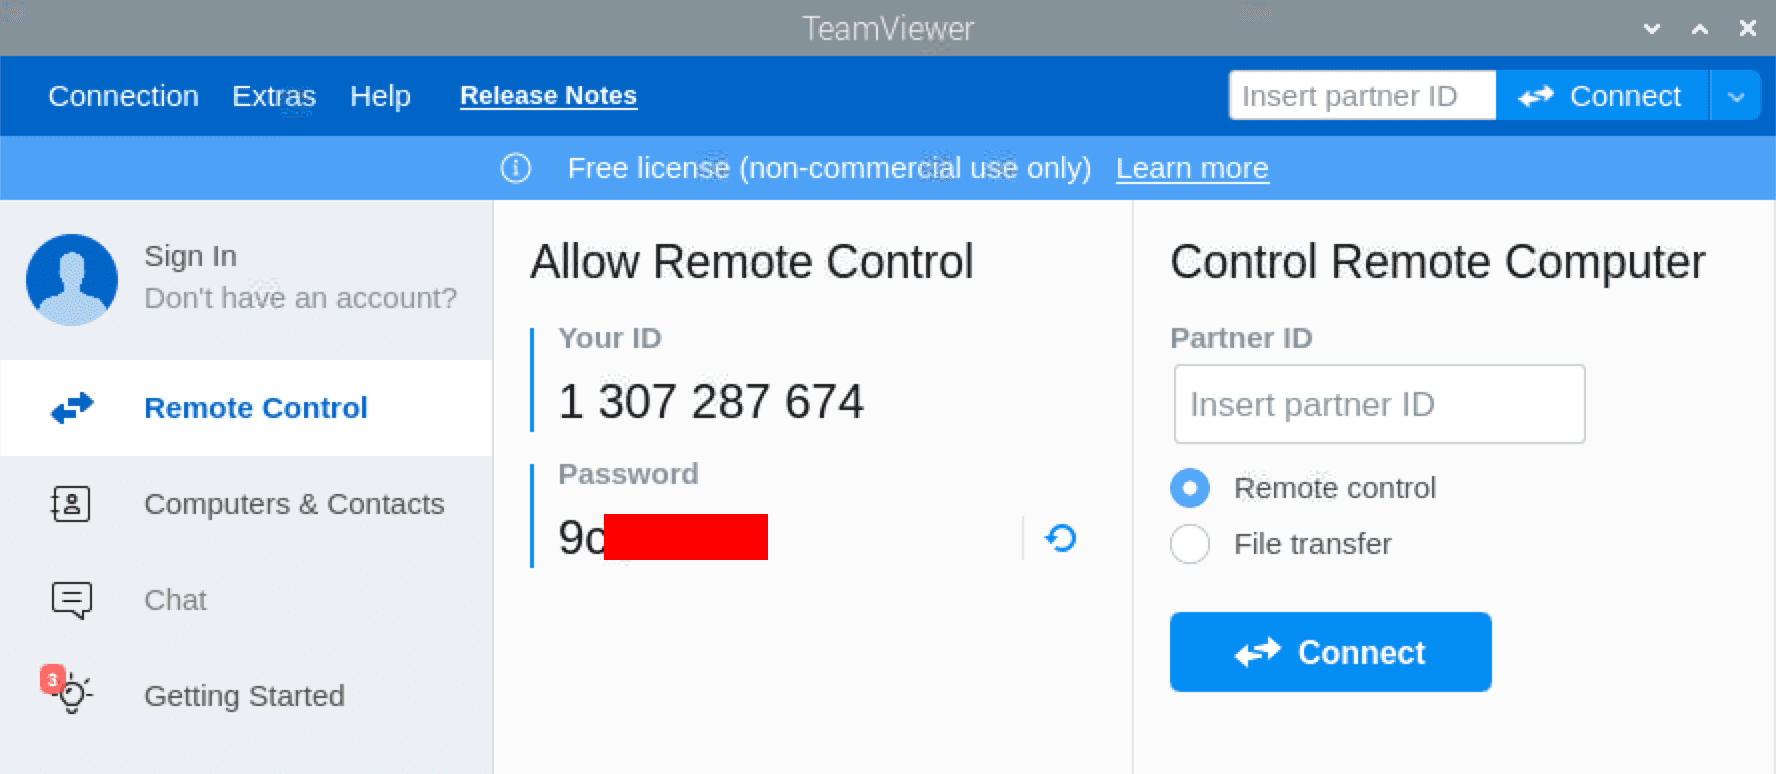
After a successful installation, launch TeamViewer from the applications menu and mark the ID and Password as shown below.
Raspberry Teamviewer
After installing team viewer on your Raspberry, install team viewer on your PC. You can find the installation files on your device’s official TeamViewer download page. Launch the application, enter the ID and Password displayed on the Raspberry Pi TeamViewer, and click “connect” to establish a connection.
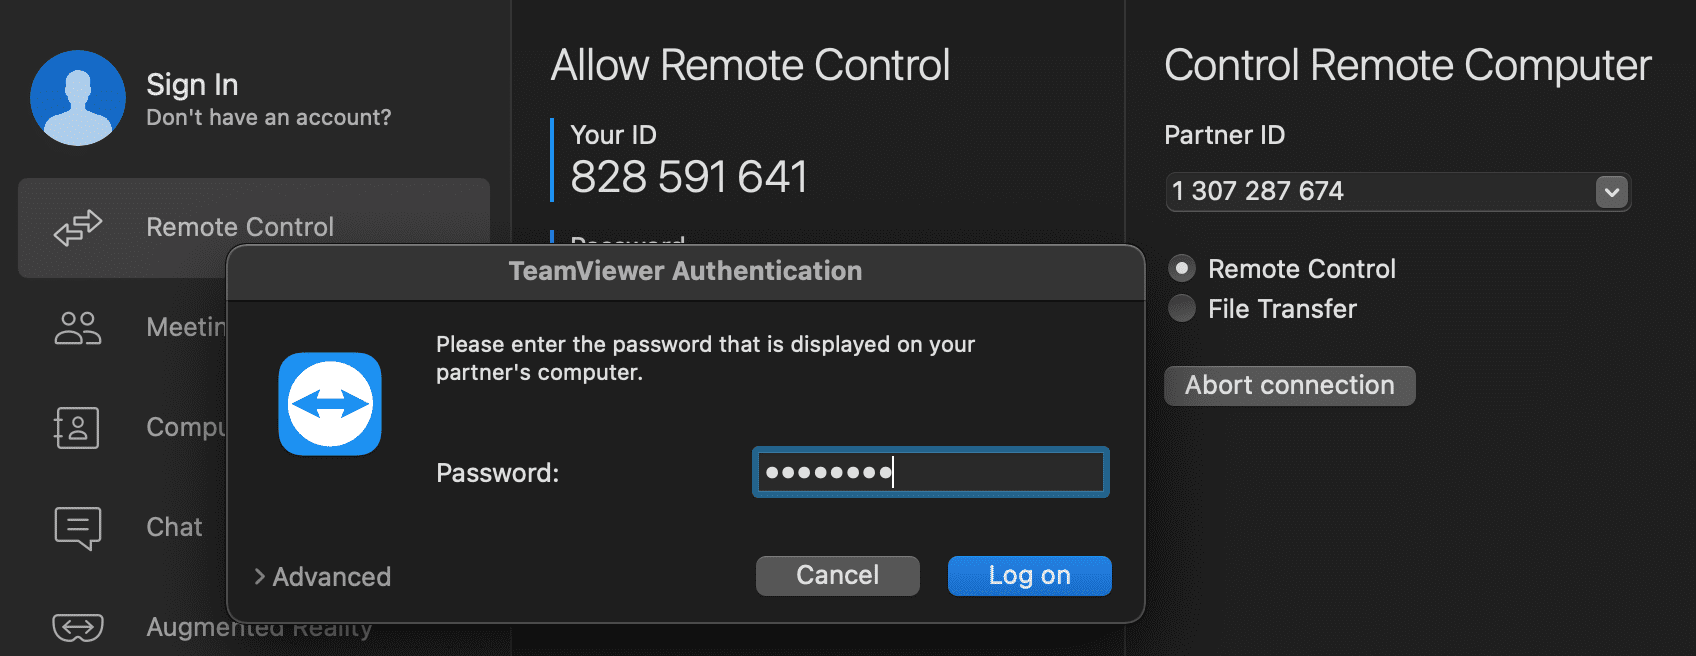
Connect to Teamviewer
After a successful connection, you should see the Raspberry Pi graphical UI on your PC, as shown below.
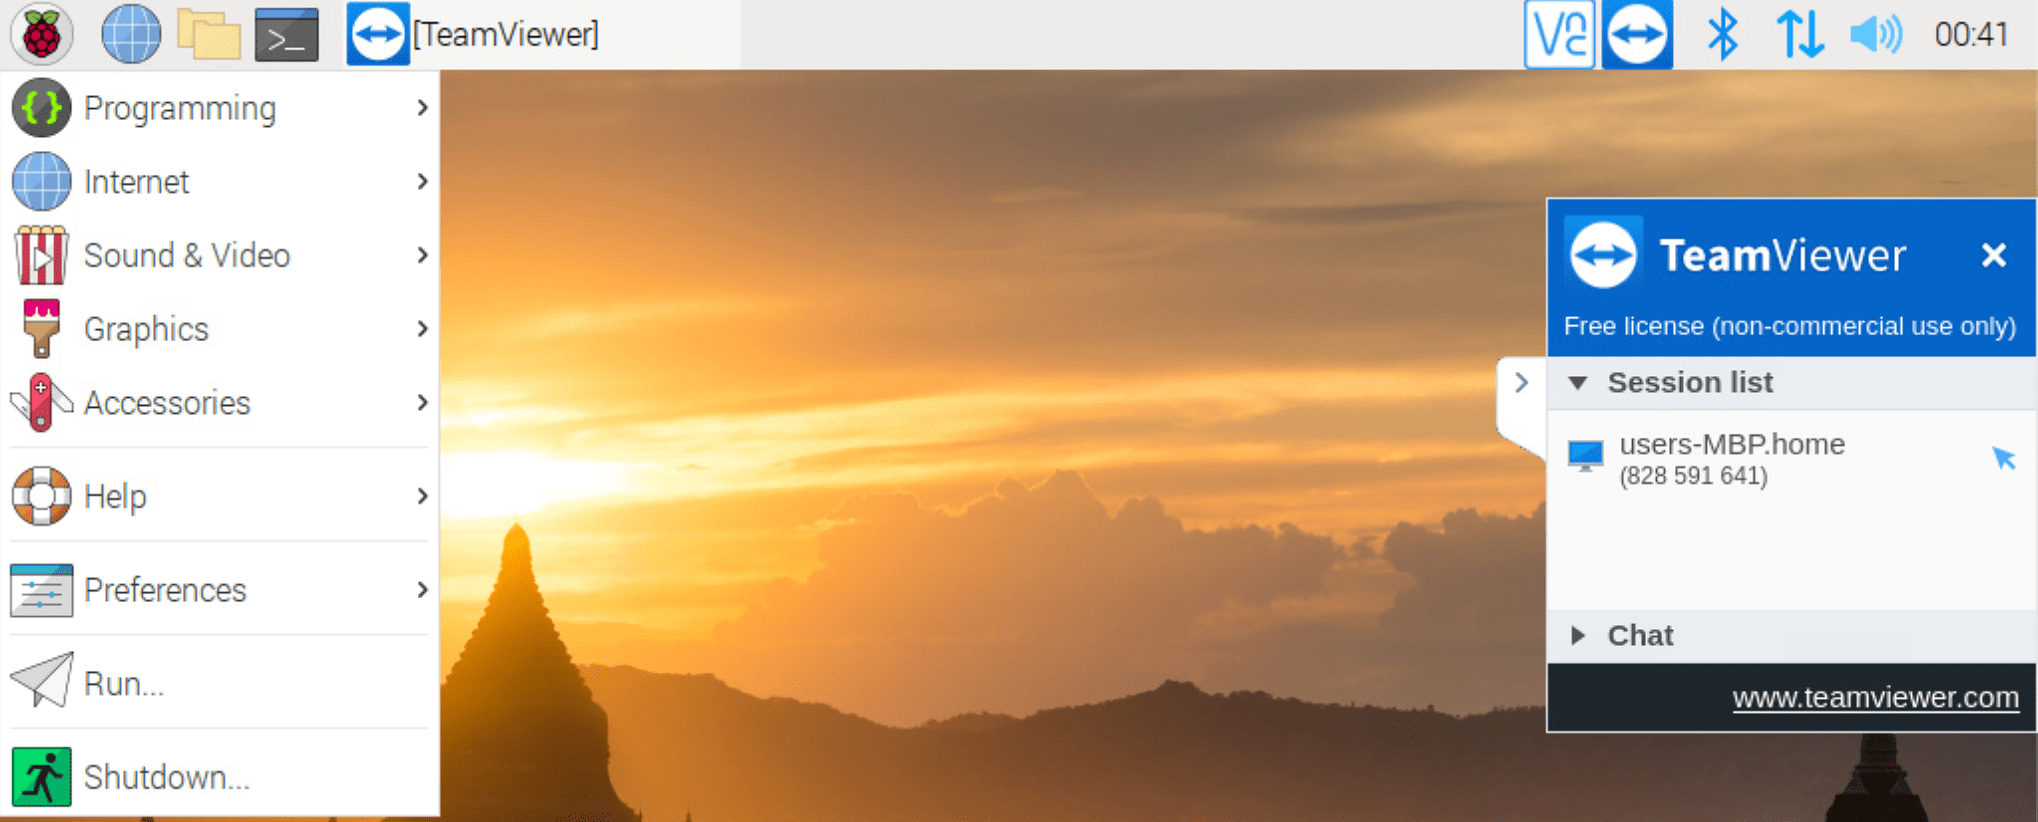
Teamviewer
Method 3: Virtual Network Computing (VNC)
VNC is another excellent alternative for connecting a Raspberry Pi remotely. VNC can connect any computer to another machine if the VNC server is running on the target PC. This method is beginner-friendly as it is simple and doesn’t require much technical expertise.
The simplicity of this method is that all you require for the connection to be successful is the unique IP address of the machine to which you want to connect. In our case, it’s the Raspberry Pi. Once you are aware of the IP address of our Raspberry Pi, the next thing you will require is its username and password.
Tip: The VNC server is default disabled on the Raspberry Pi. So, if you need to use it, ensure you enable it in the settings using GUI or CLI.
Follow the steps below to enable VNC on Raspberry Pi from the Graphical User Interface;
- Click Main Menu -> Preferences -> Raspberry Pi configuration.
- On the Raspberry Pi Configuration, go to the interfaces tab, enable VNC by checking the ‘Enable’ radio button, and press ‘ok’ to save your changes.
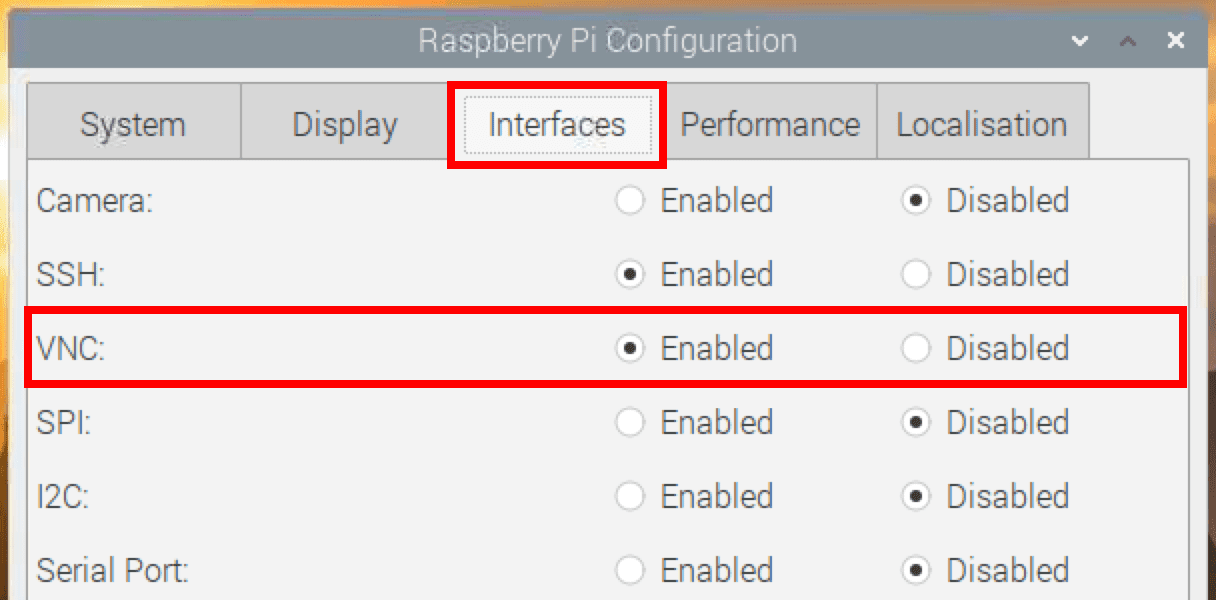
Enable VNC GUI
To enable VNC via CLI, run the command below on your Terminal to launch the Raspberry configuration tool.
sudo raspi-config
Select Interface Options -> VNC. See the image below.
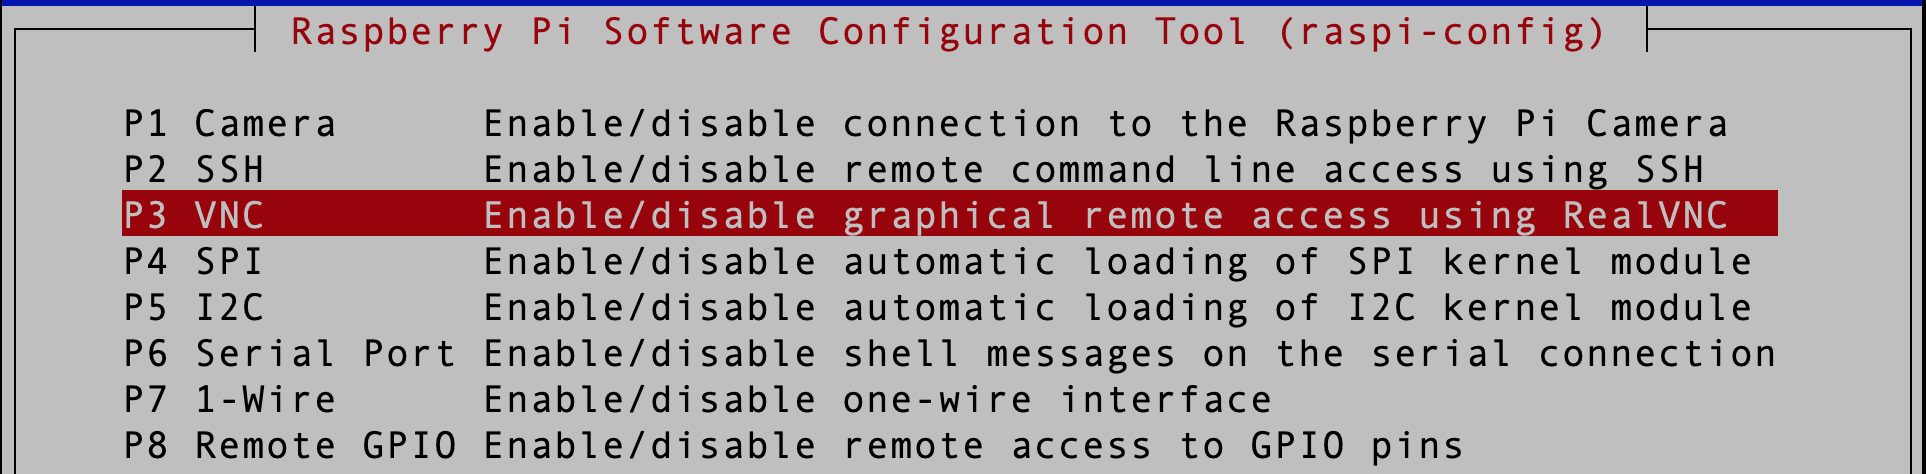
Enable VNC CLI
Once you have enabled the VNC server on your Raspberry Pi, you will need to install a VNC client on the computer or PC that you want to access your Raspberry Pi from. There are various VNC client applications, including VNC viewer, Real VNC, Tiger VNC, etc. For this post, we will install VNC viewer on our PC.
Once finished, open the VNC viewer program on your computer and connect by entering the Raspberry Pi’s IP address. A pop-up window will appear, asking for your Raspberry Pi username and password. Fill in and Click “OK.”
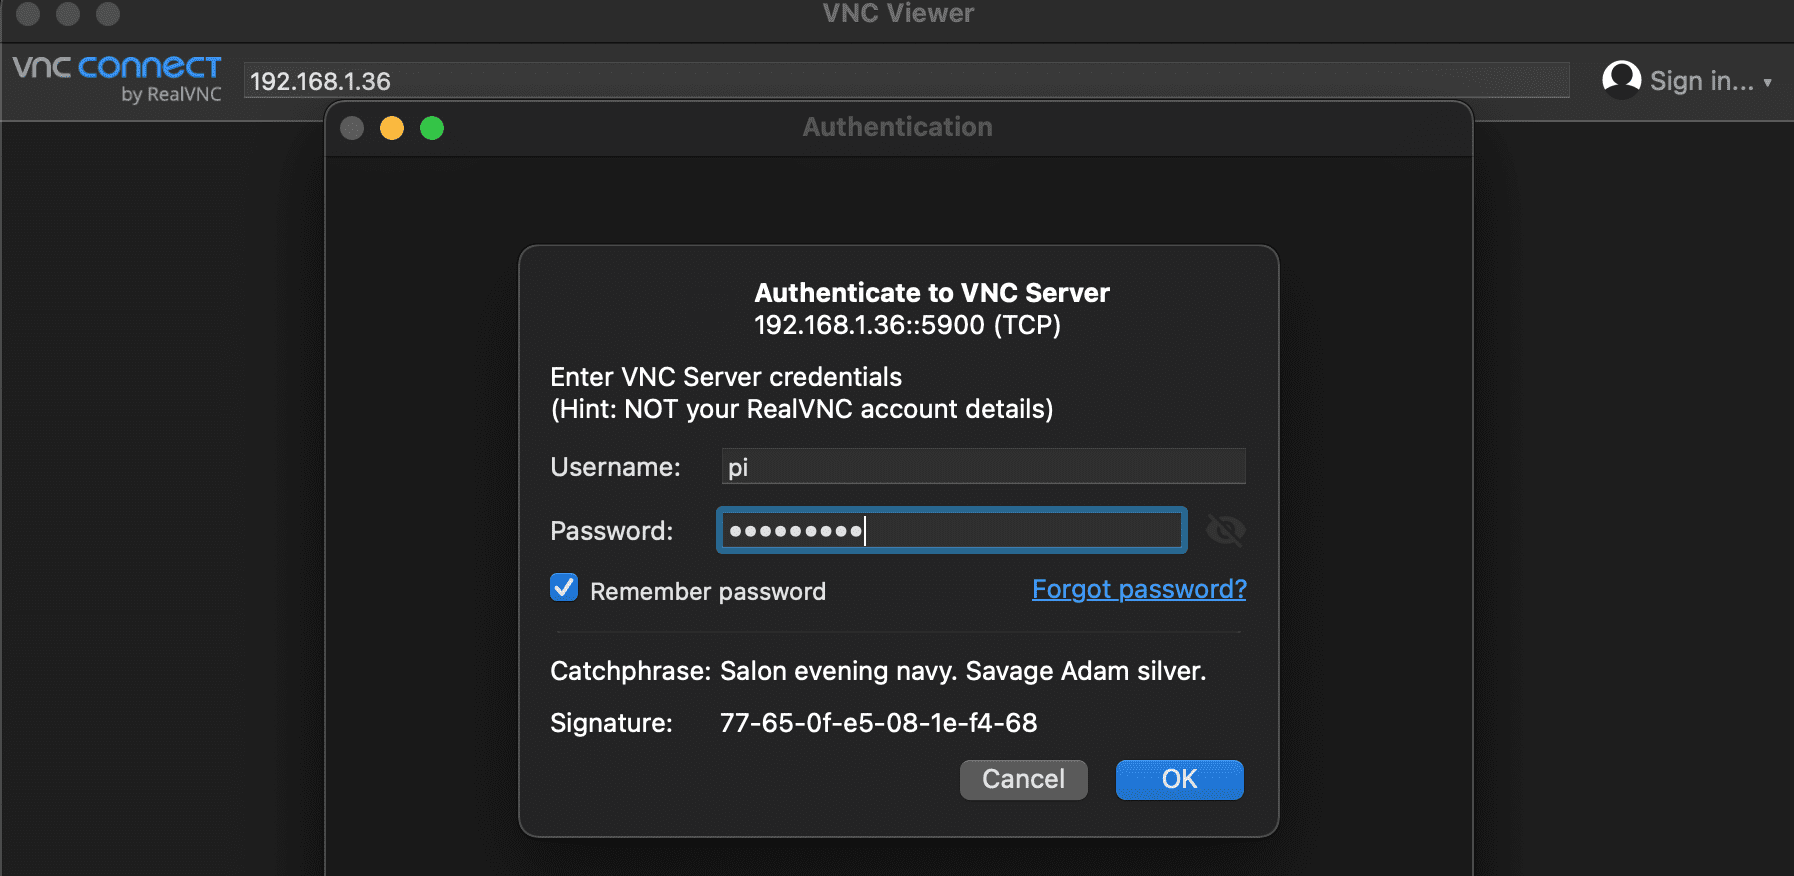
Connect via VNC
The connection will be successful if the information you filled in is correct. As shown below, you will see a Raspberry Pi desktop popping up to confirm a successful connection.
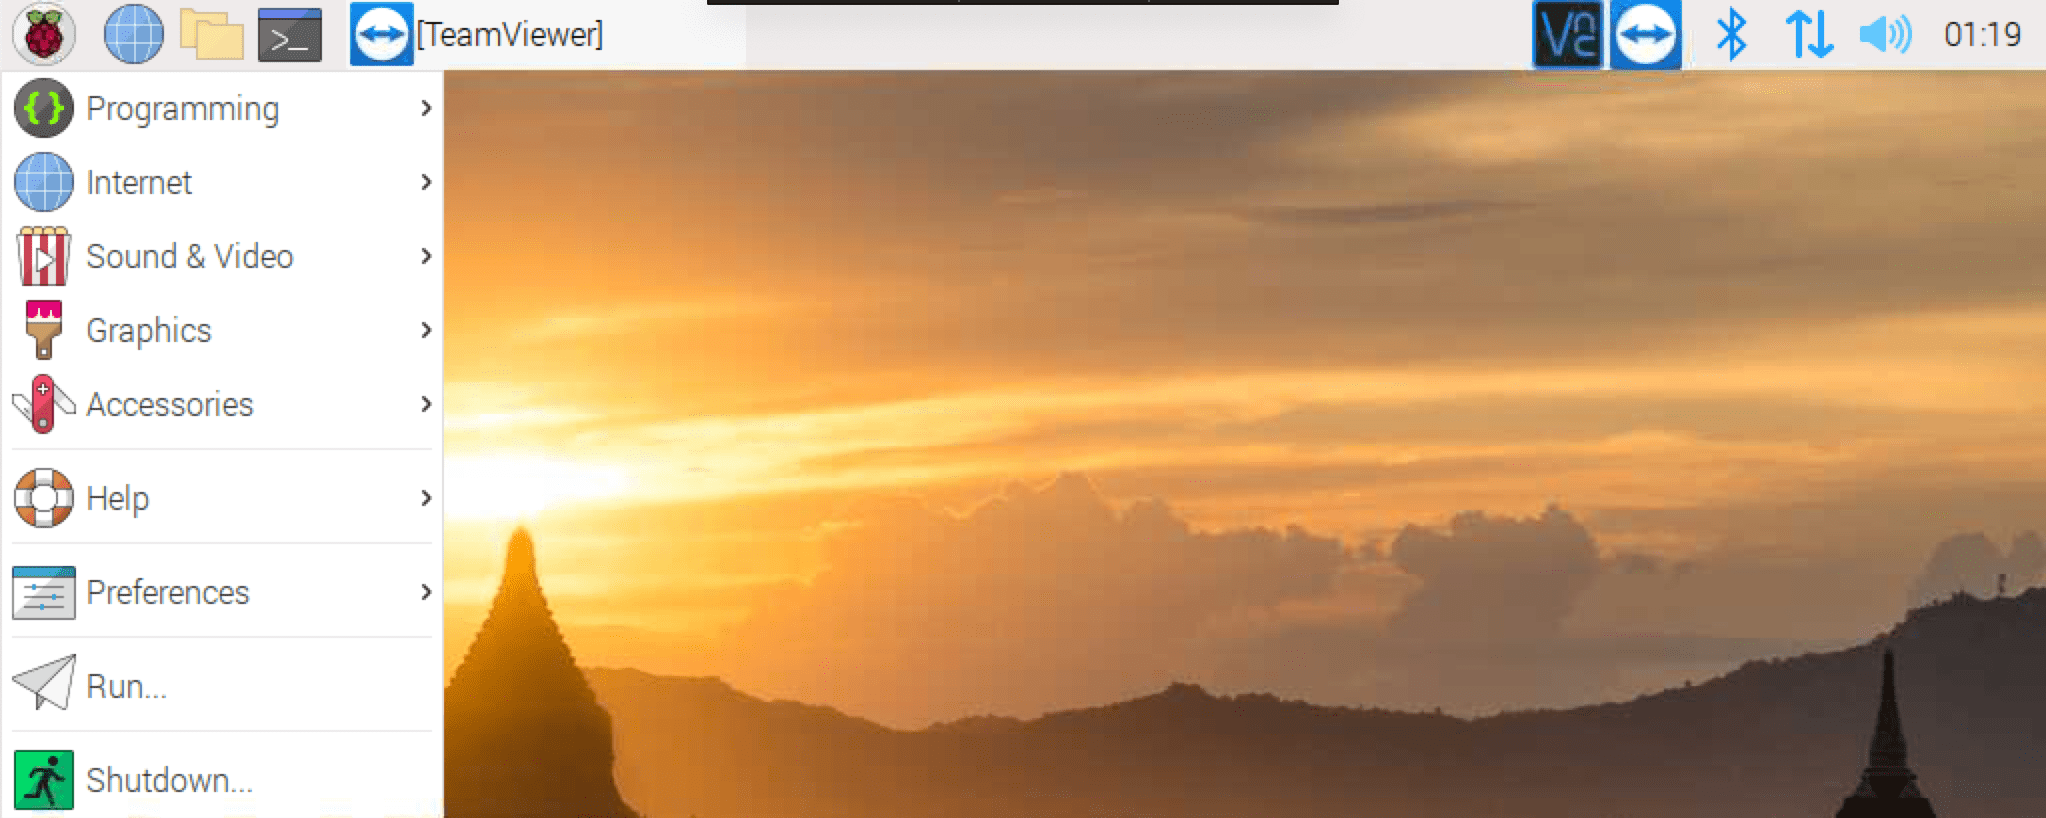
VNC GUI
Method 4: Xrdp
You can also use the Xrdp to connect your Raspberry Pi remotely. You can access your Raspberry Pi using Xrdp using any OS. Here, you will also be required to install Xrdp on Raspberry Pi. Use the apt command to install Xrdp on your Raspberry Pi, as shown below.
sudo apt install xrdp -y
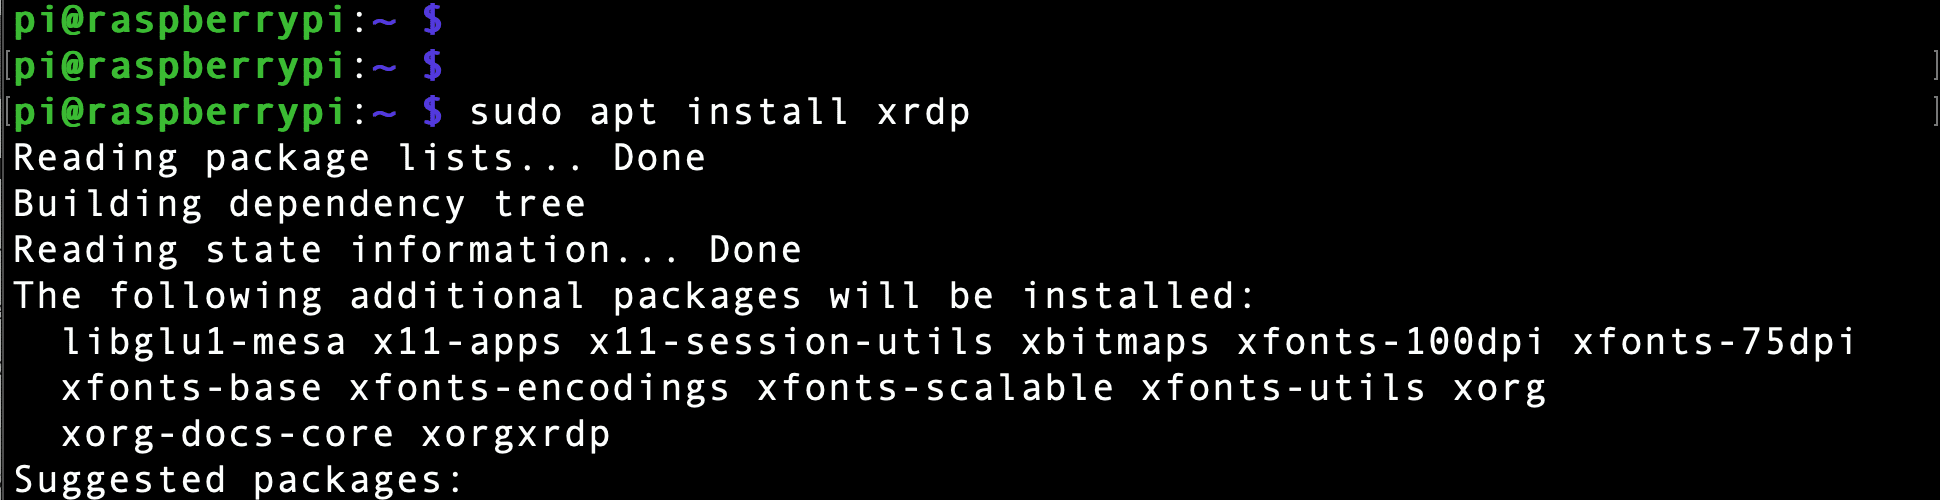
Install Xrdp
Xrdp utilizes the Remote Desktop Protocol (RDP) to get access to other computers. To connect Raspberry Pi using Xrdp, you can use any remote control client, such as Remmina for Linux. To install it, use the command below.
sudo apt-get install remmina
Unfortunately, Remmina is not available for macOS or Windows. If you are a Windows user, download Microsoft Remote Desktop Assistant or its alternatives. macOS users can download Microsft Remote Desktop from App Store. After a successful installation, launch the RDP client, enter the IP address of the Raspberry Pi and connect. Make sure the RDP protocol (for Remmina) is chosen while doing this.
Method 5: NoMachine
NoMachine can also be used to connect Raspberry Pi remotely. All you need is to install No Machine on both devices – the Raspberry PI and the PC you want to use to access the Pi remotely.
To download the NoMachine setup file for the Raspberry Pi, navigate to the official NoMachine website. First, download the DEB setup file (32-bit or 64-bit, depending on your Raspberry Pi board/ OS). After a successful download, use the command below to install NoMachine on your Pi.
chmod +x [package-name]
e.g
chmod +x nomachine_8.2.3_3_armhf.deb
sudo apt install ./[package-name]
e.g
sudo apt install ./nomachine_8.2.3_3_armhf.deb
After successfully installing NoMachine on your Pi, launch it from the applications menu. Now proceed to install NoMachine on your PC. First, download the setup file from the official NoMachine website. When done, launch the application and enter the IP of your Raspberry Pi, as shown below.
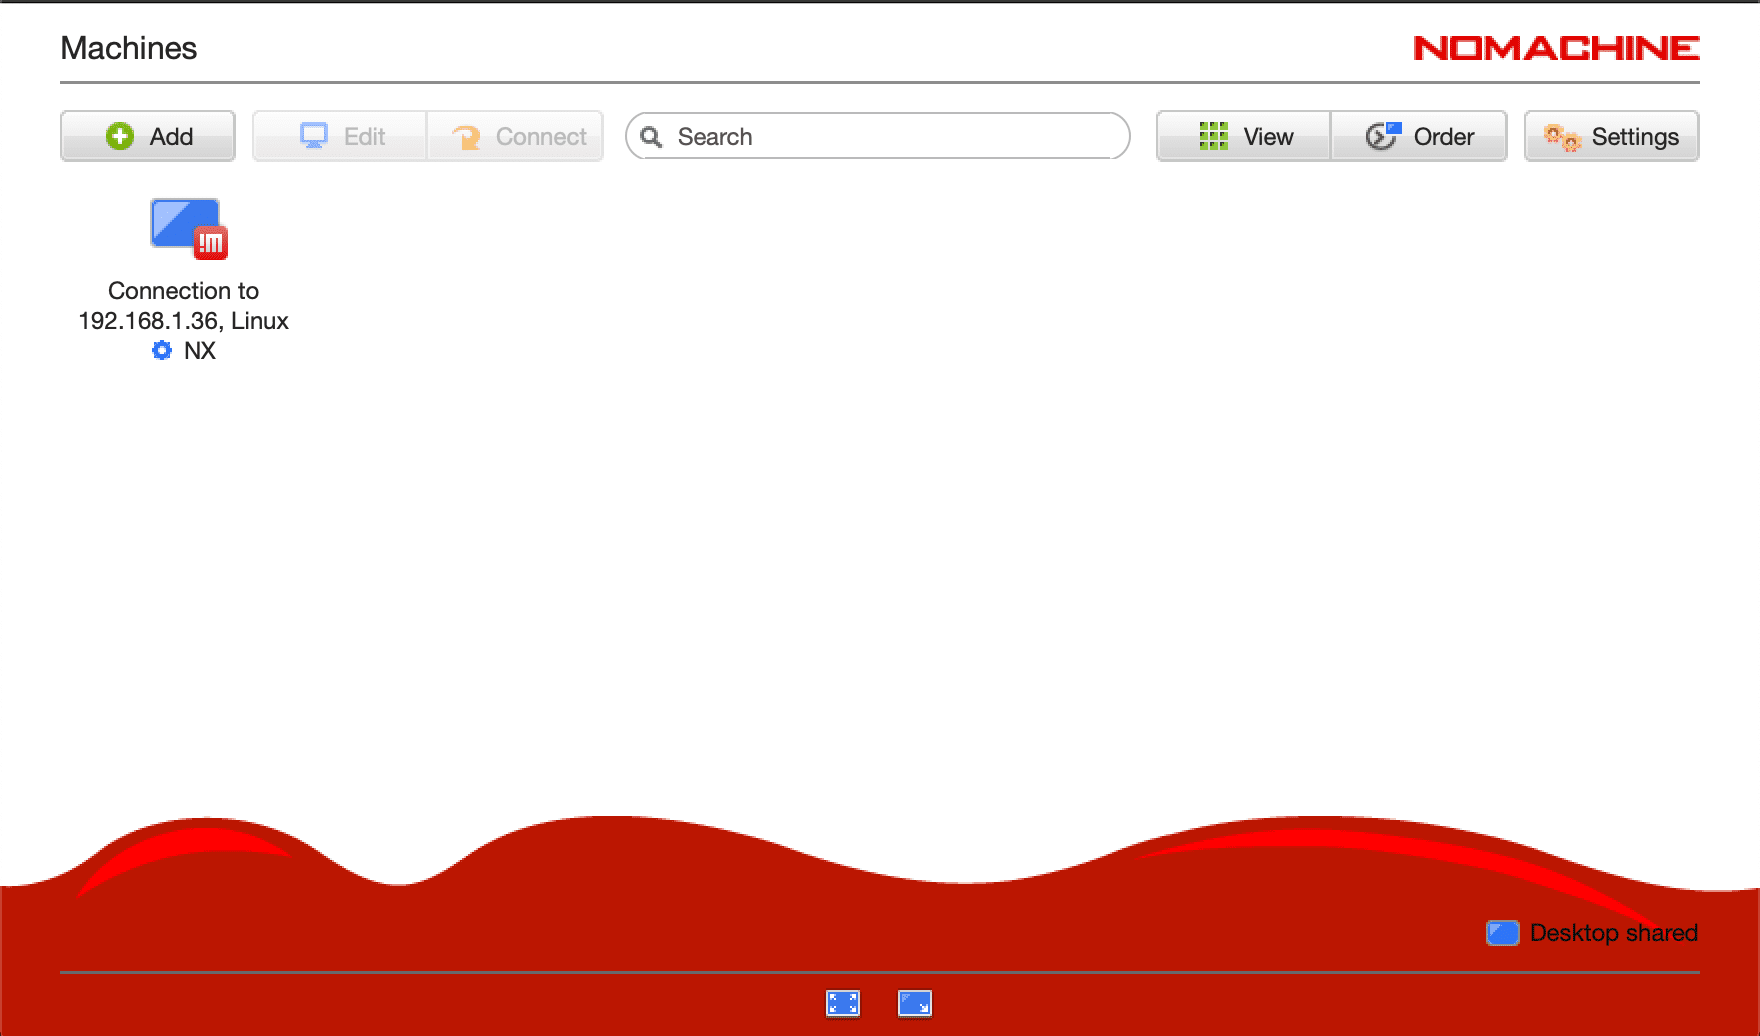
NoMachine
You will see a prompt to enter the Pi username and password. Then, if everything is correct, you will see the Pi graphical interface on your PC, as shown below.
NoMachine Raspberry Desktop
Conclusion
With the proper configuration, Raspberry Pi can be accessed remotely from other computers to carry out the various tasks on it in the manners described above. Did we miss something? Please share any additional techniques you may have for remotely connecting a Raspberry Pi in the comments.