
Want to install and run Android on your Raspberry Pi? Here’s how to do it – and why you need to try Android in the first place. The Raspberry Pi is one of the most popular Small Board Computers (SBC) used in many different ways by many other people. We have seen many operating systems available for the Raspberry Pi but installing Android has always proven to be a challenge. Many solutions have existed in the past, but none has ever worked like a True Android on Raspberry. However, that’s until limitations that hindered Android from running smoothly on the Raspberry Pi were lifted.
Currently, we have several operating systems that will enable Raspberry users to run a full build of Android seamlessly. They include:
For this particular tutorial, we will look at OmniROM and Emteria OS. If you are using Raspberry Pi 4, consider using the OmniROM since writing this post, Emteria.OS doesn’t have a release for Raspberry Pi 4. If you have Raspberry Pi 3B+, opt for Emteria.os
What You’ll Need
- Raspberry Pi 4/ Raspberry 3B+
- A reliable, suitable power supply
- A high-quality microSD card that’s at least 16GB
- OmniROM or Emteria OS depending on the Pi model.
- Display -the official 7-inch Raspberry Pi Touchscreen Display. (Optional)
- Mouse and keyboard if you’re not using a touchscreen display
Installing Android on a Raspberry Pi 4 with OmniROM
OmniROM is an open-source operating system designed and developed to run on smartphones and tablet computers based on the Android mobile platform. This project is currently making headlines for its new unofficial port, enabling Raspberry Pi 4 users to run Android 11.
Even though most of the small board computers, including the Raspberry Pi, use the ARM architecture similar to that in Android devices, porting Android to Pi has never been easy due to missing drivers. There have been many attempts, but as of now, the new OmniROM appears to be the most promising. It is based on Android 11 and designed exclusively to run on Raspberry Pi 4.
Let’s dive in and see how we can run Android on Raspberry with OmniROM. Follow the steps below.
Step 1. Flash OmniROM to SD card
Download OmniROM from their official website with the link below.
You will see a long list of files. Select the latest build with the extension MICROG.zip. If you are a big fan of Bleeding edge technology, you can opt for the weekly release, which has the extension ‘WEEKLY.zip.’ The file will be downloaded as a zipped file. Therefore, ensure you extract it to retrieve the ‘.img’ file.
To flash the OmniROM image file on our SD card, we will need to use Balena Etcher. Use the link below to download and install Etcher from their official website.
When the installation completes, launch Etcher from the applications menu, which features three main steps.
- Click on Flash from File to select the image to flash on the SD card.
- Click Select Target to choose the destination external storage device.
- Click Flash to burn the image file onto the SD card.
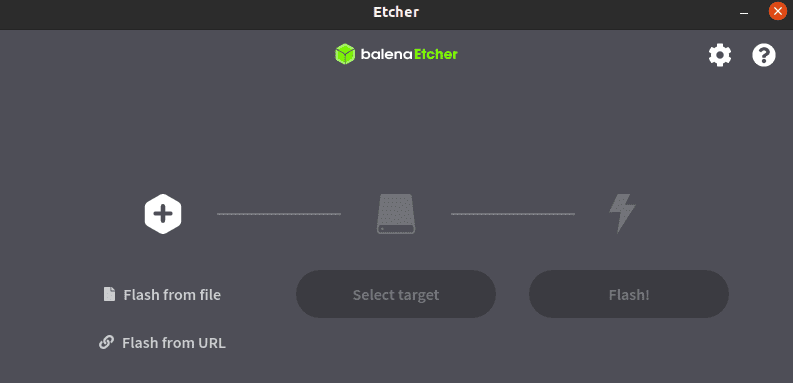
Balena Etcher
Step 2: Install OmniROM on Raspberry Pi 4
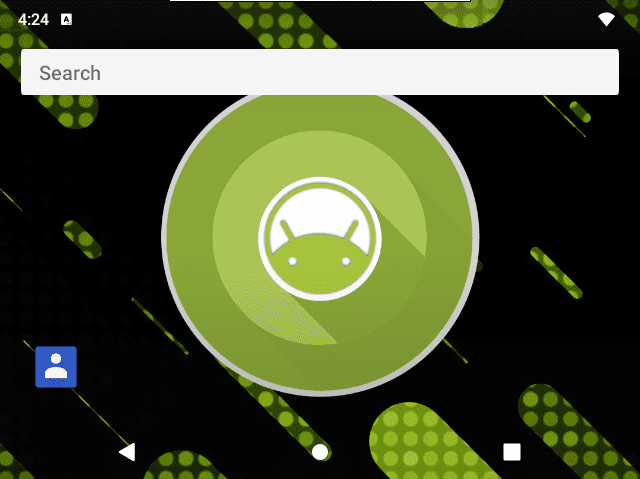
When the Flashing process is complete, remove your SD card from the PC and insert it into your Raspberry Pi 4. Connect a reliable and suitable power supply to boot OmniROM. The first screen you will see is the animated OMNI logo, which will be moving across your screen.

OmniROM
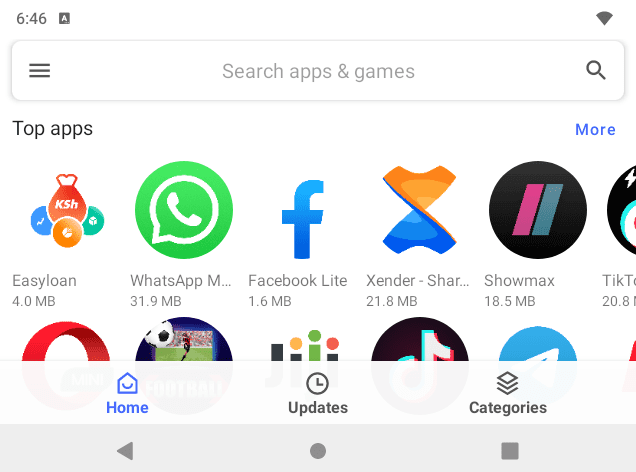
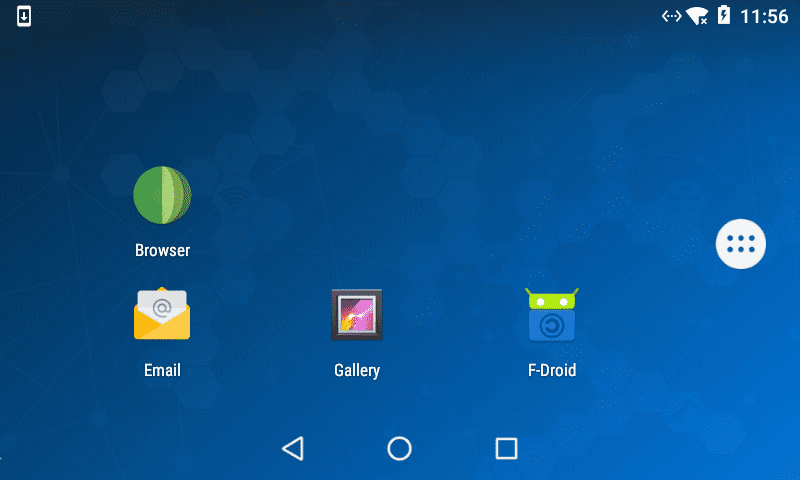
The OmniROM runs in Tablet mode. After a successful boot, you should get a screen similar to the one below.
OmniROM Android
At this point, the operating system is fully installed and running. You can perform various tasks like you would on a real Android smartphone. For example, You can swipe from the bottom to access the currently installed application or swipe from above to access some basic settings like WIFI, Bluetooth, Airplane mode, etc.

Basic Settings
For many, this would be enough – But what if you want to install applications? With OmniROM, not only does it support installing Android APK files manually, but it also comes pre-installed with the Aurora Store for Android. It is the unofficial client to Google’s Play Store from where users can download and update applications.
To get started with Aurora, launch the application from the apps menu. For first time use, you will see two login options. Login Anonymously (requires no user details) or log in via a Google account. Select the option that you see best. Once logged in, search for any app you wish to install from the vast store.
Aurora Store
If you want to install an APK, you first need to enable the option ‘Install unknown apps’ in Settings -> Apps & Notifications -> Special App Access. Once done, proceed to the location where you have the APK file stored. Double-tap/double click on it to install.
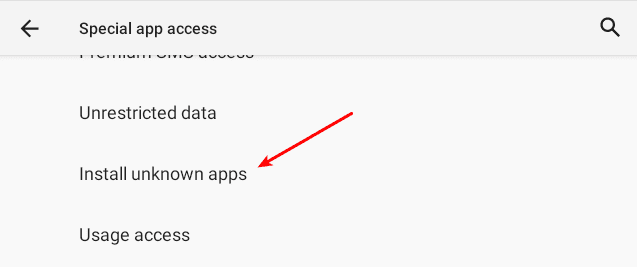
Install Unknown Apps
I believe that was a straightforward guide on installing Android on Raspberry Pi 4 with OmniROM. If you have a Raspberry Pi 3B+ board, the section below will give you a step by step guide of installing Android with Emteria OS.
Installing Android on a Raspberry Pi 3 with emteria OS
Emteria is one of the most popular implementations of Android on Raspberry Pi. It is available both as a free and premium product. As of writing this post, EmteriaOS is available for Raspberry Pi 3. If you have a Raspberry Pi 4 board, go through the section above, which gives you a clear guide on installing Android with OmniROM.
Follow the steps below to get started with Emteria.
Step 1. Register and download the installer.
Unlike most of our previous posts, where we flash an image on the SD card with tools like Balena Etcher, EmteriaOS comes with its installer. To download the installer, you first need to create an account on their official website.
After successfully creating an account, sign in and navigate the Downloads menu to get the installer. It is available in two versions, the .exe file for Windows and AppImage file for Linux. Download the one that suits you.
Step 2. Flash the SD card
After successfully downloading the installer, execute it to launch the EmteriaOS installer. Like on the website, you will be required to sign to use the app.
After a successful sign in, you will see the installers’ main window. Here, you will need to select several options. Just set everything as shown in the image below. However, if, as of reading this post, emteria has included support for newer Raspberry Pi models or has a new release, select the suitable options. Once done, click Continue.
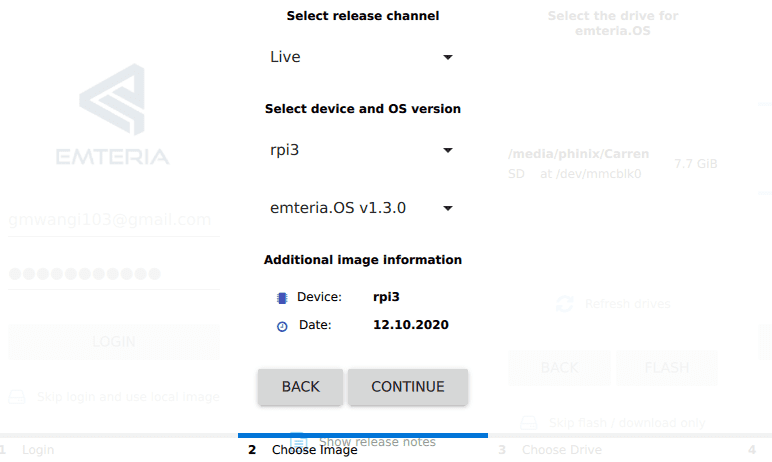
Emteria Installer
On the next screen, you will see your SD card and Flash option. If the SD card is not detected, click on the Refresh drives button. When ready, click Flash to burn EmteriaOS on the SD card. It might take a while because the installer will first download the emteria image then automatically Flash it on the SD card.
Step 3: Install Emteria on Raspberry Pi 4
After successfully flashing the SD card, eject it from your PC and insert it on the Pi. When you first boot Emteria, you will get to the initial boot screen with the Emteria logo.
Emteria logo
From here, follow the steps below:
- Click Next to open the Language screen. Select the language you want to use and when done, click Next.
- Set your Time and date. Click Next.
- You will see an option to setup up a network connection. That is necessary for device activation and customized setup. If you have connected an Ethernet cable to your Pi, skip this step. Otherwise, connect to a WIFI network. Click Next when done.
- Activate EmteriaOS. If you don’t have a license, skip this step.
- Next, you will see an option to download certain OEM features. This option is available if you purchased emteria OS through OEM. Click Apply to install additional packages. When done, click Next.
- Accept the End-User License and click Next.
- Finish the setup wizard and reboot the Pi. If there were no customizations applied, you could click Next without the need to reboot.
After the setup process completes, your Pi is now ready to use. Enjoy running Android on Raspberry Pi with emteria.OS!
Emteria
Conclusion
We have looked at two operating systems that will enable you to run Android on your Raspberry Pi. OmniROM for Raspberry Pi 4 and Emteria.OS for Raspberry Pi 3. These, however, are not the only available operating systems you can use to have Android running on your Pi. There are others outlined above that you could check out. In case you face a challenge with any of the steps above or wish to share any additional information with our readers, feel free to leave a comment below.