
Ideally, an EmulationStation is the official graphical frontend of the RetroPie project. Most people often confuse whether an EmulationStation is an emulator or not. Get it right today; an EmulationStation is not an emulator; instead, it is an enhanced polished game launcher that comprises of:
- Controller and keyboard support.
- Scraper for box art and game metadata.
This great Software was initially developed by Aloshi (backend code) and Nils Bonenberger (User Interface), but due to shifting to other projects, the RetroPie project maintained its fork. That fork has surprisingly made some outstanding achievements to the project improvements such as controller integration, video support, faster load times alongside others.
Those users who have ever used RetroPie on their Raspberry Pi machines should at least comprehend EmulationStation as they should have at least interacted with or used it before. An emulationstation is a central section of RetroPie and allows you to sort and run configurations on your games.
Interestingly, you can initiate your own alternative to RetroPie when using an EmulationStation on your Pi machine. A point to note is that an EmulationStation doesn’t whip with any emulators, so you need to set it up yourself.
Along the review, we will prepare our Pi for EmulatioStation then set up the Software by utilizing the RetroPie setup script. Another vital thing to keep in mind is that you should use a “lite” version of the Pi OS for this guide to be effective. Then again, the EmulationStation may hit some hitches when running on a complete desktop environment.
Below are some of the requirements for ensuring that EmulationStation is up and running on a Raspberry Pi:
- Raspberry Pi.
- Ethernet cable or Wireless Fidelity (Wi-Fi).
- HDMI cable.
- Power Supply.
- Micro SD Card.
- Xbox Controller or Playstation (PS3, PS4, or PS5 controller).
Preparing the Raspberry Pi for EmulationStation
Always ensure that your packages are up to date at all times before installing anything on your machine. As such, the overall functionality of your machine is maintained. So, before installing the EmulationStation on our machine, we will have to carry out the initial preparatory work.
Step 1: Update and Upgrading
As we previously said, our first step is to update our Pi’s OS. To attain this, run the following commands:
sudo apt update
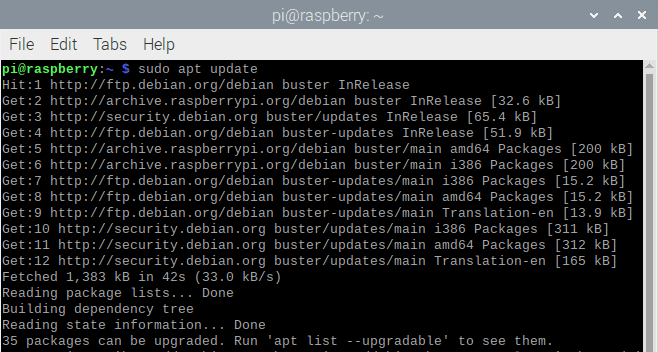
update command
The above command will run through the package list and check if any packages need an upgrade. You will be shown the number if there are, hence easing your work. So, if you find packages that need an upgrade, like in our case 35, run the following command:
sudo apt full-upgrade
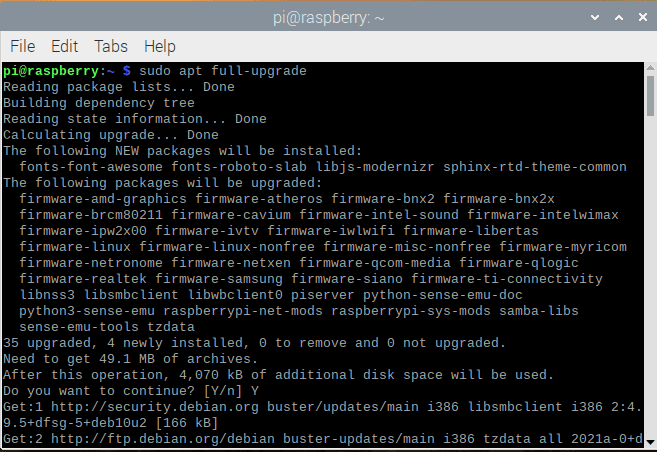
full upgrade command
Step 2: Dependencies installation
With our Pi machine now up to date, let us go ahead and install any dependencies required to install the EmulationStation. The dependency, in this case, is the git package.
To have this mandatory package (git) on our device, run the following command:
sudo apt-get install -y git
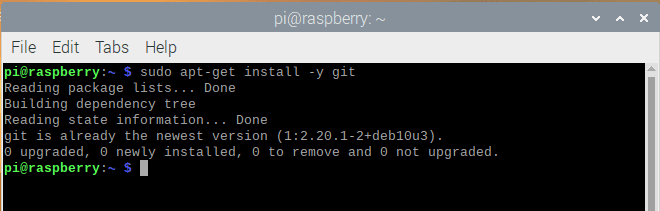
git command
The above command simply tells that the only package we need for this procedure to work is git. Are you asking yourself what git is for? If that is the case, git is used to grab the script required to install EmulationStation.
Step 3: RetroPie-Setup Script clone
In the finalizing stages, we will clone the latest version of the Retropie-setup script to our pi machine. What makes this step even more straightforward is the git we installed earlier. So, run the following command to clone your machine’s most recent script version.
git clone --depth=1 https://github.com/RetroPie/RetroPie-Setup.git
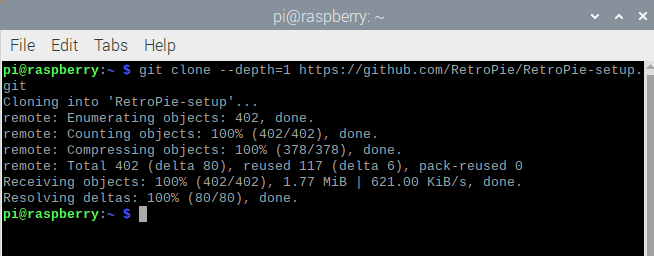
retropie setup script clone
Some may wonder why we are downloading the setup script. This is because the script eases the installation process of the EmulationStation on our Pi machine.
Contrastingly, we would have to clone and compile a number of other packages like SDL to get the EmulatioStation up and running. But this script we are utilizing is handling everything for us and is continually maintained by the RetroPie team.
Note: you should notice the “–depth” option in the above command. This ensures that we only grab the latest commit of the repo. Basically, this choice lightens the amount we need to download to our Pi machine.
After looking at that, let us now focus on installing EmulationStation on the Pi machine.
Installing the EmulationStation on the Pi Machine
After preparing our pi machine, the next step is to install the EmulationStation. Overly, the installation process of this Software is pretty straightforward as we will utilize the RetroPie setup script.
Step 1: Directory change
Prior to running the script setup, we have to navigate and switch into the directory we cloned the RetroPie to from Github. To navigate into this directory, we can use the subsequent “cd” command in our terminal:
cd RetroPie-Setup
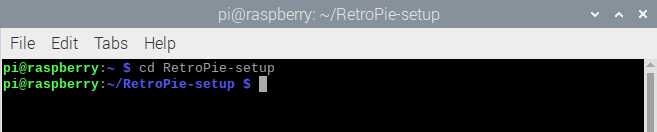
navigate to the directory
Step 2: Run the Setup Script
Immediately we are in the right directory, run the RetroPie setup script. Via this script, we can install specific components of RetroPie. This proves that we can install the EmulationStation to our Pi machine in our event.
sudo ./retropie_setup.sh
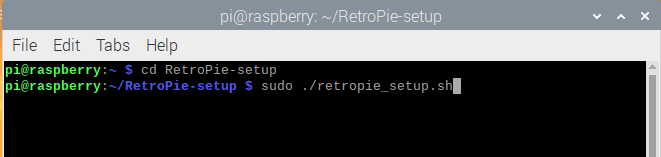
Run the retropie script
When you initially run the setup script, it will by itself install any dependencies that it might need to work.
Step 3: Switching to Manage Packages
Since we don’t intend to install the entirety of RetroPie for this review, we must switch to the “Manage Packages” screen. You can attain this by pressing the “P” key, then pressing “Enter.”
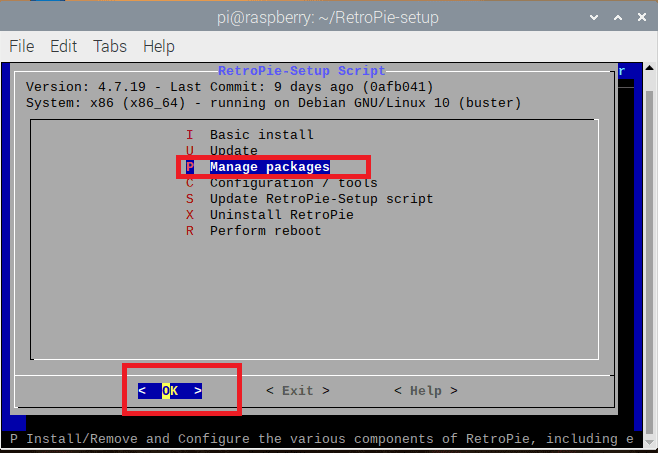
select manage packages
Note: You can navigate through these menus by using the Arrow keys. However, we will be utilizing the shortcut keys for simplicity.
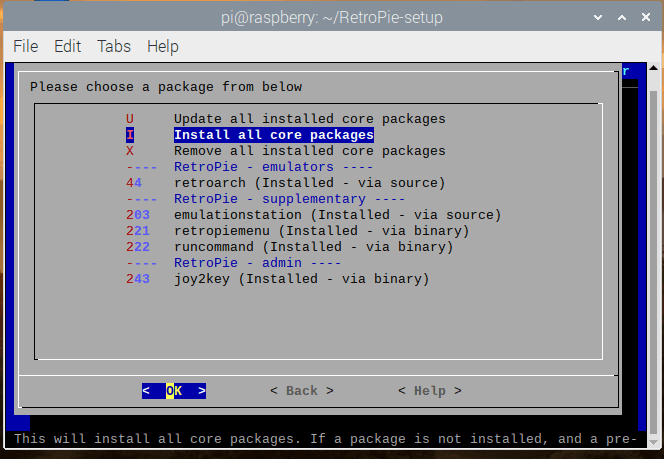
Step 4: Switching to the core package
Because the EmulationStation is a core package for RetroPi, we will simply switch to the first option, “Core Manage core packages,” and press the “Enter” key to select.
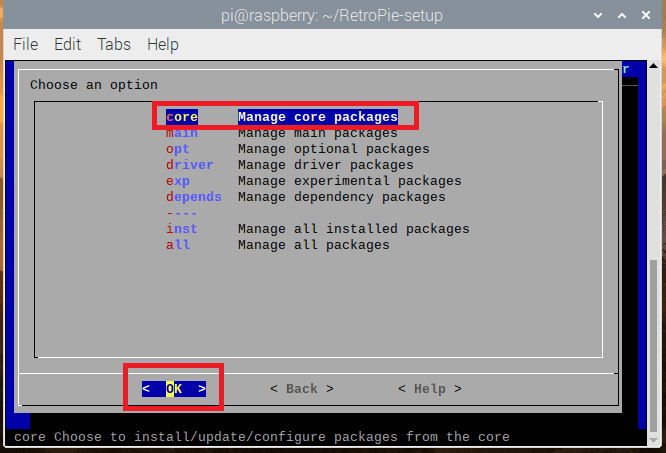
select manage core packages
Step 5: Select EmulationStation
In the next window, you will select the “emulationstation” option. You can simply attain this by hitting 2, then the “ENTER” key.
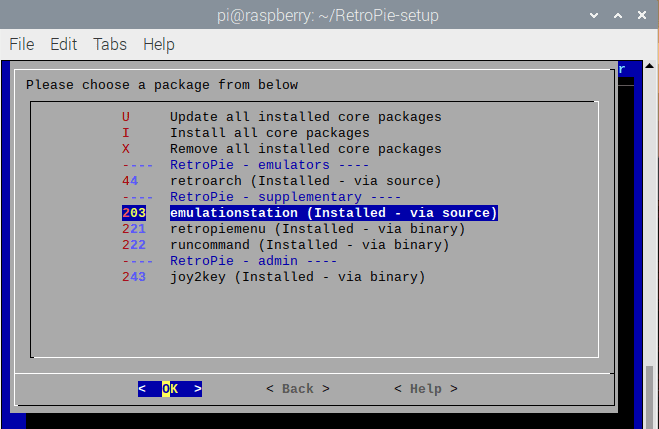
select emulationstation
Step 6: Installation selection
Here, you have the option to either install by source code or by installing a pre-compiled binary made available by the RetroPie team.
In our event, we will be using the re-installation via source option in this review because of its faster installation abilities. Press “U”, then the “Enter” key to select this option.
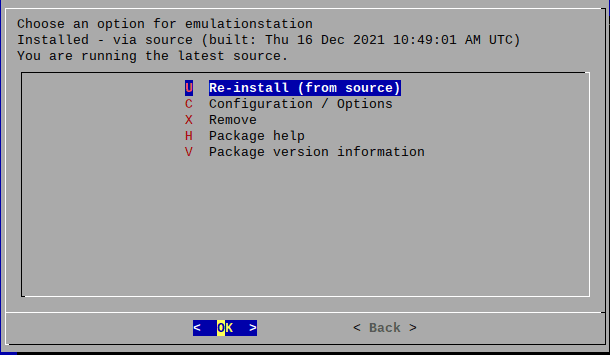
select re install from source
Step 7: Confirmation Window
In this window, you will be queried to attest your choice to install EmulationStation to your Raspberry Pi from the RetroPie source.

select yes
To confirm, press “Y” on your keyboard then the “Enter” key to proceed with the installation.
Note: Please note that the installation process will take time as a number of packages need to be installed in your system.
Step 8: Completion
At this moment, you are done with the installation process, and you will see such a screen:
such a window will appear
To quit the installation window, hit the “ESC” till you are redirected to the terminal.
Since we are done with the setup process, we now have to get the Emulationstation up and running to help generate some initial configuration files. To fire up the Software, run the following command:
emulationstation

run the emulation command start up the software
Typically, many run into an error upon running the EmulationStation for the first time. Nonetheless, you need not worry if that is the case, as we will show you how to deal with and configure the Software in the subsequent step.
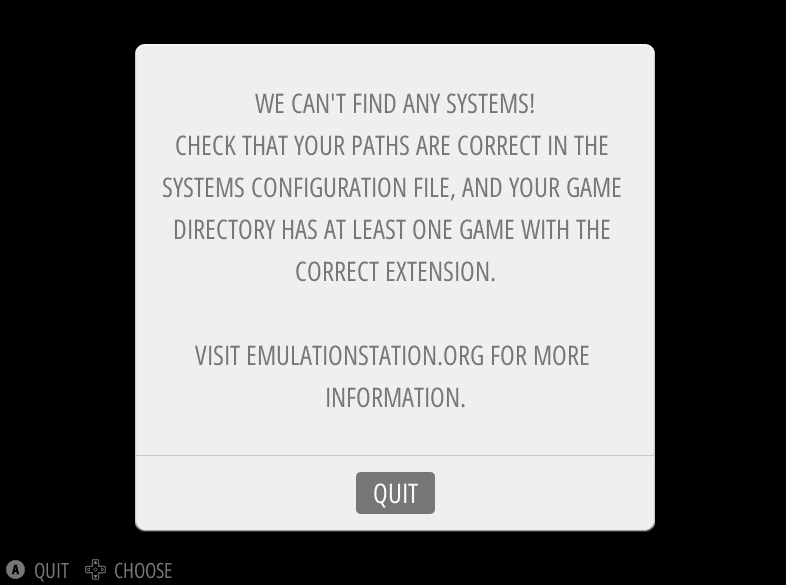
you will run into an error
When such an error screen appears, press the “Enter” key to exit back out of that window.
Then again, when quitting from the EmulationStation window, you will also run into the following error “EmulationStation crashed!.” We suggest you safely ignore this.
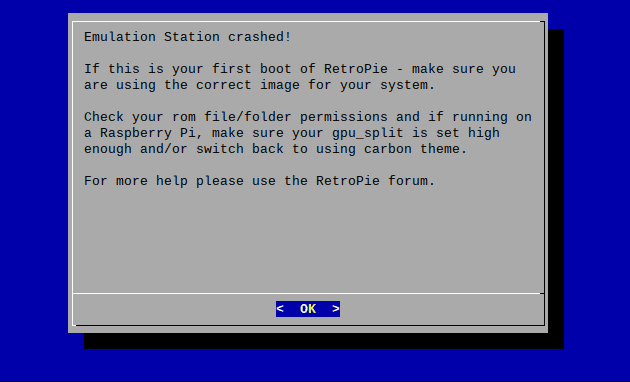
emulationstation crashed
Note: This error results from using the RetroPie build of the Software, and it expects a number of configuration stuff to be appropriately carried out from the word go. To return to the terminal, press “ENTER.”
Configuring The EmulationStation
Beforehand, we must first configure at least one system to emulate before using the EmulationStation on your Pi machine.
In this section, we will brush through the EmulationStation configuration file and also give you an overview of how well you can configure a system.
Step 1: File edit
First, we will begin by editing one of the EmulationStation config files. The file that we will be editing, in this case, stores the systems needed to be included as part of the Software’s interface.
To attain this, we will use the nano text editor by running the following command:
nano ~/.emulationstation/es_systems.cfg
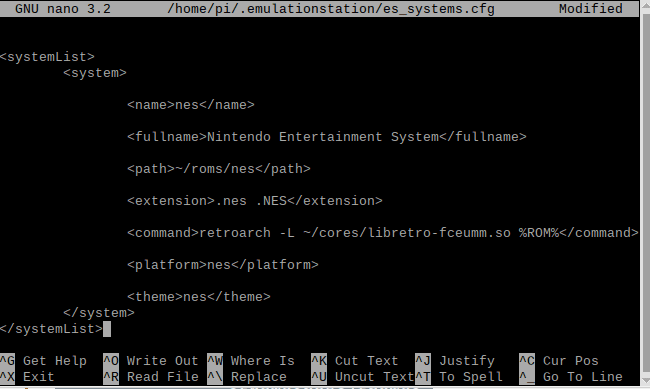
nano editor
You will basically find the following text already set within this file. Ideally, this is a basic configuration file saved when you first run the Emulation software to give you an impression of how you define a system.
<systemList>
         <system>

                 <name>nes</name>

                 <fullname>Nintendo Entertainment System</fullname>

                 <path>~/roms/nes</path>

                 <extension>.nes .NES</extension>

                 <command>retroarch -L ~/cores/libretro-fceumm.so %ROM%</command>
                 <platform>nes</platform>

                 <theme>nes</theme>
         </system>

</systemList>
With this sample file in hand, I know you are itching to understand how the Emulation software handles each option. However, you need not itch anymore as we will run you through it.
<systemList>
Always ensure that everything you set is within this file “systemList.” This tag shows a list of systems that the EmulationStation will look for. The file should always begin with this tag open.
<system>Here, every “system” that you want to define within this file requires wrapping in this tag. This tag basically shows the start of a new system. However, with this tag, you don’t close until the end of your settings for that system.
<name>shortname</name>On the “name tag,” the name tag needs to possess a shortened name for your system. It is internally utilized by the Software on your Pi machine. Make sure you write this value in lowercase (small letters).
The key function of this tag is that it is used internally by the graphical frontend to locate this system within the code. For instance, if we were to set this up for a PlayStation 5 emulation, we would use this syntax “<name>ps5</name>.”
<fullname>Longer and Nice looking Name For Exhibit</fullname>The “fullname tag” gives you the flexibility to specify a lengthy and most preferable name for your system without any limit. Ideally, the name stored within this tag will be shown in the Software in things like menus. This tag is nonobligatory; hence it will redirect to the value name set in the name tag in case it is not set.
For instance, if we were to set this for a PS5 emulator, we would apply the syntax as follows:
“<fullname>PlayStation 5</fullname>“.
<path>~/roms/exampledirectory</path>
The “path tag” aids you in specifying where these ROMs are located on your Pi machine. The Software will include all sub-directories. As such, the EmulationStation needs this tag so as to be able to know where to scan for ROMs for this system particularly.
Let us take an instance where you were to store ROMs based on the system name within a directory called “singleboardbytes,” you will, in this case, write this tag like this “<path>~/singleboardbytes/ps5</path>.”
<extension>.example .EXAMPLE .eg .EG</extension>The “extension tag” is explicitly used in the specification of file extension names that the scraper should focus on when searching the directory stated in the path tag. Remember that file extensions are case sensitive and must have the period (.) at the start.
Another critical point about extensions is that you can specify multiple file extensions within a tag. Nevertheless, they must be separated by whitespace. In case you have no idea what whitespace is, it is basically a single space. This tag is vital as it is required to be set for the EmulationStation Software to scan for your ROMs. Due to that, it is clear that without the tag, the Software will be unaware of what to look for.
For example, if our ROMs were stored in a .boarbytes file, we would use the following setting “<extension> .boarbytes .BOARDBYTES</extension>“.
<command>emulatorcommand %ROM%</command>We use the “command tag” to help specify the command that the Software should use to run the emulator. So, the EmulationStation will execute this command when a ROM is selected within its interface.
Note that you first need to key in the command you want to be executed when filling this tag. Where you would ideally write the path to your ROM, you would instead use “%ROM%.” The “%ROM%” text will be spontaneously replaced with the path to the selected game.
Note: Always remember that you need to have this emulator formerly installed for the EmulationStation to run it on your Pi machine. Furthermore, this tag is necessary because, without it, the interface will not know how it can run your game as EmulationStation does not have any emulators of its own.
<platform>psx</platform>When it comes to the “platform tag,” you can use this tag to tell your EmulationStation what platform this “system” is for. If this, in turn, corresponds to a supported platform, then the EmulationStation will scratch for info for those ROMs.
Are you in search of a way to find a list of platforms supported by EmulationStation’s scraper? You need not look anymore since you can find it by looking at the Platformld.cpp file. This tag is also optional, but it aids the software in pulling out more information about the ROMs on your Pi machine.
<theme>themeName</theme>Not least of all, we will look at the “theme tag” that is used to specify a theme to load from the currently set theme. If you need to better understand how themes work in the EmulationStation, you can go over their official documentation on the EmulationStation themes.
</system>Once you have inputted all the tags required to make up your system, you need to ensure you have the closing system tag.
</systemList>The final tag included in your file must be the closing element for the “systemList tag.” The key function of this tag is to indicate an end to your list of systems.
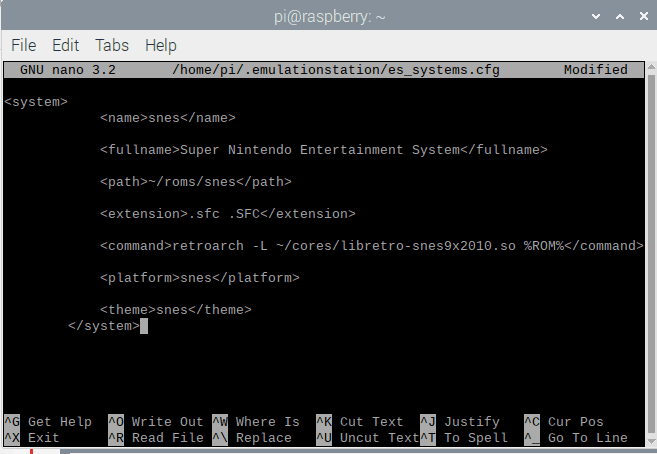
After completing that face of running down all the values, let us now delve deeper and affix the SNES as an additional system to the sample configuration system list. The following lines will tell more about a “system” for the SNES console, filling out all the tags we previously went through.
<system>
   <name>snes</name>

   <fullname>Super Nintendo Entertainment System</fullname>

   <path>~/roms/snes</path>

   <extension>.sfc .SFC</extension>

   <command>retroarch -L ~/cores/libretro-snes9x2010.so %ROM%</command>

   <platform>snes</platform>

   <theme>snes</theme>
</system>
Once this system is added into the file, you need to save and quit from the file using “CTRL + X,” then “Y,” followed by the “ENTER” key.
add this file
Before rerunning the Software, you will need a ROM for one defined system. Once you have one, ensure that you put it into the specified path for that system in the config file.
Running EmulationStation on the Raspberry Pi Machine
Now it is time to start up our Software after configuring the systems file and adding a valid ROM on our Pi machine. Follow the following steps to take you through the process of Running the EmulationStation
Step 1. To launch the Software, type in the following command on your pi machine
emulationstation
run the emulation
Step 2. Upon executing the command for the first time, like in our case, you should be greeted with a welcome screen. To proceed, you need to either hold down a keyboard or instead a button on a gamepad.
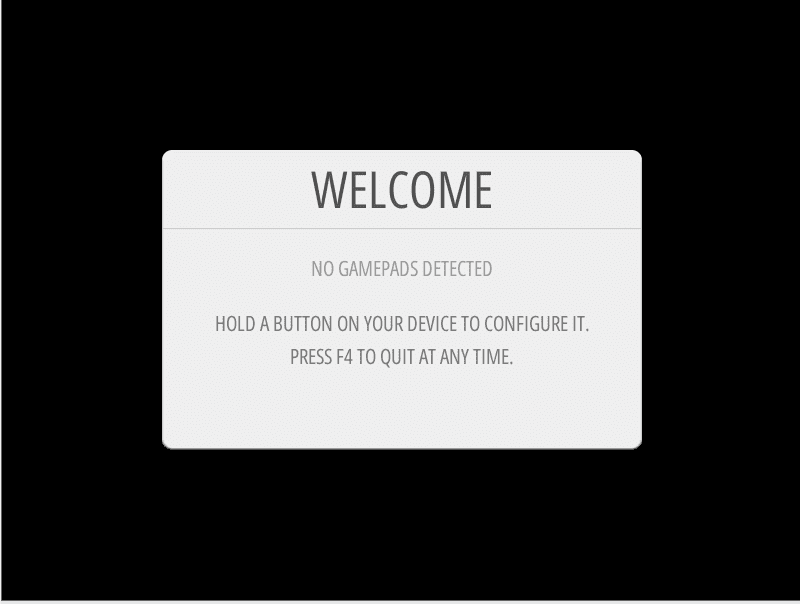
Welcome window
Take note that if you see an error screen, you have to check in to confirm whether you appended your system correctly and ensure a ROM is available in its directory.
Step 3. The next step is configuring the controls of the EmulationStation. The dialog that will appear in this step will run you through a number of controls. What you do here is press the button on your keyboard or gamepad that you want to be associated with that particular action. As such, the Software will utilize these settings for circumnavigating through its many lists of options (menus).
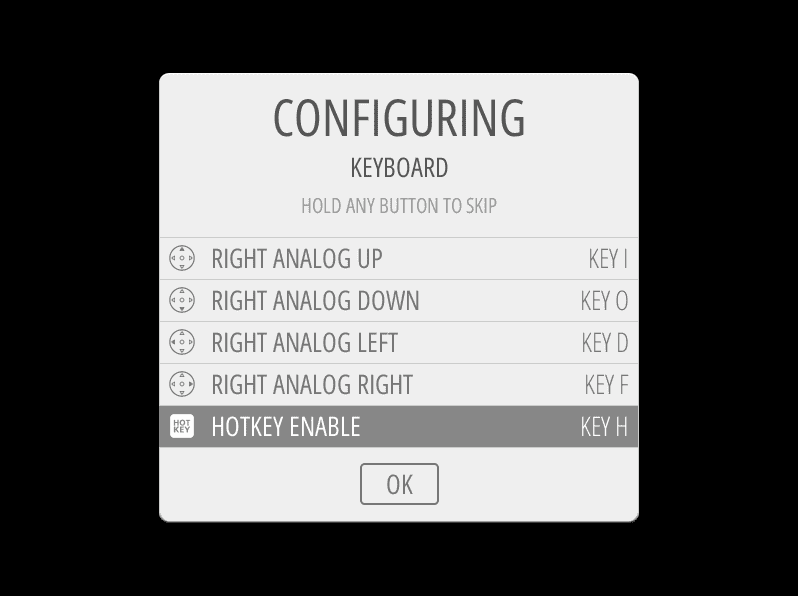
configuring controls
In case you want to skip setting a button, hold down any key and automatically skip to the next available option. After configuration, click on “OK” to proceed.
Step 4. At this point, you now have successfully acquired an up and running EmulationStation on your Raspberry Pi. However, you can proceed to configuring and tweaking the graphical display to your preference.

ready
Conclusion
To this far, we believe that the steps were simple enough to aid you in installing and configuring the EmulationStation to your Pi machine without much struggle. We in this review used the RetroPie fork of the Software as it has been a lot more updated and has a pretty straightforward setup script that we can utilize to install the graphical display. After installing, we ran a successful configuration of the Software and finally showed how to run the Software.