
Retropie is a free software library used to emulate video games on the Raspberry pi computer. It’s built primarily for the Raspberry range of Small Board Computers (SBC) but can run on other boards like ODroid running on top of kernels like Ubuntu and Debian. Retropie is front-end management for launching retro games. It is free to download and runs on top of retroarch, granting access to a wide range of playable systems on one computer.
Retropie allows you to play video games and play movies or tv shows and listen to music. Retropie runs emulation stations and supports all major retro game emulators, allowing users to have an amazing experience playing games.
This post will give you a step-by-step guide to installing RetroPie on your Raspberry Pi board. There are two ways through which you can install RetroPie:
- Install Retropie using the SD card image – It is the easiest and highly recommended.
- Install Retropie on top of another Operating System like Raspbian (Official Raspberry OS).
Installing Retropie on Raspberry Pi
In this tutorial, we will look at how to Install Retropie using the SD card image. Let’s dive in and get you up and running Retropie on your Raspberry SBC.
Requirements
- PC (Laptop or desktop)
- Raspberry PI board
- MicroSD card
- SD Card reader
- Screen (TV, Projector, Computer Monitor)
- Reliable power supply
- The game controller of choice
- Keyboard (Optional)
Installation
1. Insert the SD card into your laptop using the SD card slot or Micro SD card reader, which comes in many designs, including the USB.
2. Download the Retropie SD card image. Now, here you will need to select the image for the specific Raspberry Pi board you have. For example, for Raspberry Pi 4 users, you will download the RPI 4/400 image.
3. Once you have downloaded the Retropie file, we will need to extract the image and burn it on our SD card. There is a lot of software available to flash images and ISO files on SD cards. However, in this particular tutorial, I recommend using the Balena Etcher tool, which is available for Linux, Windows, and macOS.
The Balena Etcher tool comes with an intuitive user interface, and it’s quite easy to use. Launch the applications and follow the steps below:
- Click “Flash from file” and select the Retropie image you just downloaded.
- Click the “Select Target” button and choose the SD card you want to use.
- Confirm that all your selections are correct, and click the Flash! Button to burn the image to the SD card.
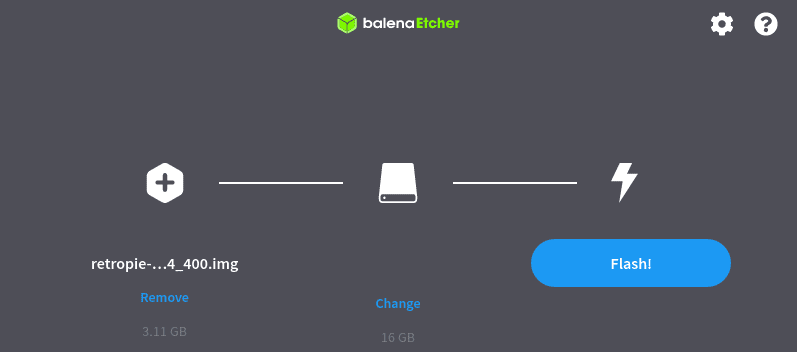
Balena Etcher
4. Balena Etcher will start flashing the Retropie image to the SD card. This process might take a while. Please be patient.
5. Once done, eject the SD card and insert it into your Raspberry Pi. If you have a Game controller, plug it into the Raspberry Pi for configuration; if you don’t have one, plug in an external USB keyboard.
Boot your Raspberry Pi and Configure Controllers
When you first boot the Raspberry Pi, the Linux Kernel will load, and you will see the Retropie Welcome screen. If you have plugged in a Game controller, you will see the message “1 GAMEPAD DETECTED”; otherwise, you will see “NO GAMEPADS DETECTED.” If you plugged in an external keyboard, it wouldn’t be listed here, but we can still configure it.
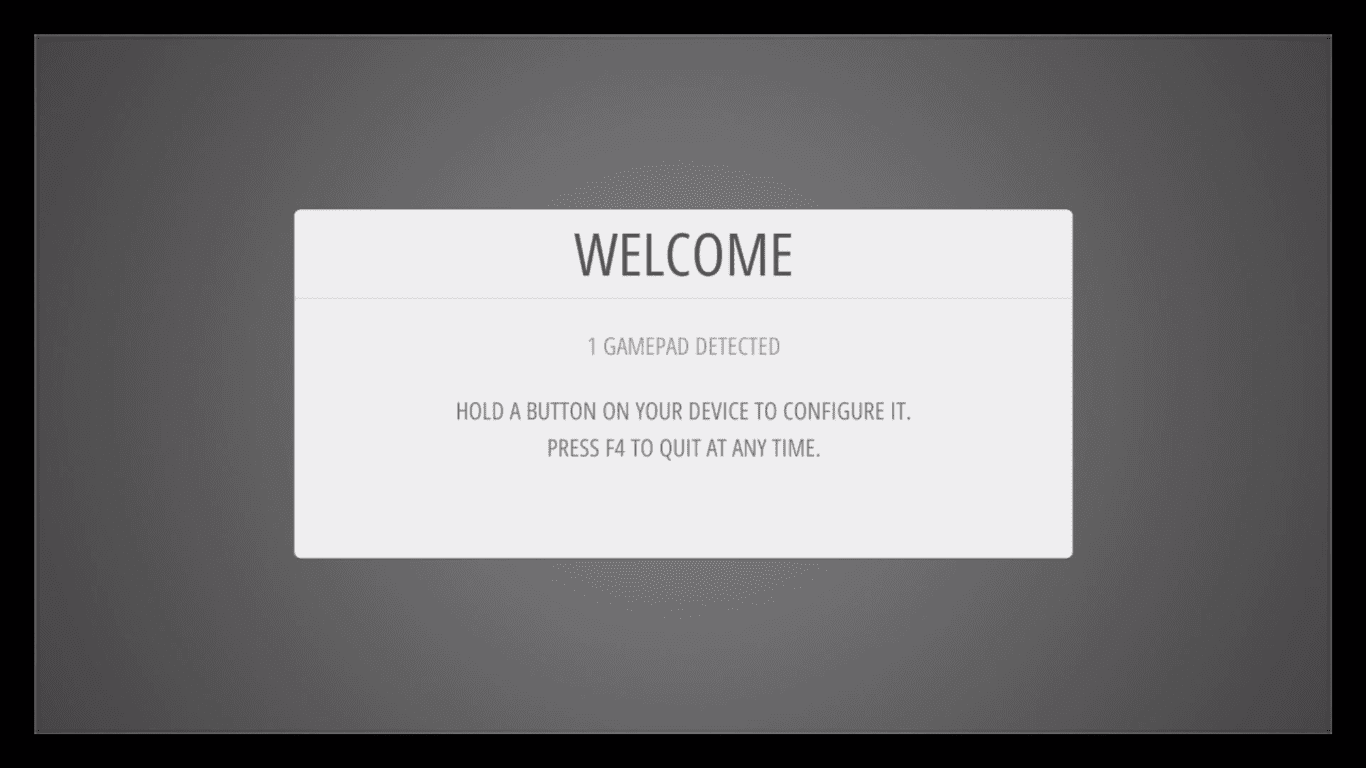
Retropie Welcome screen
Hold down any key for some time, and you will see the name of the device you plugged in before the configuration window opens. In the image below, you can see I connected a USB,2-Axis 8-Button gamepad. If you plugged in a Keyboard, you would see the name “KEYBOARD” at the bottom.
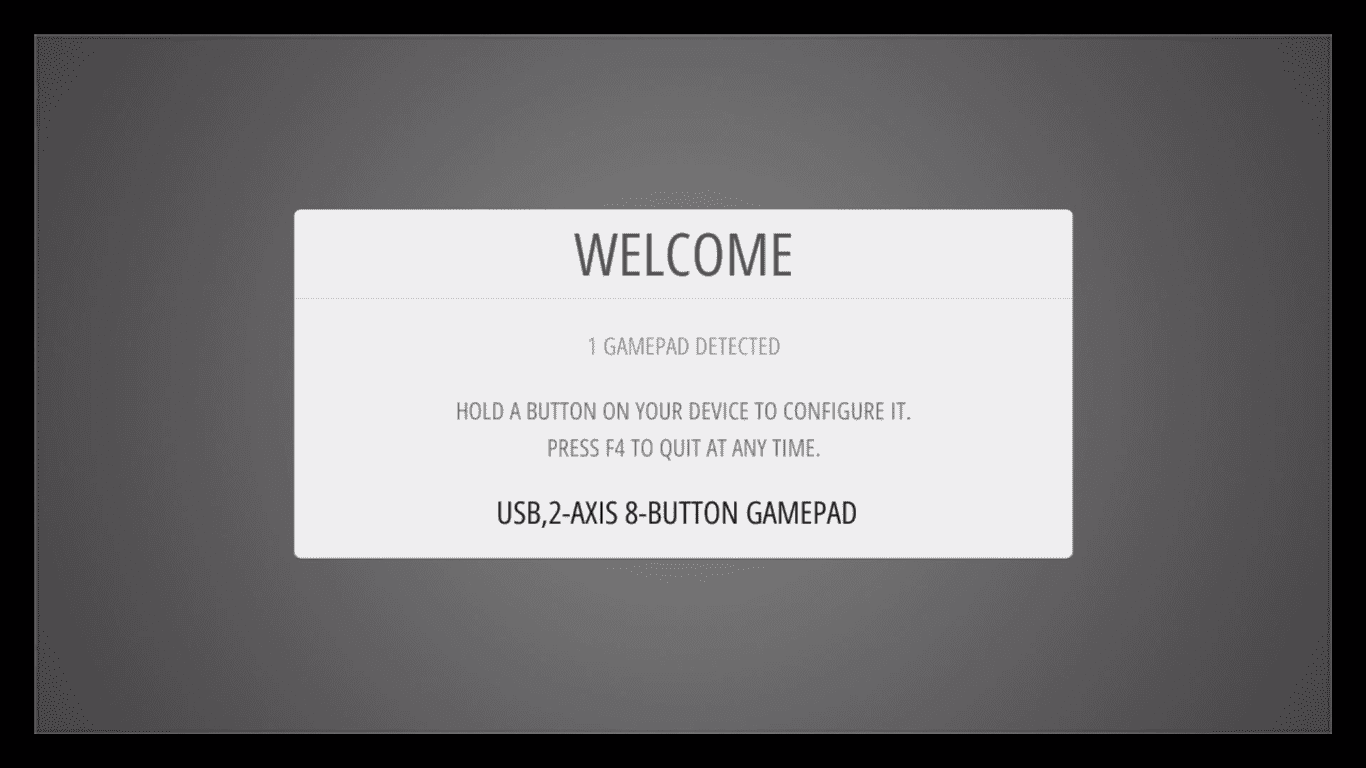
Device name
After a few seconds, the configuration screen will open. As you will see, all the options are set to “NOT DEFINED.” You will need to select a button for each option by pressing the button of choice on your device (Keyboard/Gamepad). You can see for the “LEFT BOTTOM” option; I pressed “BUTTON 4”. To skip any option, hold down a button for a few seconds. When done and you get to the OK button, press the button you configured as “A.”
If you mess up with the configurations, don’t panic. You can still access the configurations window later by pressing the “START” button.
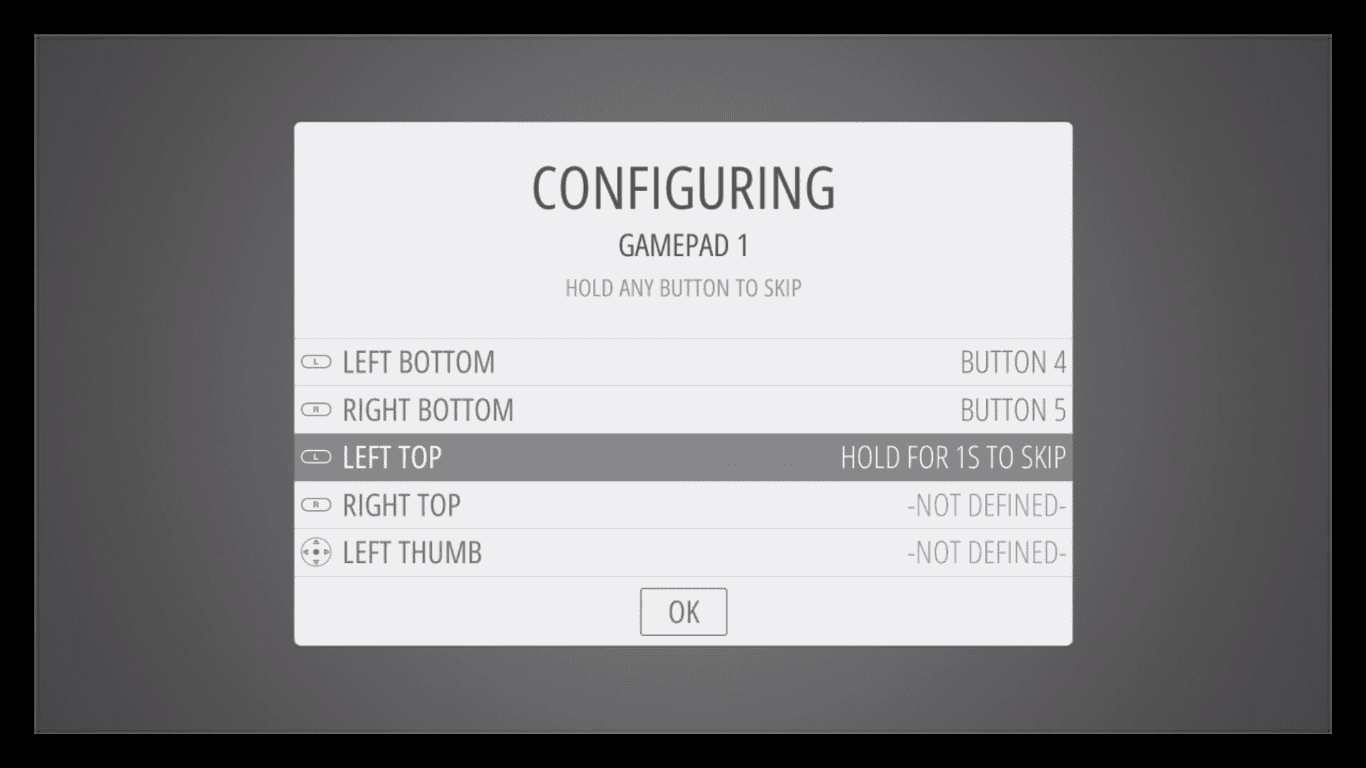
Device Configuration
You are not limited to a single gamepad. If you wish to configure another controller, you can easily do so from the start menu of EmulationStation. In case the buttons sound confusing, use the image samples below for some of the popular game controllers we have in the market.
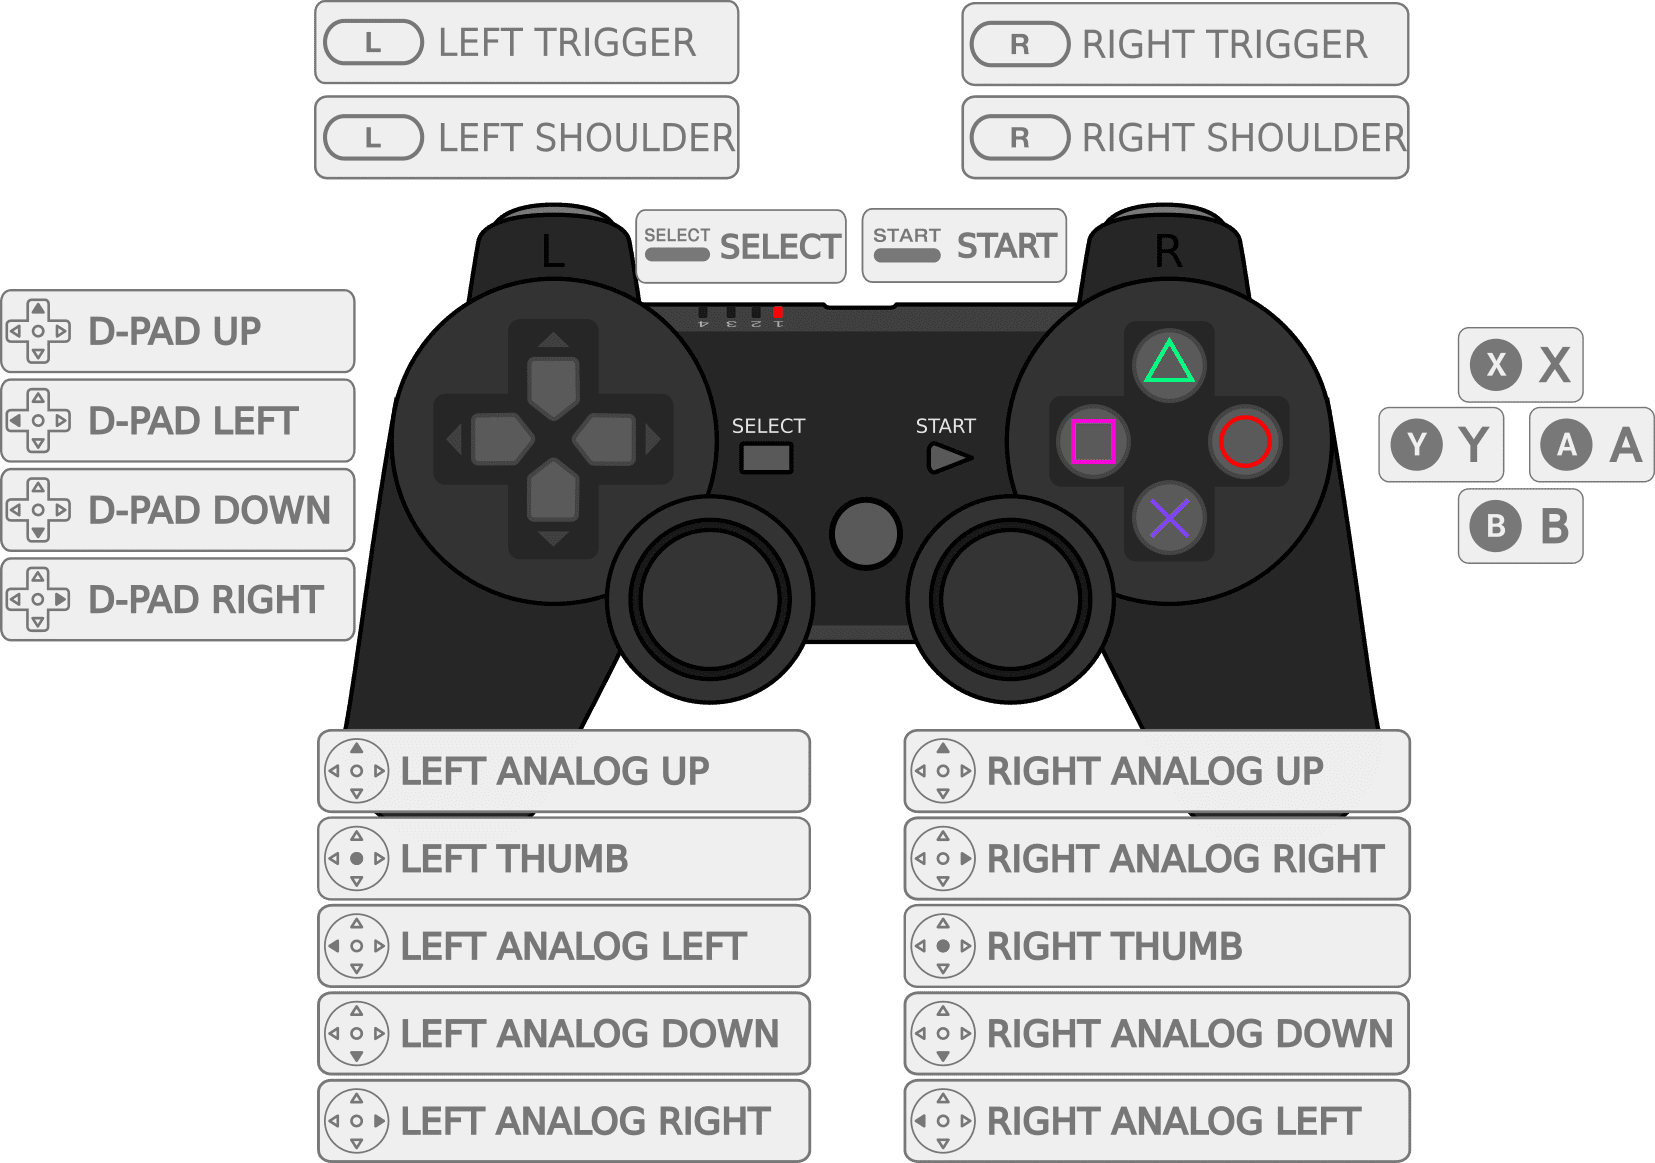
PS3 Controller
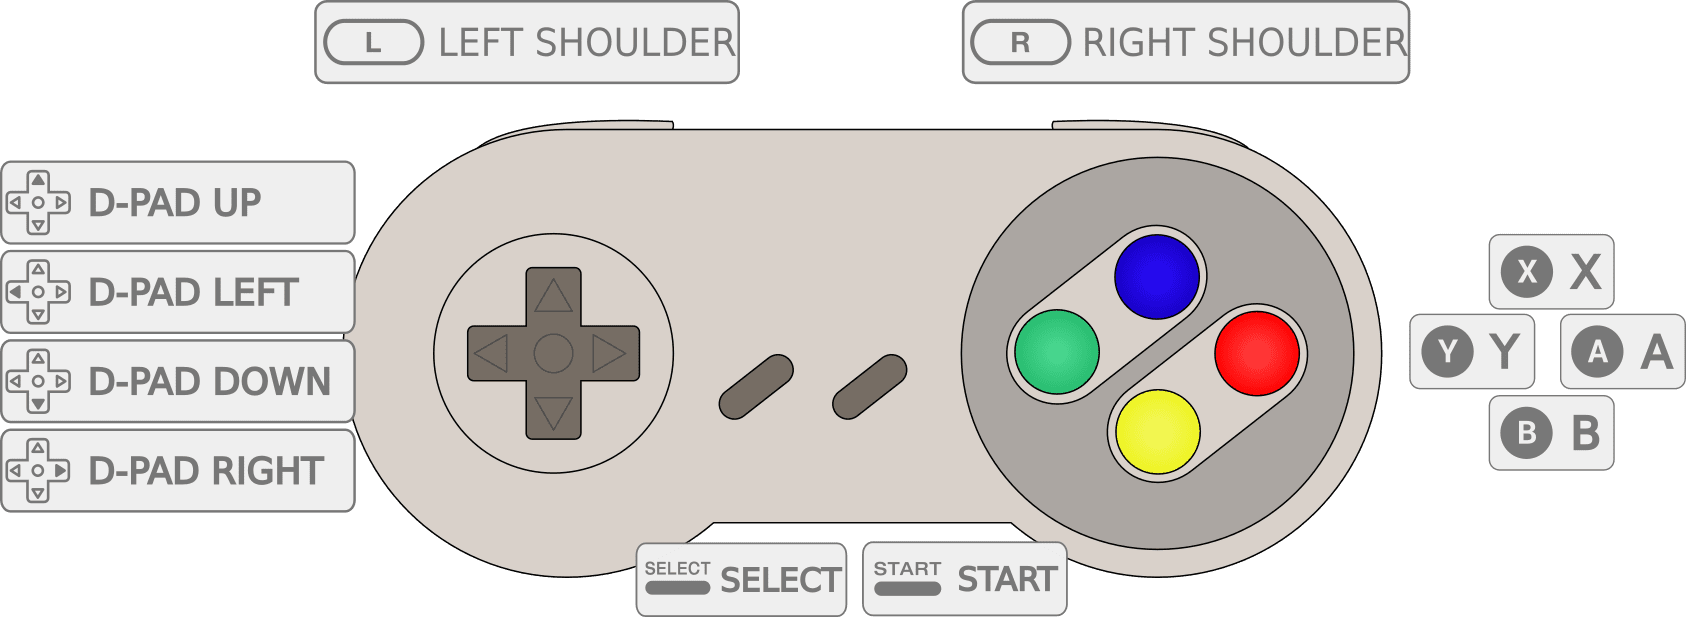
SNES Controller
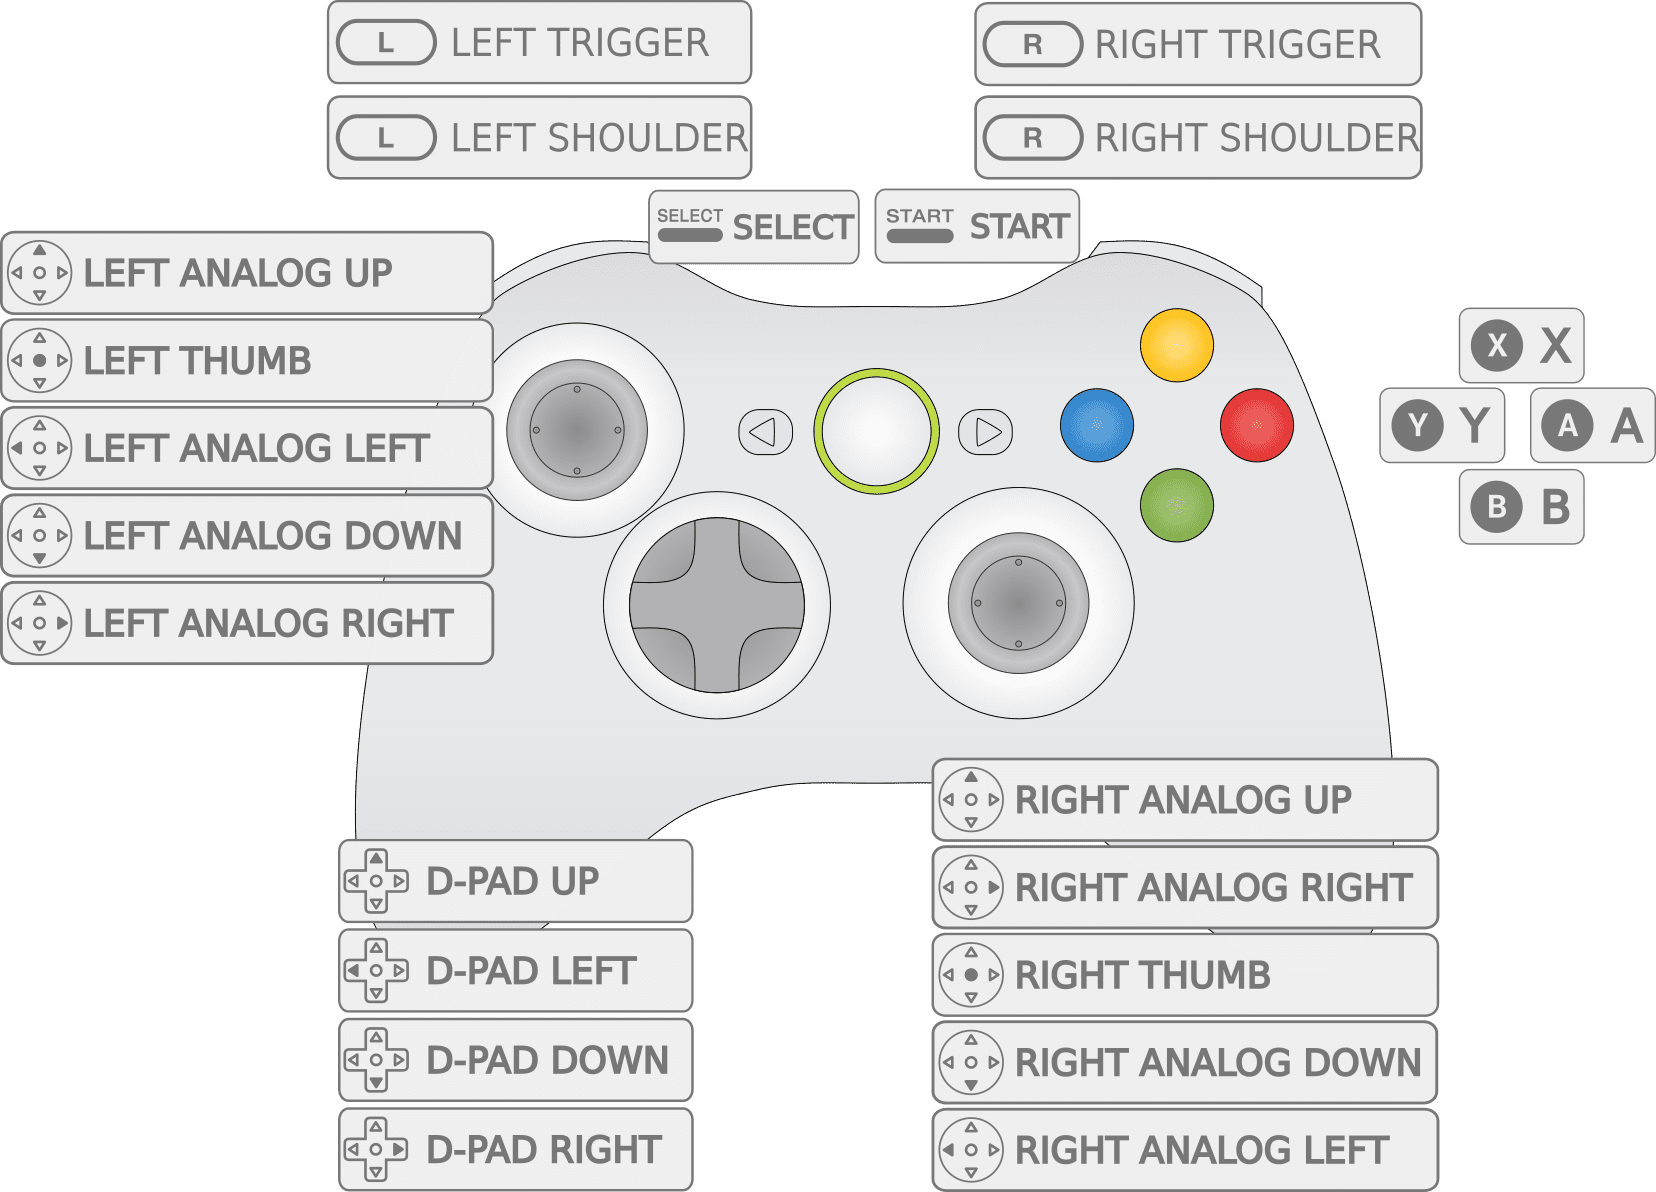
XBox 360 Controller
Hotkey
Think of the Hotkey just like another SHIFT or FN key you would find on a standard keyboard. It is used to perform more additional functions like exiting emulators, loading games, and saving your configurations or progress. From experience, I would recommend you use the SELECT key as the Hotkey. To use the Hotkey combination, hold down the SELECT button and press another button to execute a particular command.
The table below shows some of the default Hotkey combinations.
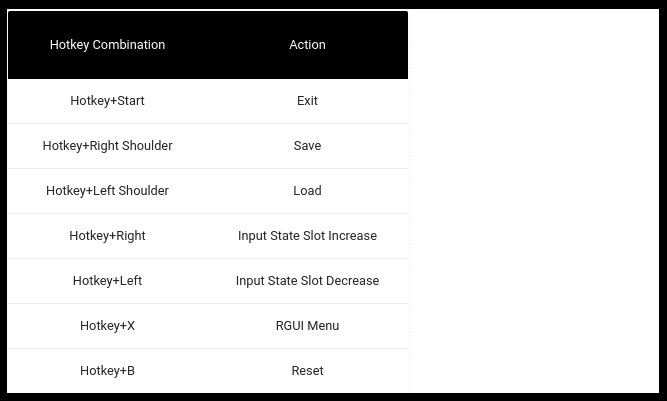
Table
When you are done with the configurations, you will see the EmulationStation. Press the START button to open the menu window.
EmulationStation
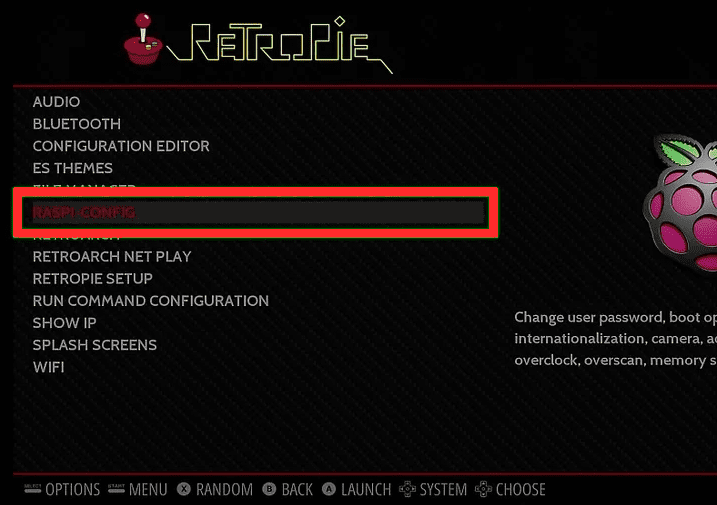
Here, select the option that you want to configure. It can be Audio, Bluetooth, Configuration Editor (for Gamepads), WIFI, etc. For example, to Enable SSH, VNC and change the screen resolution, use the RASPI-CONFIG option.
Playing Games on Retropie
Up to this point, I believe you have configured your Gamepad controls, setup the Screen resolution of your choice, and done pretty much everything you need to get started with Retropie. To start playing the game, follow the steps below:
1. Expand the Filesystem
When you install Retropie, it created a partition to hold the Retropie operating system and no other data. To store our ROMs (games), we will need to expand this partition. We will use the Raspi-Config option in the Configurations menu or execute the command raspi-config if you have SSH enabled. Once you are in the Raspi-config window, select Advanced Options -> Expand Filesystem. When the process is complete, reboot your Pi.
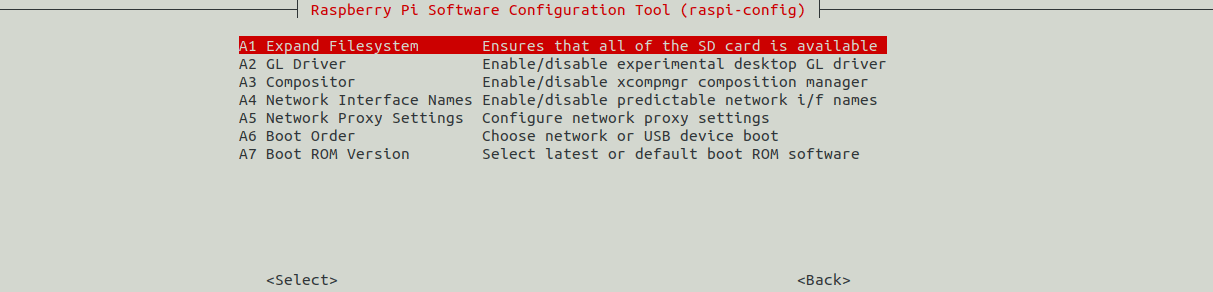
Expand Filesystem
2. Download ROMs (Games)
For this step, you will need to use your PC. There are tonnes of websites available where you can download Game ROMs. Some of the sites I have used before include:
- Classic games: https://www.mamedev.org/roms
- Coleco Vision games: https://cvaddict.com/list.php
- ROMs for many different systems: https://www.freeroms.com
3. Transfer the Games to your Raspberry Pi
There are many ways you can use to transfer the Games to your Raspberry Pi. In this tutorial, I will transfer them over to FTP using FileZilla. Therefore, you will need to connect to a network and enables SSH.
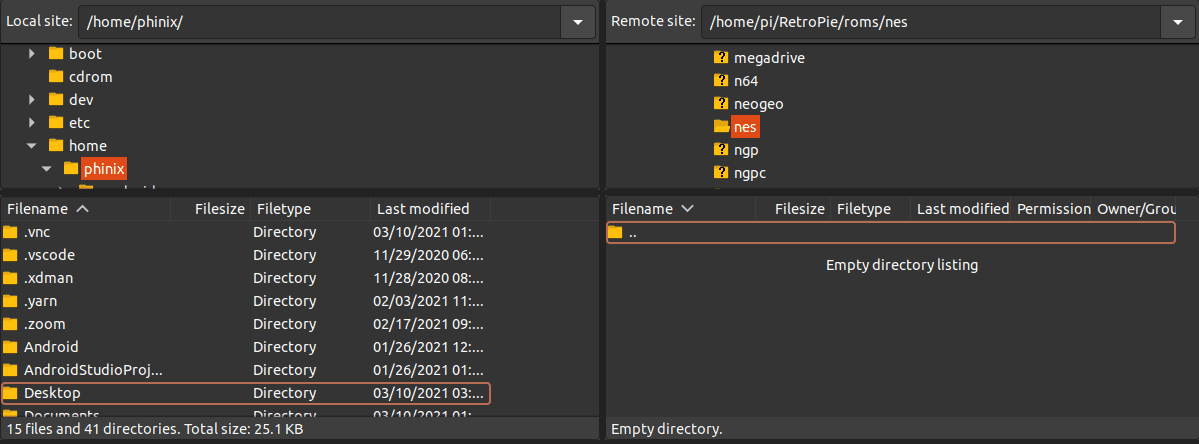
FileZilla
If you downloaded the ROMs in a ZIP format, you would need to extract them first. Copy the files in the /home/pi/RetroPie/ROMs/<specific> directory. By “specific,” I mean games like the Super Mario Bros 3 ROM will go into the /home/pi/RetroPie/ROMs/nes directory. Games like Gridley and Super Tank will go into the /home/pi/RetroPie/ROMs/mame directory. When you are done transferring the ROMs, reboot the Raspberry Pi for the games to show up. That’s it! You can now play games seamlessly on your Raspberry. The only limitation is your imagination.
Conclusion
I believe this post has given you a step-by-step guide to installing Retropie on your Raspberry. In case you come across any issue or want to share an additional tip with our readers, please leave a comment below, and we will be ready to help.