
Some, if not all, people would love to change the I2C speed in their Raspberry Pi to increase their sensor reads or various other applications’ speed. This claims to be specifically essential when using the I2C interface as it helps control the display module. Actually, changing the default I2C bus speed on the Raspberry Pi can help improve the performance of some projects on your machine. However, in the latest versions of Raspbian, this change must be made using a Device Tree parameter.
Generally, a Device Tree (DT) refers to a description of the hardware in a system. This ranges from the name of the base CPU, its memory configuration, and any peripherals (both internal & external).
The I2C(Inter-Integrated Circuit, alternatively know as IIC, is an asynchronous, multi-master, and serial communication bus invented in 1982 by Philips Semiconductors. The software is widely used for attaching lower-speed peripheral ICs to processors and microcontrollers in short-distance, intra-board communication.
The I2C is appropriate for peripherals where simplicity and low production cost are more critical than speed. Some of the common I2C bus applications include:
- Software to access real-time clocks and NVRAM chips that keep user settings.
- Software to change sound volume in intelligent speakers
- Software to control small LCD or OLED displays.
- Software used to read hardware monitors and diagnostic sensors such as fan’s speed.
To add on, a specific strength of I2C is its capability of a microcontroller to control a network of device chips with just two general-purpose Inputs/Output pins(GPIO) and software. As a result, the bus speed is sometimes denoted as “baudrate,” albeit the two aren’t actually the same thing.
Changing Raspberry Pi I2C bus speed
Before jumping to how we can change the I2C Bus speed on our Raspberry pi, let us take a quick dry run of enabling the I2C for those who don’t know.
Enabling I2C interface
By default, the Raspbian disables I2C. So before you can use it or change the bus speed like in our case, the interface must be enabled. This can be carried out using two methods that we will show you.
Method 1- Using the” Raspi-config” on terminal
Below are the steps to verify the first method.
Step 1: Launch the config utility.
To begin with, copy and paste the following command into your terminal to launch the Raspberry Pi configuration tool:
sudo raspi-config
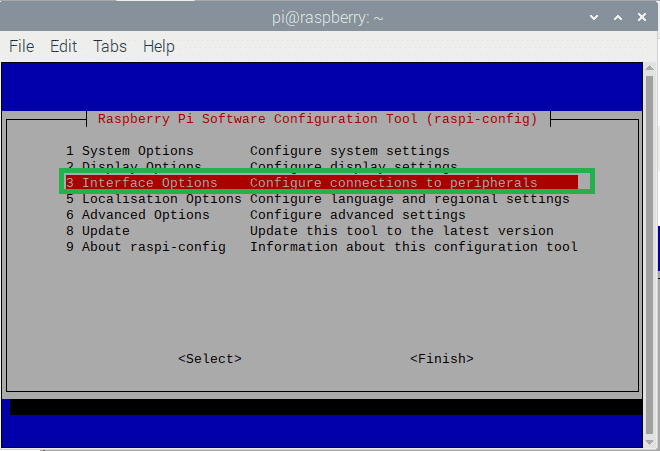
select interface options
Upon running the above command, the terminal will launch the raspi-config utility software. Here, select “Interfacing Options.”
Step 2: Highlight I2C
You will see several options; using your keyboard arrow keys, navigate to the P5 I2C option, and select it.

Select I2C
Step 3: ARM inquiry window
In the next screen, you will be queried if you want the ARM I2C interface enabled. Select “Yes” to proceed.
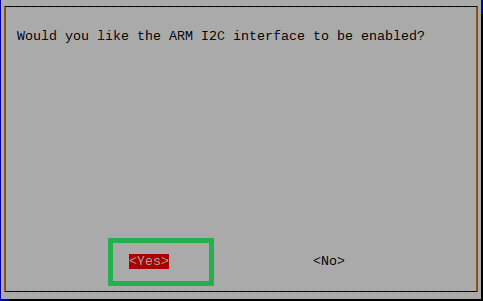
select yes
Next, click on “OK.”
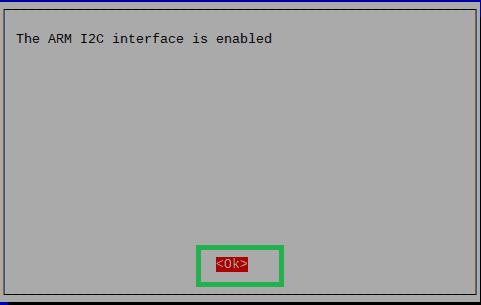
select OK
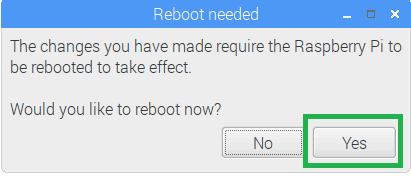
Step 4: Reboot
In the next window, the Raspberry Pi will request you to reboot it now. For the sake of the changes to take effect, we recommend selecting “Yes.”
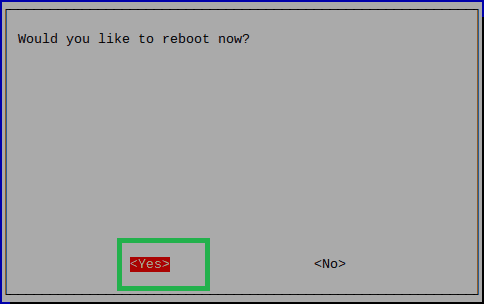
select yes to restart
The I2C module should be automatically enabled once your Pi machine has rebooted.
Method 2- Using “Raspberry Pi Configuration”
Below are the steps to verify the second method.
Step 1: Open the Raspberry Pi configuration settings
If your Pi machine boots the desktop, you can either open the terminal and use the first method or the graphical tool “ Raspberry Pi Configuration.” This option is found under Menu>Preferences>Raspberry Pi Configuration.
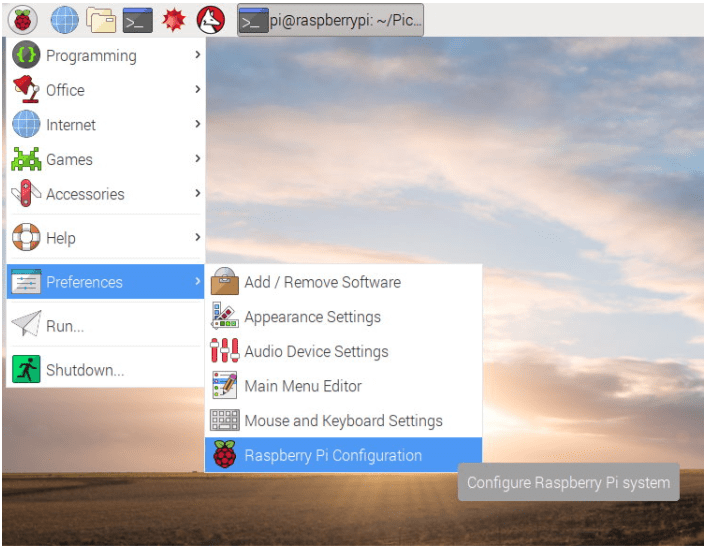
select menu
Step 2: Select the interface tab
Upon selecting the Raspberry Pi Configuration, the following window will appear.
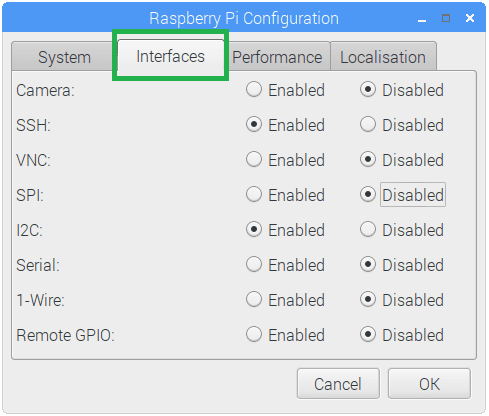
select interfaces
Maneuver to the second tab, “Interfaces,” where you will see many options, including the camera, SSH, VNC, not forgetting I2C and others.
Step 3: Enable I2C
After that, locate I2C and click on Enabled
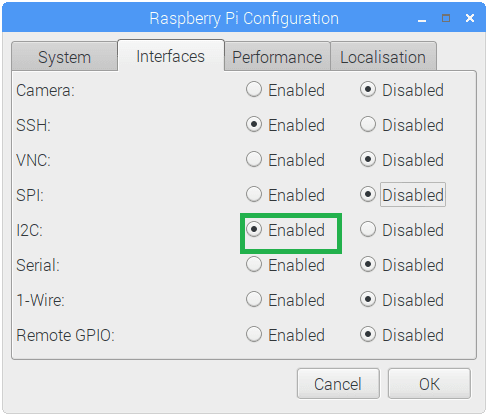
select enabled
Step 4: Reboot
Upon enabling I2C, click on the “OK” at the right bottom of the window. After that, you will be urged to reboot your Pi machine.
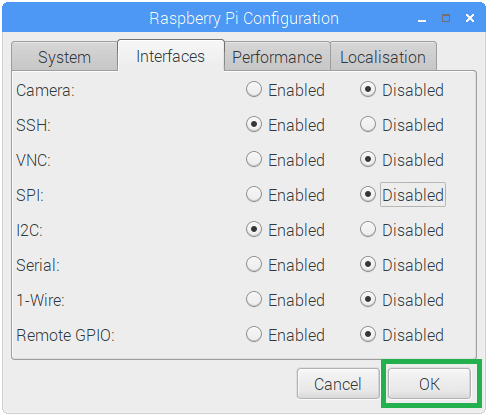
select OK
Select “Yes” for the Pi to reboot and for changes to take effect.
select yes to reboot
The Pi will reboot, and the I2C should be enabled.
Step 5: Install utilities
To aid in debugging and allowing the interface to be used within Python, we can use the following commands:
sudo apt-get update
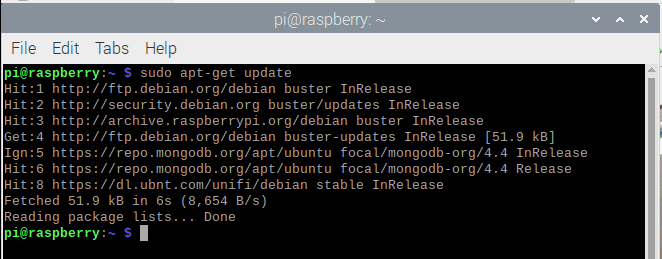
update system
sudo apt-get install -y python-smbus i2c-tools
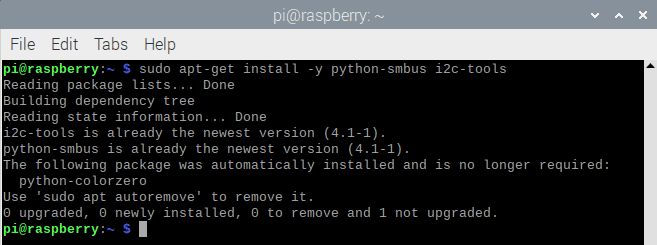
install python tools
Without much ado, let us dive into checking speed using the I2C tool.
Step 1: Check your current I2C speed
Before changing the I2C interface, you can run the following command in the terminal to check your current I2C speed
sudo cat /sys/kernel/debug/clk/clk_summary
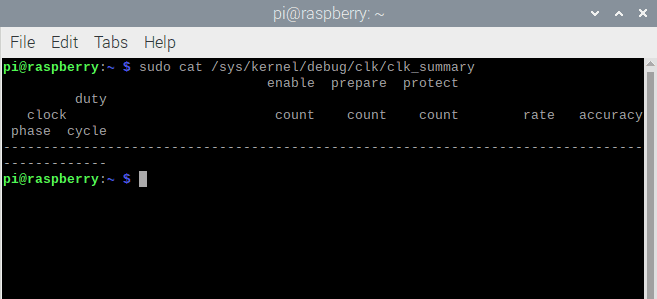
check count
Step 2: Changing the I2C speed
After that, you can proceed to change the I2C speed by editing the /boot/config.txt file. Make use of the following command to attain this:
sudo nano /boot/config.txt
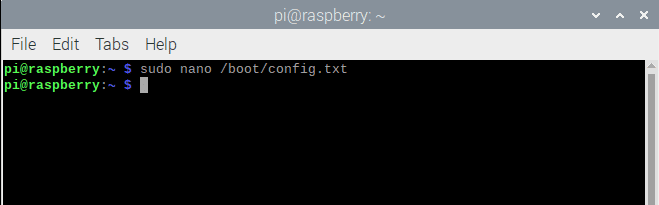
Run the command to open the editor
The above command will open up the nano editor and put you in editing mode for your boot configuration file.
edit the image
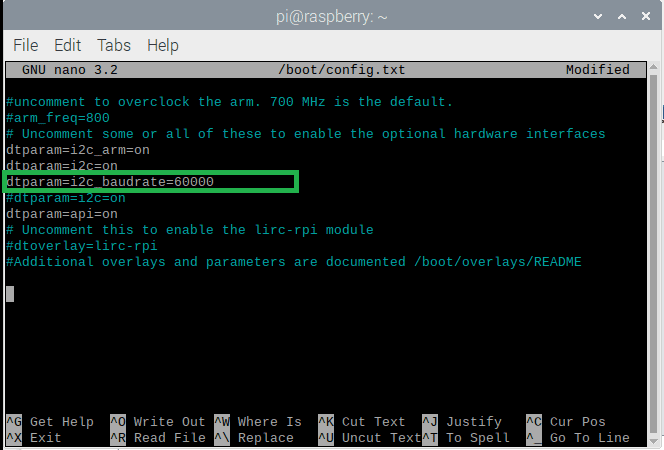
Upon opening, find a line with the following text “dtparam=i2c_baudrate=60000.” However, the baudrate value may not be the same as ours, so change the value to the speed you want.
Note: If you cannot find the above line to specify your baudrate value, add it to the bottom of the page. For instance, if I wanted to change my I2C speed to 500kbps, I would have the line as follows:
dtparam=i2c_baudrate=500000
After editing or adding that line, use “Ctrl + X” and then press “y” to save the changes in the nano editor; after that, you must reboot your Raspberry Pi for the changes to take place effectively. To reboot your machine, copy and paste the following command into your terminal
sudo reboot
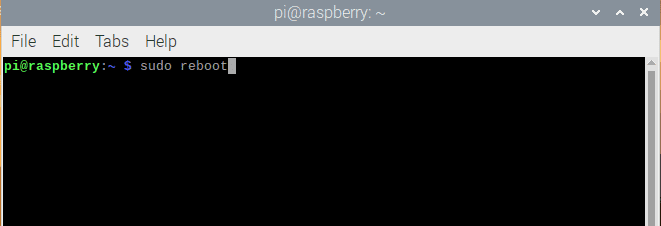
Run the sudo reboot command
Note: it is unnecessary to change the I2C speed when using the Mindsensors PiStorms; however, if you cherry-pick to do so, there are many issues with the touch screen on the PiStorms.
Conclusion
This article has gone through the required steps for you to change your Raspberry Pi’s I2C bus speed. Before looking at the core part of the article, we turned our attention a little bit to enable I2C in our Raspberry Pi, where we looked at the steps needed for you to enable your I2C when disabled. We also looked at the meaning of I2C before running down to the article’s key subject, which is changing the bus speed. We hope that by now you are capable of changing the I2C bus speed without any issue. Thanks for reading! And in case of anything, do not fear to reach out.