
If you are a novice Raspberry Pi user, you may not know why it is essential to back up your Raspberry Pi SD card. But if you have used it for a while, you probably understand why backing up the Raspberry Pi is essential for every Pi owner. Typically, backing up your Raspberry Pi SD card helps you prevent data loss by ensuring that you don’t lose any data when you make significant system changes or in the event of a system malfunction.
This article will take you through various ways to back up your Raspberry Pi SD card.
How to backup Raspberry Pi SD card
You can back up your Raspberry Pi SD card in a couple of ways. This post will specifically cover three ways you can back up a Raspberry Pi SD card. These methods include:
- Using SD Card Copier
- Compressing your Raspberry Pi Home Directory
- Backing it up as an SD card image
Method 1: Using SD Card Copier
One of the common ways how to back up Raspberry Pi SD card is using an SD card copier. It is one of the easiest methods to run a backup because of the graphical user interface capability, and the option is available in the Raspberry Pi main menu.
- Put a USB drive into the Raspberry Pi and select the “Accessories” menu.
- A drop-down menu will appear when you click on accessories; please select ‘SD Card Copier’ and launch it.
- When you launch the SD card copier, you must select the SD card using the “Copy From Device option” and the USB storage using the “Copy to Device” option.
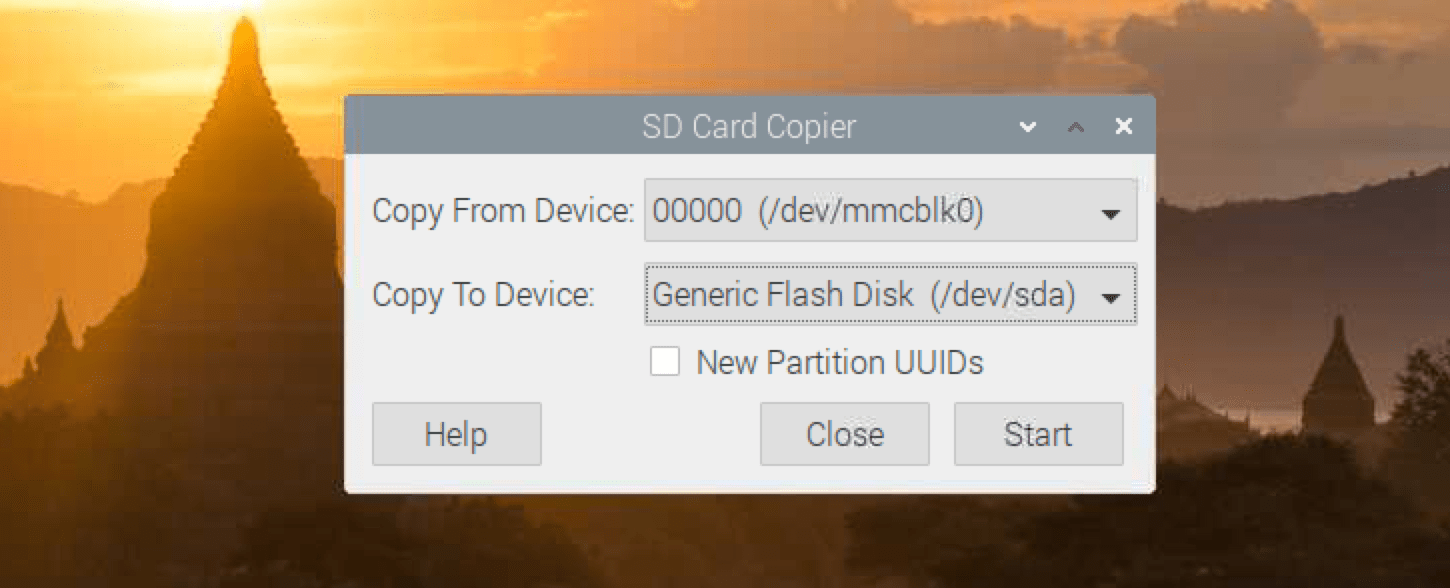
SD Card Copier
Click “Start” to start copying data from the SD card to the USB drive. You will see a warning message – “This will erase all the data on the Flash drive. Are you sure?” If you don’t have any critical data on the Flash, click “Yes.” This process might take several minutes – please be patient.
Method 2: Compressing your Raspberry Pi Home Directory
Compressing the Raspberry Pi home directory is one common way people back up the Raspberry Pi SD card. However, unlike other methods, this one does not require removing your SD card from the Raspberry Pi before performing the backup procedure, making it a straightforward process.
It is used to back up files and data for the ‘home‘ folder. After that, you can unzip the file and restore all of your Raspberry Pi OS’s directories. Follow the steps below.
Launch the Terminal and use the cd command to navigate to the Raspberry home folder.
cd /home
You should see the “pi” directory when you run the ls command. This is the directory you will compress, containing all your user files and information. Execute the command below.
sudo tar czf RasperryPi_homebackup.tar.gz pi
This process might take a few minutes – please be patient.

Compress the PI directory
When done, you can copy the compressed file – in this case, the “RasperryPi_homebackup.tar.gz” file and save it on another PC or external drive.
Method 3: Backing it up as an SD card image
You can also back up your Raspberry Pi SD card as an SD card image. Here, you are essentially creating a backup copy of all the data on the Raspberry Pi to an image so that you can restore it whenever you are ready or on a predetermined schedule.
To back up the Raspberry Pi SD card as an image, follow the following instructions;
Tip: Note that the procedure for backing up Raspberry Pi as an SD card image varies from one operating system to the other. This means it will vary between macOS, Windows, and Linux, among other operating systems. Our post will specifically look at Linux and macOS operating systems.
- To begin, turn off your Raspberry Pi and take out the SD card.
- Connect the SD card to your computer or laptop using a card reader or an adapter.
- Open a Terminal window on your computer, whether Linux or a Mac and type df.
- Next, examine the drives that appear.
- Sometimes, your SD card might not be detected. If this is the case, try unplugging and plugging the card in again to see if it will appear. If it does, enter df once more.
- You will now notice a recently mounted drive. On a Mac, for instance, you might see something like
/dev/rdisk2, and on a Linux computer,/dev/sdaas follows;
On Linux:
sudo dd bs=4M if=/dev/sda of=raspbian.img
On macOS:
sudo dd bs=4m if=/dev/rdisk2 of=raspbian.img
Tip: Names may change depending on the system.
- You can use the image file created by running the command to restore your entire operating system to an SD card in its current state.
- To do this, flash the SD card using the dd command in reverse or a program like Balena Etcher.
- The Raspberry Pi backup software, Win32 Disk Imager, can also be utilized to back up the SD card on a Windows computer. In this case, you must download, set up, and launch the program.
- Before going to the folder where you want to store your SD card image, select the folder icon.
- After that, select the device in the top right corner, and type any name of your choice into the Image File text box, for instance, Raspberry Pi 4_backup.img.
- Next, click Read.
- When you do that, the image file creation process begins and could take a few minutes.
- Once finished, an image file containing the entire SD card will be created.
- Click ‘OK’ when it says “Read Succesful.”
Conclusion
To ensure the security of your data in the event of deletion or file corruption that may occur as you work on projects and conduct various experiments with your Pi, it is crucial to make a backup of your Raspberry Pi SD card. If you don’t perform backups, you risk losing all necessary data if something wrong happens. Backups also help to create more space. Do you back up your Raspberry Pi SD card? Please tell us how you do it in the comment section.
1 comment
Yes