
Let’s say you have a couple of physical servers and virtual machines which you want to monitor, and you don’t just want to see whether they are online or not (since there are so many ways of doing that). You want to view more information like CPU utilization, RAM utilization, disk read and write, and other metrics. Zabbix is the perfect fit for that.
Zabbix is an enterprise-level open source monitoring software that you can use for any potential needs that you might have. That includes home office monitoring that consists of one desktop computer and a network switch, large-scale enterprise, big companies, cross data centers, and cross geographical location monitoring. Zabbix is quite flexible, with lots of options and features to use. The fact that it’s also open-source means you don’t need to pay a dime to run the app.
Installing Zabbix on Raspberry Pi 4
You can install Zabbix on most Linux distributions. However, in this post, we will install it on the Raspberry Pi 4. You might wonder how possible it is for Raspberry to run such heavy software efficiently? We monitored up to 400 devices at a go from our test while gathering 125 metrics for each device every 5 minutes.
Project Requirements
- A Raspberry Pi 4 board. The 4 GB RAM model would be much better, but the 2 GB model is still OK.
- An active internet connection. We highly recommend using an ethernet cable.
- At least 16 GB Micro SD card. You can use any SD brand. But if you plan to monitor many devices, we highly recommend getting an SD card with at least 160 MB/s read speed, and 90 MB/s write speed.
- A PC to access the Pi over SSH or VNC
Of course, if you don’t want to use the Raspberry Pi in headless mode (without a display monitor), you will require to get the following items.
- A display monitor
- An HDMI cable (micro-HDMI to HDMI)
- A keyboard
- A mouse
Follow the steps below to install and set up Zabbix on your Raspberry Pi when you have everything in place.
Step 1. Setup the Raspberry Pi
We will use the official Raspbian Bullseye (based on Debian 11) for this post. Luckily, we have a master guide that will guide you to install the OS, including formatting your SD card and using Balena Ethcer to flash the OS on the SD card. ‘How to install Raspbian on Raspberry Pi.’ If you are going to access your Raspberry over SSH or VNC, the following posts will also come in handy.
Note: We insist on using Raspbian Bullseye for this post. That’s because we will need to install MariaDB 10.5 to run Zabbix 6 on our system successfully. Unfortunately, Raspbian Buster (based on Debian 10) only has MariaDB 10.3 in its repository.
After setting up the operating system, ensure you update the system using the commands below.
sudo apt update
sudo apt upgrade
Step 2. Add the Official Zabbix 6 Package Repository
As of writing this post, the latest Zabbix release is version 6.0. Please feel free to check out their official web page for any newer releases. Download the DEB file using any of the commands depending on your Raspberry Pi OS version.
- Raspbian Bullseye (Based on Debian 11)
wget https://repo.zabbix.com/zabbix/6.0/raspbian/pool/main/z/zabbix-release/zabbix-release_6.0-2+debian11_all.deb
The file will download in your current working directory.
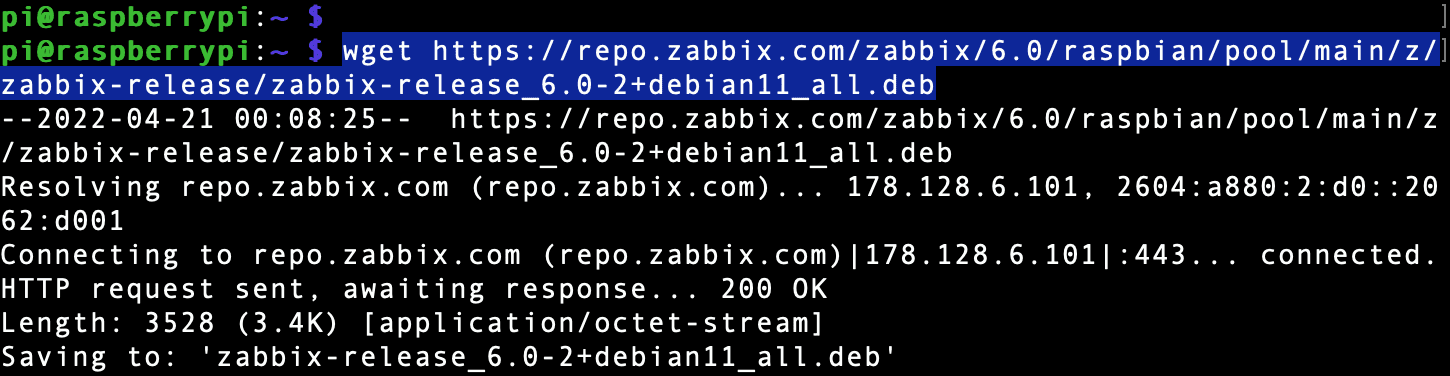
Add Zabbix repository
To install the file, use the syntax below.
sudo chmod +x [File-Name]
sudo apt install ./[File-Name]
e.g
sudo chmod +x zabbix-release_6.0-2+debian11_all.deb
sudo apt install ./zabbix-release_6.0-2+debian11_all.deb
sudo apt update
We are using the command chmod +x to make the file executable. Please remember to update the system after adding the Zabbix repository.
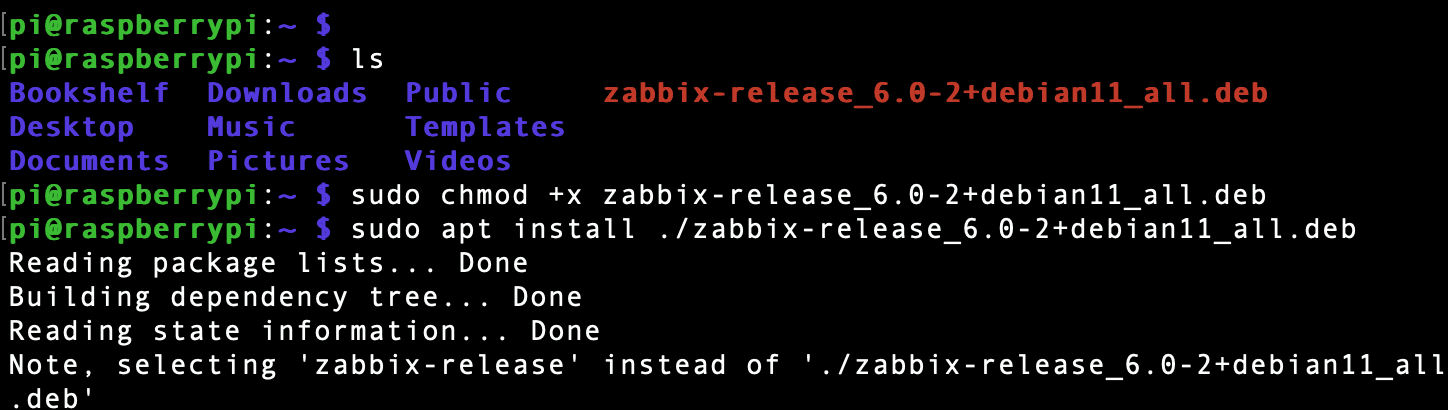
Install Zabbix repository
Step 3. Zabbix 6
Use the command below to install Zabbix 6 on your system. This command will install several packages to help you set up and access Zabbix on your system.
sudo apt install zabbix-server-mysql zabbix-frontend-php zabbix-apache-conf zabbix-sql-scripts zabbix-agent
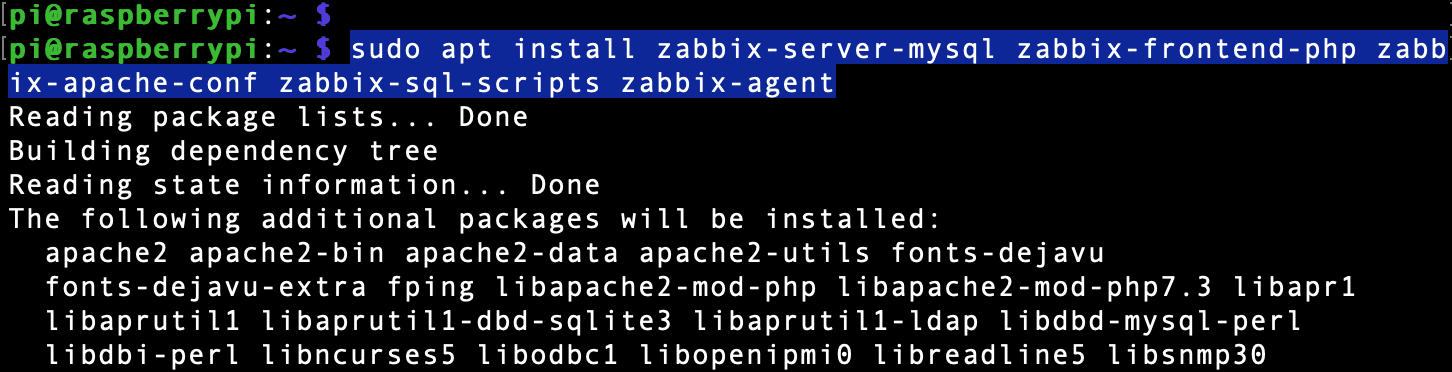
Install Zabbix 6
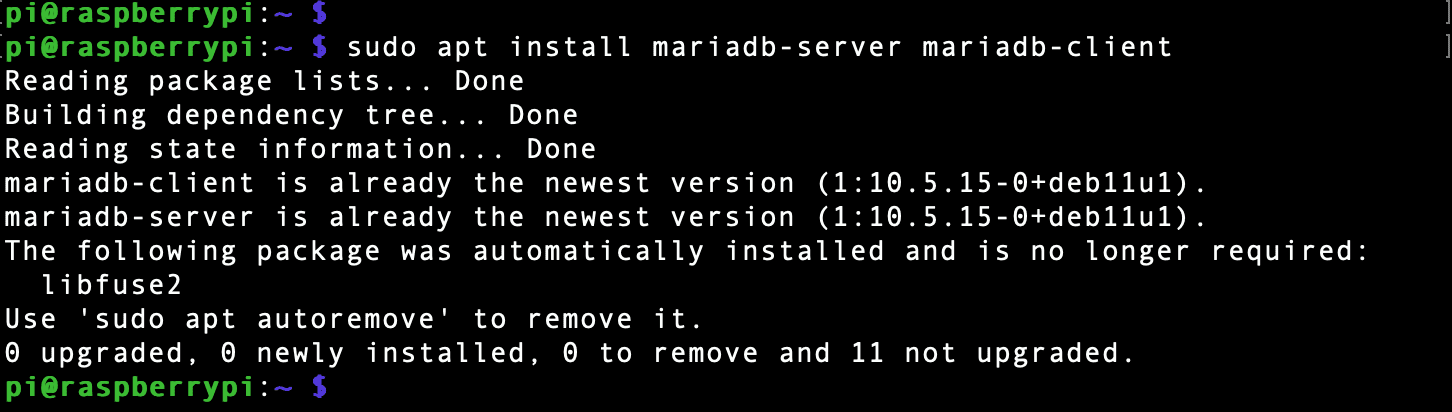
Step 7. Install MariaDB
If you have worked with Linux systems for a while, you must have come across MariaDB Database. It comes pre-installed on most distributions like Debian, Kali, etc. To install MariaDB on our Raspberry Pi, execute the commands below.
sudo apt install mariadb-server mariadb-client
Install MariaDB
You can verify whether the installation was successful using the –version command below.
mariadb --version
Use the command below to check whether the MariaDB service ‘mysqld’ is running.
sudo systemctl status mysqld
If it’s not running, you can start it with the command below.
sudo systemctl start mysqld
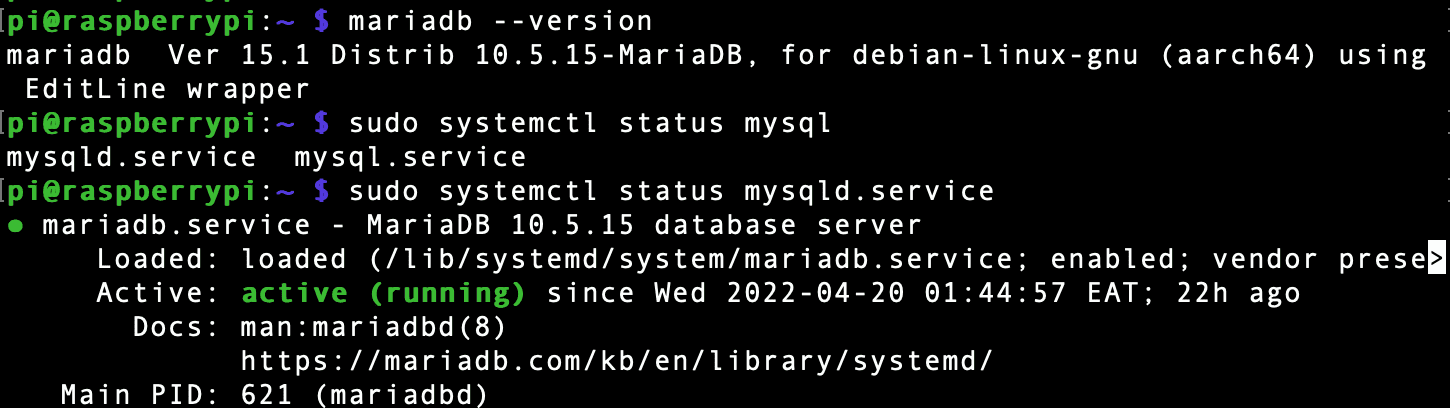
MariaDB version and service status
Step 8. Create Initial Zabbix Database
Up to this point, we have successfully installed Zabbix and MariaDB Database on our system. We need to create a database where Zabbix will store its data. To get started, log in to the MariaDB using the command root user with the command below.
sudo mysql -u root -p
Let’s look at the parameters in the command above.
-u root: This specifies that we are accessing the DB using the root user.-p: This parameter tells MariaDB that we are using a password for login
Note: You will see a prompt to enter a password. However, just press Enter since we have not set one yet.
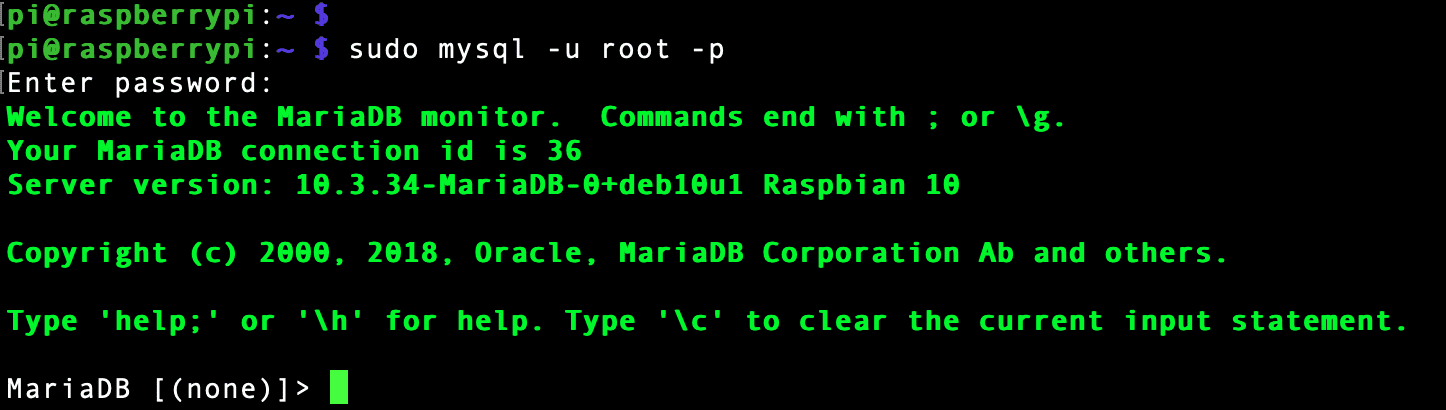
Log in MariaDB
After a successful login, you should see a prompt similar to the image above.
To get started, create the Zabbix database using the command below.
create database zabbix character set utf8mb4 collate utf8mb4_bin;
Next, create a database user and set the user password using the command below.
create user sbb_user@localhost identified by 'SBB_Password';
Note: For this post, we are creating a user with the name sbb_user with the password SBB_Password.
Execute the command below to grant all database privileges to the new user we just created.
grant all privileges on zabbix.* to sbb_user@localhost;
Execute the command below to exit.
quit
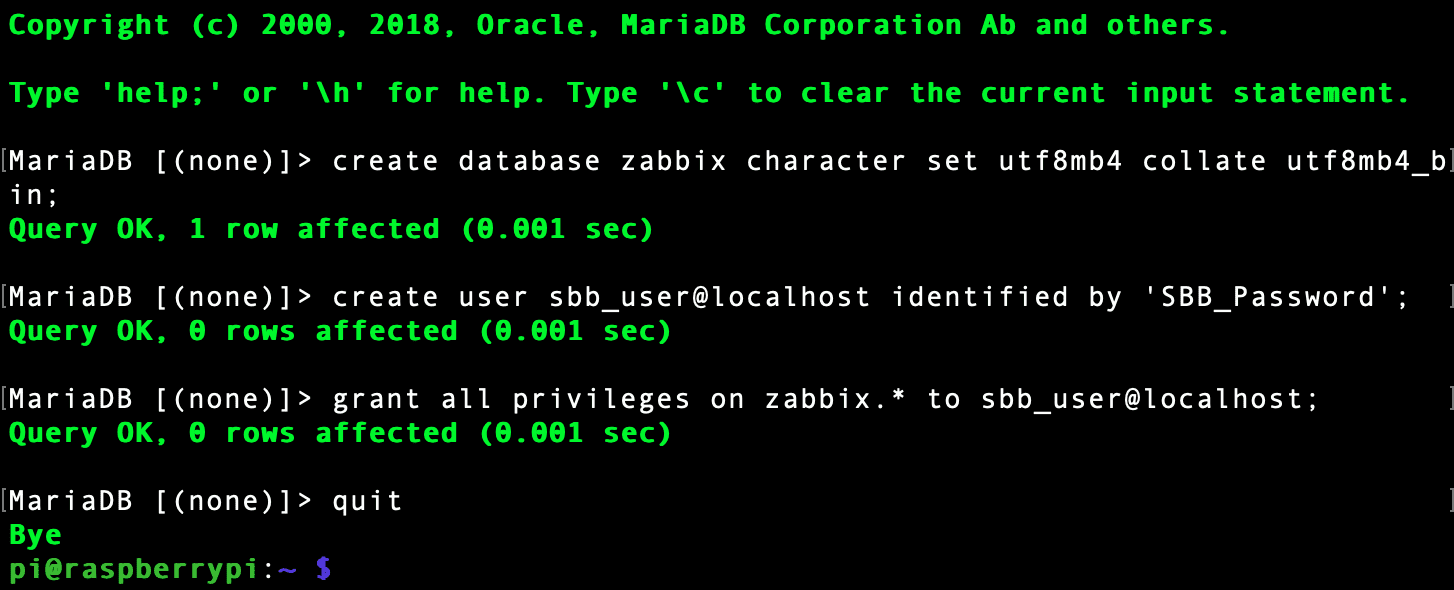
Create Database
To finalize everything about the database, we need to import Zabbix 6 database schemas and data. Execute the command below on the Terminal.
zcat /usr/share/doc/zabbix-sql-scripts/mysql/server.sql.gz | mysql -usbb_user -pSBB_Password --database=zabbix
Remember to replace the following details:
sbb_user: Replace with the name of the user you created in the database.SBB_Password: Replace with the password you set when creating the database user.zabbix: If you chose a different name for the database, replace it here.
Tip: This command might take a few minutes to complete execution. Please be patient.

Import database schema
Step 9. Configure Zabbix
We have successfully set up the Zabbix database on our system up to this point. Next, we need to configure Zabbix to use this new MariaDB database we just created. To do so, we will need to edit the /etc/zabbix/zabbix_server.conf file. Execute the command below to open the configuration file using the nano editor.
sudo nano /etc/zabbix/zabbix_server.conf
Here, locate the two lines below and uncomment them by deleting the # sign at the front. Set these lines to the information you specified when configuring the database. For example, we created a user called ‘sbb_user‘ with the password ‘SBB_Password.’
DBUser=sbb_user
DBPassword=SBB_Password
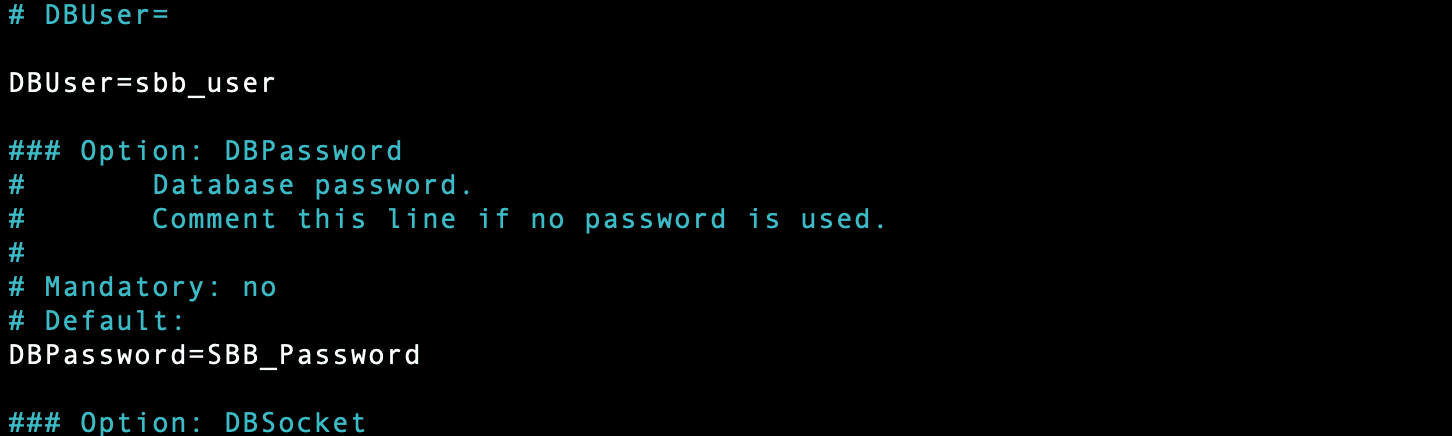
Configure Zabbix
Save the file (Ctrl + S) and Exit (Ctrl + X).
To apply these new configurations, we need to restart the zabbix-server service, zabbix-agent service and the Apache service. Use the command below.
sudo systemctl restart zabbix-server.service
sudo systemctl restart zabbix-agent.service
sudo systemctl restart apache2

Restart Zabbix services
Verify whether the two services are running using the commands below.
sudo systemctl status zabbix-server.service
sudo systemctl status zabbix-agent.service
Step 10. Enable Zabbix to Start on Boot
To ensure that the Zabbix server starts on boot or after restarting your Pi, we need to enable the zabbix-server service. Execute the command below.
sudo systemctl enable zabbix-server.service

Launch Zabbix on boot
Step 11. Access Zabbix on Your Web Browser
Up to this point, we have everything set up, and we can now get started using Zabbix on our system. First, we need to know the IP address of our Raspberry Pi, and there are two commands that you can use.
hostname -I
ip a
I recommend using hostname -I since the other command will list all the network interfaces present on your device. Of course, that information is also helpful, but it can be pretty overwhelming for new Linux users.
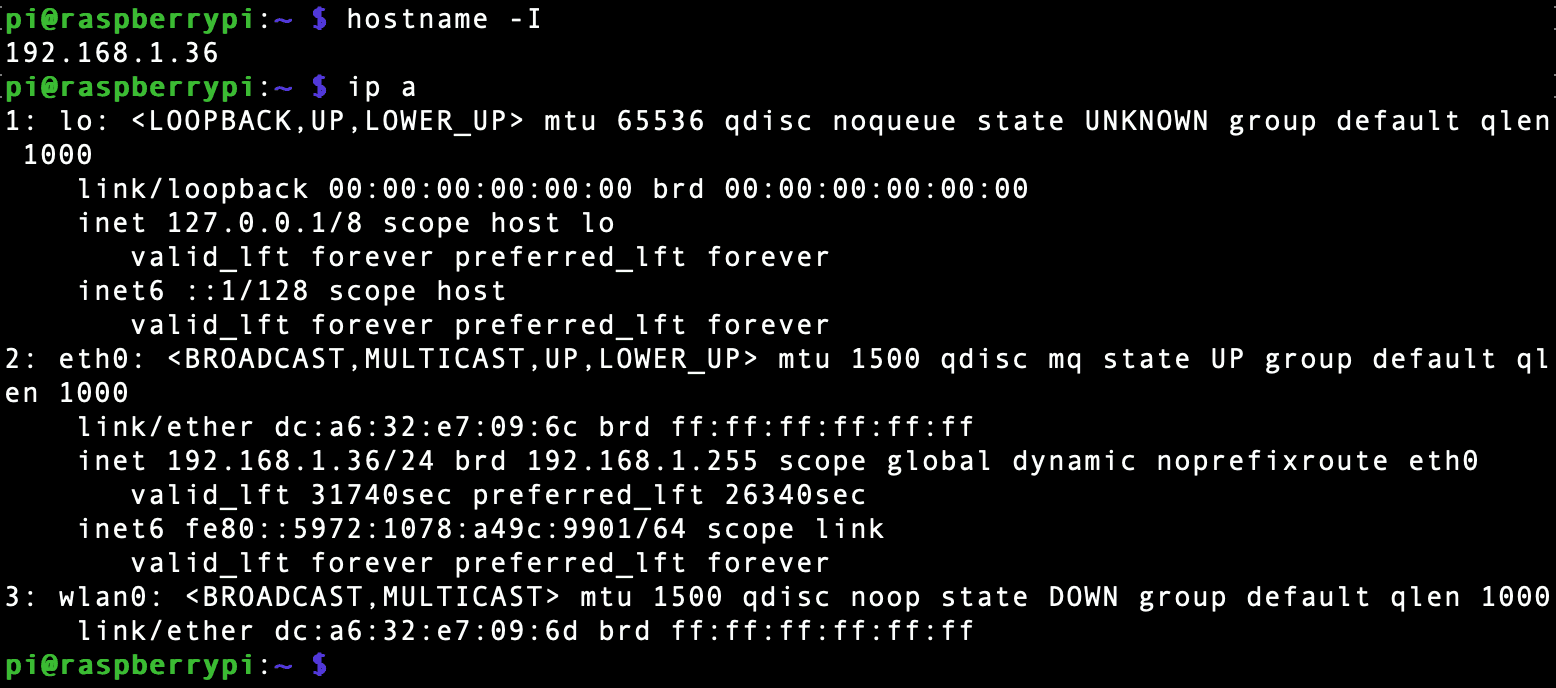
Raspberry Pi IP address
In our case, the Raspberry Pi IP address is 192.168.1.36. Launch the Raspberry Pi and type the URL below.
[Raspberry_Pi_Address]/zabbix
e.g
192.168.1.36/zabbix
If everything was successful, you should see a page similar to the image below.
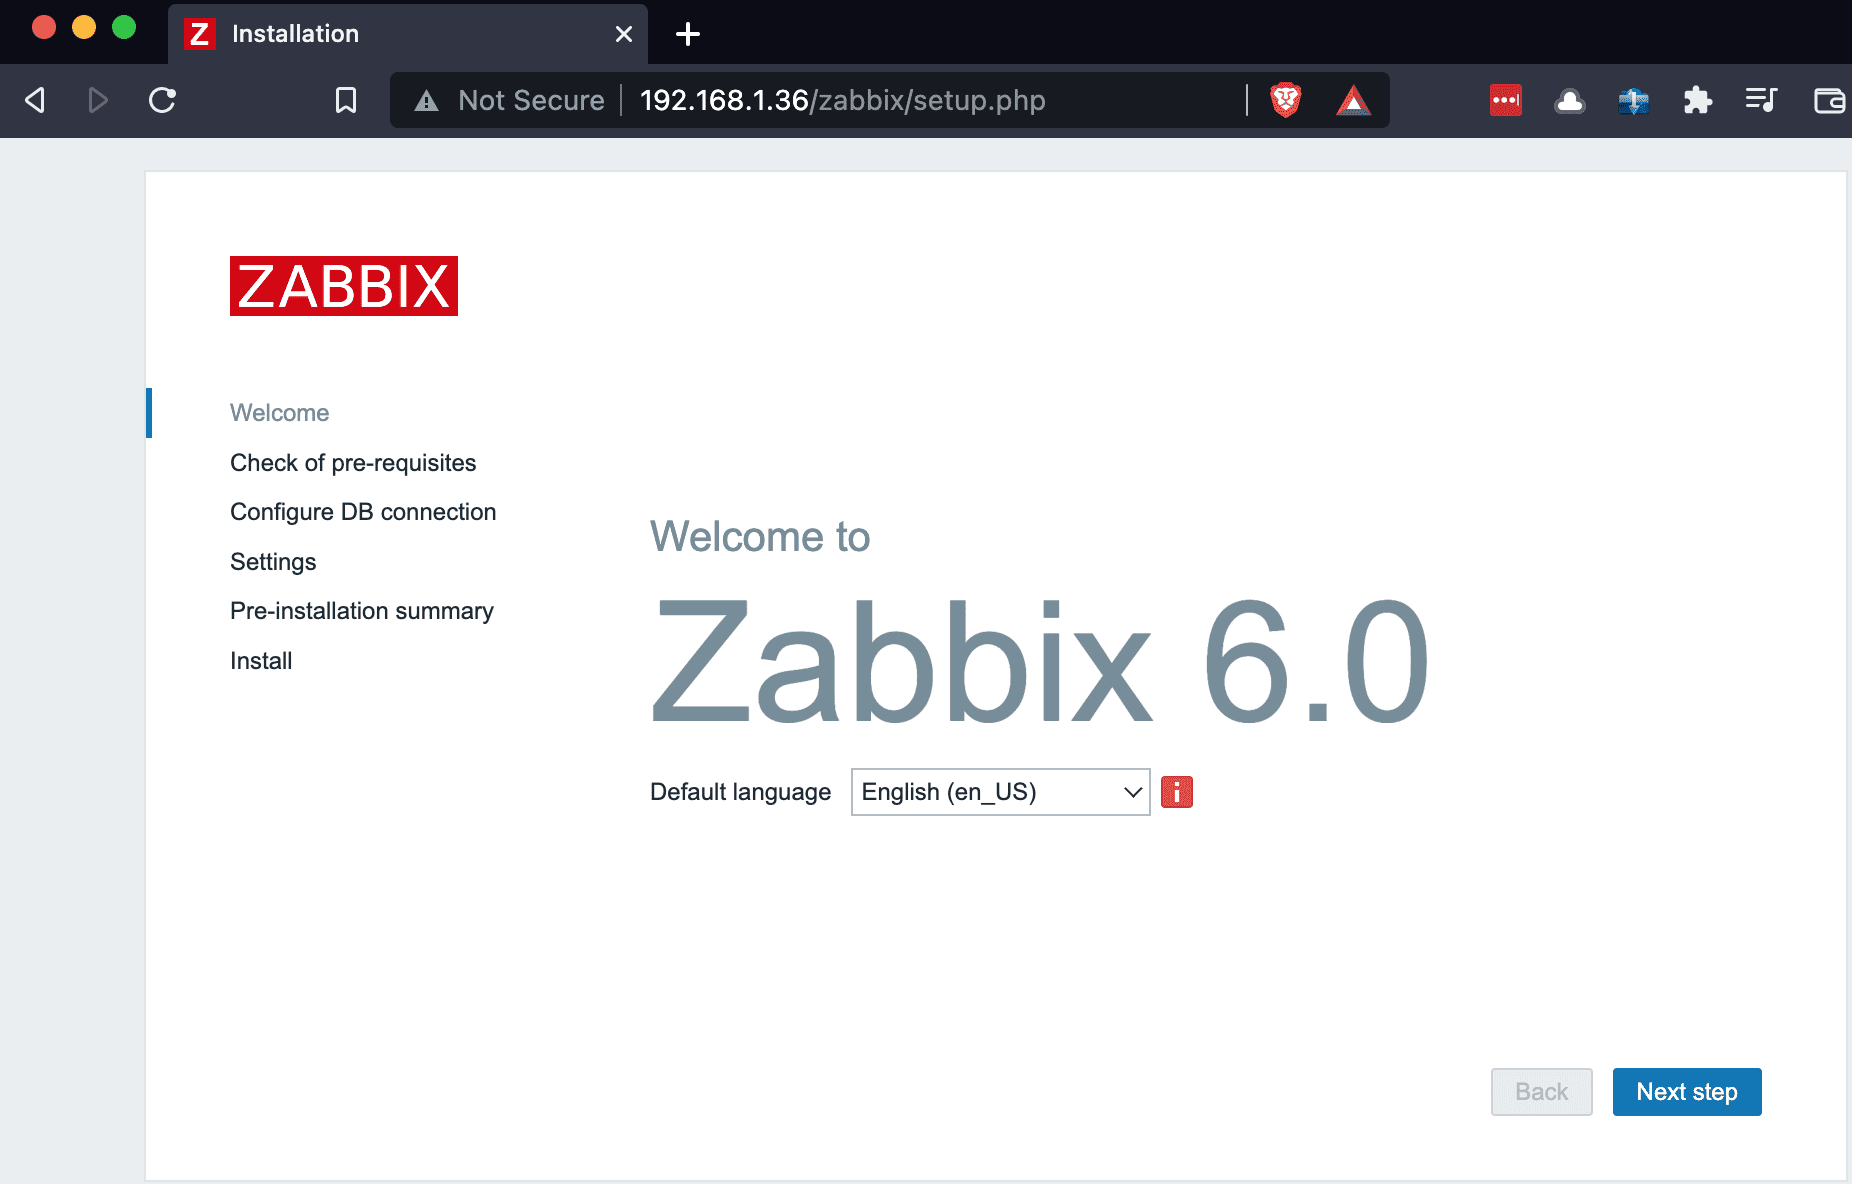
Zabbix welcome page
Select the language you want to use (e.g., English) and click ‘Next Step.’ On this page, Zabbix will check your system for the required pre-requisites. These are mostly PHP modules. If every module is marked as ‘OK,’ click ‘Next Step‘ to proceed.
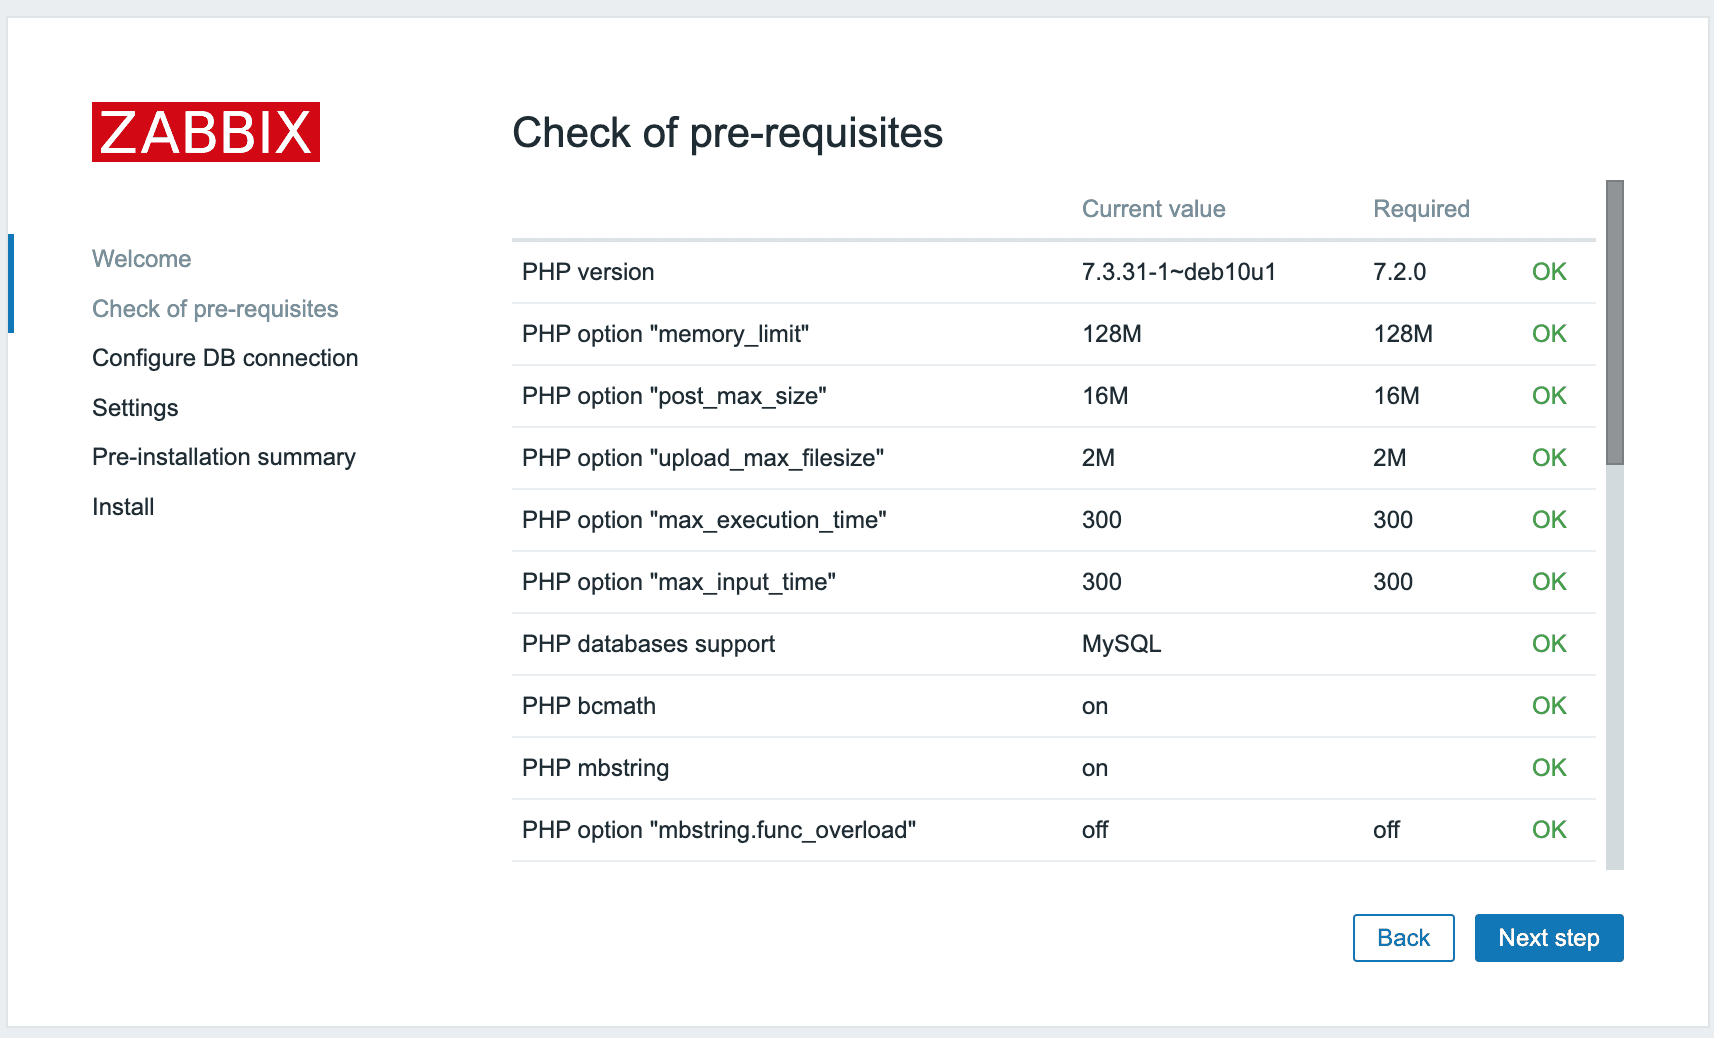
Check pre-requisites
Next, you need to connect Zabbix to the MariaDB database we created. You need to fill in three main details on this page:
- Database name
- User
- Password
All these are the details you specified when configuring MariaDB. In our case, we used:
- Database name = zabbix
- User = sbb_user
- Password = SBB_Password
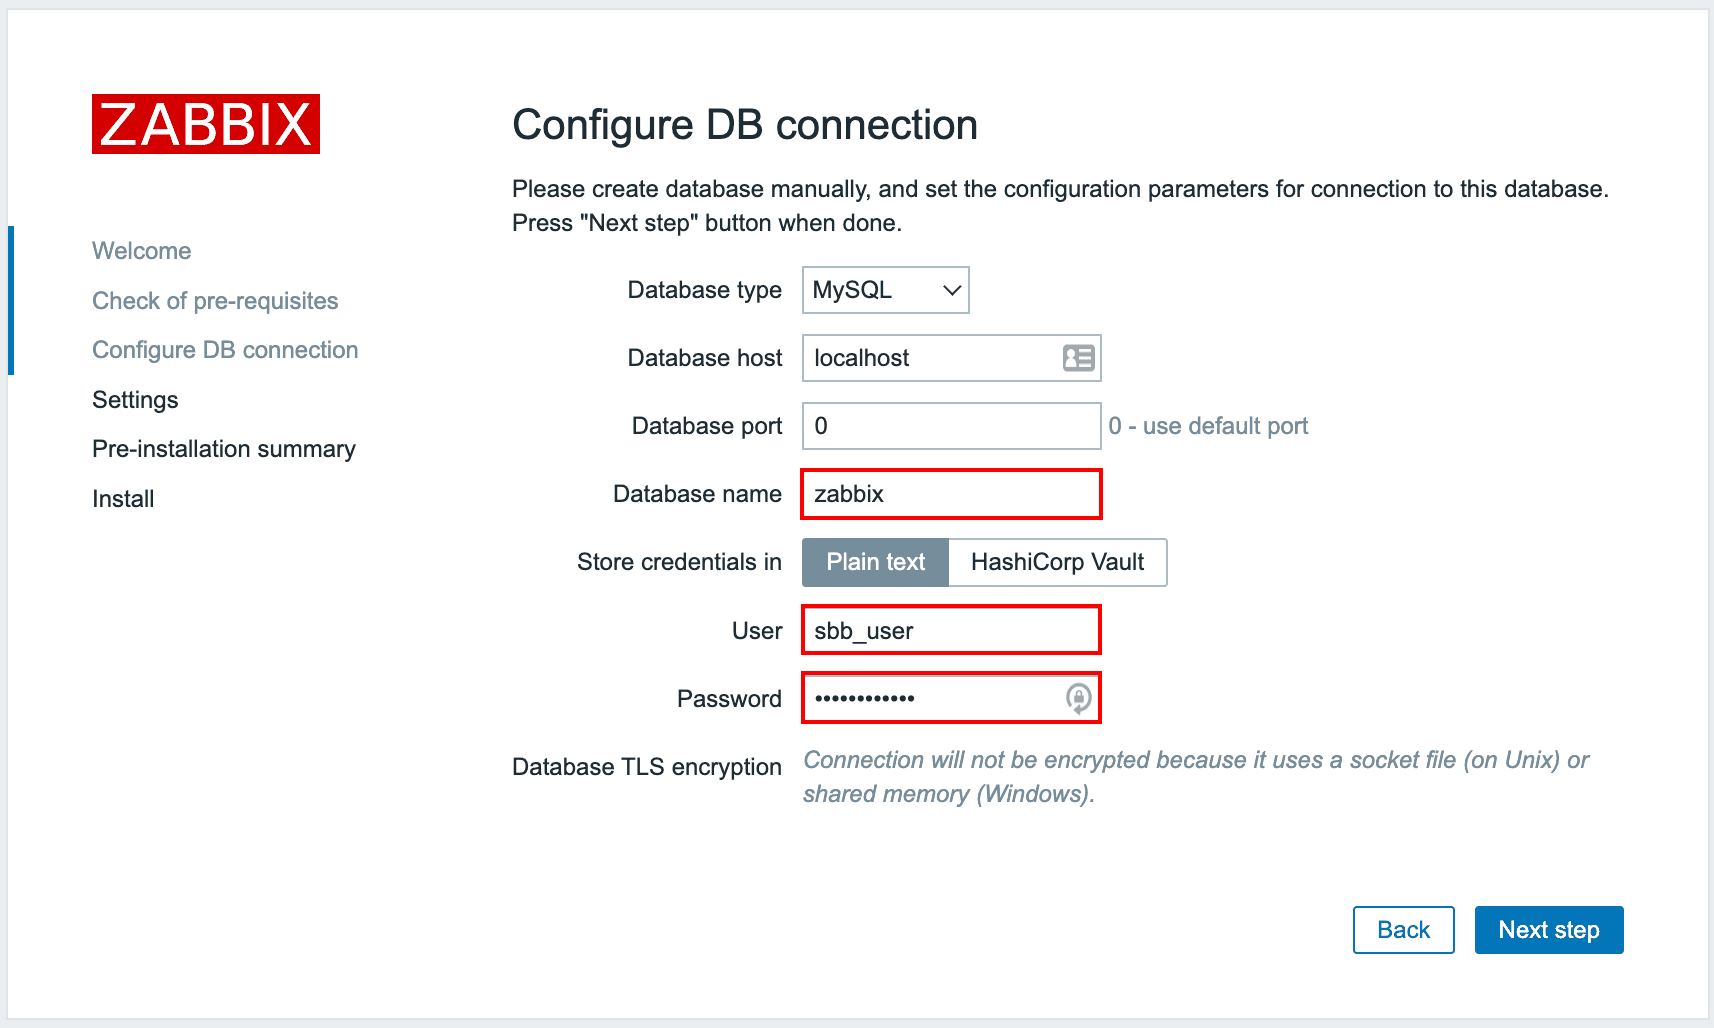
Connect database
Click ‘Next Step‘ when done.
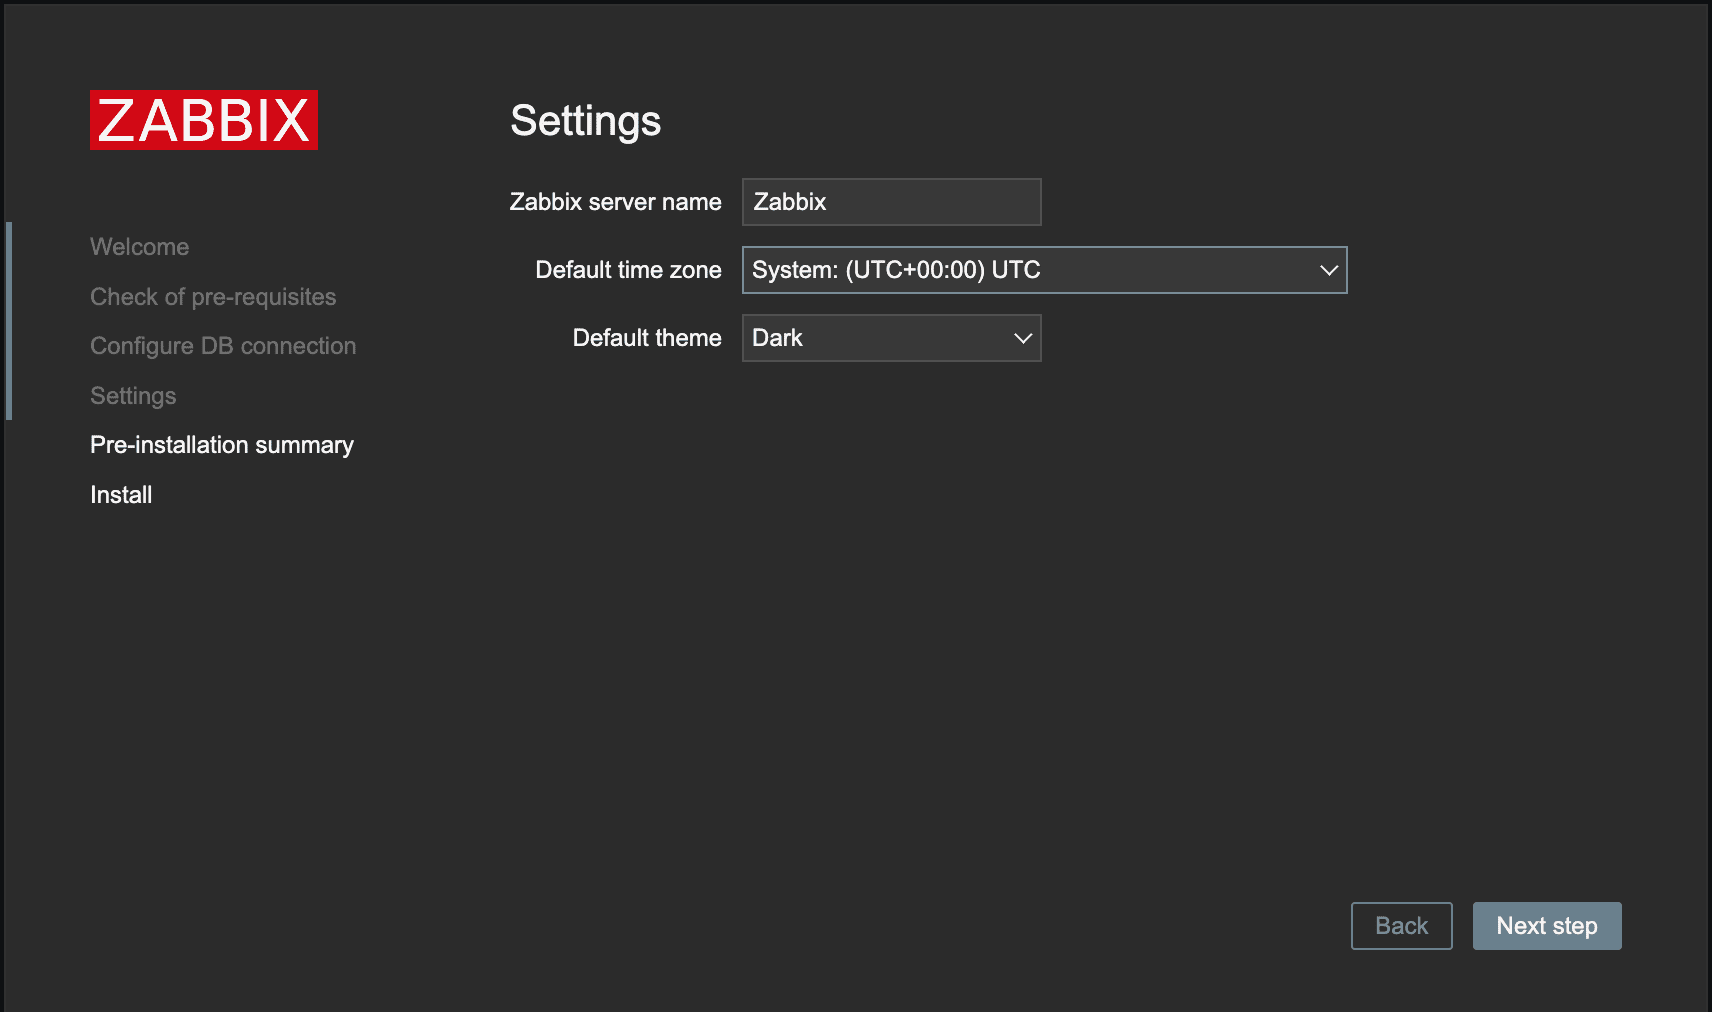
On the new page that opens, you will need to set a Server Name and select a Theme for your application. We will put the server name as ‘Zabbix‘ and select the ‘Dark‘ theme for this post.
Zabbix
Click ‘Next Step‘ when done.
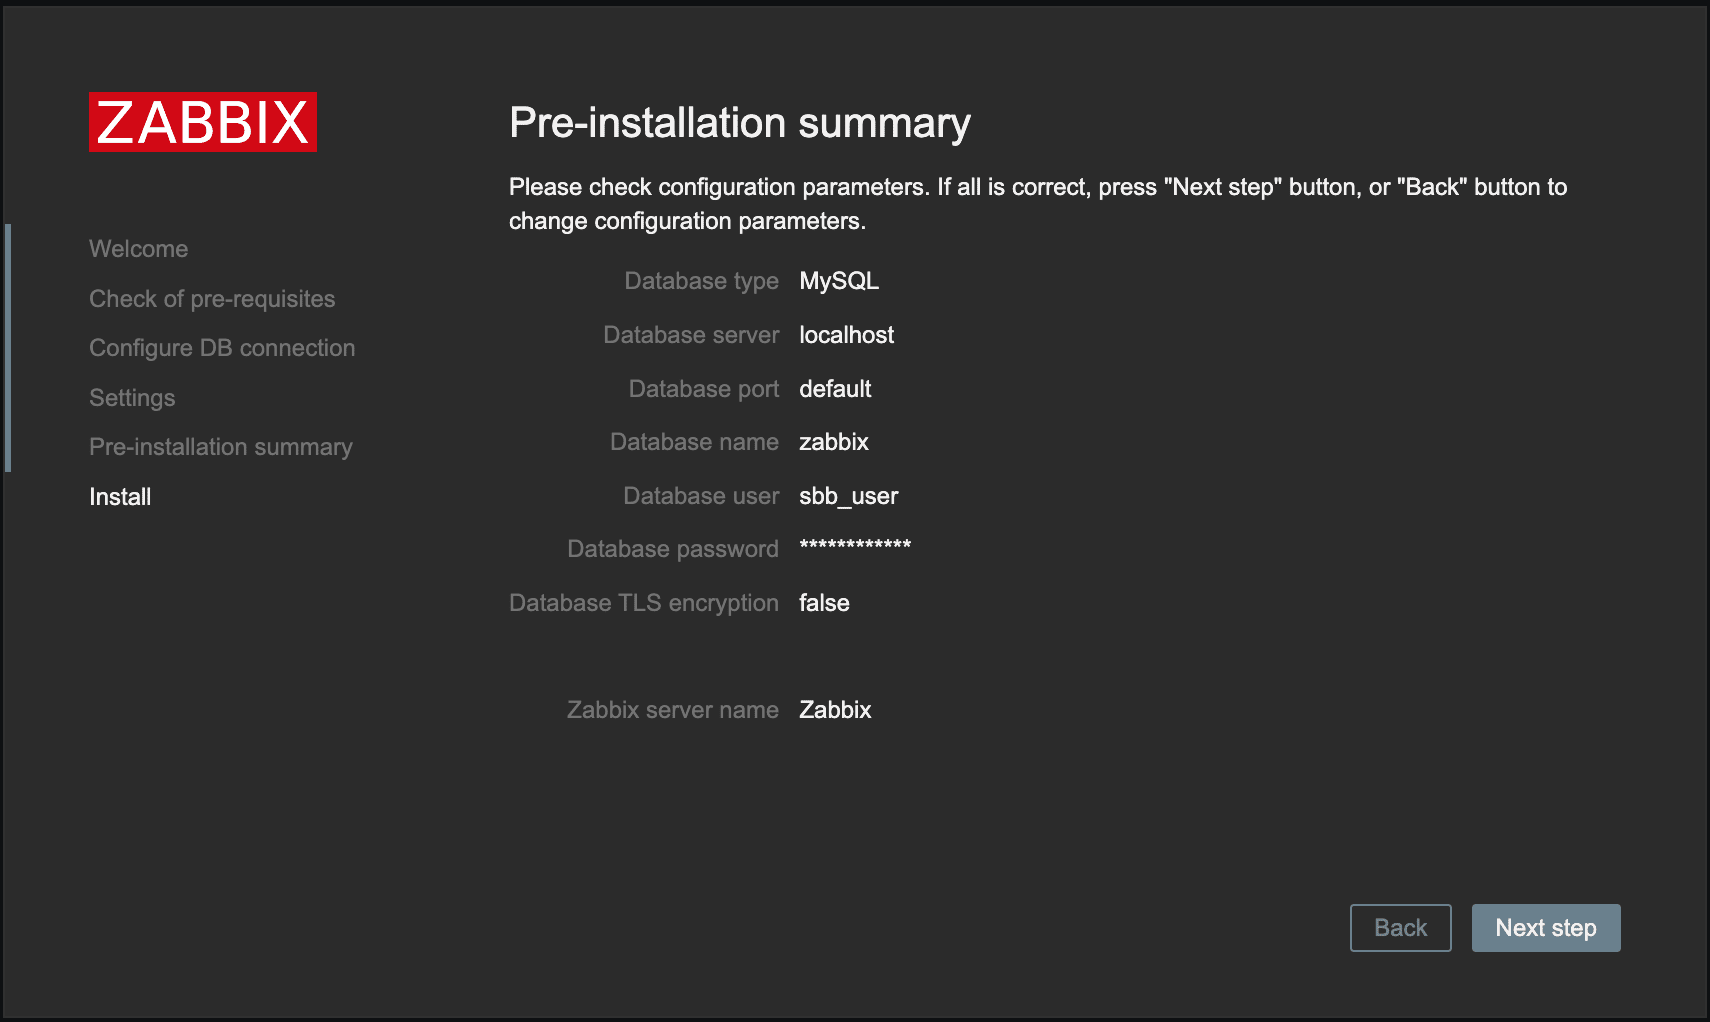
On the next page, you will see a summary of all your configurations. Click ‘Next Step‘ to start the installation if everything is OK.
Pre-installation summary
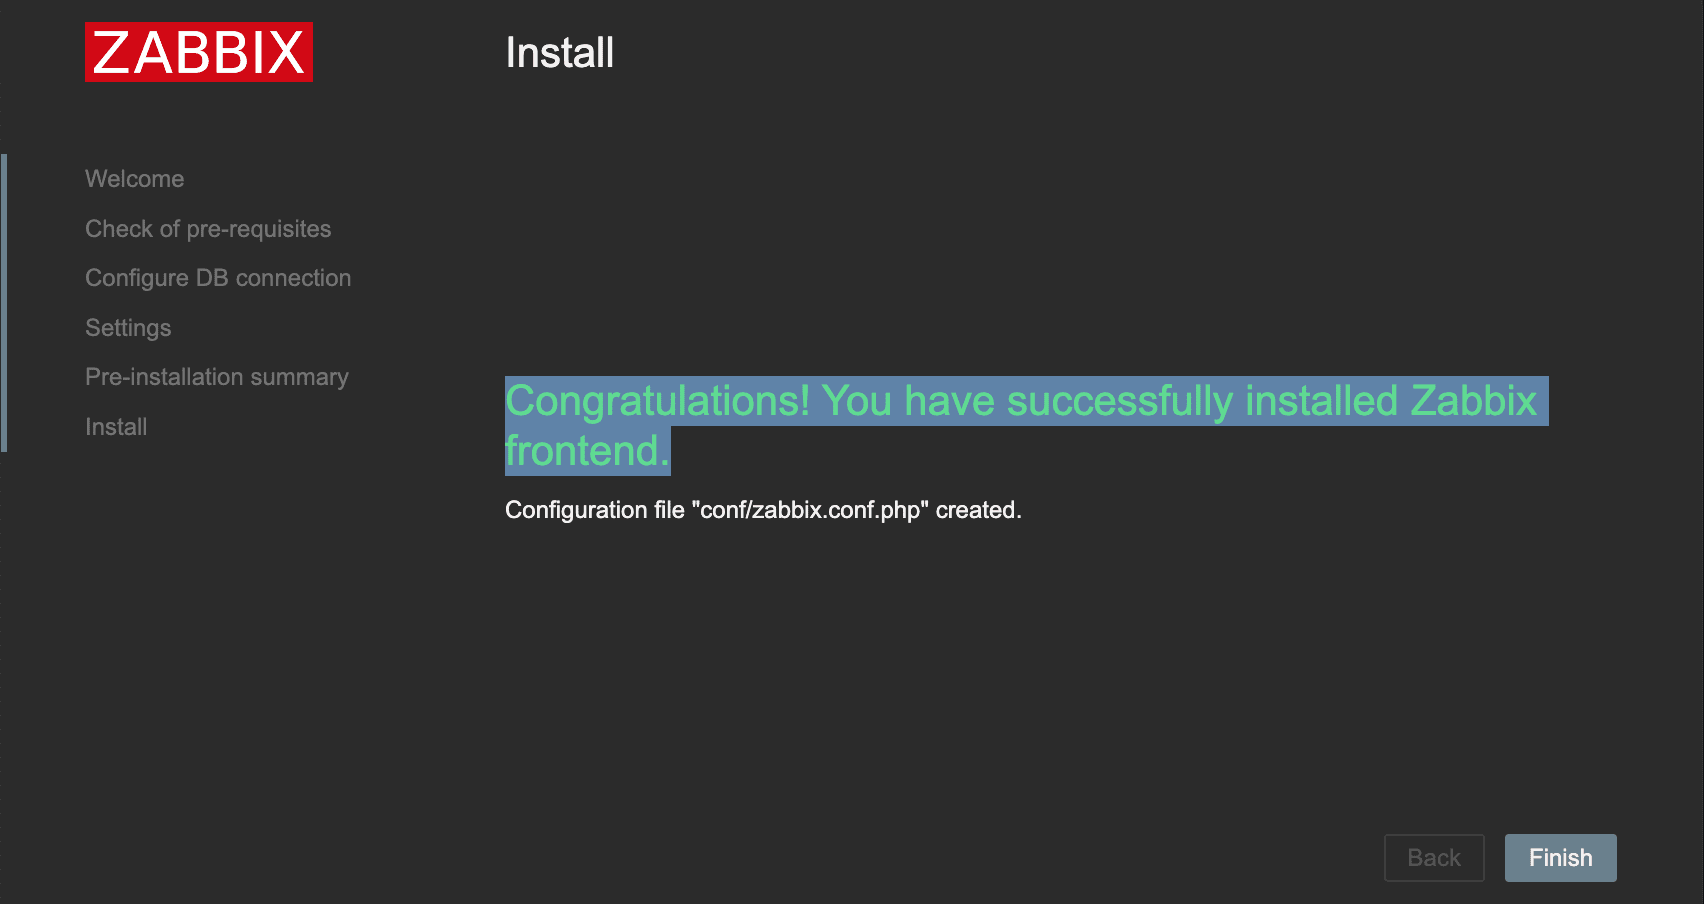
If everything was successful, you should see the message ‘Congratulations! You have successfully installed the Zabbix frontend.’ That’s it! You are done. Click Finish!
Installation complete
On the next, you will see a login page. Use the default credentials below.
- Username = Admin
- Password = zabbix
After a successful login, you should now see the Zabbix web app in all its glory.
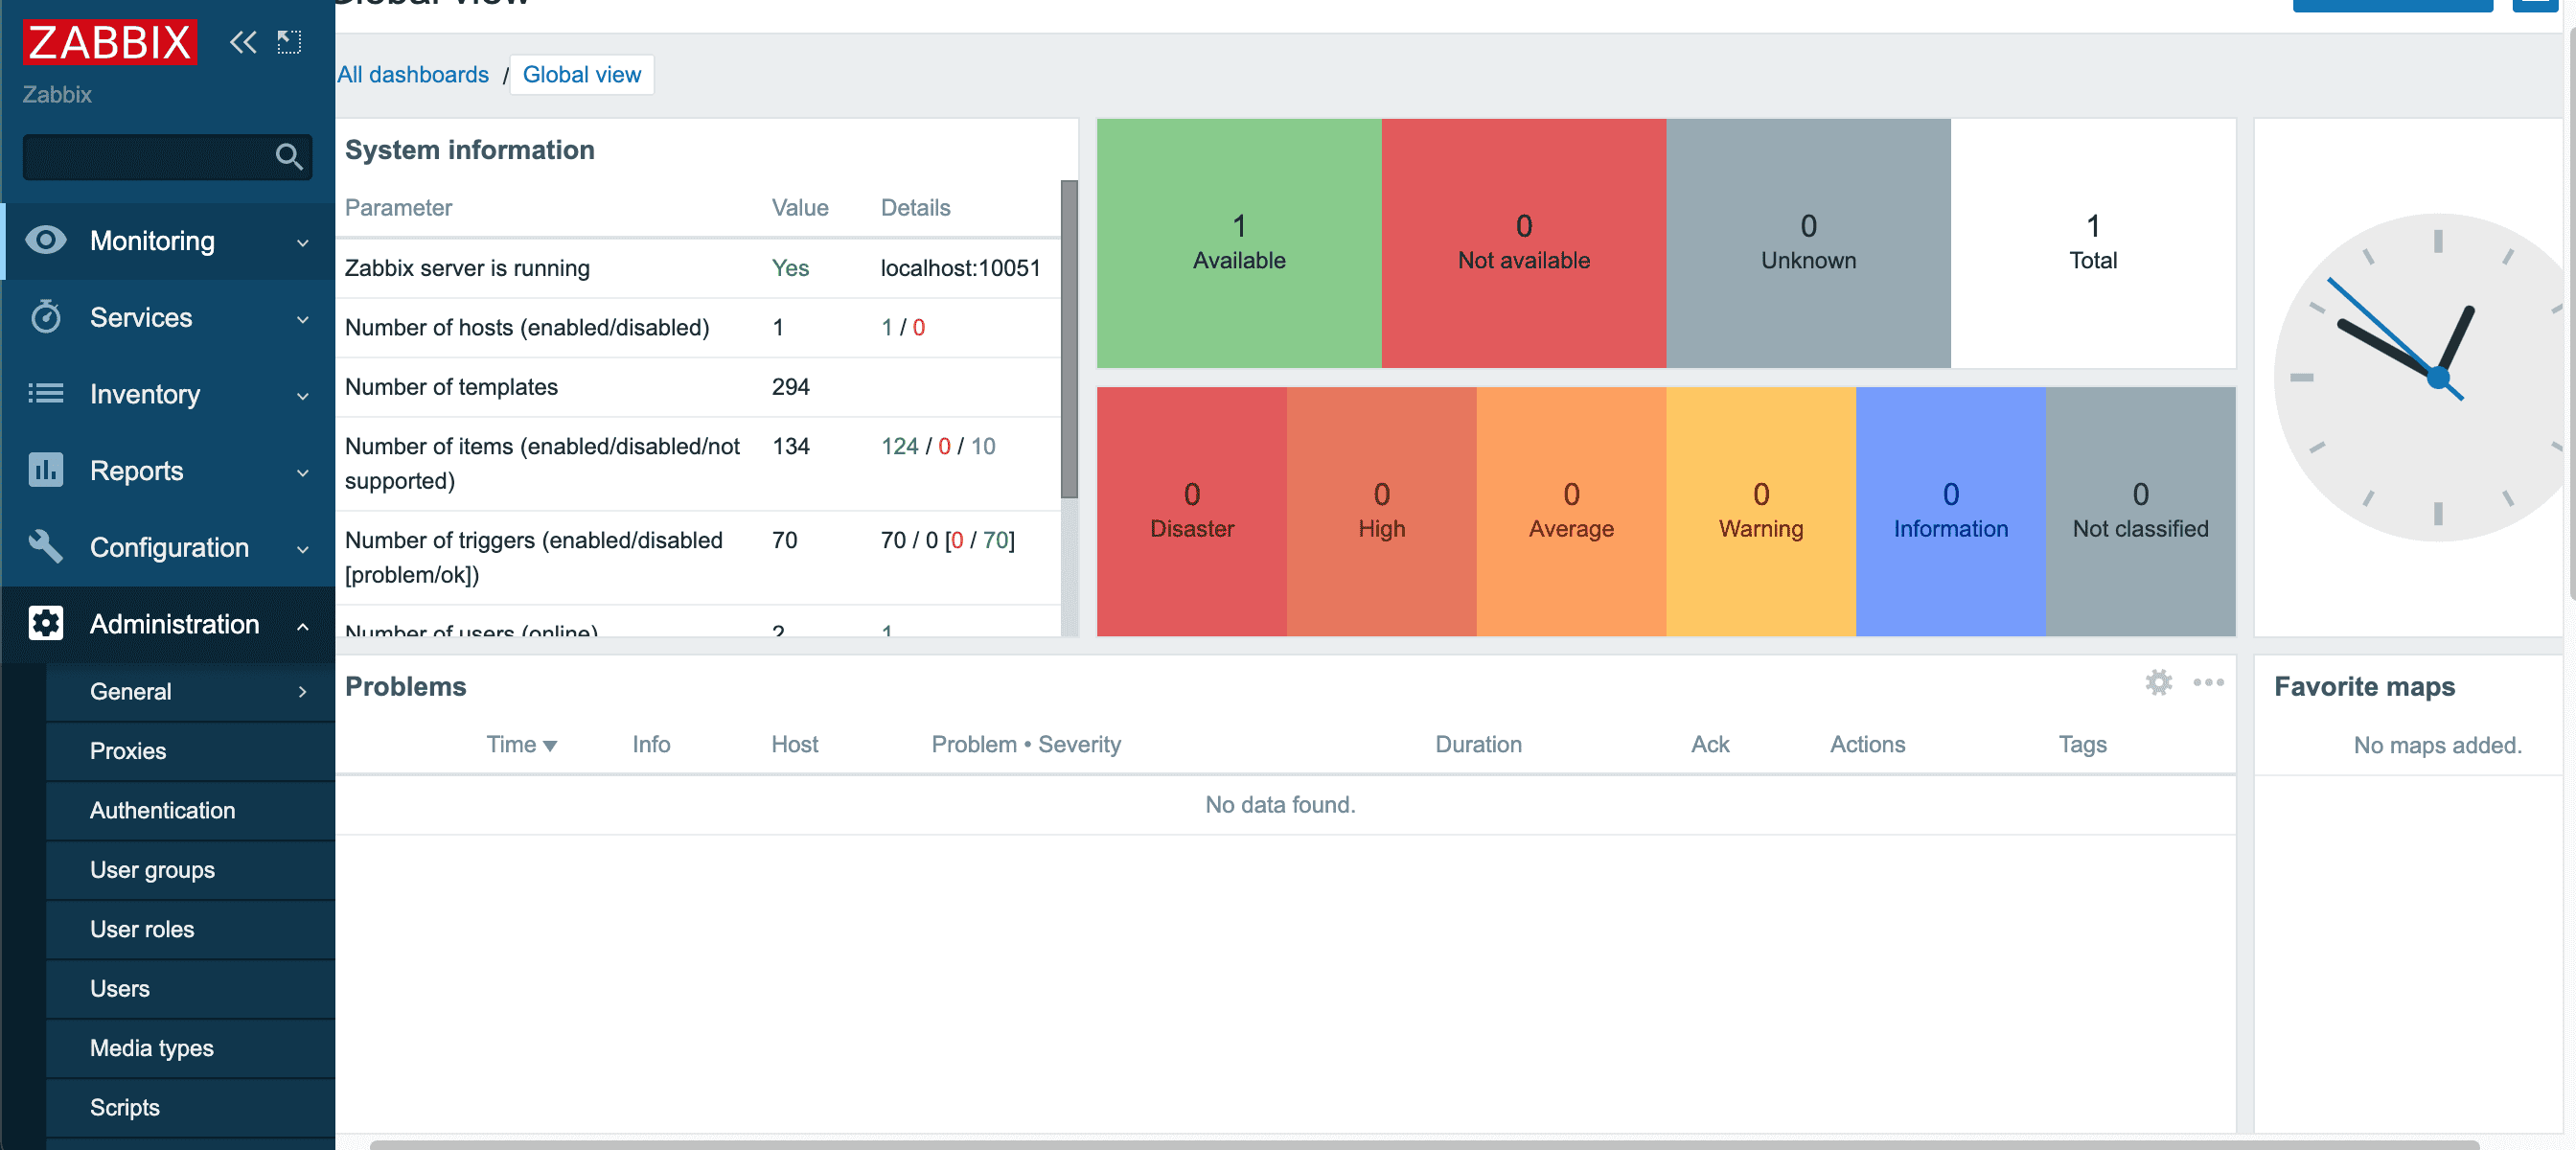
Zabbix
Change the Default Admin Password
In any computer system setup, security is essential. It would be pretty risky if we left the Admin credentials of our Zabbix monitoring tools as the set defaults. Follow the steps below to change the Admin password.
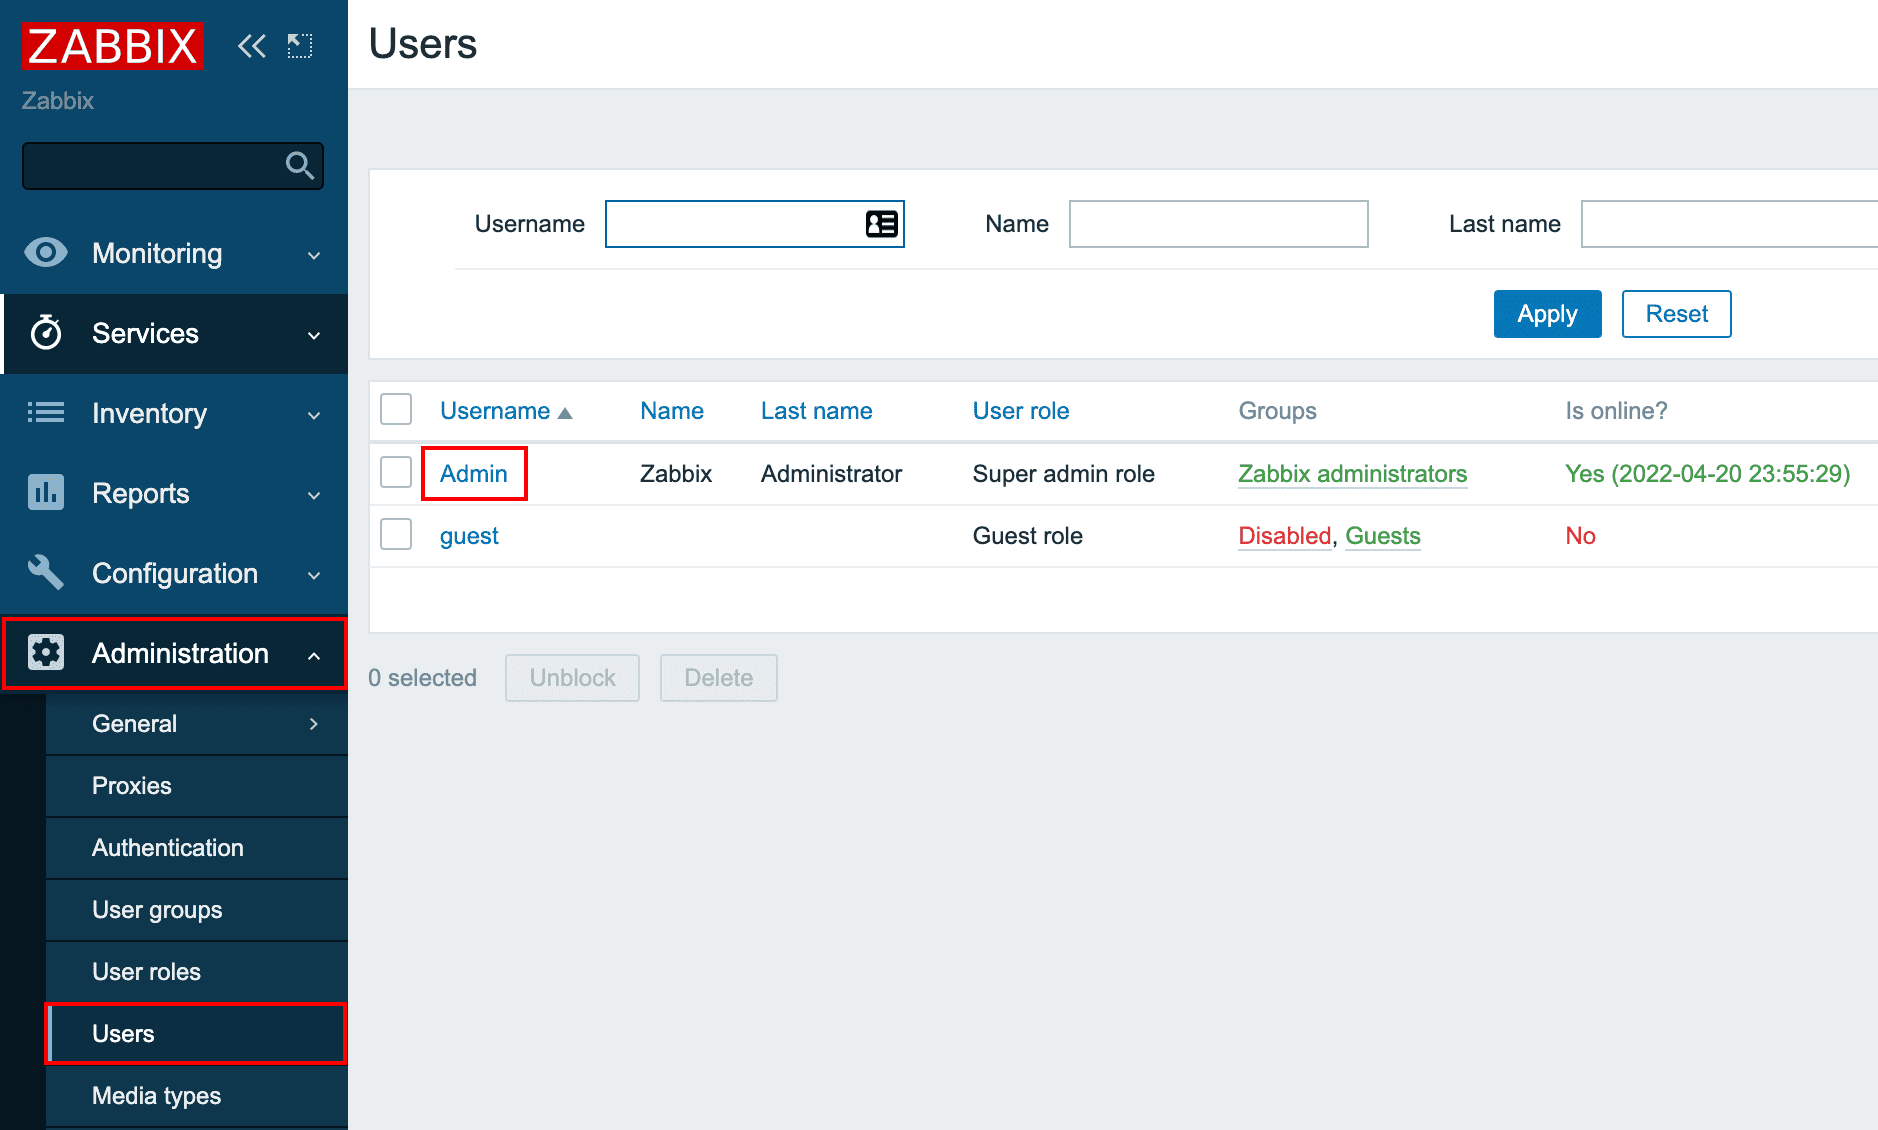
- Log in to your Zabbix dashboard.
- Click on the ‘Administration‘ dropdown menu on the left and select the ‘Users‘ tab.
- That will open a screen with a list of all users registered on the system.

Admin user
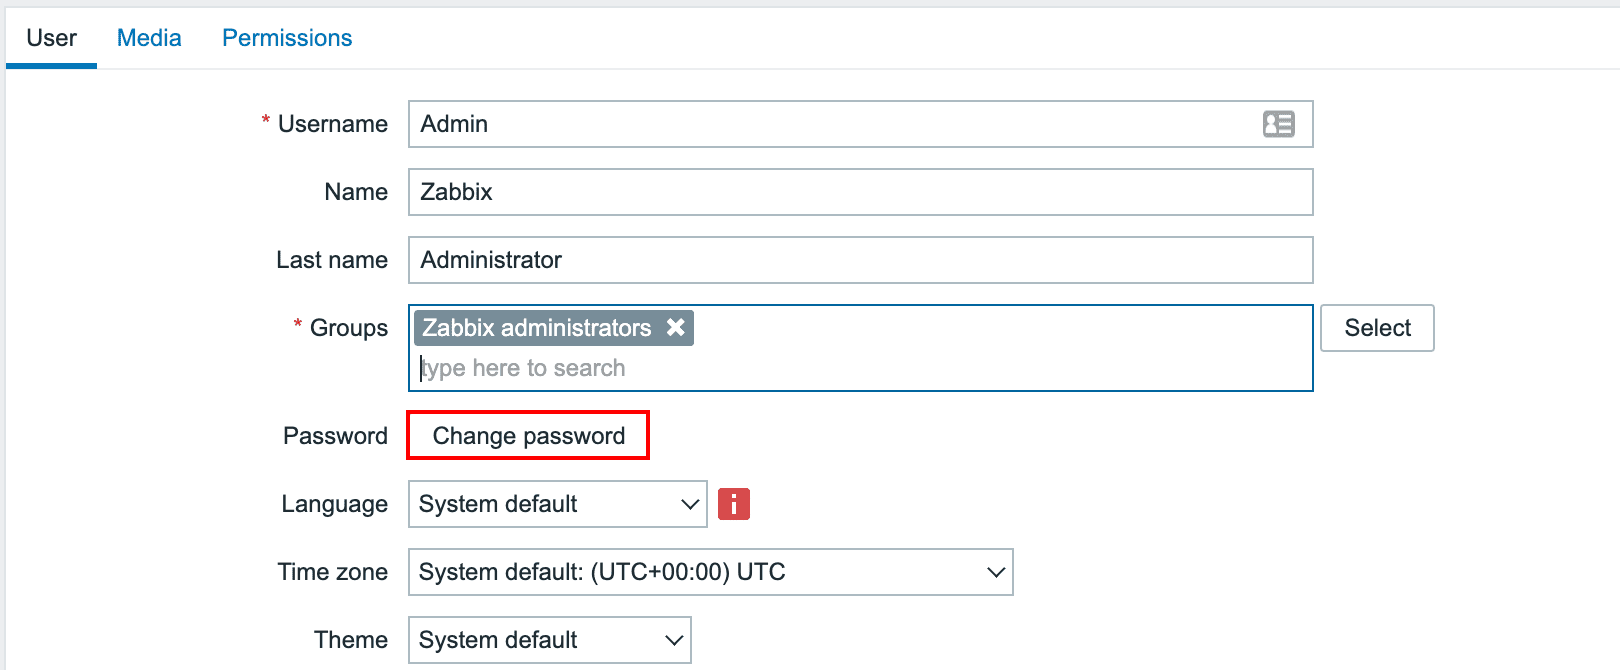
- Click on the ‘Admin‘ to open the user configuration page.
- Click on the ‘Change Password‘ option.
Change password
- Enter your new password and click ‘Update.’
You can now log out and log in with your new password.
Conclusion
That’s it! We have successfully installed Zabbix on the Raspberry Pi 4. You can now monitor the various devices on the network and even your Raspberry pi CPU usage and network utilization. If you encountered any issues during the installation, please let us know in the comments below.