
DietPi is a lightweight, optimized operating system for your Raspberry Pi. DietPi is designed to provide a streamlined, efficient experience for users looking to set up their Raspberry Pi for various purposes. So whether you’re using your Raspberry Pi as a media center, a retro gaming console, or a low-power home server, DietPi has you covered. In this guide, we’ll walk you through the process of setting up DietPi on your Raspberry Pi, including installation, configuration, and optimization. Before heading to that let’s discuss DietPi and its advantages over Raspberry Pi OS.
Why DietPi over Raspberry Pi OS?
Unlike Raspberry Pi OS, which comes preloaded with a variety of applications and features, DietPi has a minimal footprint and only includes the essential components needed to run the system. This means that DietPi can run faster and use fewer system resources, making it a great option for those looking to optimize the performance of their Raspberry Pi.
Additionally, DietPi has a user-friendly interface that makes it easy to install and configure software packages, including popular applications like Kodi and Plex. This can be especially beneficial for beginners who may not have a lot of experience with Linux-based systems.
Ultimately, whether you choose DietPi or Raspberry Pi OS will depend on your individual needs and preferences. If you’re looking for a lightweight and optimized system that can help improve the performance of your Raspberry Pi, DietPi may be the right choice for you. However, if you need a more fully-featured and customizable system, Raspberry Pi OS may be the better option.
Why you may need DietPi for your Raspberry Pi
DietPi comes in handy for Raspberry pi users as it is designed and has the following capabilities. Some of these include:
- It is lightweight: DietPi is a lightweight, optimized operating system designed to run on resource-constrained devices such as the Raspberry Pi. This makes it an ideal choice for those using their Raspberry Pi for lightweight tasks such as media streaming or web browsing.
- It is customizable: DietPi allows users to customize their installation by selecting the specific software packages they want to install. Users can then modify the operating system to suit their unique requirements and preferences with this.
- It is efficient: DietPi is designed to be efficient in terms of memory and power usage. This makes it an ideal choice for those who want to use their Raspberry Pi as a server or for other tasks that require low power consumption.
- It is easy to use: DietPi has been made so that both novices and Pi gurus can easily use it. This makes it an excellent choice for those new to the Raspberry Pi or those who want a no-fuss operating system.
- It has top-notch security: DietPi has built-in security features that help to protect your device against malicious attacks.
- It is cost-effective: DietPi is a cost-effective solution for Raspberry Pi, as it doesn’t require additional hardware to run, and the software can be easily updated and maintained.
Steps to set up Dietpi for the Raspberry Pi
Setting up DietPi on your Raspberry Pi is a relatively simple process that can be broken down into a few key steps:
1. Download the Dietpi image file
The first step for setting up DietPi for Raspberry Pi is downloading the DietPi image file. To do this;
- You need to go to the DietPi official website to download it.
- Scroll through and select the version of Raspberry Pi you have (for instance, Raspberry Pi 2, 3, 4, etc.)
- The “Download” button should be clicked next to the relevant image file. See the image below;
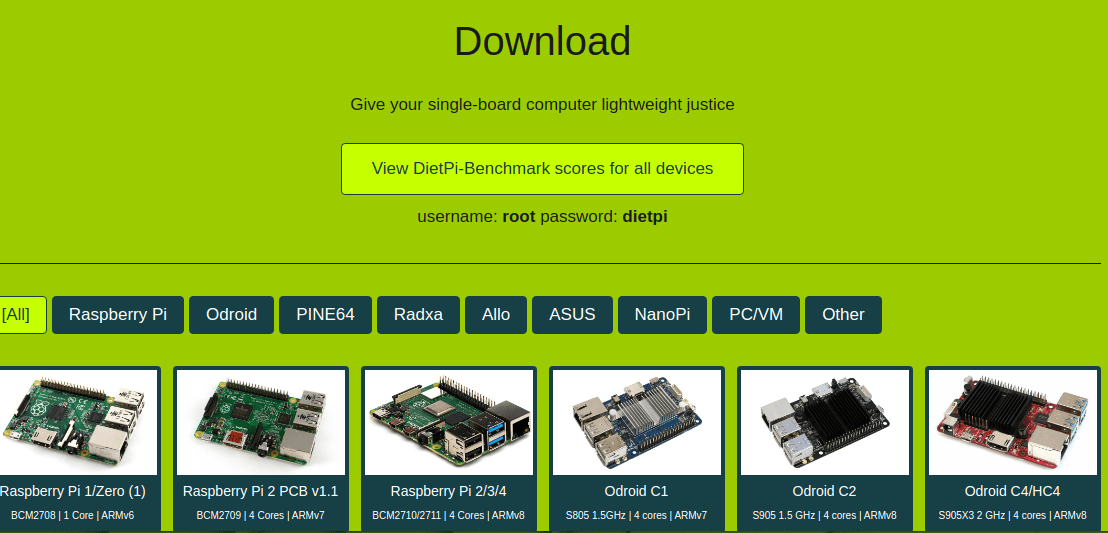
Click on the image to download
- Allow it a few minutes to download.

Downloading
2. Extract the DietPi image file
You will notice that the downloaded file comes in a compressed format. You will need to unzip it to extract the DietPi image file you need for installation.
3. Flash the extracted image file
- Flashing the Dietpi image file can be done to the initial raspberry pi SD card or another high-quality SD card with enough space.
- Insert the SD card into your computer, and choose the DietPi Image. You can use your Raspberry Pi SD Card by removing it from the pi or using a different SD card available.
- Double-check that the image file you selected is correct before the flashing process starts.
- Next, use Raspberry Pi imager or Balena Etcher to flash the DietPi image onto the SD card. Allow it some time to finish,h as it may take some time. You will see the flashing progress as shown in the image below.
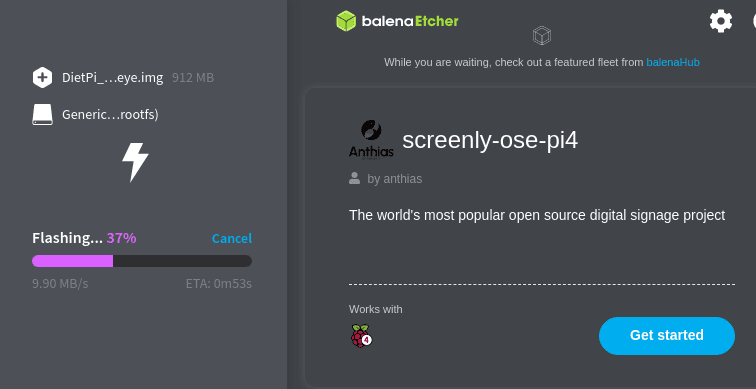
Flashing DietPi
- Remove the SD card from the PC after completing the flashing and validating process. You should be able to know that the flashing is complete when you get the following notification;
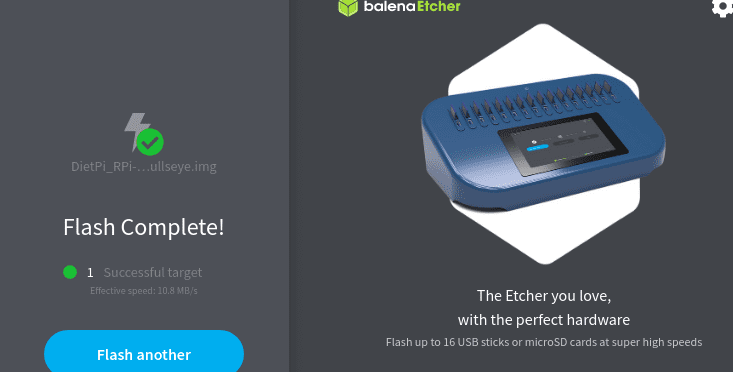
Flash notification
4. Insert the SD Card Into the Raspberry Pi for setup and log in to Dietpi
- Put back the SD card and turn on your Raspberry Pi.
- The next thing you will see is a first boot that usually occurs automatically to set up DietPi.
- The default login username and password for DietPi are root and dietpi, respectively.
- However, you can change the username or password later when it’s more convenient for you.
Note: The default username (root) and password (dietpi) can be used to connect over SSH if you have allowed SSH access and can access your Raspberry Pi remotely. See the following image;
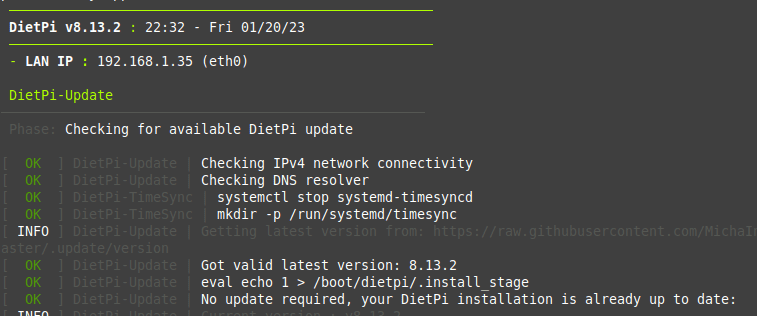
DietPi update
- You will be prompted to set your password, time zone, and keyboard layout. Additionally, you’ll be prompted to choose the applications you want to install.
- The choice of software will come next; DietPi offers many pre-configured software alternatives, including media servers, web servers, and programming environments. The software you want to install can be chosen here, or you can do it later by either clicking ‘ok’ or ‘cancel’.
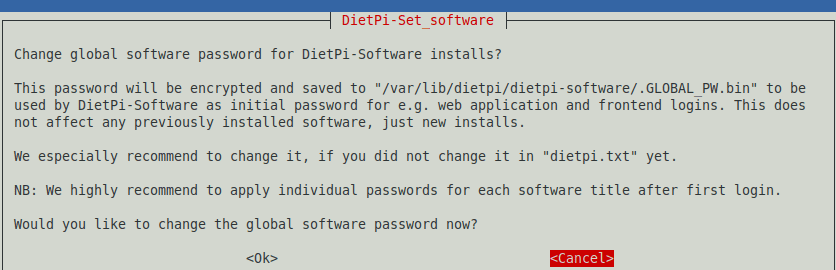
DietPi software
- Depending on the software you choose and your Raspberry Pi’s speed, installing any program you choose may take some time.
- Next, you will be prompted to change the login password if you wish to. Remember that you can do this immediately or later in your free time. For security reasons, ensure you change it later.
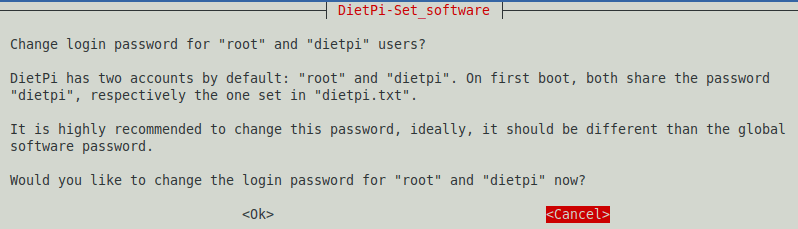
DietPi change password
- A serial/UART console will then be enabled, and you will be given the option to turn it off or leave it running. It is safe to choose a UART device, and by halting the associated processes, it releases some MiB RAM. By selecting “No” or “Yes,” you can enable it now or later.
- Enabling UART can also be made possible through dietpi-config ->advanced options->serial/UART. See the image below:
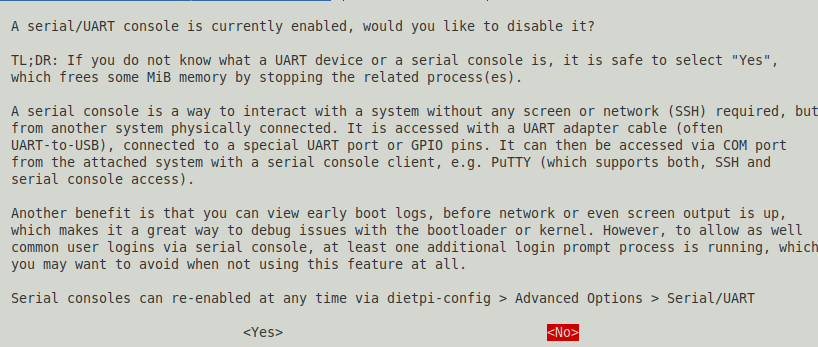
UART
- Once the boot is complete, you will see a prompt for logging in and setting up a few things like dates, usernames, and passwords.
5. Customize and use Dietpi for your convenience
Then, a popup with several options will show up so you may tailor the DietPi’s settings to your preferences. You can now customize and utilize your DietPi as you wish. One can use DietPi for a lot, so feel free to explore.
You may now, for example, alter the default passwords and toggle on or off specific Raspberry Pi hardware components. Additionally, DietPi offers a selection of optimization choices.

DietPi customization
- Run the DietPi-Config tool by typing “dietpi-config” in the command line. This tool allows you to configure various settings such as language, keyboard layout, overclocking, and network settings. The DietPi-Config utility allows you to change performance parameters and activate cutting-edge capabilities.
- Use the DietPi-Software tool to install and manage software packages. This tool lets you easily install popular software such as web servers, databases, and media players.
- Use the DietPi-Sync tool to back up and restore your DietPi system. It helps to prevent data loss.
- Use the DietPi-RAMlog program to keep an eye on how much memory your system is using. This tool can identify processes using a lot of memory and optimize your system’s performance.
- To access your DietPi system remotely, you can use SSH or VNC.
- You can run the dietpi-launcher command to access all the installed software.
- Scroll through, and when you are done with the customization, click”OK” for the changes to be effective.
Depending on your specific needs, there may be additional steps you need to take to customize your DietPi system fully.
Summary
Setting up DietPi for the Raspberry Pi is a great way to take full advantage of the capabilities of this powerful and versatile device,e and you can do so in a few simple steps. DietPi is a lightweight, optimized operating system that runs on resource-constrained devices such as the Raspberry P. It offers many benefits, including customization, efficiency, ease of use, security, and cost-effectiveness mentioned in the post.
Its simple and intuitive user interface makes DietPi easy to set up and use, even for those new to the Raspberry Pi. Whether using your Raspberry Pi as a media streaming device, a web server, or any other purpose, DietPi is an excellent choice to help you get the most out of your device.