
The Raspberry Pi comes with a 1-wire Interface bus used to connect sensor modules when working on IoT projects. For example, one such sensor is the DS18B20 used to measure temperature. 1-wire interface is basically a single wire which can carry out multiple functions, including low-speed data transfer, power over a single conductor, and signaling. Practically, the Raspberry Pi supports a 1-wire interface on any GPIO pin; however, the default pin is GPIO 4.
Enabling 1-wire interface on the Raspberry Pi
By default, this interface is disabled on Raspberry Pi. This post will get you a step-by-step guide on enabling a 1-wire interface on your Raspberry Pi. We will look at three methods:
- Using the “Raspi-config” tool
- Using “Raspberry PI Configuration”
- Using the “/boot/config.txt” file
Method 1: Using the “Raspi-config” tool
This is one of the easiest methods, especially if you are accessing your Pi over SSH. First, execute the command below on your Terminal.
sudo raspi-config
This action will launch the Raspberry Pi Software Configuration Tool, as shown in the image below. Next, scroll down to the “Interface Options.”
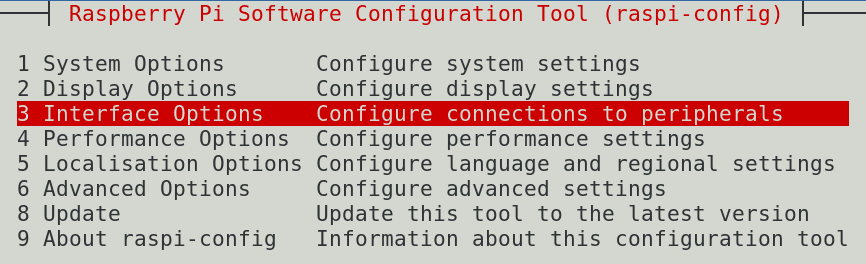
Interface Options
Press ‘Enter” to select the option. Then, on the new screen that appears, scroll down to the 1-wire option and hit “Enter.”
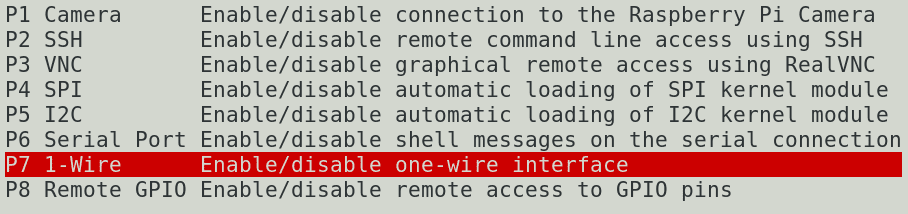
1-Wire
You will the prompt, “Would you like the one-wire interface to be enabled?” Select Yes and hit Enter. That’s it! You have successfully enabled a 1-wire interface on your Raspberry Pi. When you click Finish, you will see a prompt to Reboot the Pi. Select Yes.
Method 2: Using “Raspberry Pi Configuration” Window
If you don’t want to go the command-line way, you can use the Raspberry Pi Configuration graphical tool. You will need to connect your Raspberry PI to an external monitor or use a VNC connection for this option. Feel free to check out our post on How to Setup VNC on your Raspberry Pi.
Click on Menu -> Preferences -> Raspberry Pi Configuration, as shown in the image below.

Raspberry Pi Configuration
This will open the Raspberry Pi Configuration window. Click on the “Interface” tab. Next, click on the enable radio button next to the 1-Wire option, as shown in the image below.
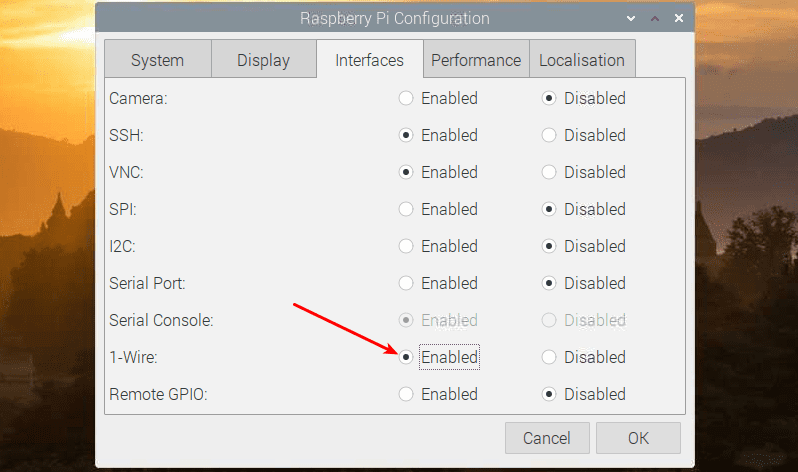
Enable 1-Wire
Click Ok when done to apply your changes.
Method 3: Using the “/boot/config.txt” file
Alternatively, you can enable the 1-wire interface by configuring the /boot/config.txt file. To get started, execute the command below on your Terminal to open the file using the nano editor.
sudo nano /boot/config.txt
Then, add the line below at the bottom of the file.
dtoverlay=w1-gpio
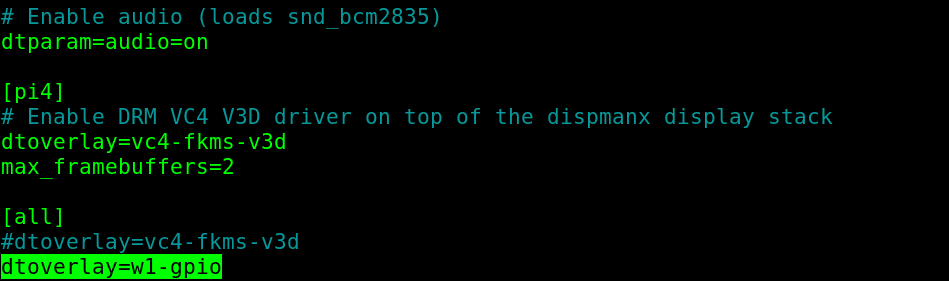
Enable 1-Wire
Save the file (Ctrl + S) and Exit (Ctrl + X). Reboot your Pi to apply the changes. Execute the command below.
sudo reboot now
Conclusion
That’s it! Those are three methods you can use to enable the 1-Wire interface on your Raspberry Pi. To list all the discovered devices, you can use the command, ls /sys/bus/w1/devices/.