
Kodi is a free and open-source media player software app developed by the XBMC Foundation, a non-profit tech consortium. It is available for several operating systems and hardware platforms on the market. This software is coded in python, C++, Assembly language, C, and objective-C. Kodi is one of the excellent platforms out there for streaming audio, video, and music from set-top boxes or android to televisions and home theatres.
It has a compelling interface and extensive library of add-ons and plugins, accompanied by a quick installation method, increasing the number of users switching into this streamlined interface. However, those already using this software must have, in one way or the other, noticed that the streaming speed grows slow and stuttery after regular use. This, therefore, means that Kodi occasionally features slowdowns and buffering after a long time of non-stop usage.
While several playback problems happen from network instability or typical buffering slowdowns, the software generally becomes too slow for reliable use. When such a situation occurs, it may be time to empty the cache. Like Android phones or tablets, clearing cache in this software is not an operation you must complete frequently. Nevertheless, this process aids in fixing minor issues on interface and playback functionality.
Far from the Android phones or tablets, where you can internally clear cache without any additional requirement, in Kodi, you need an additional plugin. Some of the previous ways to clear cache included using the Merlin Wizard add-on and other look-alike ones, but those repos are obsolete.
In this write-up, we will be using the latest version of Kodi 19.3(matrix) on our Raspberry Pi machine.
What is Kodi cache?
Ideally, the Kodi cache is where temporary data from the Kodi app is stored to fasten the streaming process during the playback. Unfortunately, Kodi and other similar streaming applications tend to keep the cache from the previous playbacks despite this cache being temporary. This, in turn, piles up and often give rise to slow performance, no streams issue on Kodi, and other related issues.
Why should you clear the Kodi cache?
Despite being great at streaming and watching applications, sometimes, many face constant hanging and buffering issues with Kodi. This is brought about by the cache data that causes it to stop functioning as intended. One of the well-known issues is the sluggish working of the software, which makes it respond slowly to command or even maneuvering in the app, and that is where cache clearing comes to play. On the bright side, clearing these cache data routinely will enhance your Kodi to be faster and more responsive like never before.
This process can internally fix many technical and such-like issues and is often the best solution if you face playback or buffering problems on Kodi. Therefore, this article will emphasize manually clearing Kodi Cache on our Pi machine. After that, we will give you an overview and procedural steps of clearing the cache using Exodus Kodi Add-on, Clearing cache Kodi on Covenant, and Firestick to sum up the article.
Method 1: How to manually clear the Kodi Cache on Raspberry pi
Kodi does not whip with any inbuilt feature to clear the cache. Therefore, we will show you another approach you can use to clear the cache in case you are using this software on a PC, like in our case, the Raspberry Pi.
This method entails installing the EzzerMacs on Kodi. This Wizard has multiple maintenances features, including the clear cache, which will keep your Kodi software functioning perfectly without any hitches. Ensure you follow the subsequent steps keenly for a clean clearing of cache on your software.
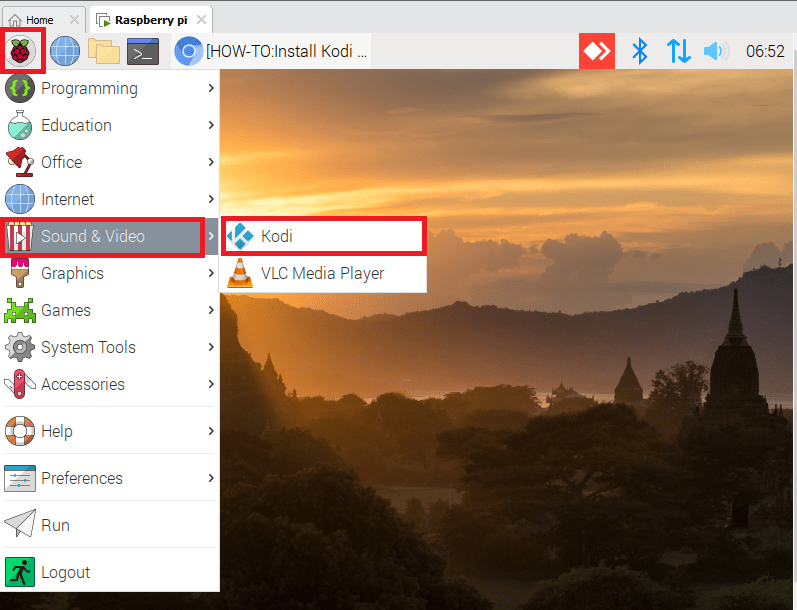
Step 1: Launch Kodi
First things first, we will launch the Kodi software by going to the start menu> sound & Video, then click on the Kodi icon as shown in the snapshot below:
launch Kodi
Step 2: Enable Unknown Sources
We will enable unknown sources if they are not enabled by default. This is how to do it:
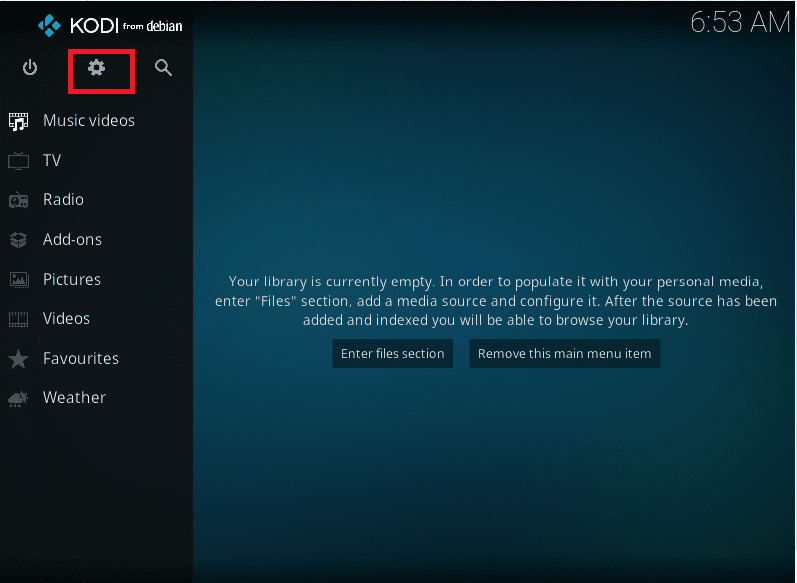
1. From Kodi’s home screen, click on Settings:
select settings
After that, click on the system settings:
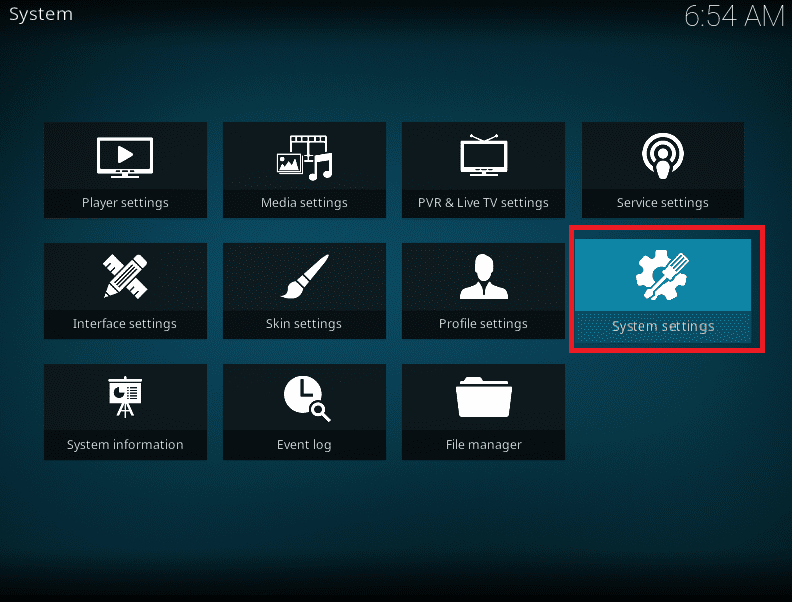
select system settings
2. Then proceed to Add-ons>Uknown Sources:
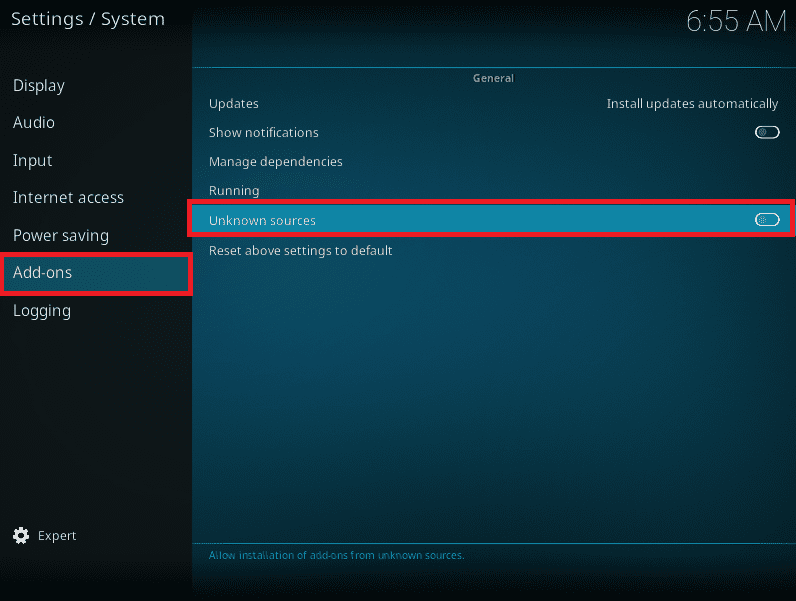
select add ons
Here, a warning window saying add-ons will be given access to personal data stored on this device will appear asking you to affirm the decision by either selecting yes or no since you will agree that you will be solely held responsible for any loss of data and any form of unwanted behavior: Here, we recommend you click “Yes.”
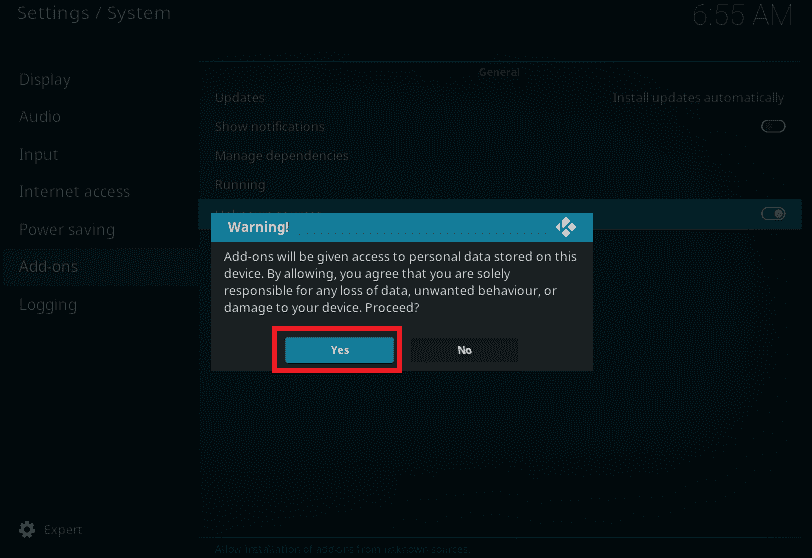
warning
3. Then, return to the Kodi home screen and head over to settings (the cog icon):
select settings
4. Select File manager:

select file manager
5. Click on the “Add Source” button as shown below:
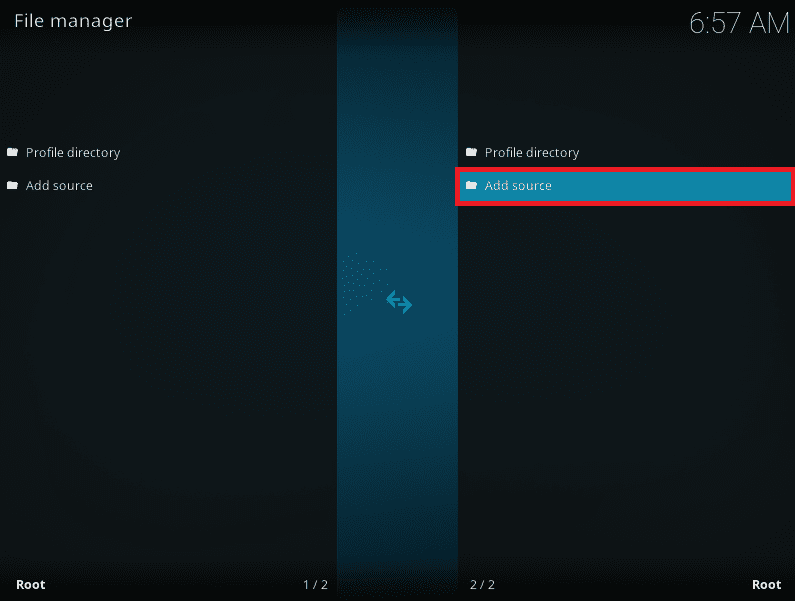
click add source
6. Here, click <None>:
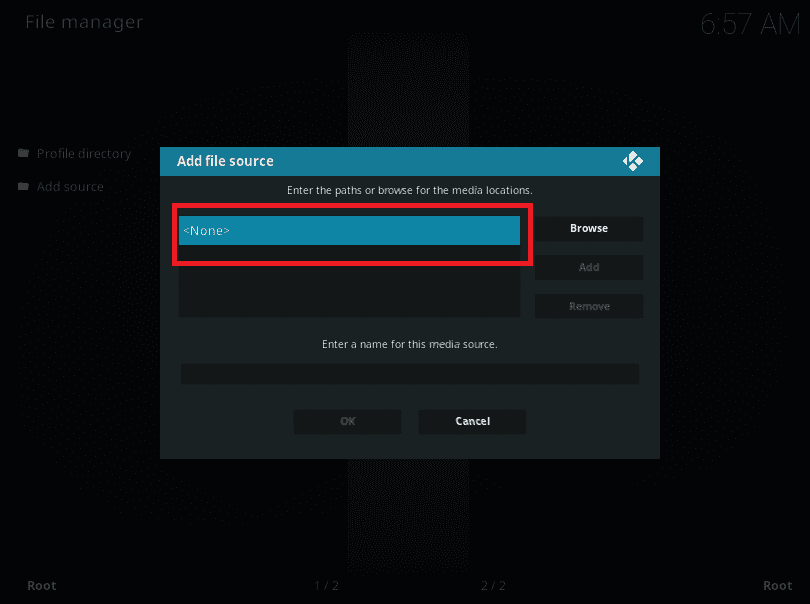
select none
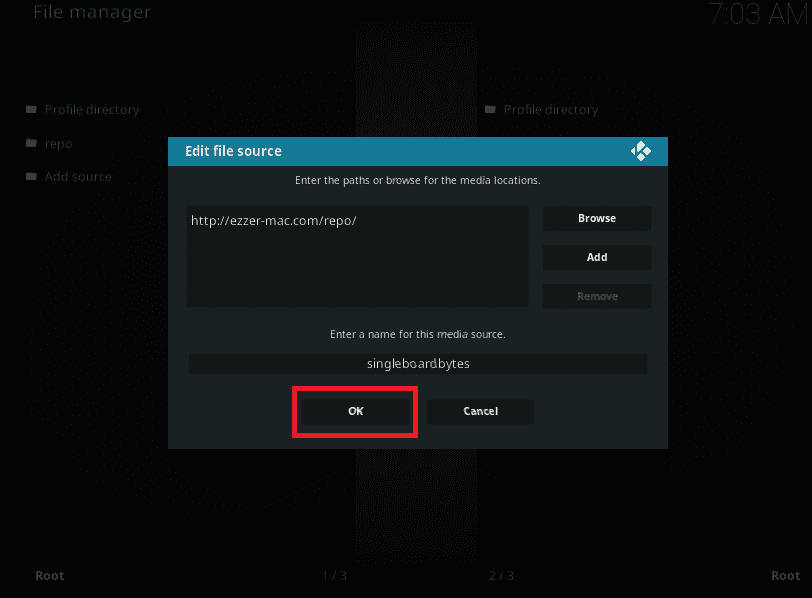
7. after that, input the following Uniform Resource Locator as it is:
http://ezzer-mac.com/repo

enter repo URL
After that, click on OK
8. We suggest you key in your preferred name on the media source name. in our course, we will write “singleboardbytes.”
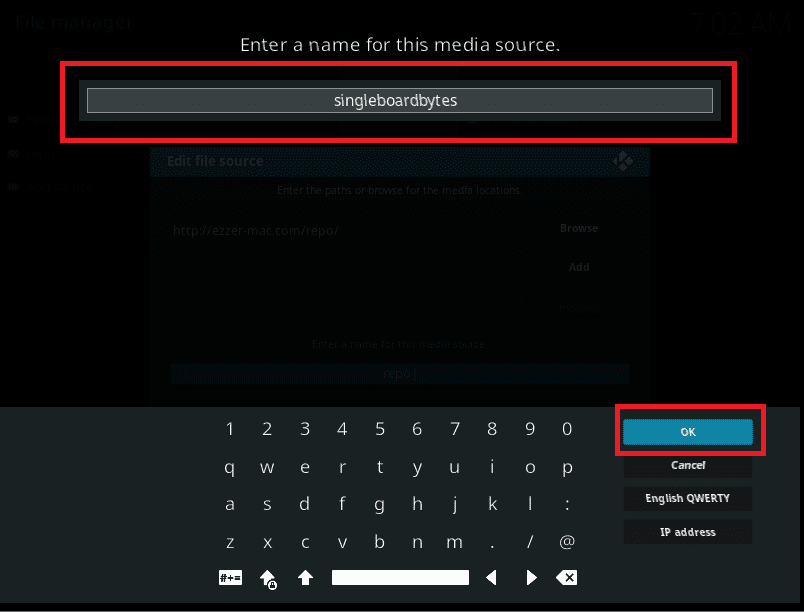
name the media source
Then click the OK button on the right-hand side of the keyboard.
9. Click on OK once again:
Click OK again
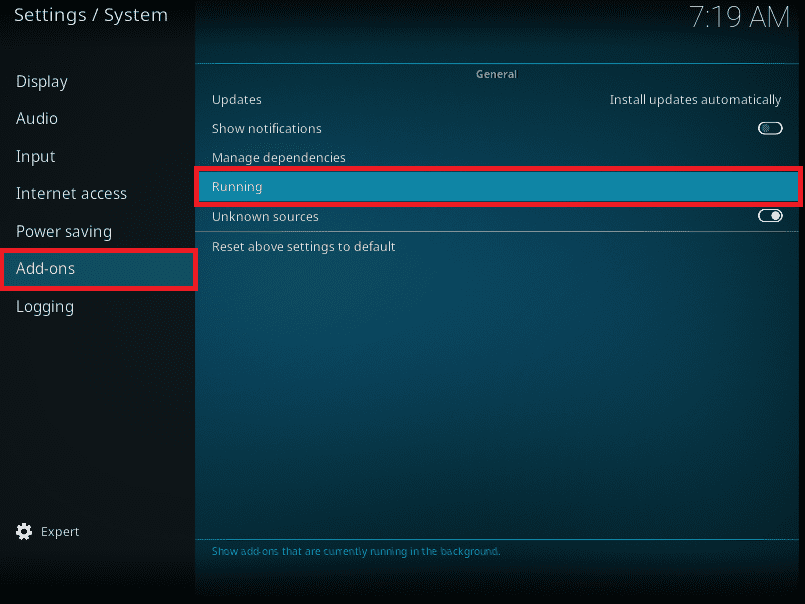
10. Go back to the Kodi system settings window and hover on Add-ons on the left-hand side, then select running on the right-hand side:
11. Click on Install From Zip File:

install from zip file
12. Then click on singleboardbytes or the name you earlier set in step 8
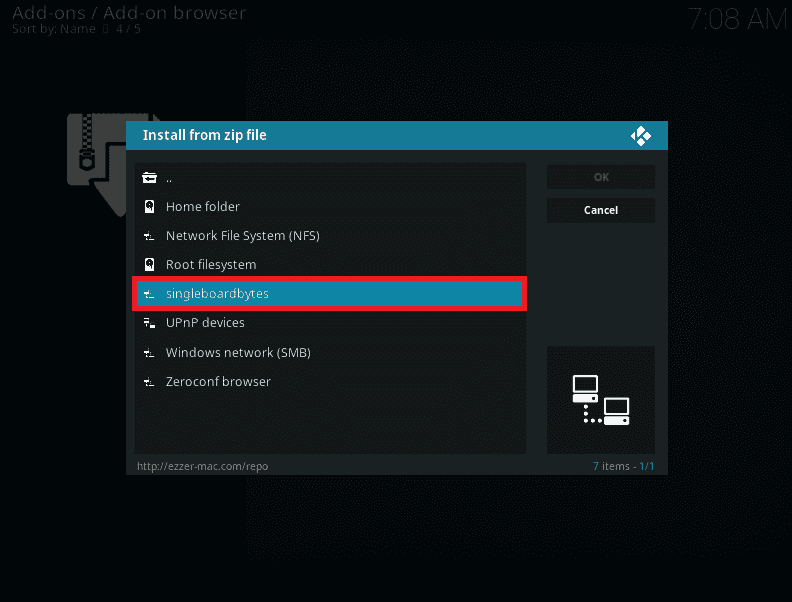
select singleboardbytes
13. Then click on repositorry.EzzerMacsWizard.zip
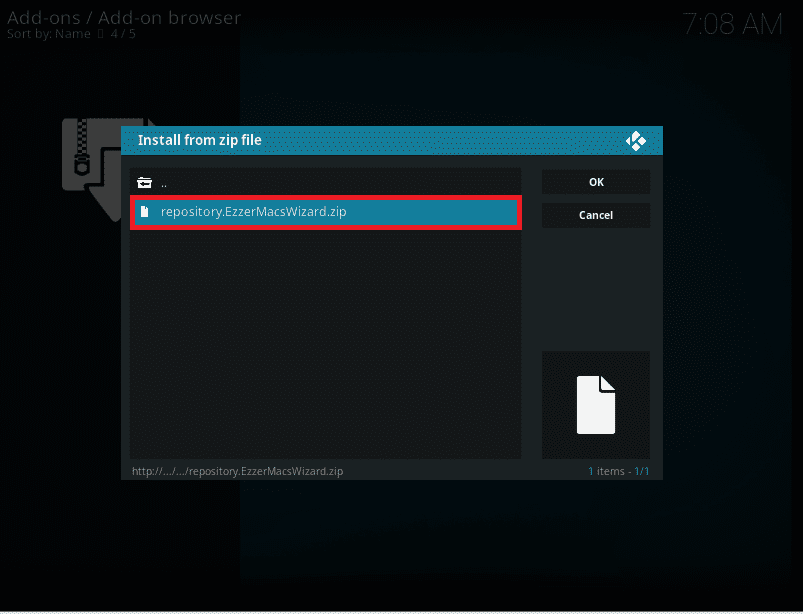
select repo
14. Be patient till you can see EzzerMac Wizard Repository Add-on installed message on your pi machine.
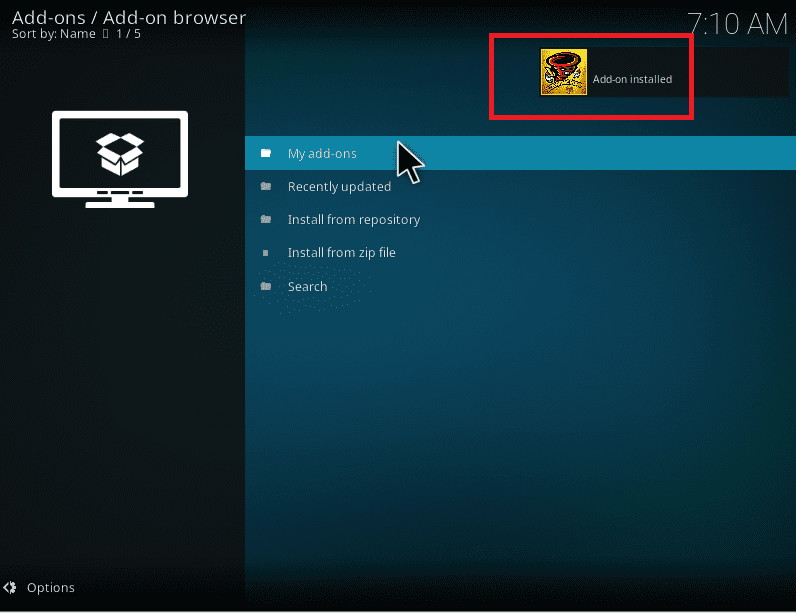
add on installed
15. Now, go ahead and click Install from Repository.
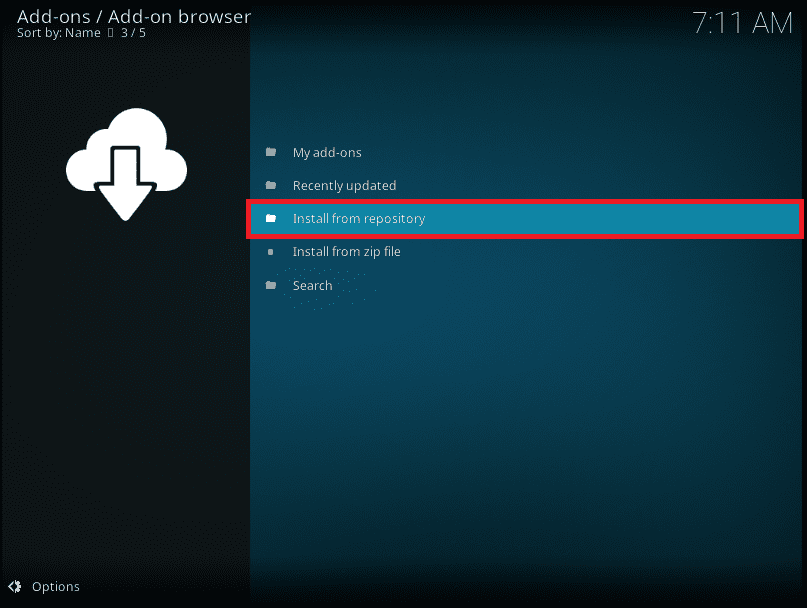
install from repository
16. Click on EzzerMacs Wizard repository:
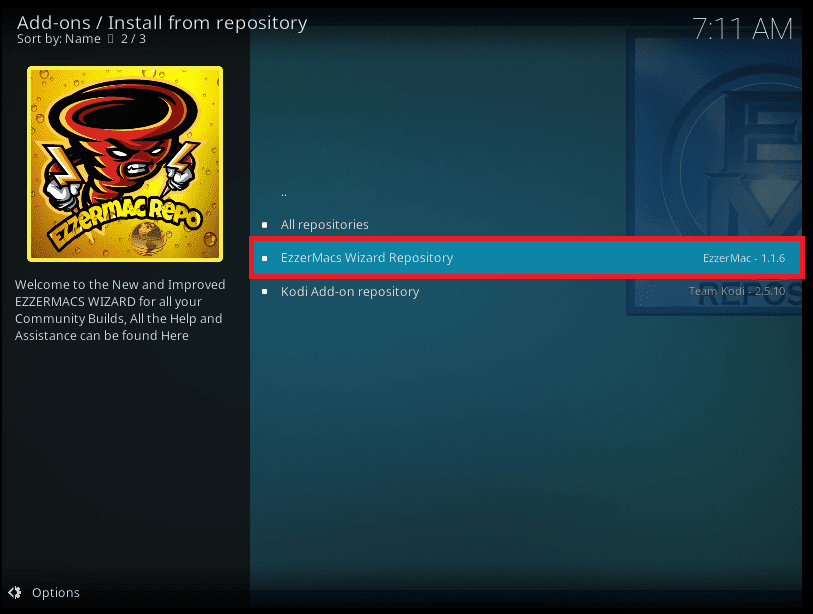
select EzzerMacs repo
17. Click on Program Add-ons:
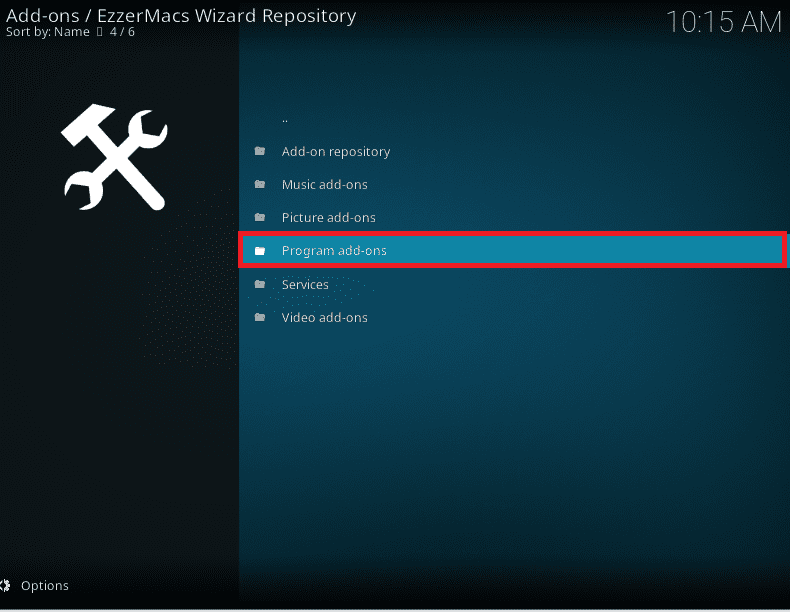
select programs add-ons
18. Then, click EzzerMac Wizard:
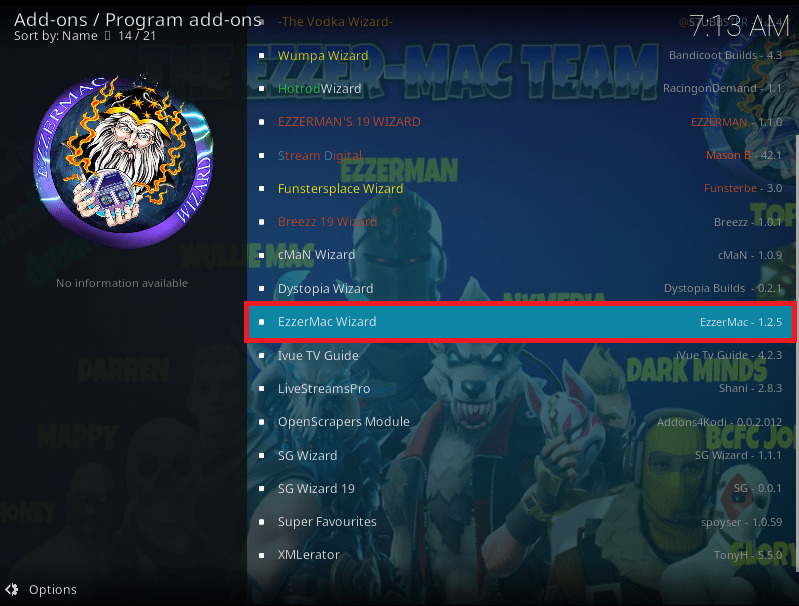
select EzzerMacs wizard
19. Here, click the Install button located at the bottom right corner
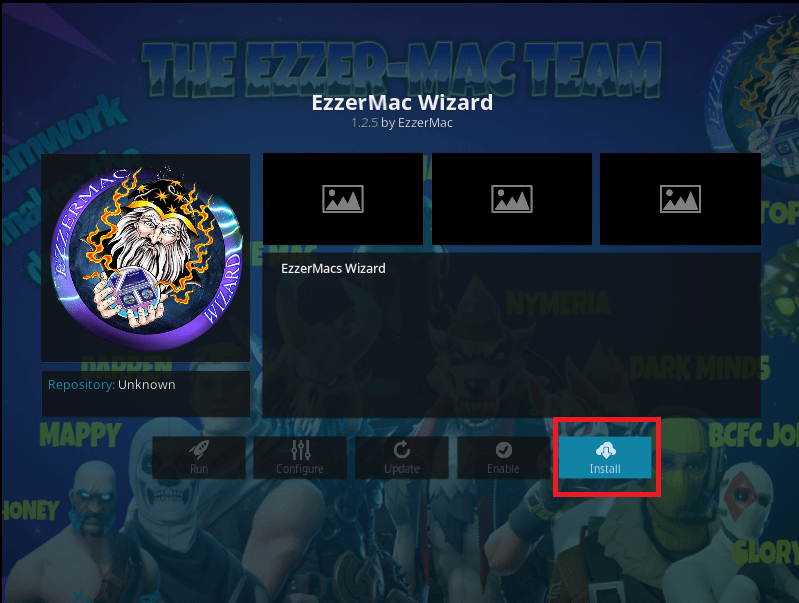
select install
20. Please be patient until a pop-up message saying EzzerMac Wizard Add-on installed appears.

EzzerMac wizard add-on installed
21. Revert to Kodi Home screen and then click on Add-ons and select running:

go to add-ons
22. Then select the two dots:
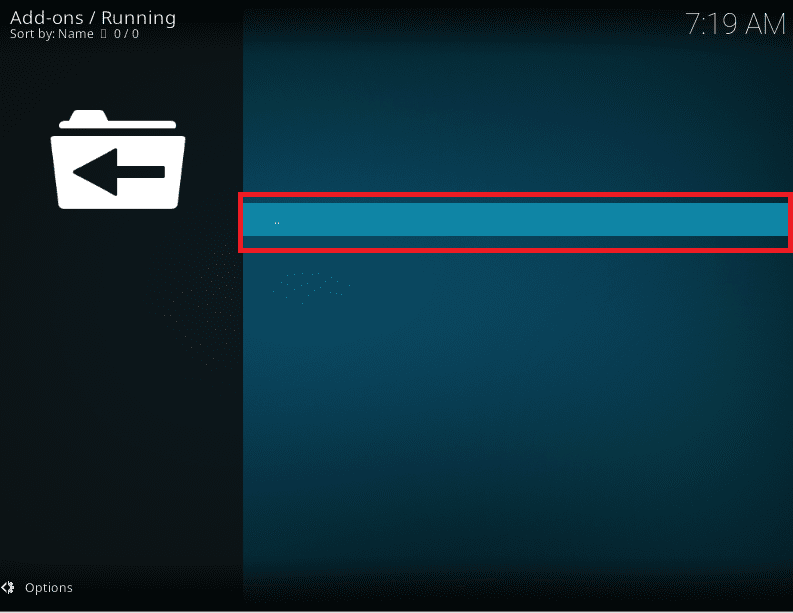
select the two dots
23. After that, go to my add-ons:
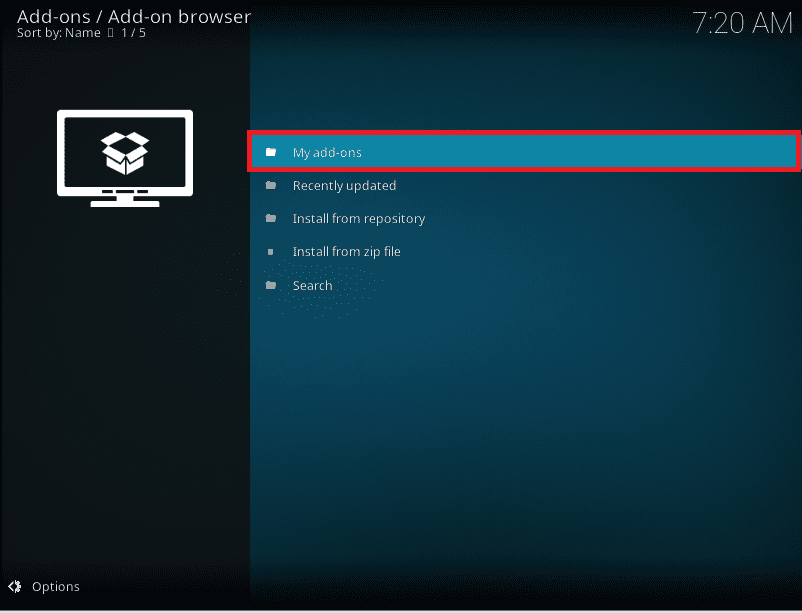
go to my add-ons
24. Then proceed to program add-ons:
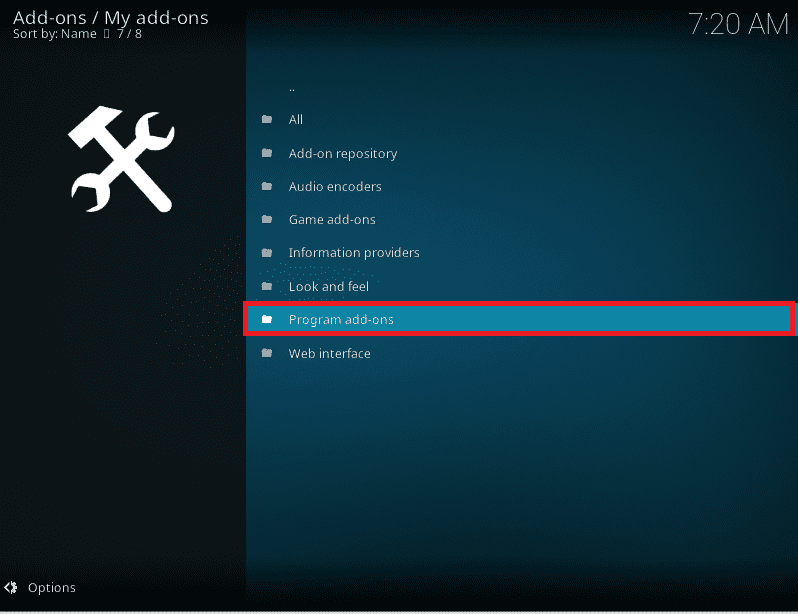
go to program add-ons
25. Click on EzzerMac Wizard:
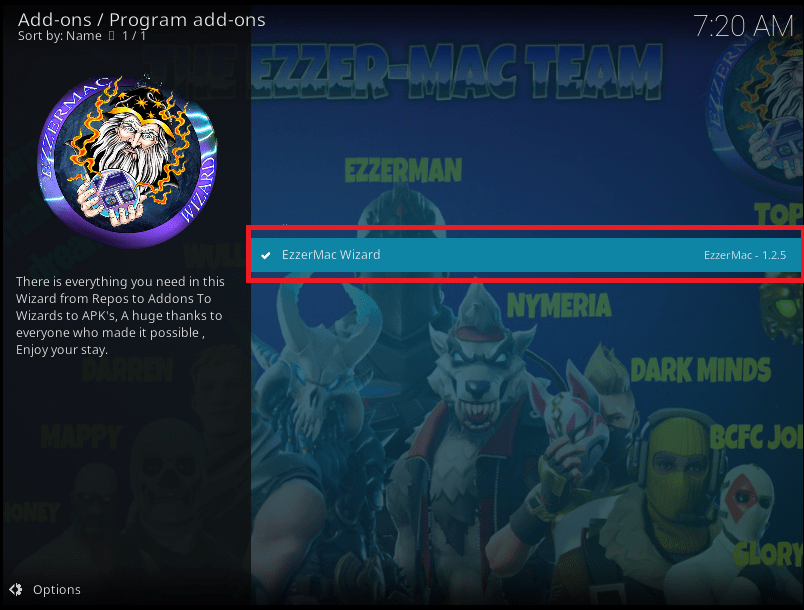
select Ezzermac wizard
26. In the following window, click on Open;
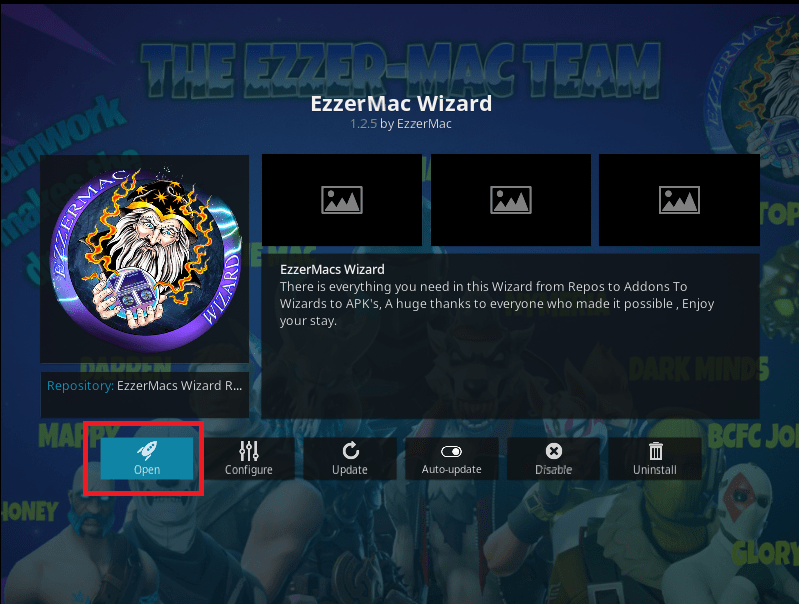
Click on open
27. Then click on Maintenance
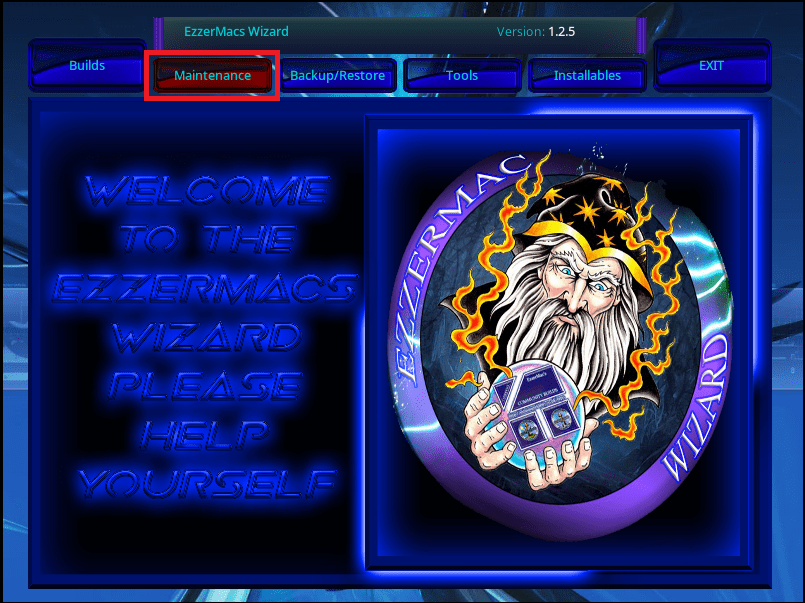
select maintenance
28. At the bottom of the maintenance tab, you should see a Delete Cache button; click on it to delete cache
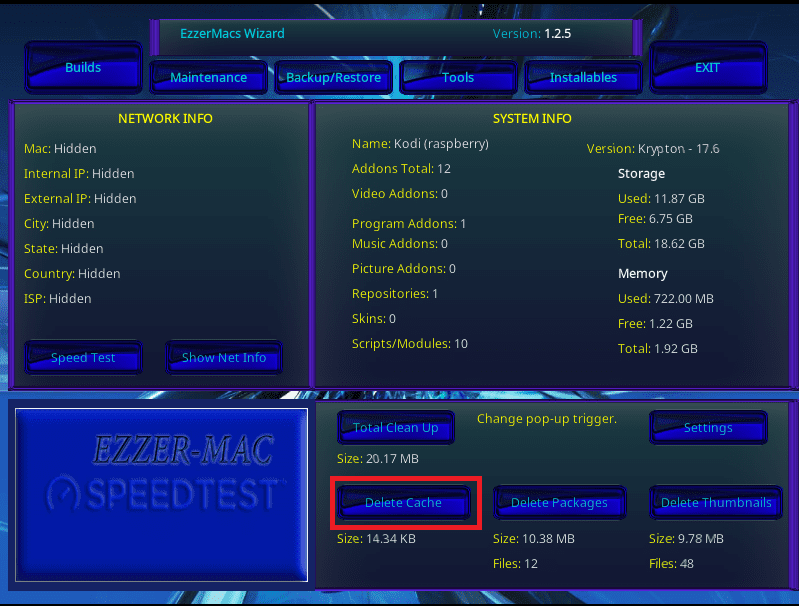
delete cache
29. After hitting the Delete cache button, a window inquiring if you would like to clear cache will appear; here, click on the Clear Cache button, and the process should be underway.
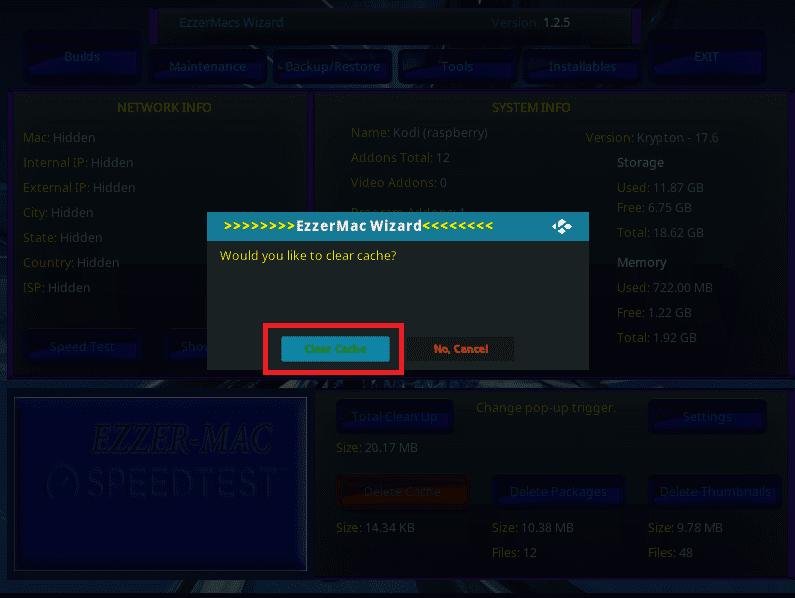
select clear cache
30. Be patient for the process to finish, and you will see a notification on the screen with the number of files deleted. That is it, guys! Your Kodi cache is now cleared.
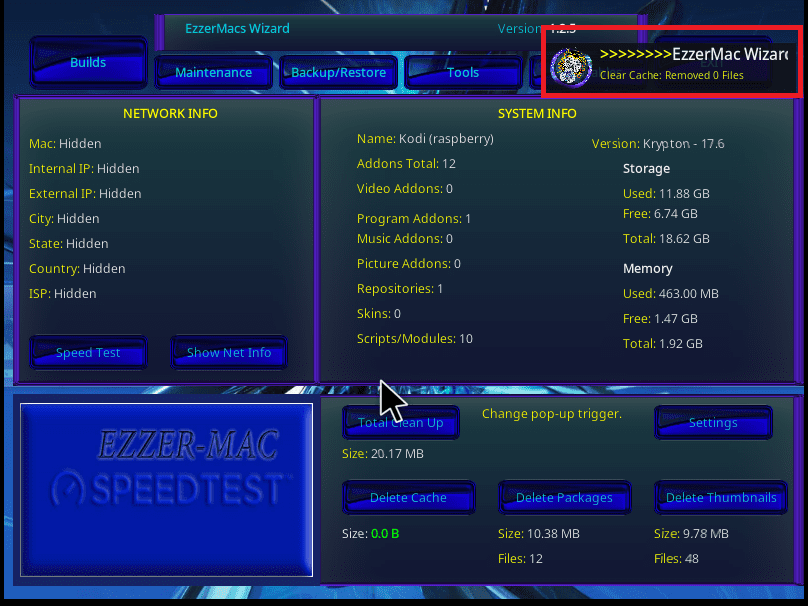
cache clearance
Method 2: How to clear the cache on Exodus Kodi Addon
Video buffering in Exodus add-on can unexpectedly take long, which could be very frustrating. Hence lowering your interest in watching movies and TV shows when it buffers. However, you can overcome this hitch by clearing the cache on Kodi Exodus using the following steps:
Step 1: Once Exodus Kodi is installed, go to Main Menu
Step 2: Manoeuver to Add-on>video Add-ons> Click on Exodus
Step 3: Here, you should see several options, including TV shows, Movies, but you will go and click on the Tools option.
Step 4: At the bottom, you should find two options like Exodus: Clear Providers and Exodus: Clear Cache. We recommend you click on both of these options to clear everything completely. You can now watch buffer-free videos.
The above solution will perfectly work for the Exodus add-on. Nevertheless, Exodus will soon be extinct since its replacement has already been introduced, i.e., Covenant. Here is the process to clear cache Kodi on Covenant
Method 3: How to clear cache Kodi on Covenant
The so-called fork of Exodus, Covenant, is usually cherry-picked by Kodi users for streaming movies and TV shows. To clear cache Kodi, you must first install the Covenant add-on.
After that, follow this step-by-step guide for you to clear cache once you have installed Covenant:
Step 1: Open Kodi>add-ons>Video Add-ons>open Covenant
Step 2: Go to the Main Menu> Open Tools.
Step 3: Now click on Clear Cache and Clear Provider> click Yes> A notification “process complete” will appear.
And that is it!
Method 4: Clearing Kodi cache on Firestick
As earlier seen, Kodi does not have a native option to clear the cache. However, this does not stop you from carrying out this action on your Firestick. The process is pretty straightforward, as covered in the steps below:
To clear the cache on your Firestick, do this:
1. Navigate and click on “Settings” located at the top of the Firestick home screen
2. Next, select “Applications.”
3. Click on “Manage Installed Applications.”
4. Select “Kodi.”
5. Select “Clear Cache.”
6. Confirm the cache-clearing action, and you should be good to go.
Below are some of the FAQs on Kodi
What is the difference between a Kodi Add-on and a Kodi Repo?
A repository is typically a file that stores multiple Kodi add-ons and more for installation. Usually, you are needed to install a repo to install a Kodi add-on or build.
Should I Clear Cache in Kodi?
As a matter of fact, yes. This process is ideal for reducing buffering and improving playback.
Is Kodi Covenant add-on legal?
Many often ask if the Kodi Covenant add-on is legal for use. It is legal. However, the content it accesses from online sources may be pirated and illegal to use. Hence it is highly endorsed to use a secure VPN while using third-party add-ons on this software.
Will I need a VPN for Covenant Add-on on Kodi?
It is always advocated to use a VPN with Kodi since many third-party add-ons access pirated content which is illegal to watch in your country freely. Hence the VPN offers a secure way to access such online content with your identity concealed from the public, ISP, Government bodies, hackers, and spammers.
Conclusion
Clearing cache is an effective and clean way of making your apps run faster. Apart from Kodi installed on your Pi or other SBC such as Odroid, the above methods can also be carried out on Windows, macOS, Linux, and Android. While this process is lengthy, it is not difficult, and you can quickly clear the cache if you follow the steps mentioned. You can proceed to the following method of clearing cache if the preceding is not working as expected. Otherwise, Thanks for reading!