
DietPi is a lightweight, highly optimized, and powerful operating system for Raspberry Pi. It’s designed to offer a fast, streamlined, and efficient platform for running applications and services. With DietPi, users can take full advantage of Raspberry Pi’s capabilities while keeping their system lean and fast.
This post will give you a comprehensive guide on Setting up WiFi and network connections on DietPi. That includes.
- Setting up a wired (ethernet) connection
- Enabling and configuring WIFI
- Setting up a static IP address
Installing DietPi on the Raspberry Pi
To get started with DietPi on your Raspberry Pi, you’ll need to download the image file from the DietPi website and flash it to a microSD card. This involves copying the image file to the microSD card using software such as Etcher or Win32DiskImager. Once the image has been written to the microSD card, you can insert it into your Raspberry Pi and boot it up.
You’ll be asked to select your preferred language, keyboard layout, and timezone during the initial setup. You’ll also be prompted to configure network settings and set a password for the default user. These initial setup steps are essential to determine how DietPi operates on your Raspberry Pi.
For more information on setting up DietPi on your Raspberry Pi, please refer to our article, “How to Setup DietPi on Raspberry Pi.” This article provides detailed instructions and everything you need to know to get started with DietPi on your Raspberry Pi.
1. Setting up a Wired (Ethernet) Connection
The DietPi system supports Ethernet connections out of the box. When you connect an Ethernet cable to your DietPi device during installation or after installation, the system will automatically detect and configure the Ethernet interface. The network configuration is handled by the dhclient or dhcpcd service, which is installed by default in DietPi.
When the Ethernet connection is established, your DietPi device will be assigned an IP address, subnet mask, default gateway, and DNS server settings by the DHCP server on your network.
Run the command below to view the current ethernet configurations on your system.
sudo cat /etc/network/interfaces
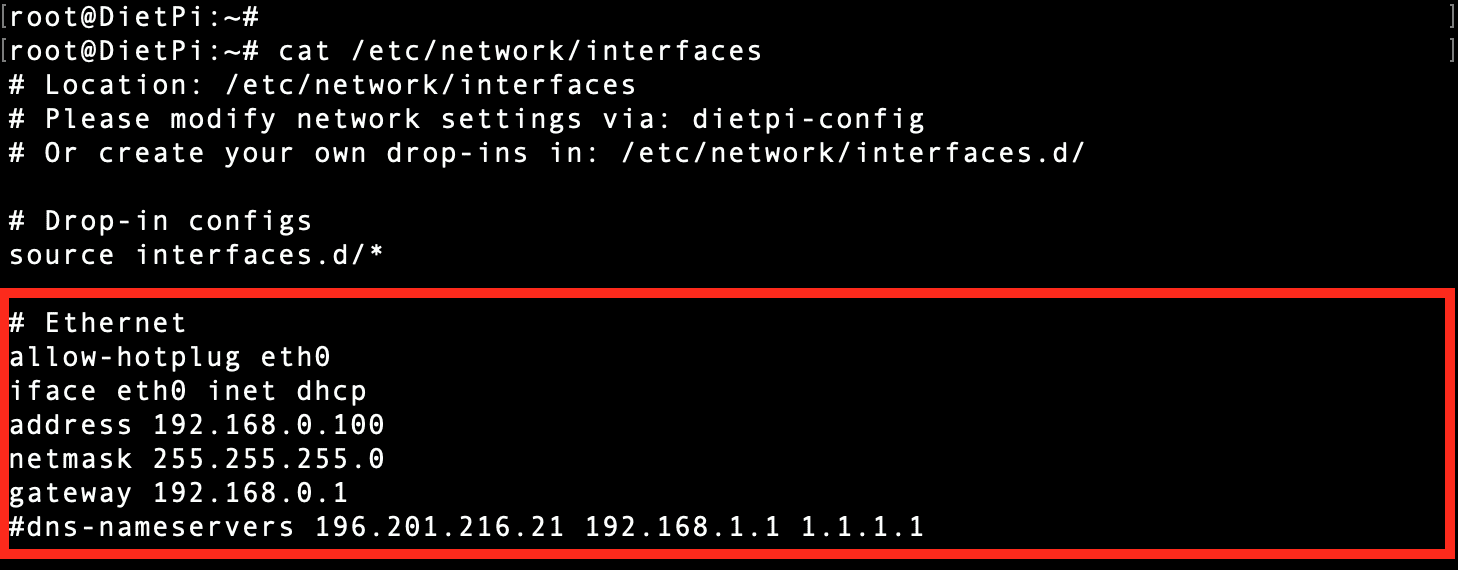
Ethernet Configurations
Setting up a Static IP Address on Ethernet Connection
If your network does not use DHCP, you can configure a static IP address DietPi system by following the steps below.
1. Open a terminal window.
2. Type the command sudo nano /etc/network/interfaces and press Enter.
Scroll down and find the ethernet section and edit the lines as shown below.
auto eth0
iface eth0 inet static
address 192.168.1.100 #REPLACE THIS ADDRESS
netmask 255.255.255.0
gateway 192.168.1.1 #REPLACE THIS ADDRESS
dns-nameservers 8.8.8.8 8.8.4.4
3. Replace the IP address 192.168.1.100 with the desired static IP address you want to assign to your DietPi device. You can use any IP address within the range of your local network.
4. Replace the netmask and gateway values with the correct values for your local network. The dns-nameservers lines specify the IP addresses of the DNS servers that your DietPi device should use for name resolution. You can use any DNS server addresses that you prefer.
5. Press Ctrl+X, Y, and Enter to save the changes and exit nano.
6. Restart the networking service by typing the command below
sudo service networking restart.
Verify that your DietPi device has obtained the static IP address that you assigned by typing the command ifconfig. You should see the eth0 interface with the assigned IP address.
Your DietPi device should now be connected to the network using the static IP address you assigned.
2. Configuring WIFI on DietPi
After installing DietPi, it’s important to note that the WiFi is not active by default. By default, DietPi uses Ethernet to connect to the network. If you want to use your Raspberry Pi wirelessly, this can be an issue, but don’t worry! This post will show you how to set up WiFi and network connections on DietPi to enjoy all the benefits of wireless connectivity.
In this post, we’ll take a closer look at setting up WiFi and network connections on DietPi. We will guide you through the process of connecting to a wireless network, troubleshooting common issues, and more. Whether you’re a seasoned Raspberry Pi user or just starting, this post has everything you need to get your DietPi up and running with WiFi and network connections.
Enable/ Activate WIFI on DietPi
First, ensure you have access to the Raspberry Pi command line. There are various ways you can use to access your DietPi system.
- Display Monitor/ Screen: These can either be an HDMI monitor or a Raspberry Pi touchscreen display.
- VNC: You will need to set up a VNC server, such as TightVNC, on the DietPi system.
- SSH: If all the above methods don’t work for you, SSH is the go-to method. We will connect to our DietPi system via SSH for this post.
Execute the command below on the Terminal to open the DietPi configuration screen.
sudo dietpi-config
Use the arrow keys to scroll through the various options. Select “Network Options: Adapters” and hit Enter.
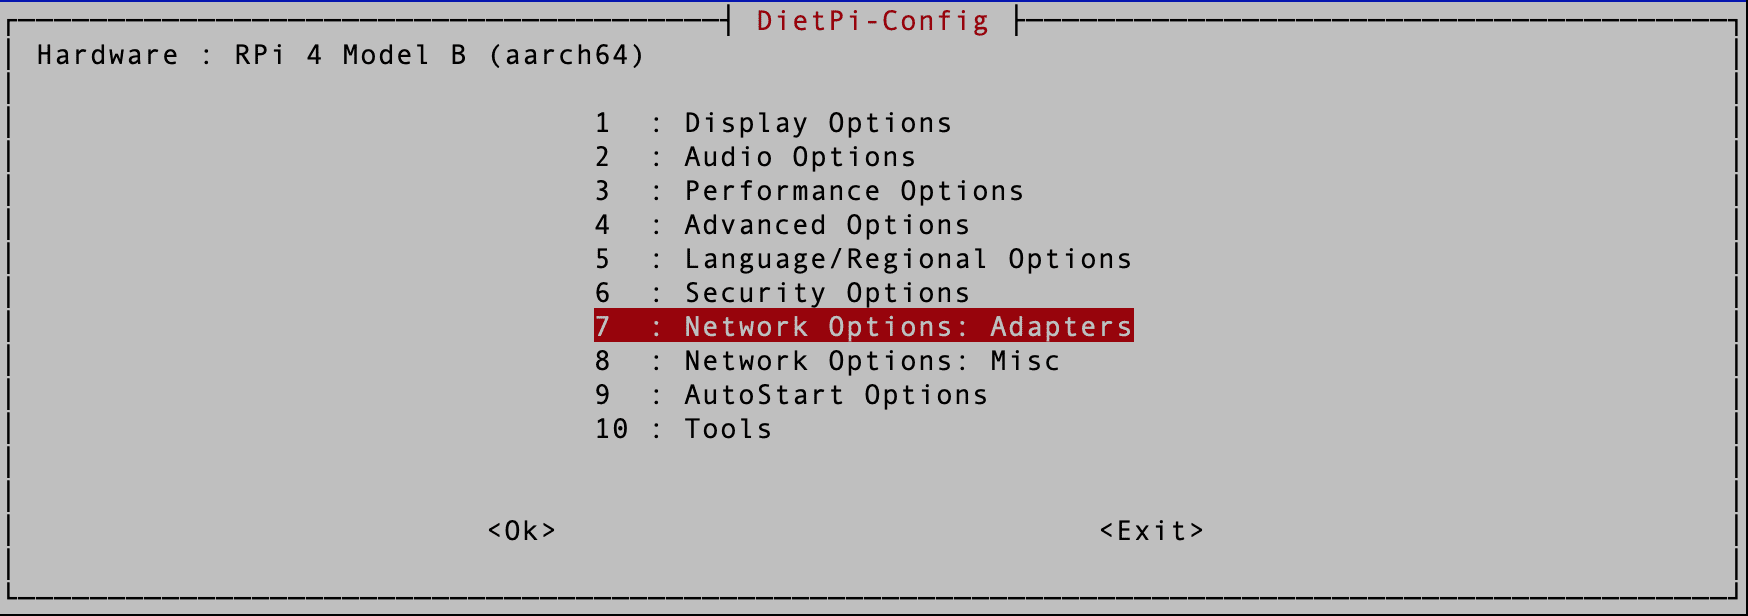
Network Adapter Options
You will see a new screen listing all the various network adapter options. They include:
- Ethernet
- WIFI
- On-board WIFI
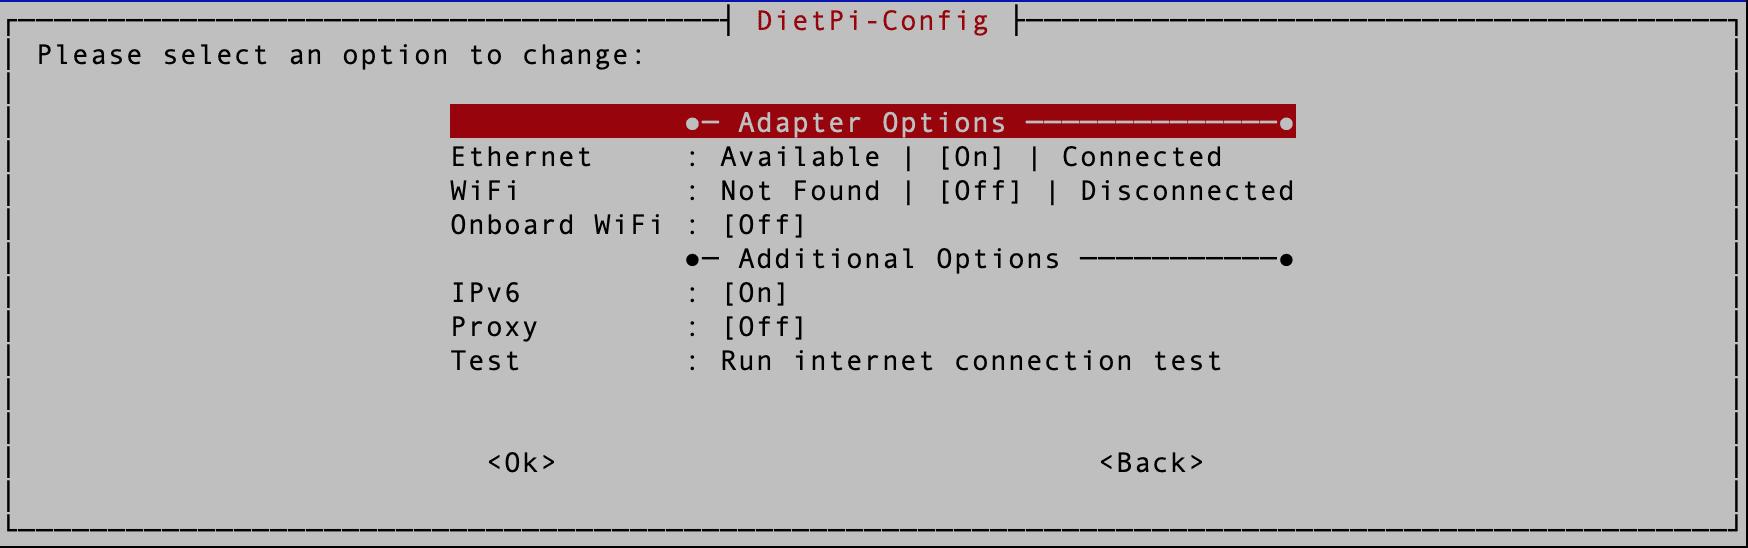
Adapter Options
Up to this point, this post assumes you already have ethernet up and running on your system. It will only focus on activating and enabling WIFI on your system. Follow the steps below.
1. Use the arrow keys to scroll through the various options and select WIFI. You will notice that it is currently set to “OFF” and “disconnected,” as shown in the image below.
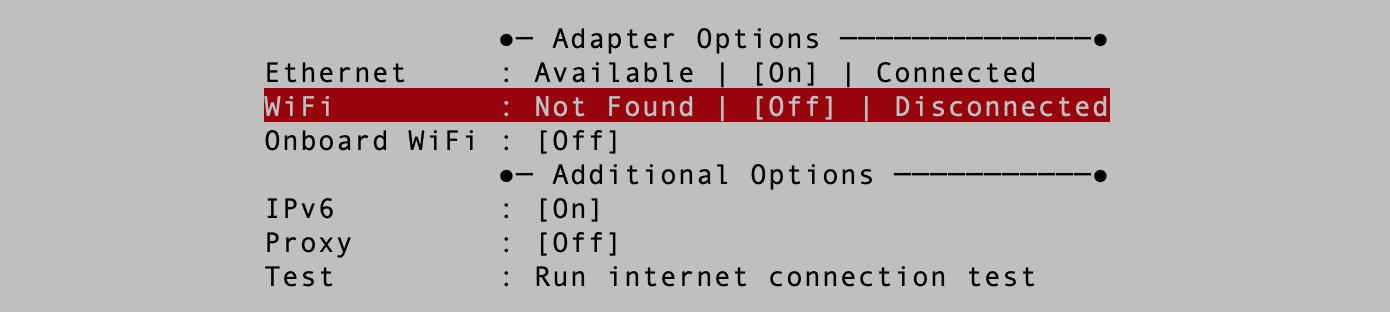
Activate WIFI
Hit enter to go to the next screen. You will see a prompt, “Would you like to enable WIFI now?” Use the arrow keys to select “OK” and hit enter.
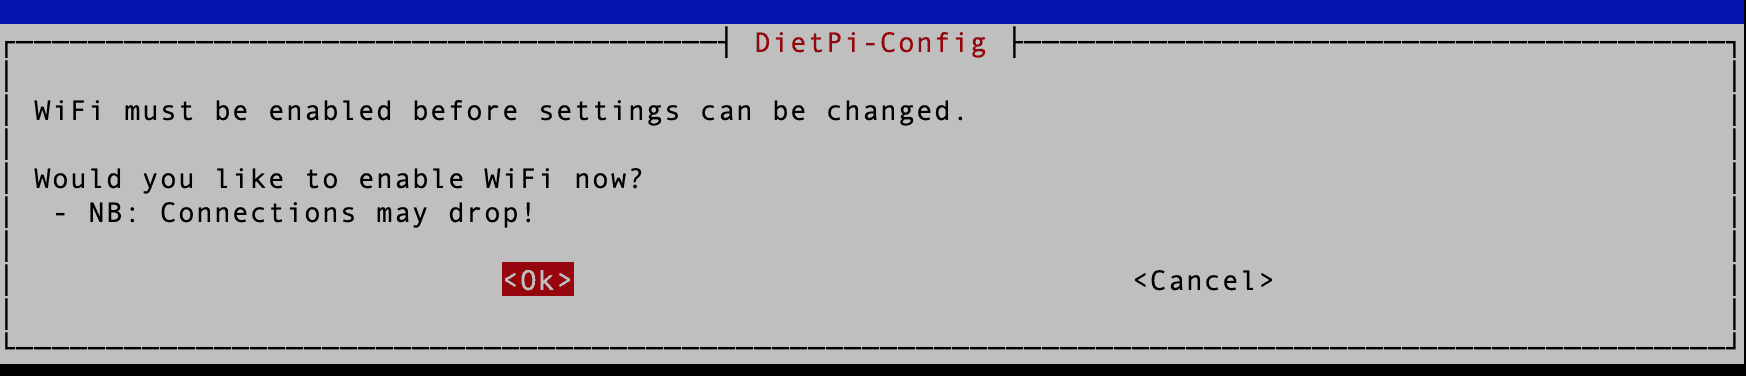
Enable WIFI
You will see various configurations happening on your Terminal. If you don’t get any error message, WIFI was successfully enabled on your system.
2. Next, you will see a screen similar to the image below.
Scan for WIFI Networks
(Important!) Don’t do anything on this screen now. Use the “Tab key” to select the “Back” button and hit Enter. Next, select the “Onboard WIFI” option and hit Enter Once. That will enable onboard WIFI on your system. Ensure it is set to “ON,” as shown in the image below.
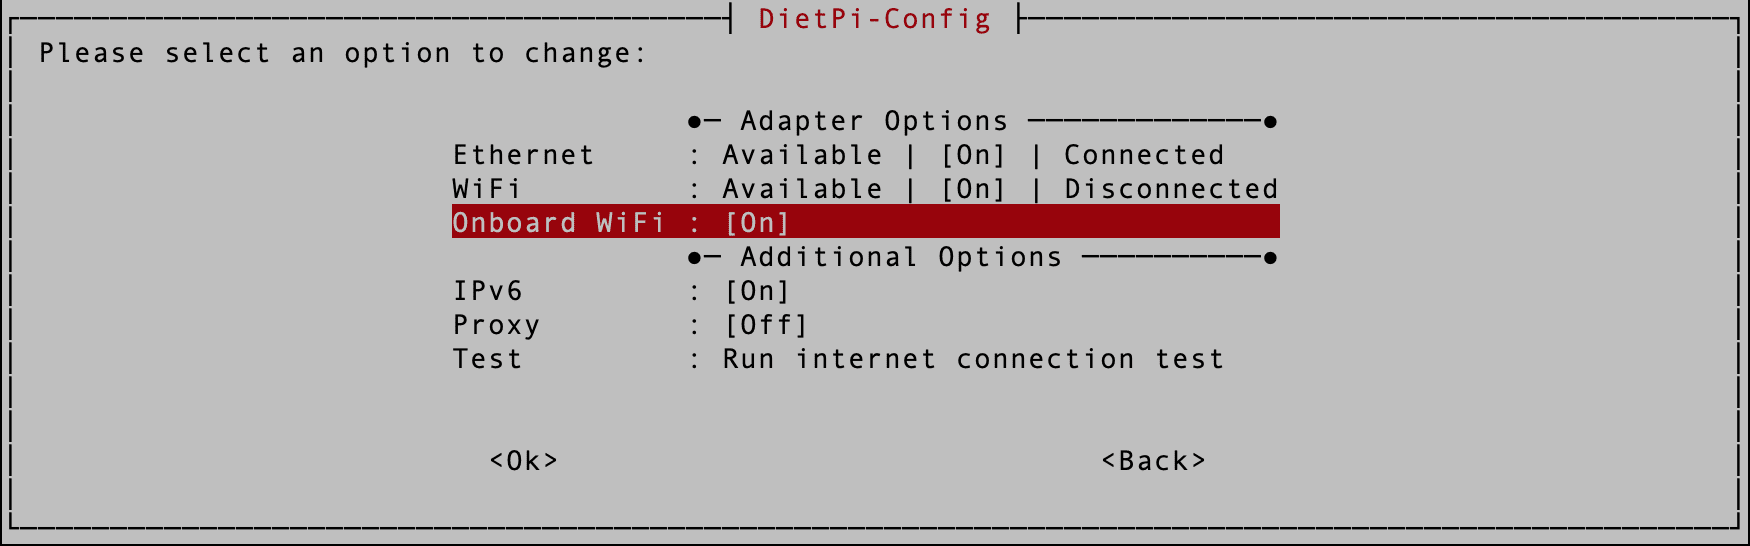
Enable On-board WIFI
3. Up to this point, you have successfully enabled WIFI on your DietPi system. However, you are not done! DietPi doesn’t come with a graphical tool that you can use to connect to wireless networks around you. You must reboot the system and scan for WIFI networks from the command line.
Use the “Tab” key to select the “back” button” and hit Enter to go back to the main screen. Next, select the “Exit” option and hit “Enter.” You will see an option to reboot the system. Go ahead and reboot the system.
Connecting to a WIFI Network on DietPI
Note: Ensure that you reboot the system after enabling both “WIFI” and “Onboard WIFI.” If you fail to do that, your system will not be able to detect any WIFI networks around you.
Once the system is up, launch the command line and execute the command below.
sudo dietpi-config
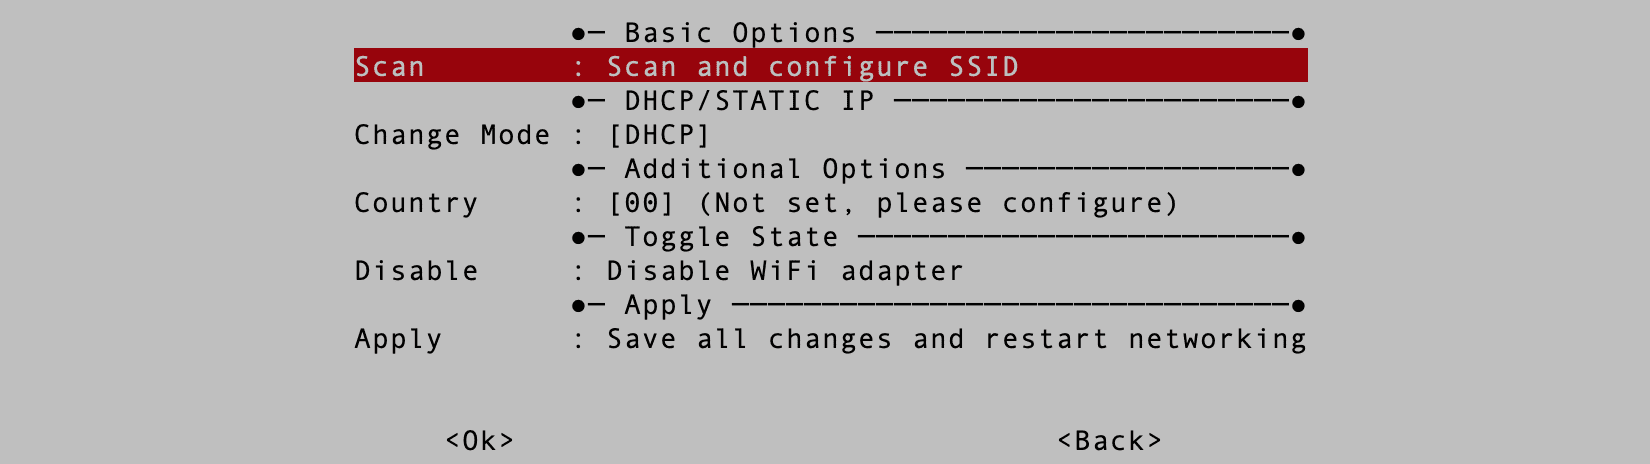
Select “Network Options: Adapters -> ” and hit Enter on the screen that appears after executing the command. On the new screen that appears, select “WIFI” and hit Enter. You will see a screen similar to the image below where you must choose the “Scan and Configure SSID” menu and hit Enter.
Scan for WIFI Networks
Next, you will see various slots you can use to configure a WIFI network on the next screen. Use the arrow keys to select any slot (start with the first) and hit Enter.
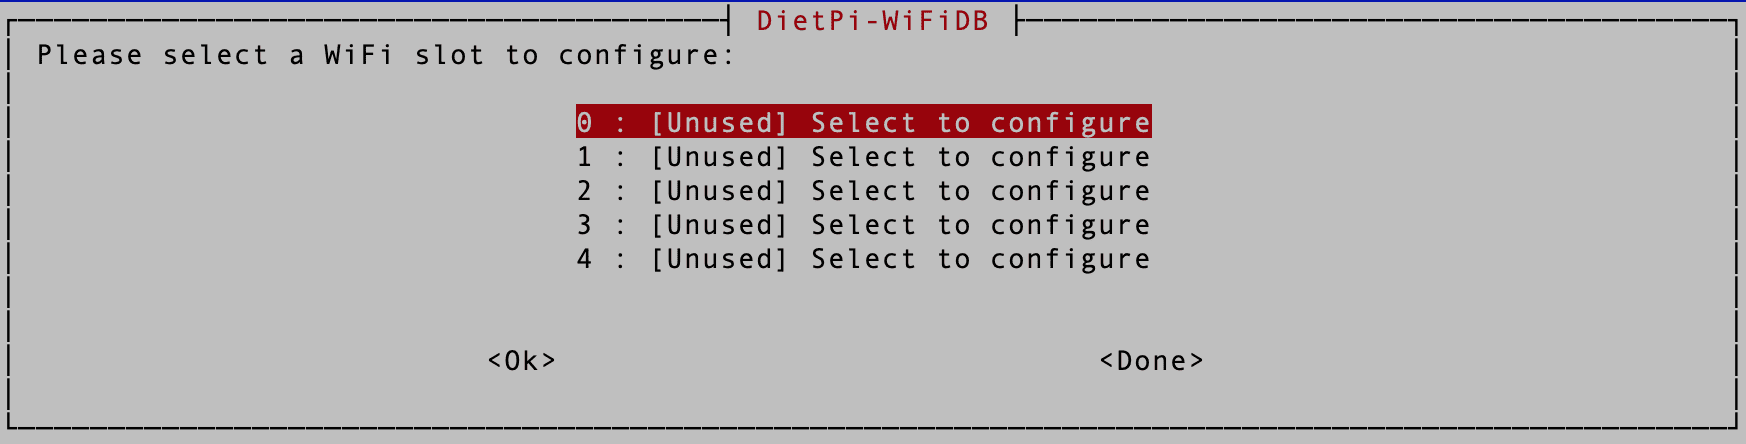
WIFI Slots
On the next screen, you will see two options that you can use to connect to your WIFI network.
- Scan: Scan and Configure SSID
- Manual: Manually enter the SSID and other network details.
See the image below;

Scan or Manual
We highly recommend using the “Scan” option as it saves you all the hustles of typing your network details. However, you must use the manual method to connect to a hidden network.
After a successful scan, you will see a list of all networks around you; select the network you want to connect to and hit “Enter.”
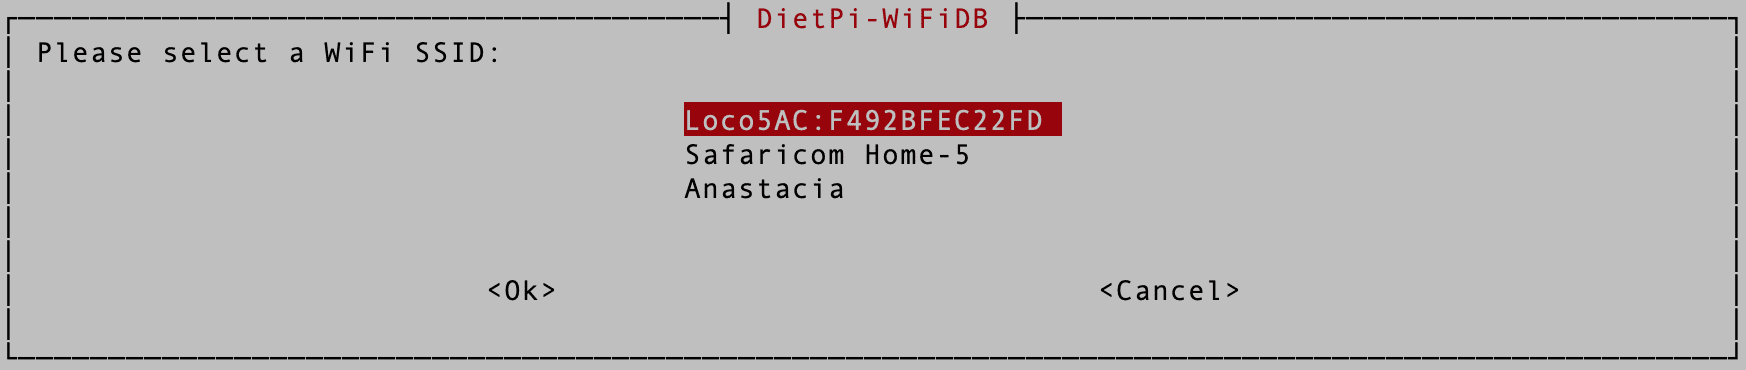
Select WIFI networks
On the next screen, you will be required to select the encryption method used on the target WIFI network. You have three options for doing so, and they include the following;
- WPA-PSK: Default (recommended)
- WEP: Legacy (insecure)
- NONE: Open host that does not require a key (e.g., free WiFi)
In our case, we are using WPA-PSK. To connect to a secure network, you must enter the WIFI key/ password on the next screen.
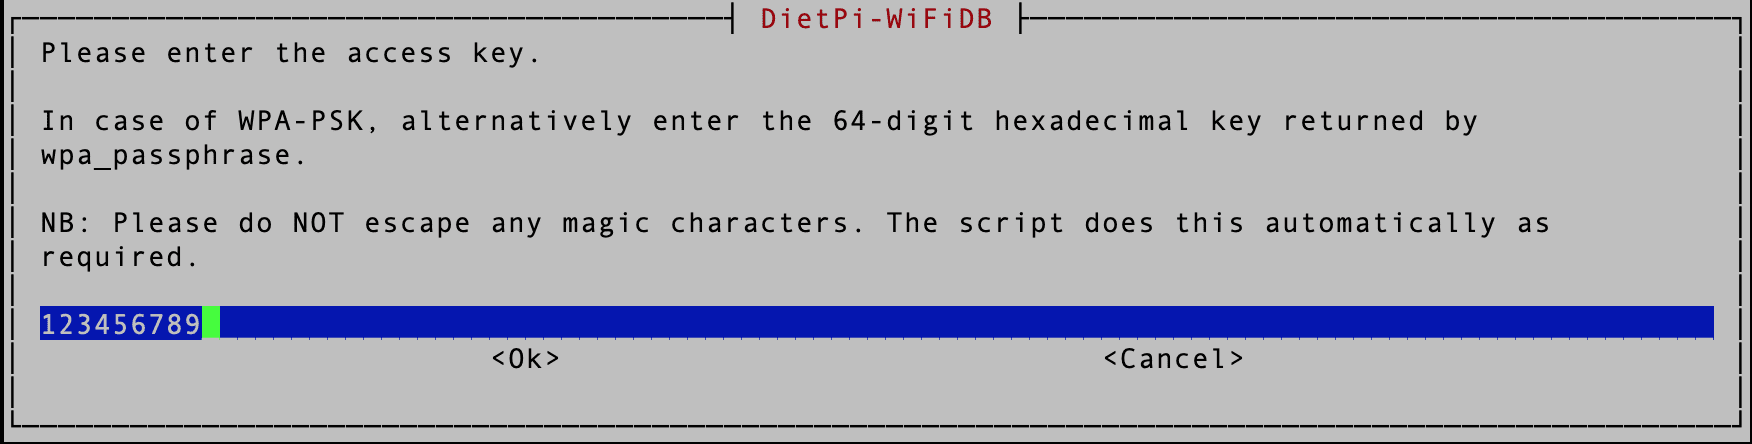
WIFI Key
Click “OK” when done.
Now go to the “Basic Options|” screen and select the “Apply Changes” button to connect to the WIFI network chosen.
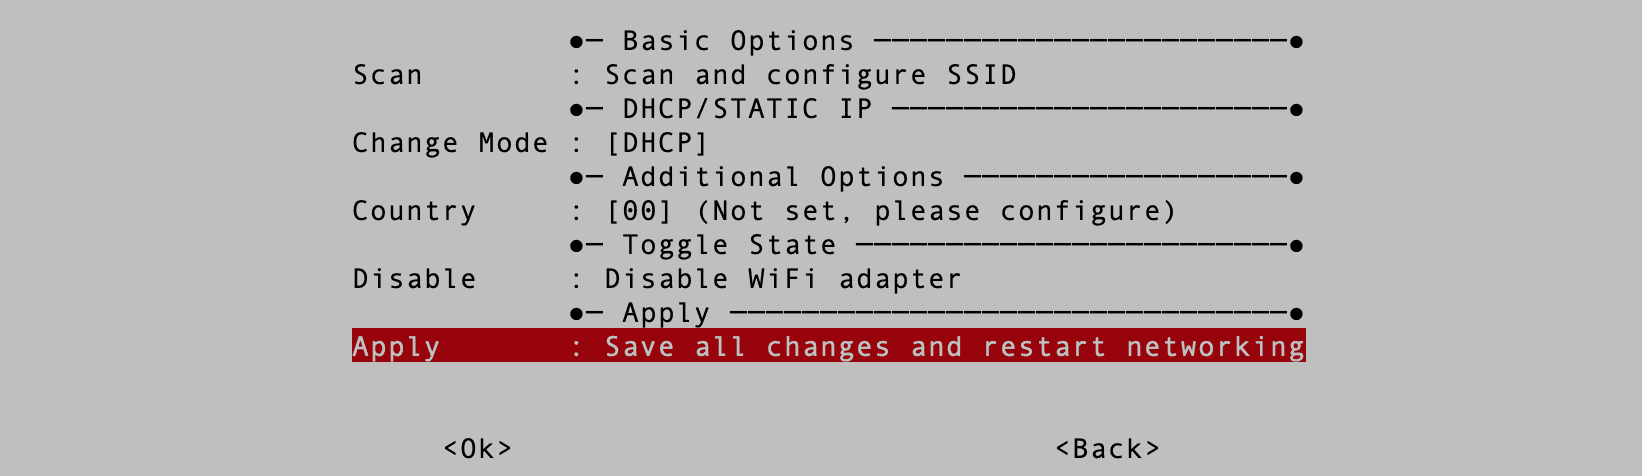
Apply Network Changes
If DietPi connects to the network successfully, you will see a detailed screen with the following information.
- SSID
- IP Address
- Gateway address
See the image below.
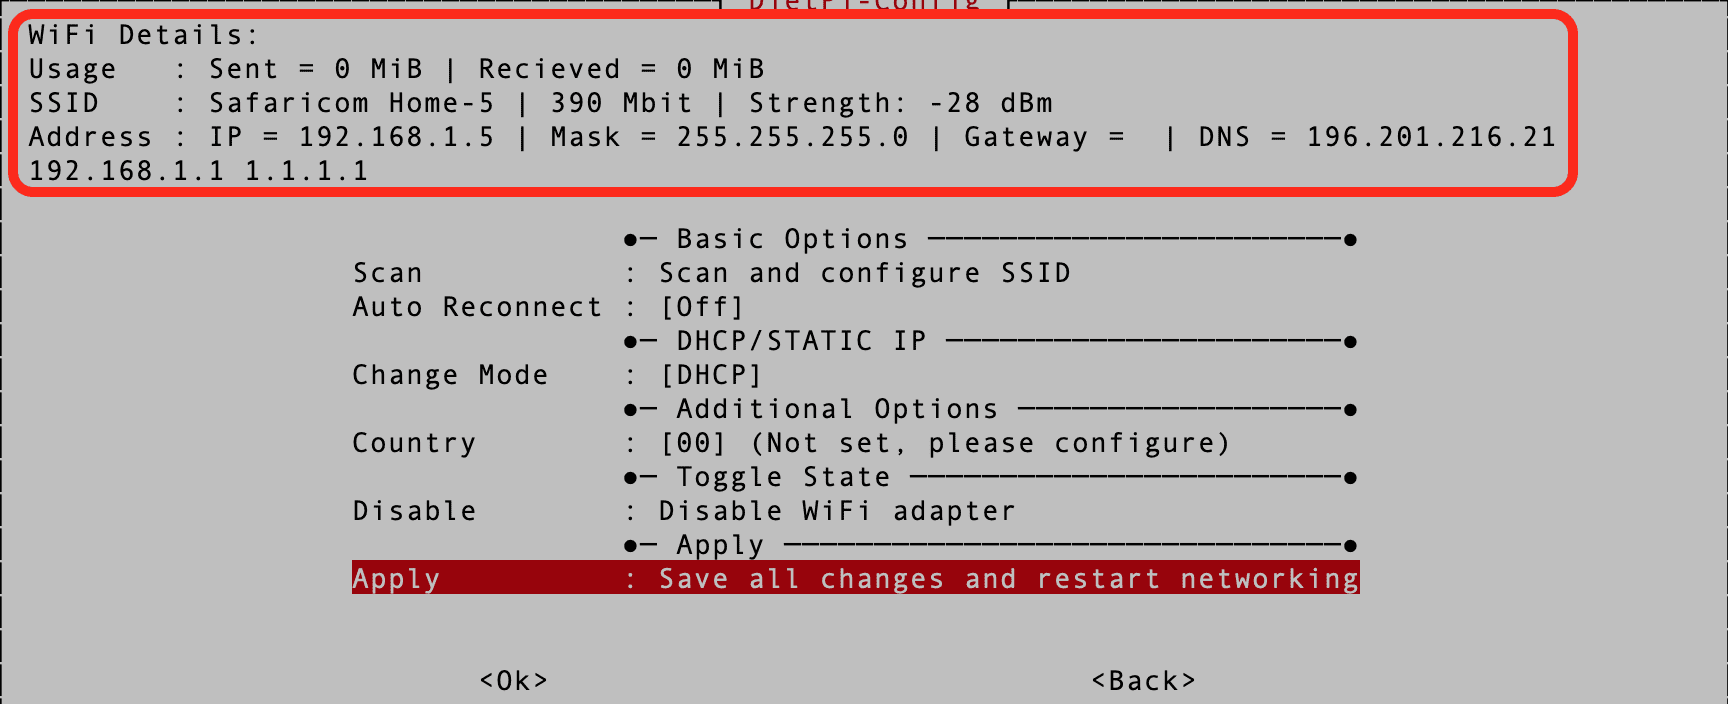
Network Connection Details
That’s it! You have successfully enabled WIFI on your DietPi system and even connected to a WIFI network. You can also use the ip a or ifconfig command to verify from the command line.
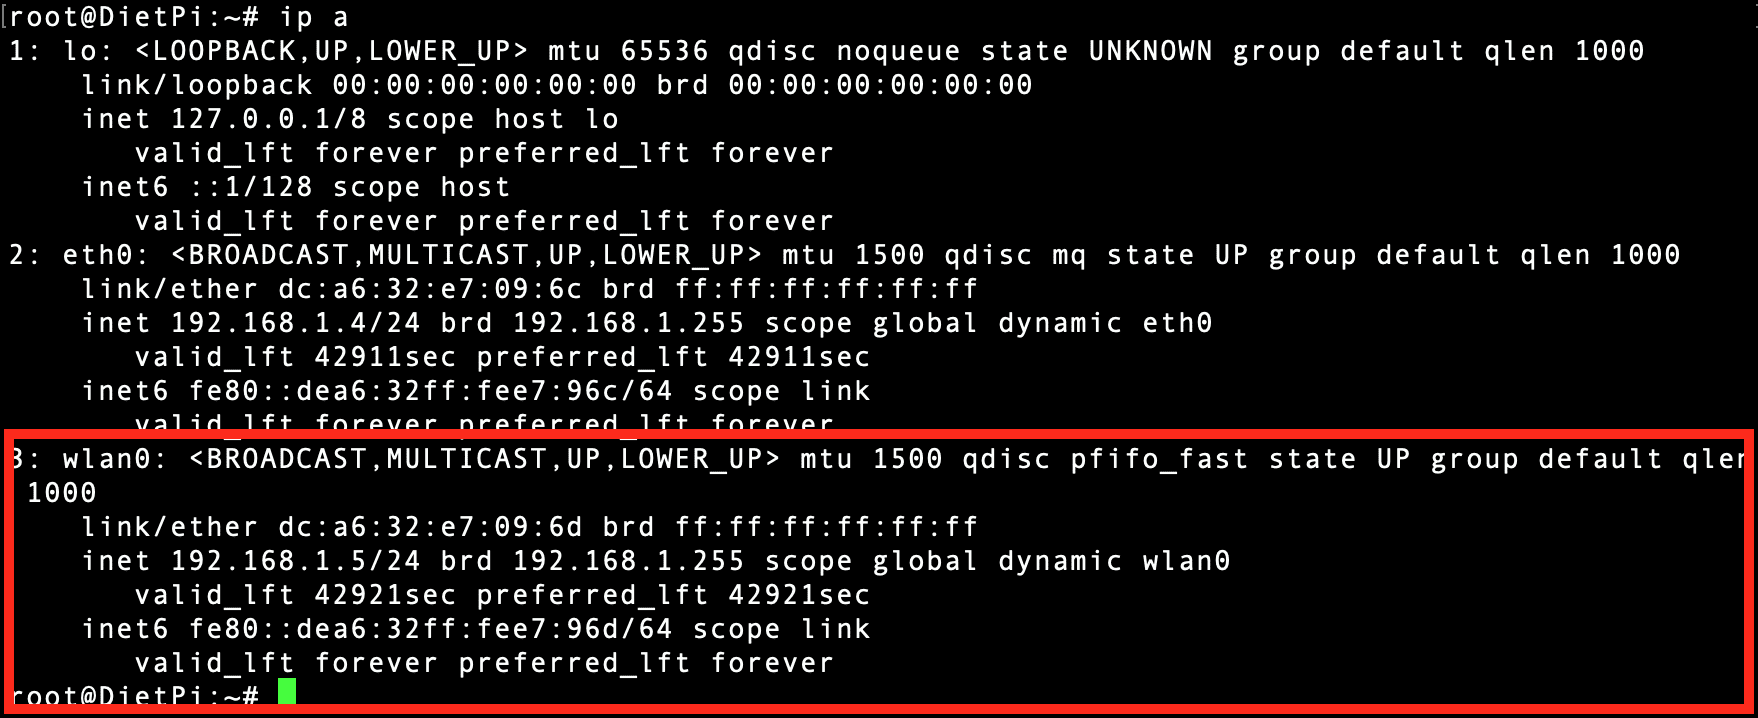
ip a Command
Setting up a Static IP Address on WIFI Connection
Follow the steps below to set up a static IP address for a WiFi connection on DietPi.
1. Open a terminal window on your DietPi device.
2. Type the command sudo nano /etc/network/interfaces and press Enter to open the interfaces configuration file.
Scroll down and edit the wlan0 section as shown below.
auto wlan0
iface wlan0 inet static
address 192.168.1.100 #REPLACE THIS ADDRESS
netmask 255.255.255.0
gateway 192.168.1.1 #REPLACE THIS ADDRESS
3. Replace the IP address 192.168.1.100 with the desired static IP address you want to assign to your DietPi device. You can use any IP address within the range of your local network.
4. Replace the netmask and gateway values with the correct values for your local network.
5. Press Ctrl+X, Y, and Enter to save the changes and exit nano.
6. Restart the networking service by typing the command
sudo service networking restart.
Conclusion
Setting up Wi-Fi and network connections on DietPi is a straightforward process that can be accomplished through the DietPi-Config tool. Following the steps outlined in this article, you can easily connect your DietPi device to a Wi-Fi network and access the internet.
Whether you’re using a Raspberry Pi, ODroid, or Orange Pi, the process for enabling Wi-Fi on DietPi is the same, making it a versatile option for various single-board computers. With the power of lightweight Linux distribution and the ease of network connectivity, DietPi is an excellent choice for projects and applications that require reliable internet access.