One of the most powerful utilities on Linux systems is the Terminal or the command line. Here, you can execute various commands to perform several tasks like installing and uninstalling applications, creating and deleting files and directories, adding and deleting users, updating the system, and software development and scripting. The official Raspberry Pi OS is a Linux-based distribution; users enjoy the Linux Terminal’s powerful features.
Of course, the Raspberry Pi OS comes pre-installed with the default Terminal. However, you might need to install a Terminal with the features you wish to use. For example, before most Terminals added the split horizontally/vertically feature, most users opted to install the Terminator terminal with those features. In this post, we shall take to look at one unique Terminal, the Guake Terminal.
What is the Guake Terminal
Guake Terminal is a Gnome Terminal whose development was inspired. by the famous first-person shooter game – Quake. This game had a unique console (Terminal) that was revealed by only pressing a single key on your keyboard – by pressing the tilde (~) key. The Guake Terminal followed this approach. You only need to press the F12 key to reveal the Guake Terminal, which is forever running in the background.
Guake Terminal Screenshot (Courtesy: Guake)
Guake Terminal Features
Let’s look at some features that make the Guake Terminal stand out among the masses.
Launch the Terminal from anywhere on your Desktop
Assume you are writing some code on your text editor and need to execute some commands on the Terminal; you don’t need to open the applications menu to launch the Terminal or minimize any open windows on your screen. Press the Guake hotkey (F12 by default) to reveal the Terminal. After executing your commands, use the same hotkey to hide the Terminal from your workspace.
Supports Window Split
Are you working on a project that requires you to switch between one Terminal window and another? Well, Guake has got you sorted. First, open a single window and choose whether you want to split the window horizontally (-) or vertically (|).
Quick Open
The Guake Terminal also features a ‘Quick Open’ feature that allows you to open a text file directly from your Terminal. For example, if you run an ls command and see a text file, click on this file or right-click on it and select the ‘Quick Open’ feature. This action will automatically open the text file on your favorite text editor.
Autoconfigure Quake
Similar to most applications on Linux, you can also configure the Guake Terminal to launch automatically after logging in. Now, let’s get started with installing the Guake Terminal on the Raspberry Pi.
Tip: This post assumes you already have the official Raspberry Pi OS installed and running on your system. If you are connected to your Pi remotely via SSH, you can use the commands below to install Guake, but you cannot launch Guake remotely from the console. You will need VNC access for that. The articles below should come quite in handy.
Installing the Guake Terminal
As a rule of thumb, you need to update your system before installing any additional packages. Execute the commands below.
sudo apt update
sudo apt upgrade
When done, execute the command below to install the Guake Terminal on your system.
sudo apt install guake
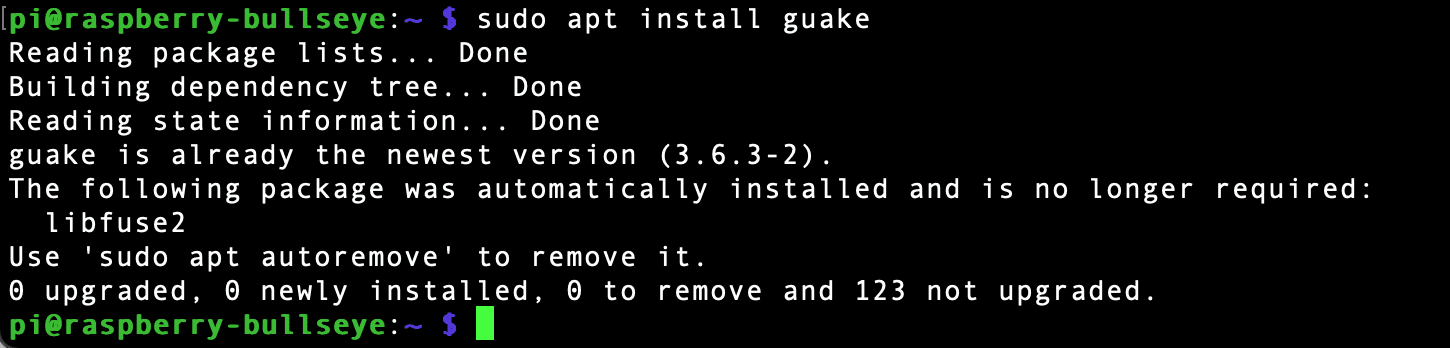
Install Guake Terminal
Tip: For this post, we already have Guake installed hence the message “Gake is already the newest version.”
Launch the Guake Terminal
After a successful installation, you can launch Guake from your Desktop -> Main menu -> Guake Terminal.
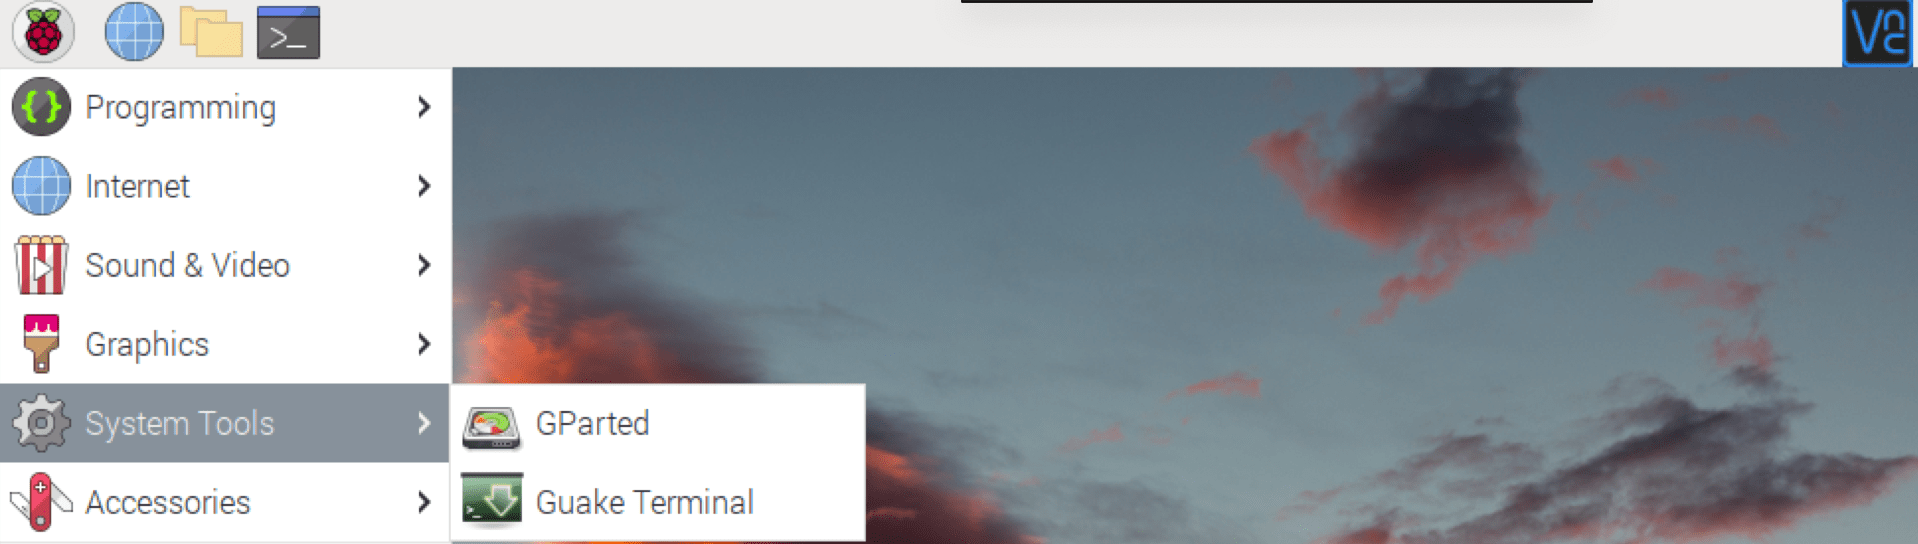
Launch Guake
You will see the Guake Terminal open on your Desktop. However, there are a few things you will notice. The Terminal window does not have any Minimize or Close buttons. It only has one button at the bottom right to add a new Terminal tab.
Why is that?
Guake Terminal is designed to be a top-down Terminal. That means you can easily use the hotkey to pull down the Terminal and use the same hotkey to hide the Terminal when done executing your commands. In short, the Guake Terminal has a similar design to most game console windows which are only meant to appear when a user needs to execute commands.
Start the Guake Terminal on Boot
To enable the Guake Terminal to start on boot, we need to copy the ‘guake.desktop’ that was created after installing the Guake Terminal and paste it into the ‘/etc/xdg/autostart’ director. Execute the command below on the Terminal.
sudo cp /usr/share/applications/guake.desktop /etc/xdg/autostart/

Enable Guake to Start on boot
Configure Guake Terminal Hotkey
As for writing this post, the default key to revealing and hiding the Guake Terminal is the F12 key. However, you are not limited as you can change this configuration. Follow the steps below.
- Reveal the Guake Terminal window by pressing the F12 key.
- Right-click anywhere on the Terminal window and select “Preferences.” That will open the Guake Properties window.
- Select “Keyboard shortcuts” and click the “General” section to reveal all available options.
- Click on the “Toggle Guake Visibility” option, then hit the key you want to use.
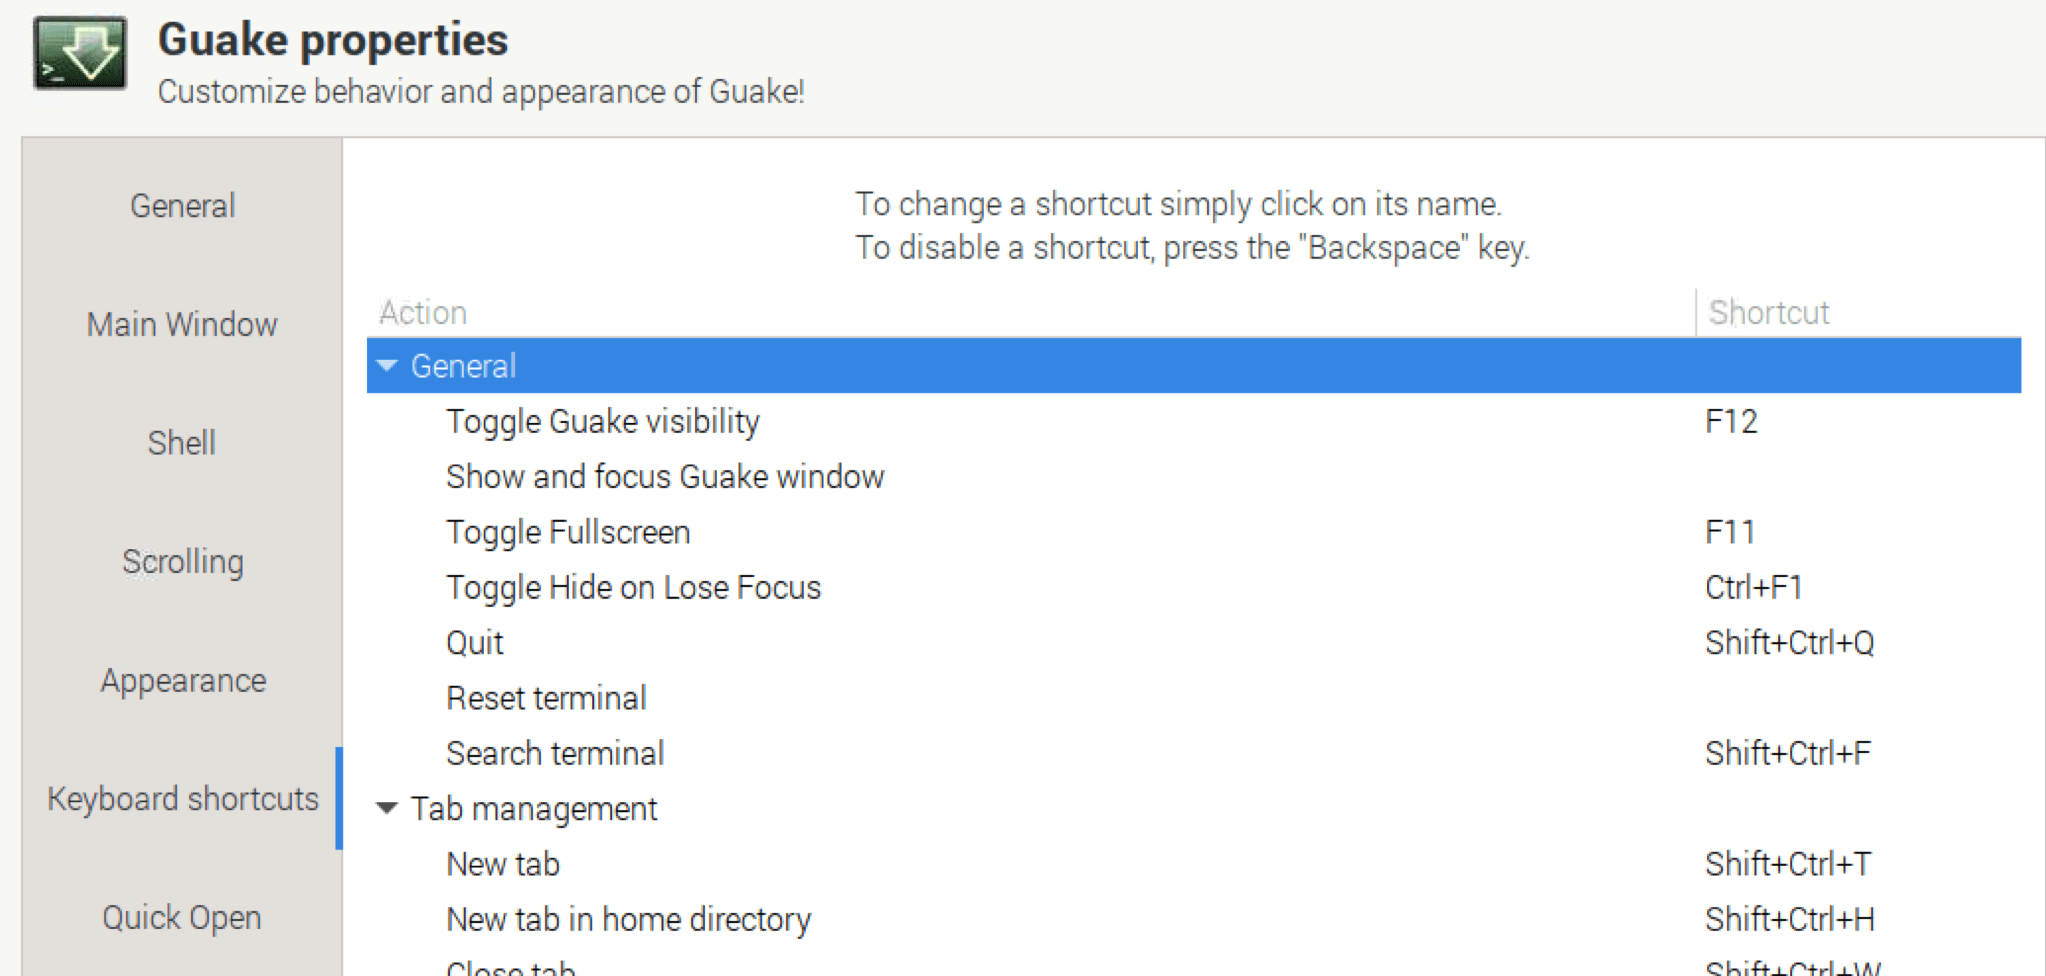
Configure Guake hotkey
Feel free to explore this window as you tweak many other options.
Conclusion
That’s it! This post has given you step-by-step guidelines on installing the Guake Terminal on your Raspberry Pi OS. The default Raspberry Pi Terminal is also good but using a top-down Terminal which only appears when you need it, feels much more exciting. How was your experience with the Guake Terminal? Please let us know in the comments below.