
DietPi is one of the most popular operating systems you can install on your Raspberry Pi. It’s a lightweight Debian-based Linux distribution enables you to perform various tasks on your Single Board Computer (SBC). In this post, you will learn how to set up a media server with Kodi on your DietPi system. You will also learn to use VLC to stream media files from the Kodi media server.
Building your own media server for streaming
What is Kodi?
Kodi is an open-source media player software that allows you to organize and access your media files, including movies, TV shows, music, and photos, from a centralized location. DietPi is a lightweight operating system that runs on low-power devices like Raspberry Pi and other single-board computers.
By setting up a media server with Kodi on DietPi, you can create a low-cost, energy-efficient, and customizable media center that can be accessed from multiple devices on your home network. This can be particularly useful if you have extensive media files spread across multiple devices and want to consolidate them in one place for easy access and organization.
What is VLC?
VLC (VideoLAN Client) is a famous open-source media player supporting various audio and video formats, including DVD, VCD, and streaming protocols. It is available for Windows, Mac, Linux, and mobile platforms. This post will show you how to stream videos and music from the Kodi media server that you will set up.
Step 1. Install Kodi on DietPi
There are two ways that you can use to install Kodi. So, choose the one that is convenient for you. These methods include;
- You can install it from the DietPi repositories using the apt command
- You can install it from the DietPi software utility
Method 1: Install Kodi from the DietPi software
Below is a step-by-step procedure to install Kodi on DietPi using the DietPi software installer:
1. Connect to your DietPi device using SSH or open a terminal window if you’re using a local monitor and keyboard.
2. Run the following command to open the DietPi software installer:
dietpi-software
3. Use the arrow keys to scroll down to the “Browse Software” option and hit “Enter.”

browse software
4. In the new screen that appears, use the Arrow keys to scroll to the “Multimedia” section and select “Kodi.” and press Space to select it.
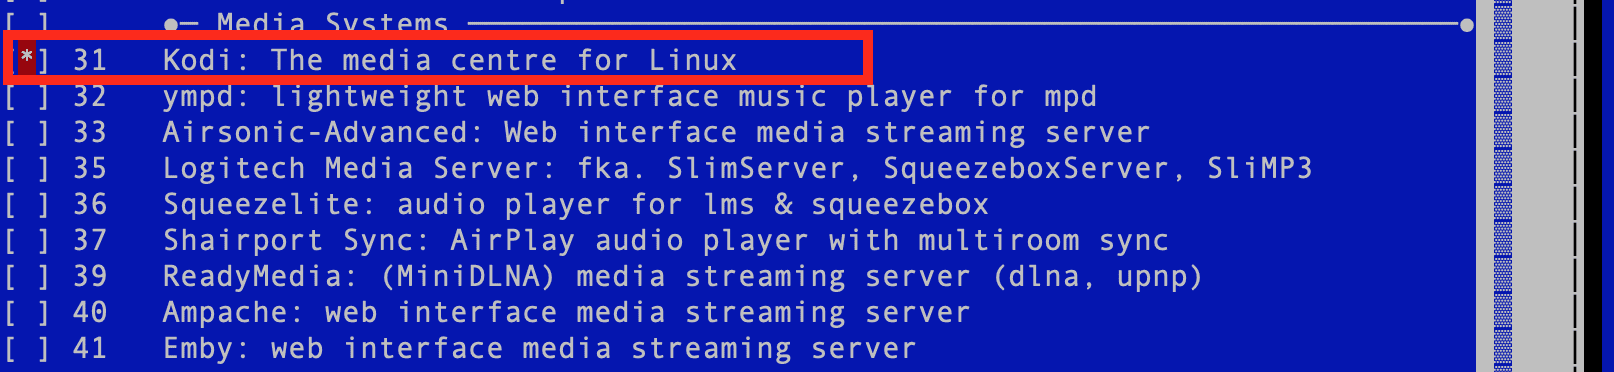
Kodi
5. Press Tab to select “Confirm” and press Enter.
Wait for the installer to download and install Kodi. This may take a few minutes, depending on your internet connection and the speed of your device. Once the installation is complete, you can exit the DietPi software installer by selecting “Exit” and pressing Enter.
Launch Kodi by running the following command in the terminal.
kodi
Kodi should now launch on your device. You can configure it to your liking, including setting up your media sources, themes, and add-ons.
Method 2: Install Kodi with apt on DietPi
Follow the steps below to install Kodi using apt on DietPi:
1. Connect to your DietPi device using SSH or open a terminal window if you’re using a local monitor and keyboard.
Update the package list by running the following command:
sudo apt update
2. Install Kodi by running the following command:
sudo apt install kodi
Wait for the installation process to complete. This may take a few minutes, depending on your internet connection and the speed of your device.

Install Kodi
3. Once the installation is complete, you can launch Kodi by running the following command in the terminal or SSH window:
kodi
Kodi should now launch on your device.
Step 2. Add path to the media files on Kodi
Kodi’s user-friendly interface makes browsing and playing your media files easy. The interface features a main menu bar that runs vertically on the left side of the screen and provides quick access to all of Kodi’s major features. The main menu includes music, Movies, TV Shows, Pictures, Add-ons, and more options.
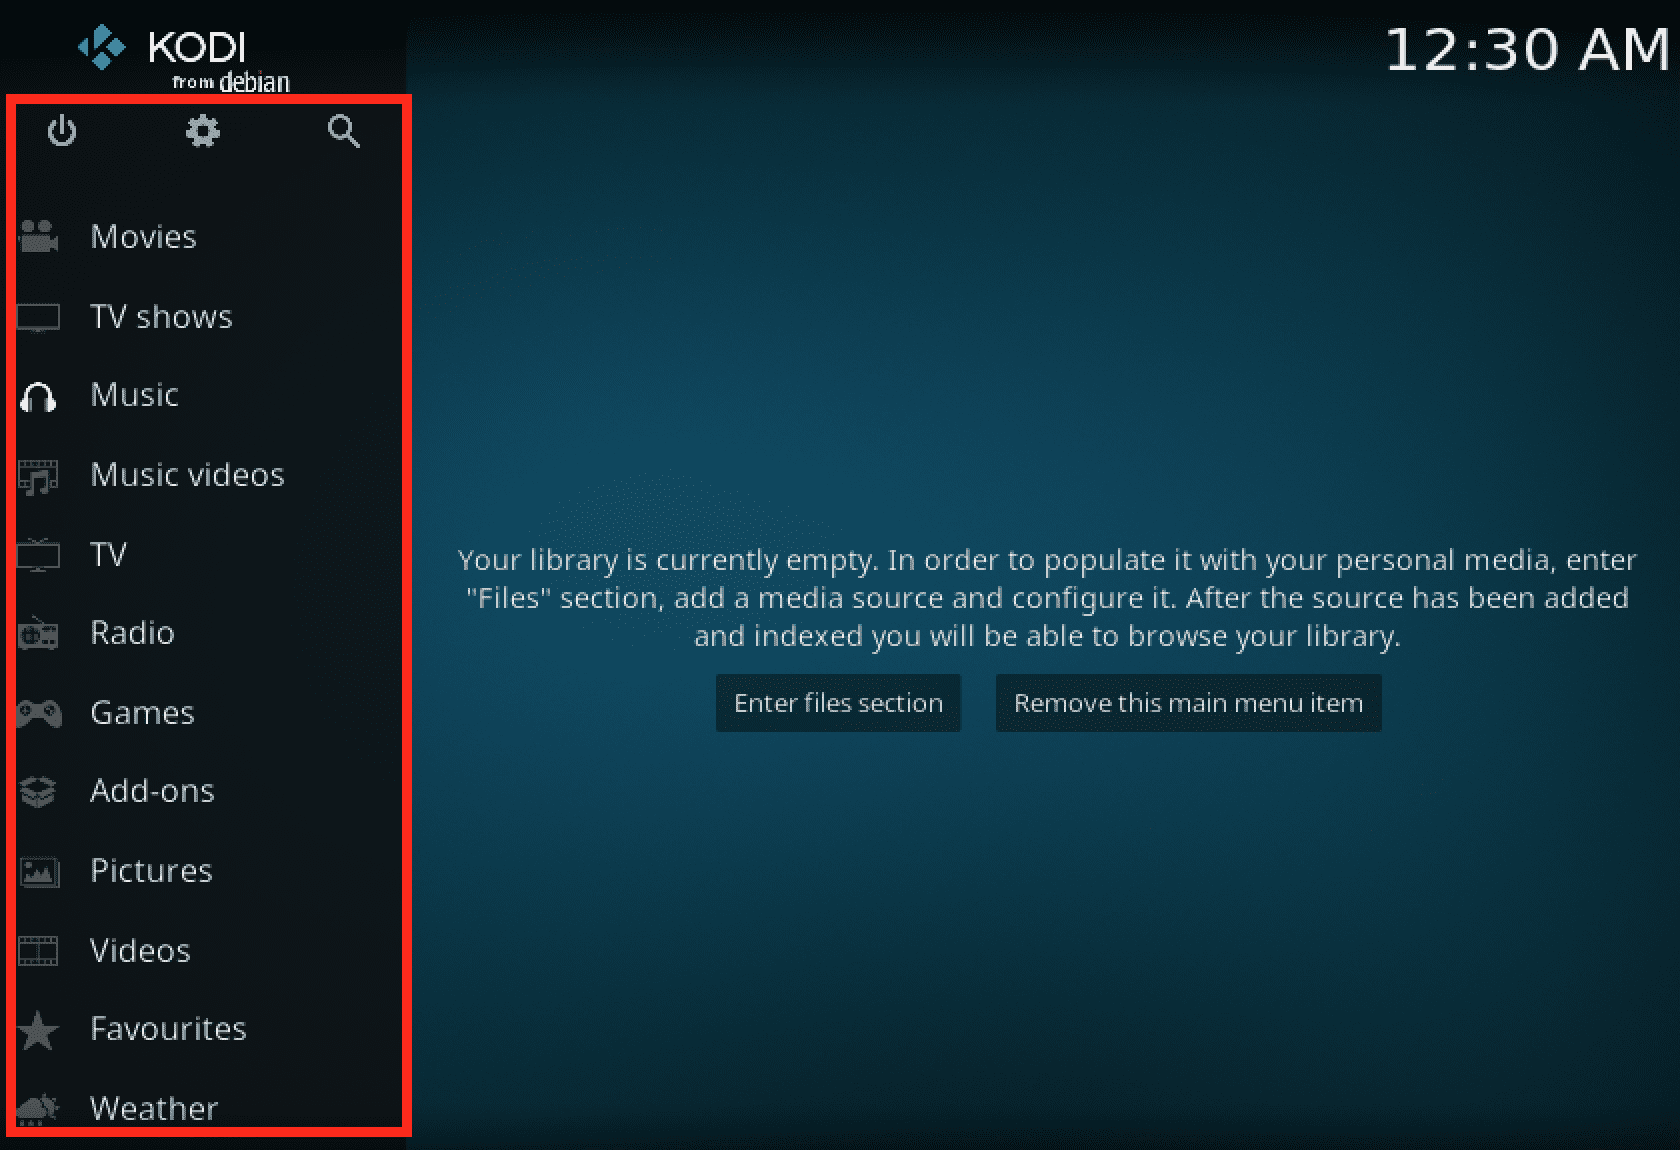
Kodi main window
This section will teach you how to add your local media files (music and videos) to Kodi. Follow the steps below.
1. From the main menu, select “Settings” (the gear icon in the top left corner).
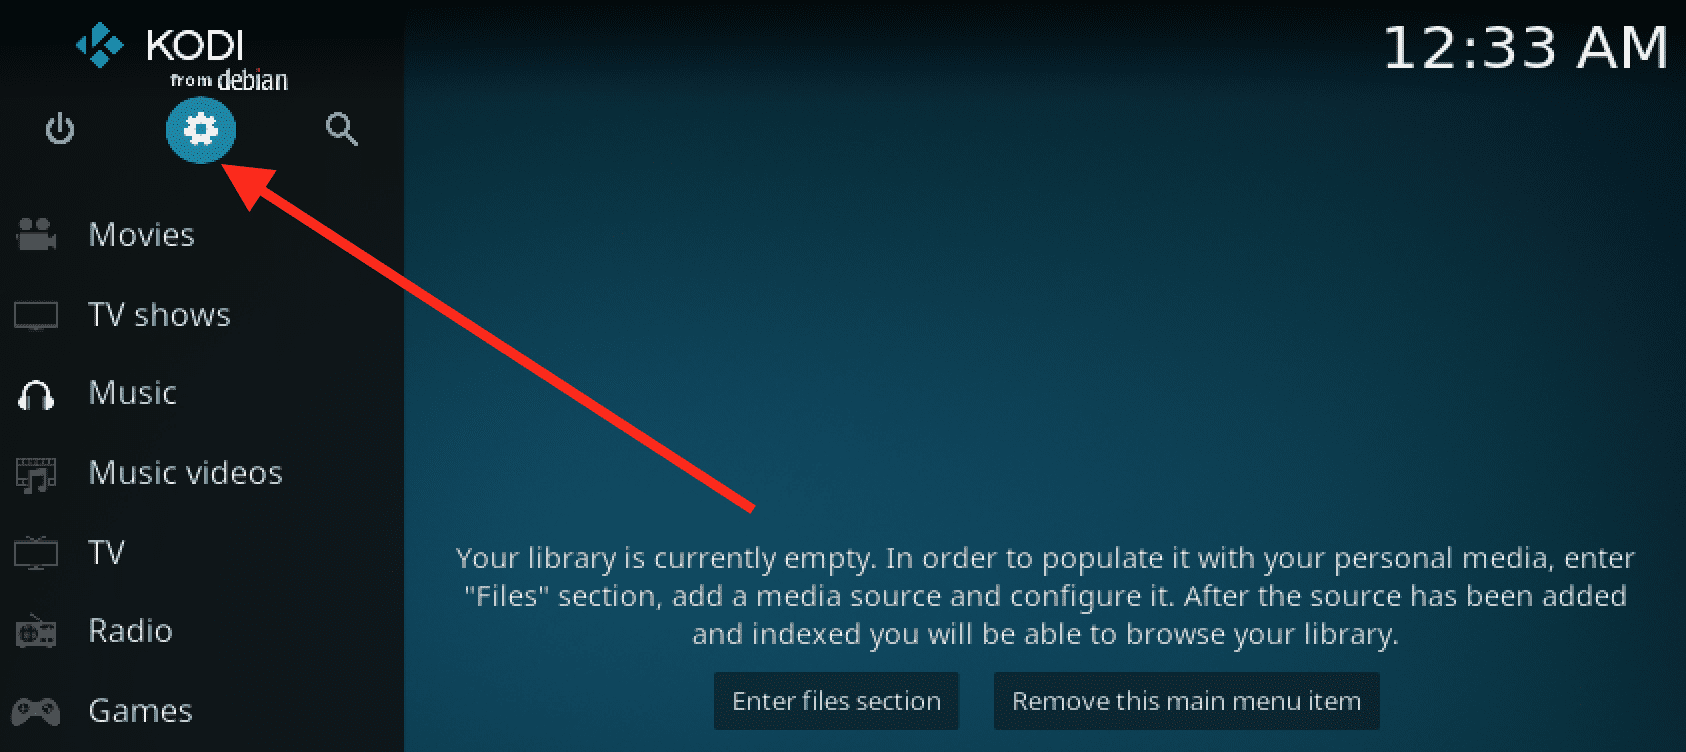
Kodi Settings
2. Select “Media” from the left-hand menu.
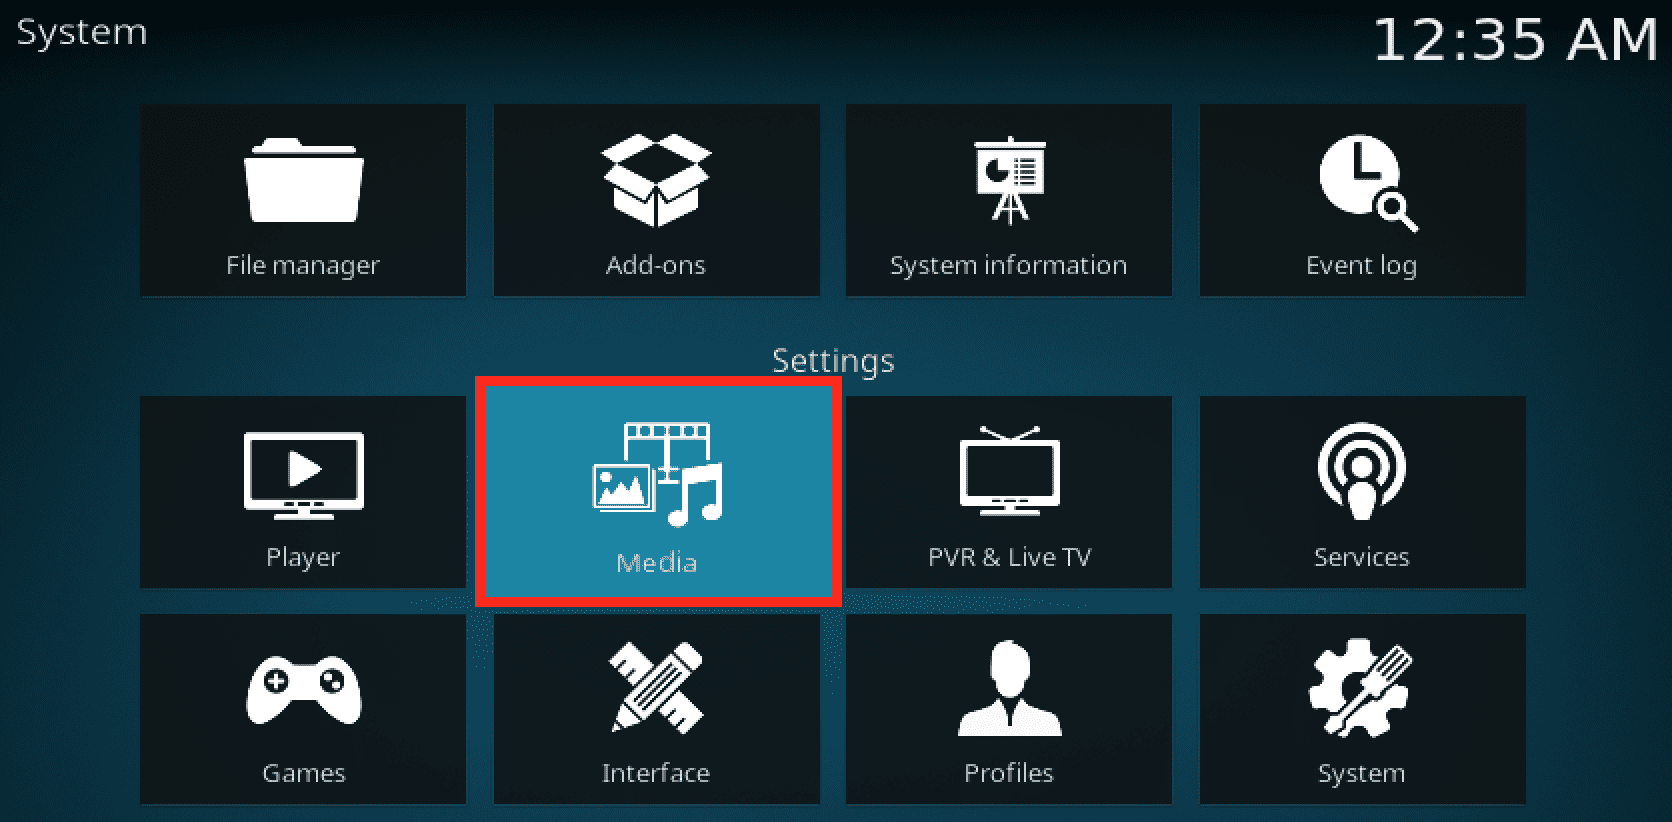
Kodi media
3. Under the “Library” section, select “Videos” or “Music,” depending on the type of media files you want to add. We will add “Videos” for this particular post.
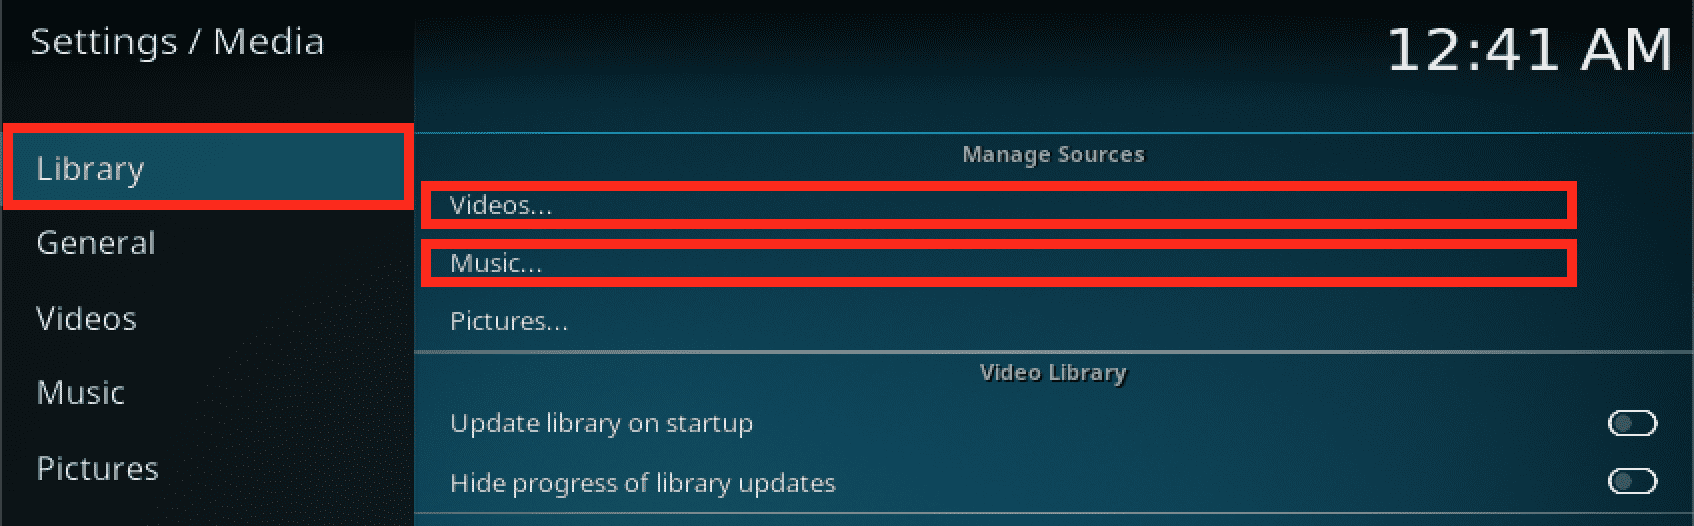
Select the media file type
4. Select “Files” and then “Add videos.” If you are adding music, then you will click “Add music.”
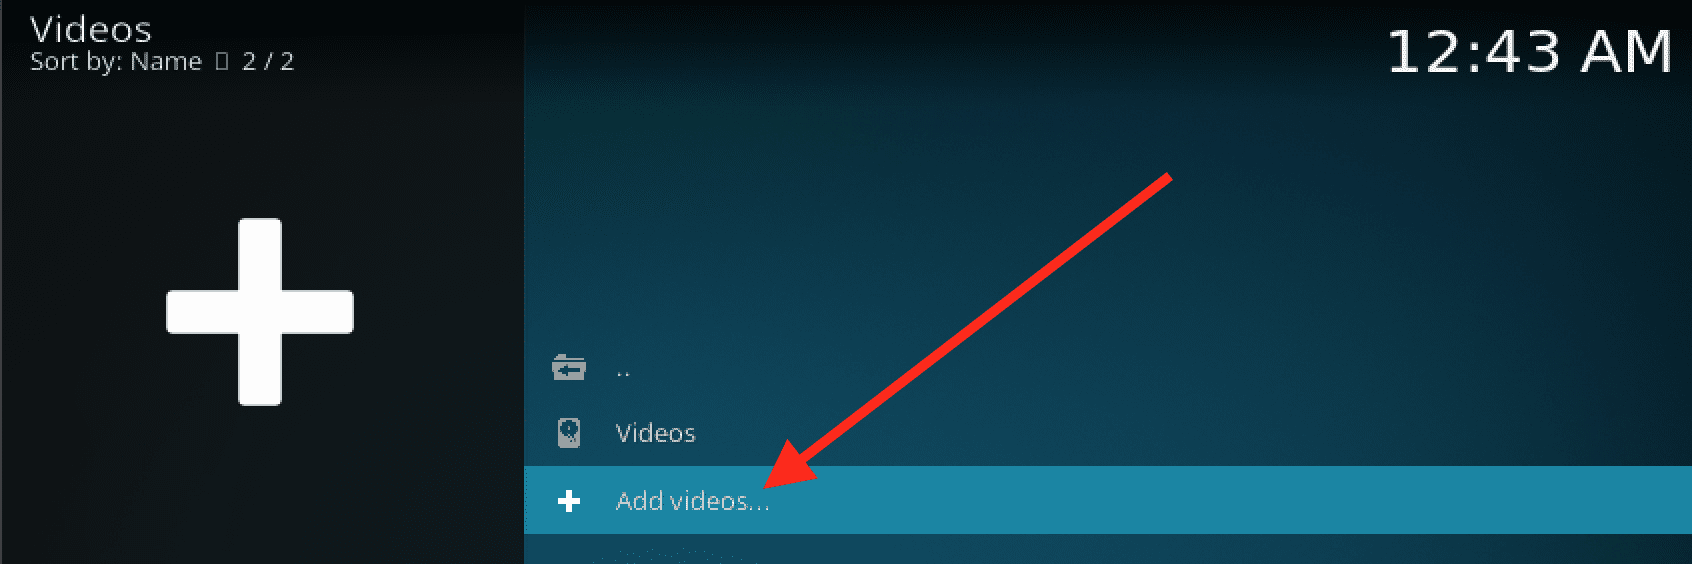
Add videos
5. Choose “Browse” and navigate to the folder on your local system that contains your media files.
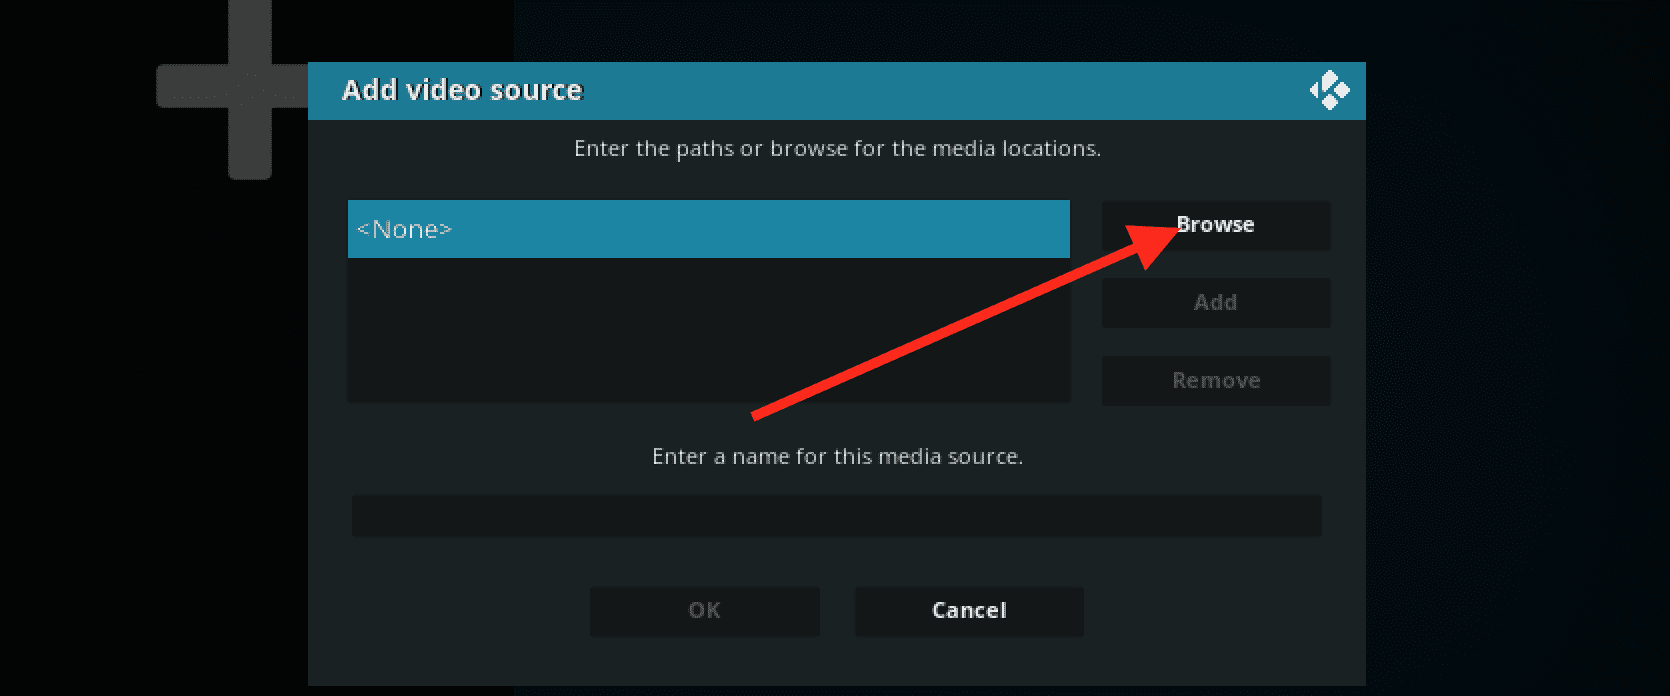
Browse files
6. Choose a name for the media source and select “OK.” For this post, we will name it “My_Video_Files.” You can configure additional settings for the media source, such as the content type or scraper.
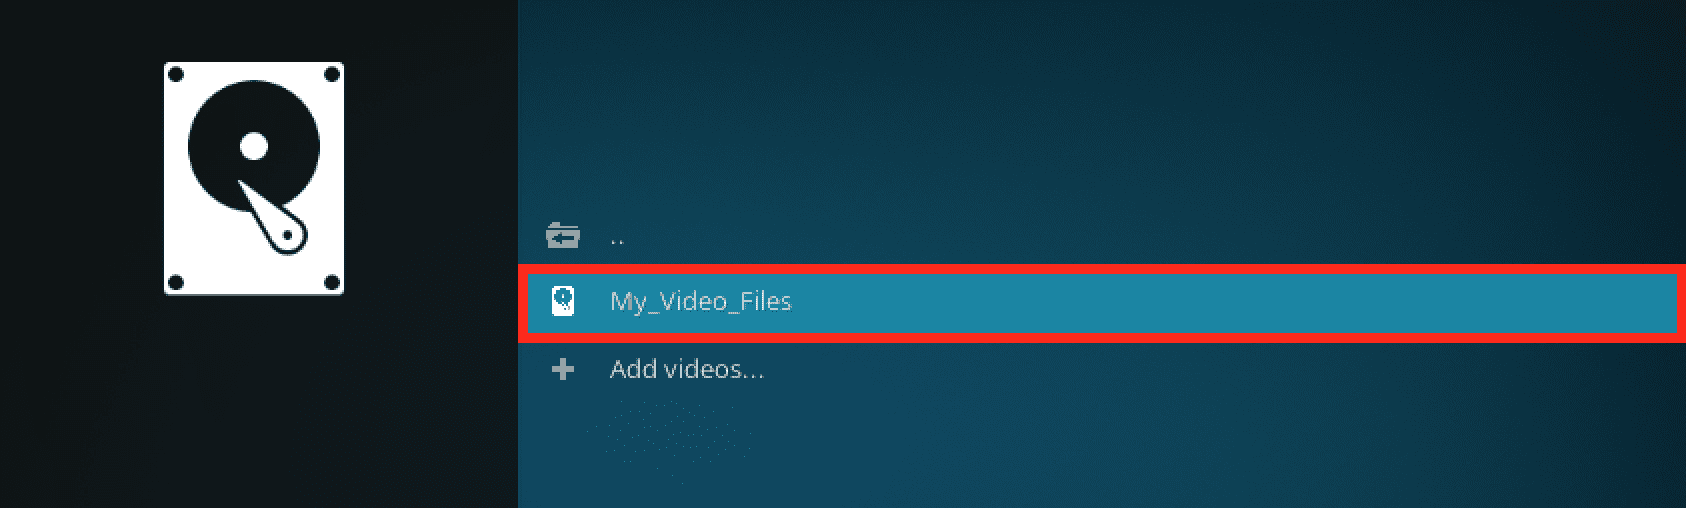
Video files
7. Wait for Kodi to scan your media files and add them to the library. This may take some time, depending on the number and size of your media files. Repeat the above steps for any additional media sources you want to add.
When you open the “My_Video_Files” directory, you will see that our media files were successfully added to Kodi.
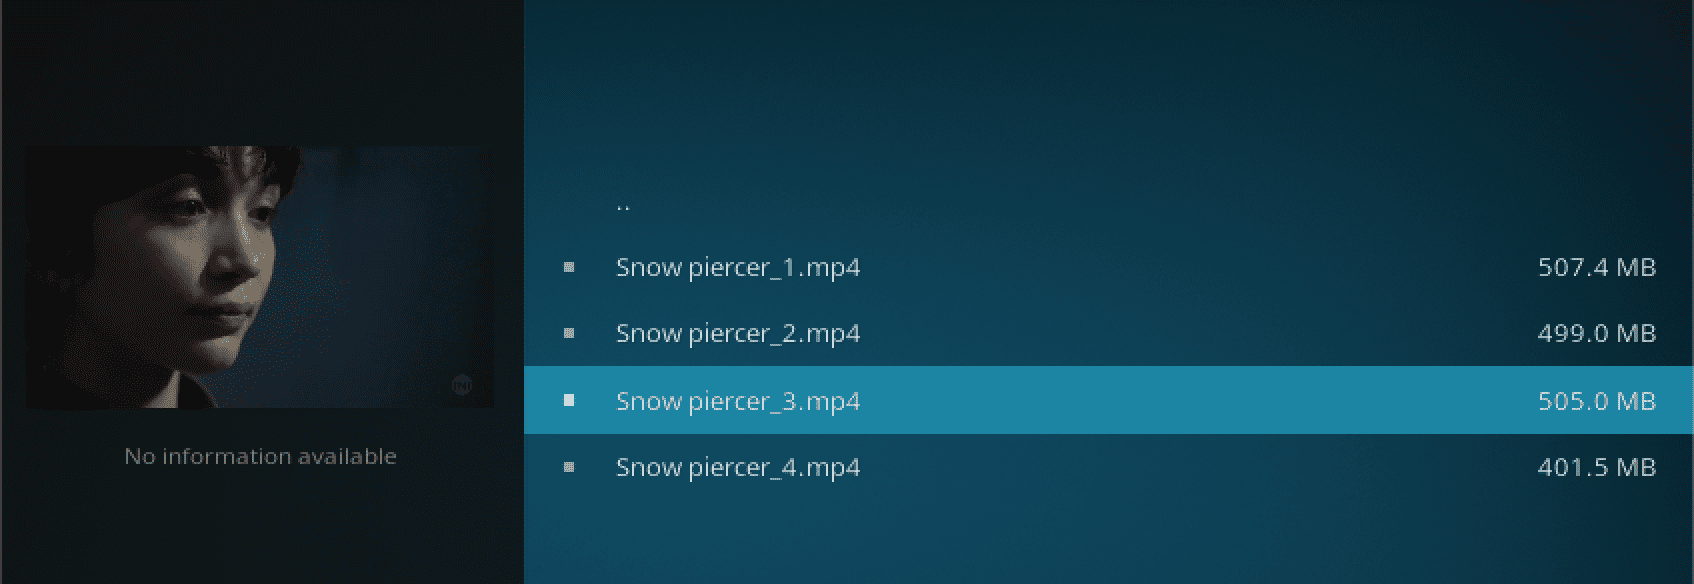
Videos
Step 3: Enable UpnP on Kodi
UPnP stands for Universal Plug and Play. It’s a networking protocol that allows devices to discover and interact with each other on a network. When enabled in Kodi, UPnP allows other devices on your network to access your media files and stream them from Kodi.
Follow the steps below to enable UPnP in Kodi:
1. From the main menu, select “Settings” (the gear icon in the top left corner).
Kodi Settings
2. Select “Services” from the left-hand menu.

Kodi services
3. Under the “Control” section, select “UPnP / DLNA.”
4. Toggle the “Enable UPnP support” switch to the “On” position. Also, toggle the “Share my libraries” switch to “On.”
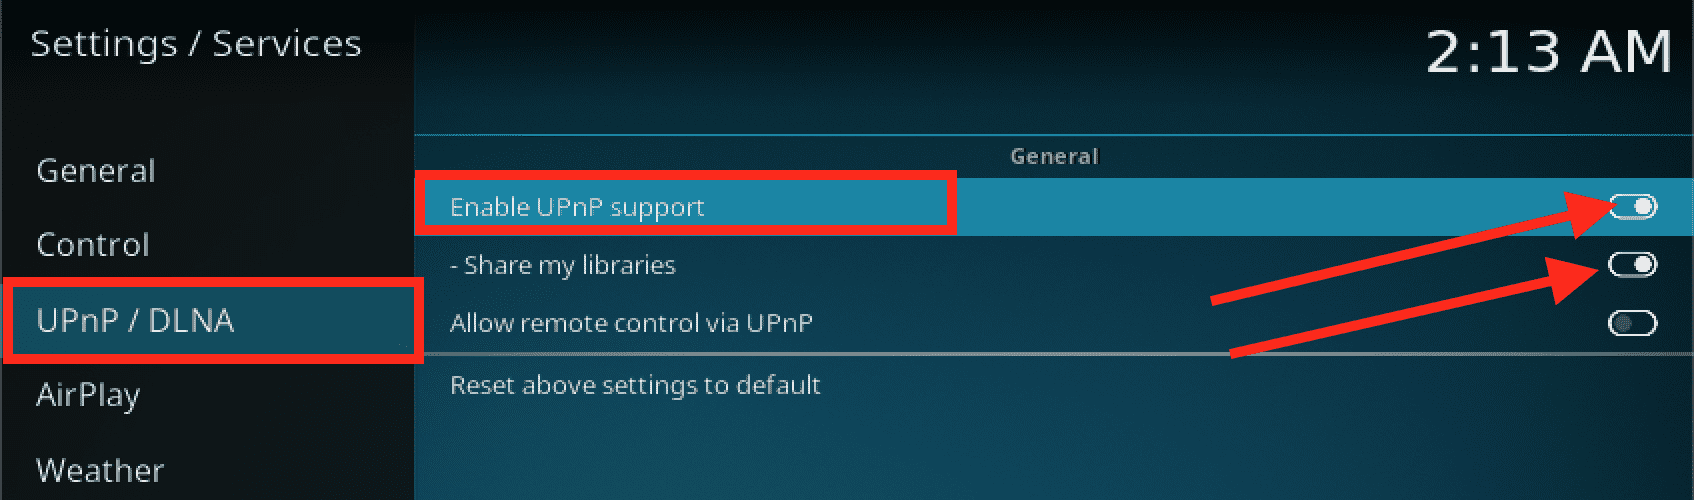
Enable UPnP
Once UPnP is enabled in Kodi, other devices on your network should be able to discover and access your media files from Kodi.
Note: You may need to configure your network settings to allow UPnP traffic if it’s blocked by default on your router or firewall.
Step 4. Using VLC to stream files on the Kodi media server
You can stream media files on the Kodi media server from VLC installed on any device. That can be Android, Linux, Windows, or macOS. This post will look at how to stream media files on Kodi from the VLC-Android version. Follow the steps below.
1. Install VLC on your Android device. If you do not have it installed, go to your Play Store and install it.
2. Next, launch VLC on your Android device to get started.
3. The Kodi media server is listed under the “Local Network” section, as shown in the image below.
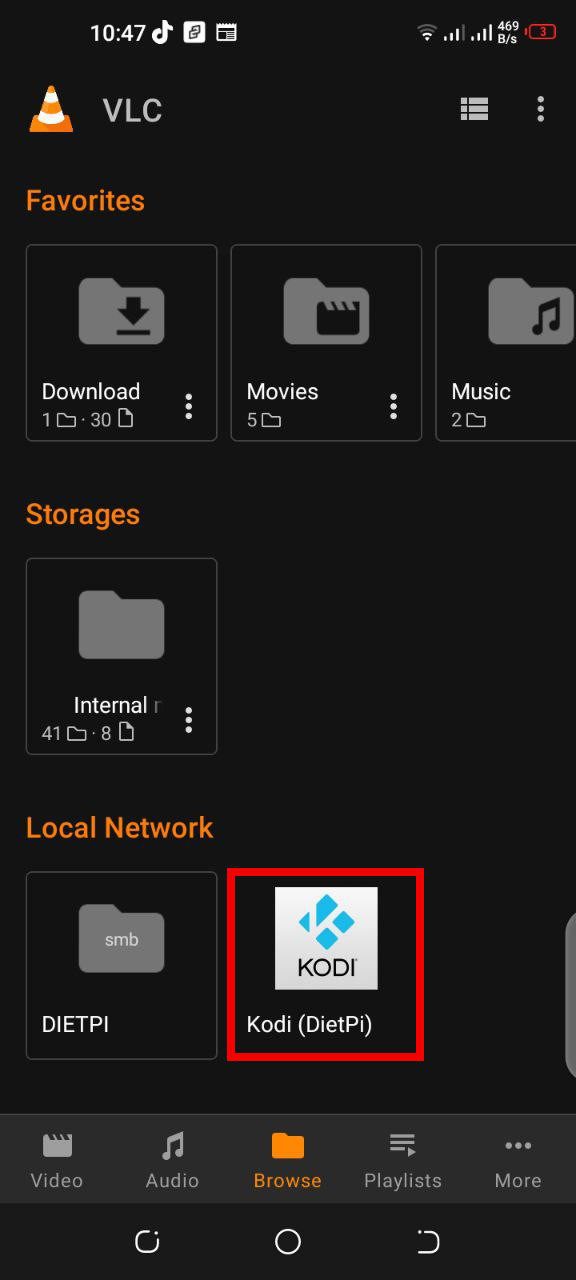
Stream videos on the Kodi media server
4. When you click on ‘Kodi,’ you will be required to browse through various folders available depending on the ones you have or the multiple folders(i.e., videos or music) added to Kodi.
Note that these instructions may vary from one Android phone to the next. So, follow the prompts until you achieve your goal.
Conclusion
Setting up a media server with Kodi on DietPi is a great way to create a low-cost and energy-efficient media center that can be accessed from multiple devices on your home network. With VLC, you can easily stream media files from the Kodi media server. Kodi has a user-friendly interface that makes browsing and playing your media files easy, and adding your local media files to Kodi is simple. Enabling UPnP in Kodi allows other devices on your network to access and stream your media files. With these steps, you can have a fully functional media center up and running on your Raspberry Pi with DietPi and Kodi.