
A Hostname is a label assigned to any device on a network. You can use it to distinguish a device from another on a network or the internet. Like an IP address, you can use the Hostname to find a computer on the network and exchange data. For example, when setting up a mail server, you will need to use a Fully Qualified Domain Name (FDQN) which also uses a hostname.
If you are using a Raspberry Pi running the official Raspberry Pi OS, you will notice that the default hostname is “raspberrypi.” If you are using your Pi like an ordinary Desktop computer, that wouldn’t be an issue. However, if you want to set up your Raspberry to be accessible by another computer on the network, e.g., as a web server or media server, leaving the Hostname as “raspberrypi” might not be an excellent decision. If another Raspberry Pi is connected to that network, there will be name conflicts since devices and other users won’t know which Raspberry Pi they should connect to.
View the Current Hostname on Your Pi
The official Raspberry Pi OS is a Linux-based operating system. You can use various methods to see the currently set Hostname on any Linux distribution. However, one of the easiest is executing the hostname command on your Terminal.
hostname

Current Hostname
From the image above, our current Hostname is “raspberrypi.”
Changing the Hostname on Raspberry Pi
This post will give you a detailed guide on changing the Hostname on your Raspberry Pi. We will look at three main methods:
- Use the Raspberry Pi Configuration utility (Terminal)
- Editing the /etc/hostname file. (Recommended: if you are not running the official Raspberry Pi OS)
- From the Desktop (Graphical Interface)
Tip: This post assumes you already have your Raspberry Pi up and running, and you can connect to it either Remotely via SSH or VNC or graphically from a display monitor. The posts below will be of great help if you are getting with using a Raspberry Pi.
(Method 1) Change the Hostname using the raspi-config Tool
This is one of the easiest methods that you can use to change the Raspberry Pi hostname. To get started, launch the Terminal and execute the command below.
sudo raspi-config
That will open the official Raspberry Pi configuration screen, as shown in the image below.
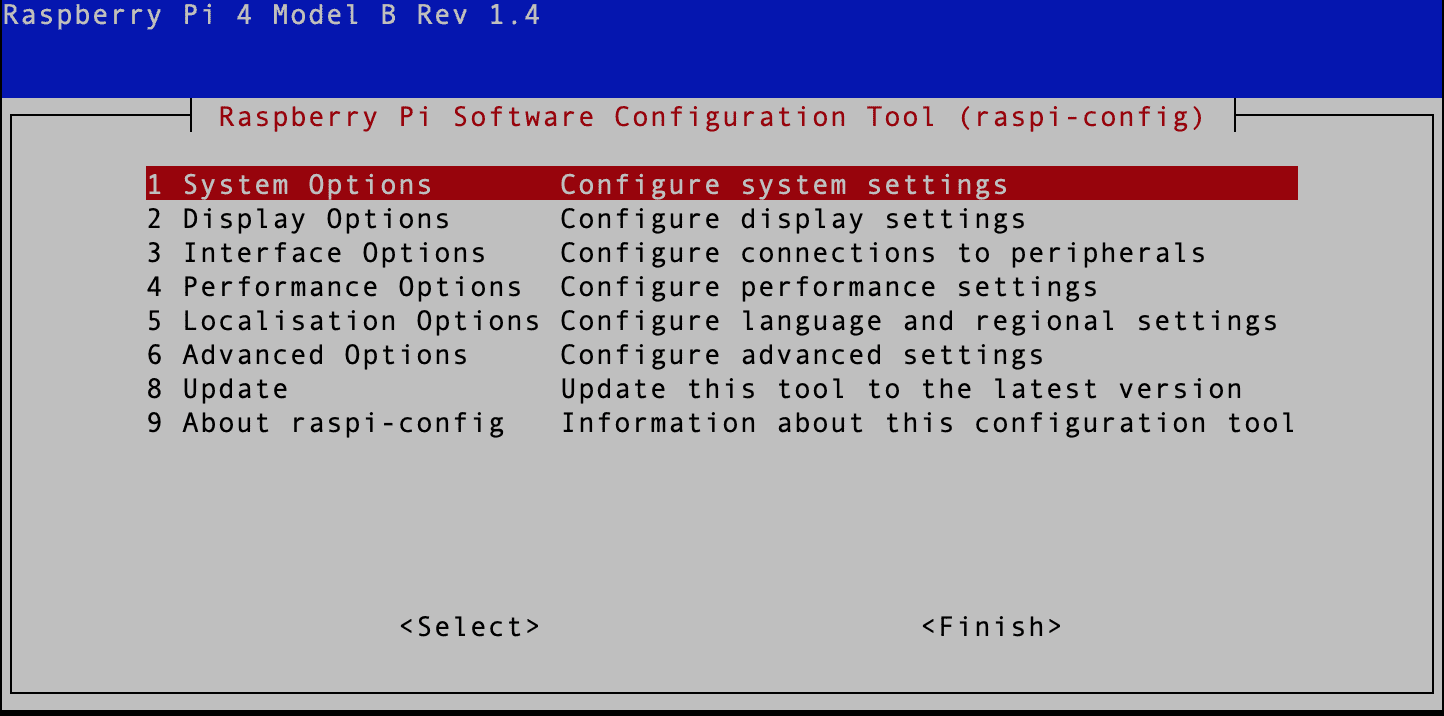
Raspberry Pi Configuration Tool
Select the first option, “System Options,” and hit “Enter.” On the new screen that appears, select “Hostname” and hit Enter.
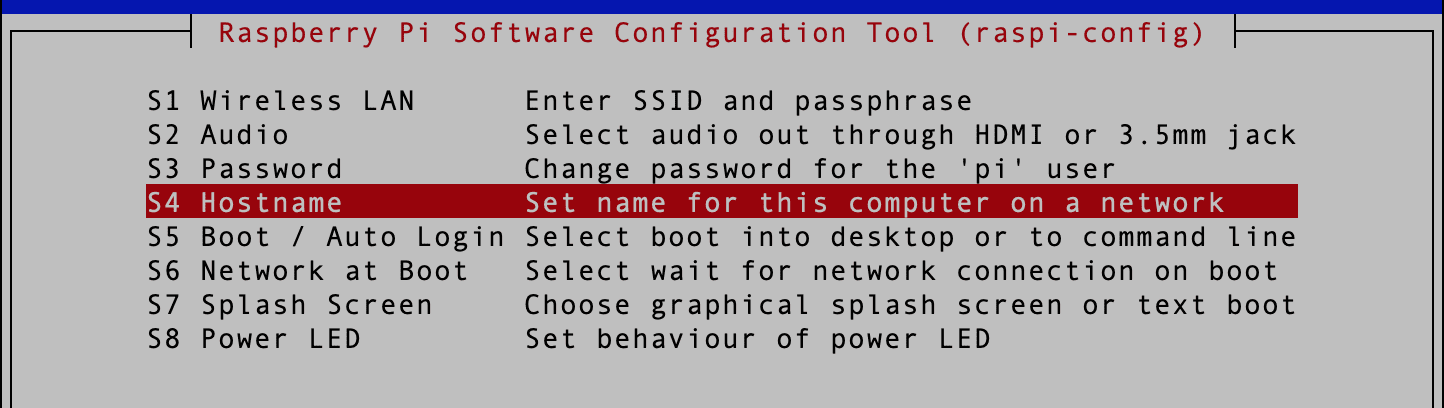
Hostname
On the screen that appears, you will see the requirements for setting a hostname. For example, a hostname can only contain ASCII characters from ‘a’ to ‘z’ (case insensitive), numerical characters between ‘0’ and ‘9’, and a hyphen. The name should also not start or end with a hyphen. In addition, special characters like commas, hash, dollar, @, etc., are not allowed. Hit Enter to continue.
You will see a screen where you can type your new Hostname. By default, this field is set to your current Hostname. In our case, it’s currently set to “raspberrypi.” We will change it to “sbb-raspberry.” See the image below.
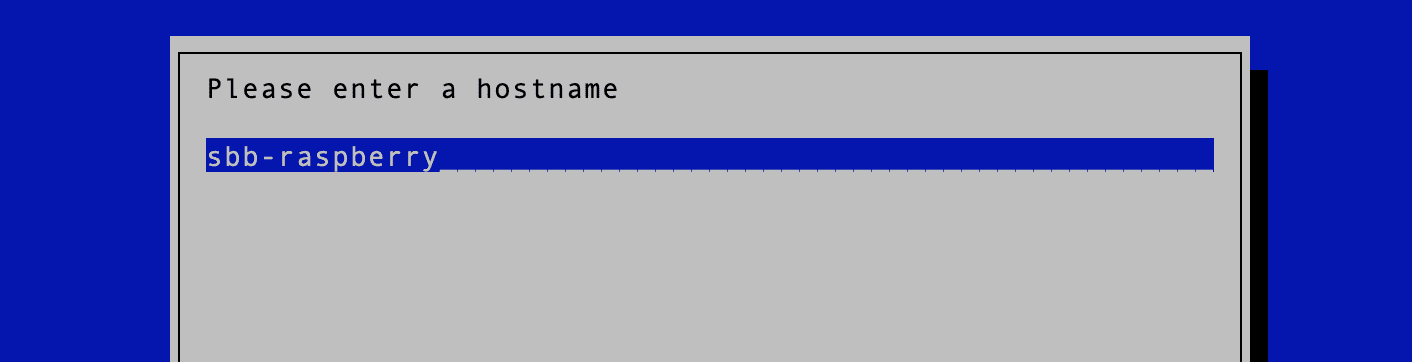
Change hostname
Select “Ok” and press “Enter” to save the changes. Select “Finish” and hit “Enter.” That will prompt you to reboot your Raspberry Pi to apply the configurations. Select “Ok.”
When done, run the command below on the Terminal to verify the new Hostname was successfully changed.
hostname

Verify Hostname
(Method 2) Change the Hostname by Editing the /etc/hostname File
Another method you can use to change the Hostname on your Raspberry Pi is editing the /etc/hostname file.
Tip: This method can change the Hostname on any Linux distribution. Therefore, if you are not running the official Raspberry Pi OS – maybe you are running an OS like Ubuntu, Pop_!OS, Manjaro, etc., we recommend using this method. Launch the Terminal and execute the command below to open the hostname file using the nano editor. Delete the current Hostname and type the name you want. In our case, we will set the Hostname as “singleboardbyes.”

Enter new Hostname
Save the file (Ctrl + S) and exit (Ctrl + X). Now reboot your Raspberry to apply the changes. After logging into your Raspberry Pi, run the command below to verify the new Hostname.
hostname

Verify Hostname
(Method 3) Change the Hostname From the Graphical Desktop
The last method we will look at is changing the Hostname from the graphical Desktop. This method is excellent for Linux newbies or people who love doing everything from the graphical Desktop.
Tip: This method utilizes the graphical tool of the “raspi-config” command-line utility discussed in “Method 1.”
On the Raspberry Pi Desktop window, click on the Main menu -> Preferences -> Raspberry Pi Configuration.
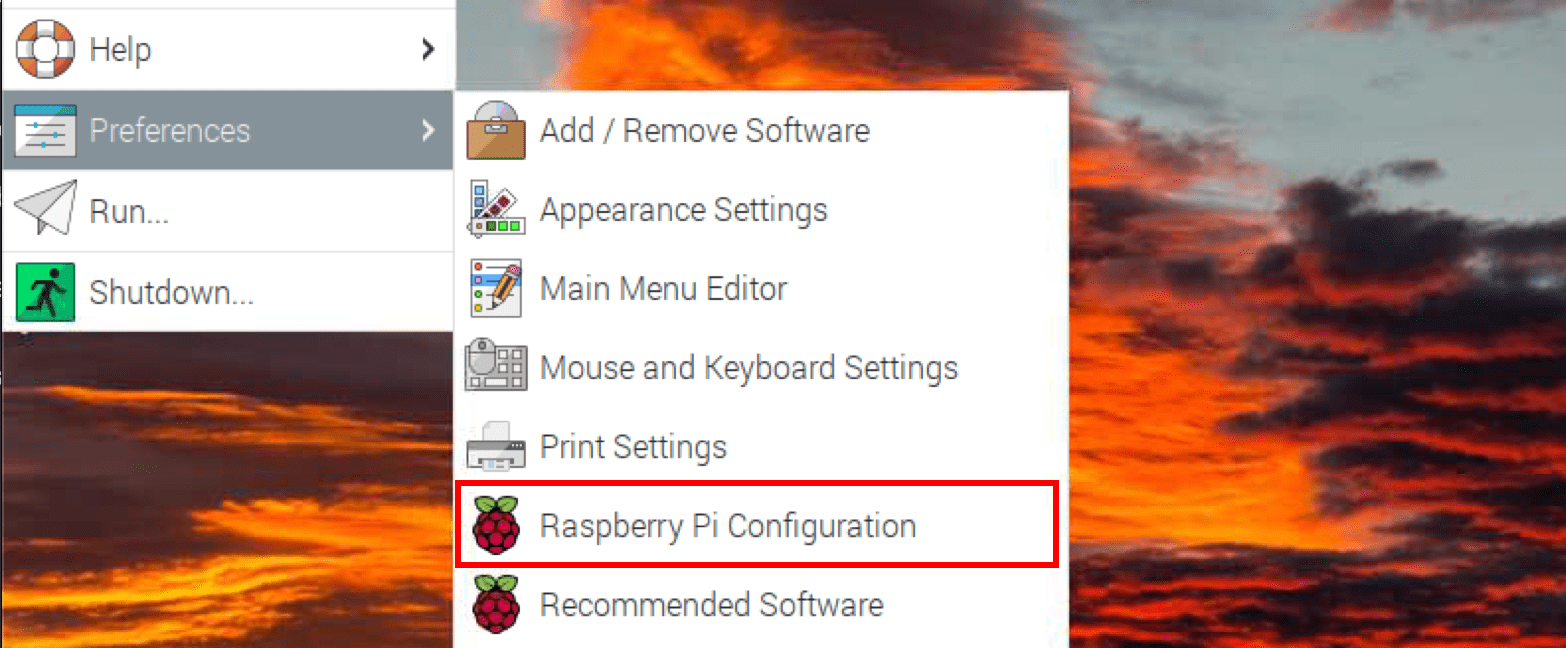
Launch the Raspi-config tool
This action will launch the Raspberry Pi configuration window on your Desktop, as shown below. You will see the hostname field set to your current Hostname.
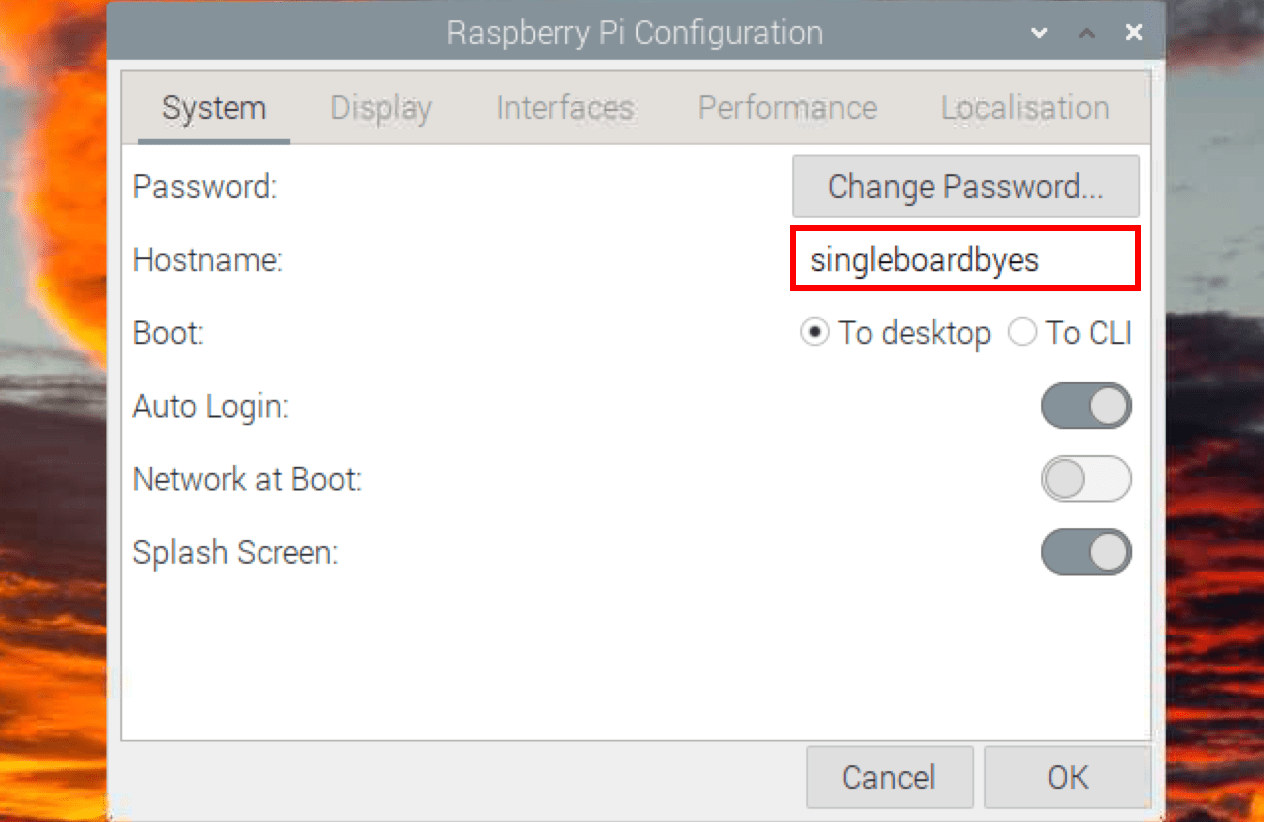
Raspberry Pi Configuration window
Edit this value to any name you wish to use as the Hostname and click “Ok” at the bottom of the window. In our case, we will set it to “raspberry-bullseye.” Next, you will see an option to reboot your Raspberry and apply the new configurations. Select “Yes” to restart the Pi. When the system is up again, launch the Raspberry Configuration Tool and confirm that the Hostname was successfully changed.
Wrapping Up!
You can use three methods to change your Raspberry Pi’s Hostname. Suppose you are running the official Raspberry Pi OS. In that case, we recommend using the official Raspberry Pi configuration tool either from the command line or desktop, as discussed in Methods 1 and 3. If running any other Linux distribution, use Method 2 to change the hostname by editing the /etc/hostname file.