
Raspberry Pi is a tiny, affordable, credit-card-sized computer that can cost less than most video games. Besides being a small-sized computer, the PC can be used to code, build robotics, and create all types of peculiar and beautiful projects. The Raspberry Pi can carry out all the stuff you would expect from a computer, like literally everything, from browsing the internet and playing games to watching and listening to movies and music, respectively. However, the Raspberry Pi is much more than a modernized computer.
With Raspberry Pi, one can get into the heart of a computer and get to set up one of their own operating systems and connect wires and circuits directly to the pins on its board.
This fabulous device enables people of all walks to explore computing and learn programming languages such as Python, Scratch, and all the major programming languages included with the official operating systems.
What is UniFi?
UniFi is a range of network devices generated by Ubiquiti, an American technology company founded in San Jose, California, in the year 2003 and later relocated to New York City. Generally, Ubiquiti manufactures and sells wireless data communication and wired products for enterprises and homes under various brand names.
These network devices range from Wi-Fi access point all the way to security gateways and switches. Establishing the UniFi software on a Raspberry Pi is a reasonably straightforward process as it just banks on the multi-platform Java runtime to run. You can control all the UniFi devices that are a part of your network using the UniFi network controller. Additionally, you will be able to use this dashboard to see the statistics of your UniFi network.
We need to set some software and configurations straight before installing the UniFi controller on our Raspberry Pi.
How to run the UniFi controller on a Raspberry Pi
The only architecture that the UniFi controller uses is the Jave Runtime Engine. This means it can be installed on many platforms, even those of different hardware architectures, hence its easy setup steps.
Step 1: Getting the Raspberry Pi UniFi controller ready
Before installing the UniFi controller software, we must update the Raspberry Pi operating system to the latest version. Unfortunately, a good number of errors many people encounter are caused by Raspian software not being updated.
To update the software, run the following commands in your terminal:
sudo apt update

update system
sudo apt upgrade
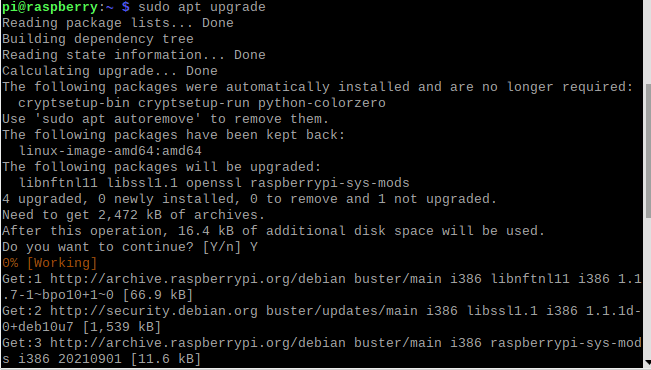
upgrade the system
Note: You have two solutions to offer to a highly outdated Raspberry Pi software. The first is, running the “apt-get full-upgrade,” and secondly, installing a new version of the OS.
Once your Raspberry Pi machine is up to date, it is time to install rsyslog, an open-source software utility used on UNIX and Unix-like computer systems for forwarding log messages in an IP network. If you run the command and get a statement claiming that it is already installed, then you are good to go! Some versions of Raspbian already include this suite/package by default hence the already installed statement.
sudo apt install rsyslog
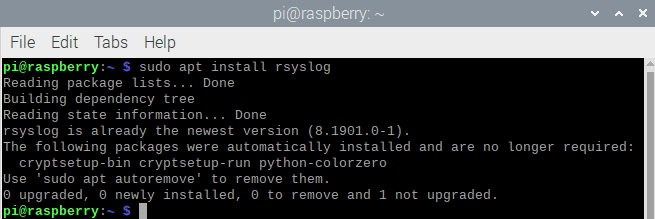
install rsyslog
Step 2: Install the Java runtime environment
As previously mentioned, the UniFi controller needs the Java Runtime Environment (JRE) to execute. The JRE acts as a bridge between the controller software and the independent CPU architecture of your device, in this case, the Raspberry Pi. Here, we are going to install the headless version of the JRE. This, therefore, means that we will not install the GUI version. If you prefer the GUI version, do away with the “-headless” part in the command.
sudo apt install openjdk-11-jre-headless
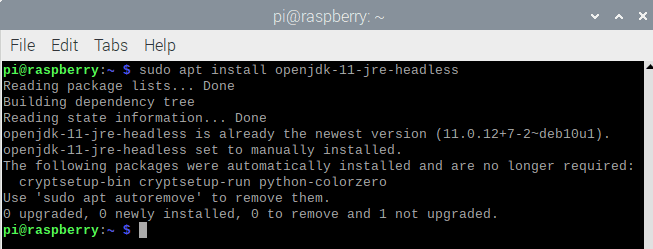
install java
Step 3: Installing the RNG-Tools (optional)
The UniFi support chat forums are loaded with complaints of the Raspberry Pi Unifi controller taking a long time to startup and not just that but also running very slow. This is almost due to the Raspberry Pi not having enough entropy to generate random numbers required by the controller. Consider entropy as the amount of randomness to the numbers generated.
To install the RNG tools, copy and paste the following commands into the terminal;
sudo apt install rng-tools
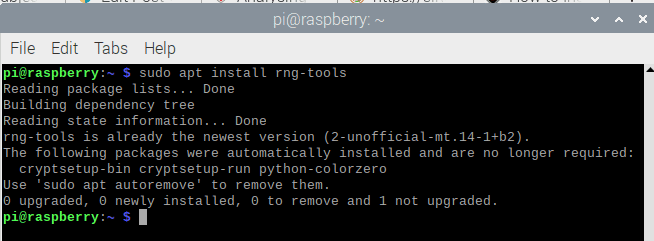
install rng-tools
After that, we need to edit the configurations for the change to take effect. To attain this, use the following command:
sudo nano /etc/default/rng-tools
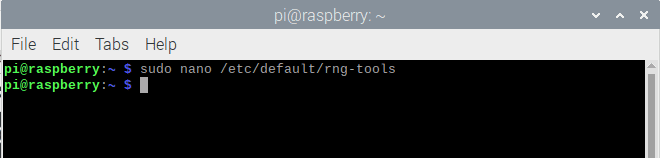
run nano command
Upon running the command, the nano editor will open.
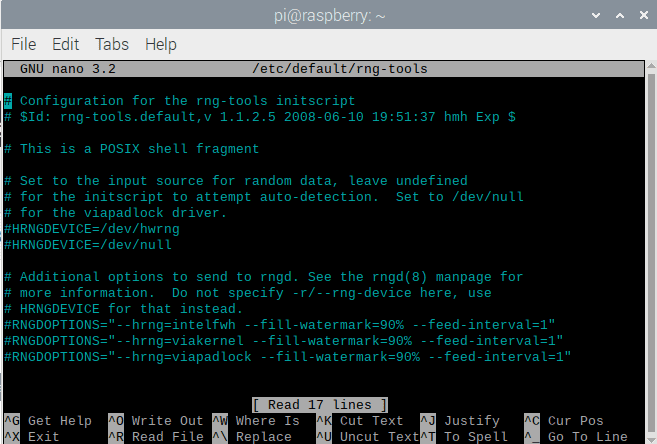
upon running the rng nano command
Here, look for the line with #HRNGDEVICE=/dev/hwrng and do away with the “#” from the start of the line to look like this:
HRNGDEVICE=/dev/hwrng
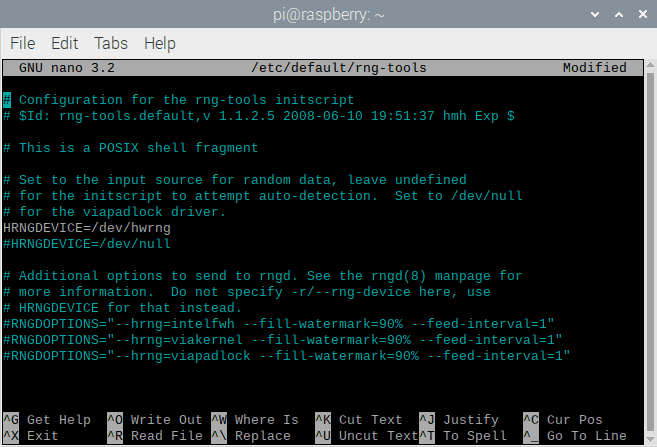
do away with “#”
This gives us the ability to use it properly since the Raspberry Pi CPU is based on ARM architecture and has an inbuilt random number generator. The last step we need to carry out here is to restart rng-tools or rather reboot our Raspberry Pi machine using the following command:
sudo systemctl restart rng-tools
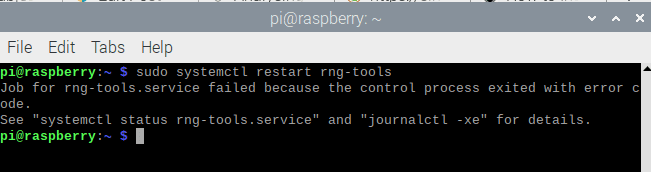
restart rng-tools
Step 4: Installing the UniFi controller on the Raspberry Pi
Whew! It is now time to install the UniFi controller onto our Raspberry Pi. To get started, we will run the following command that adds the UniFi repo to Apt that will, in turn, allow us to clone the correct code from the suitable sources.
echo 'deb https://www.ui.com/downloads/unifi/debian stable ubiquiti' | sudo tee /etc/apt/sources.list.d/100-ubnt-unifi.list
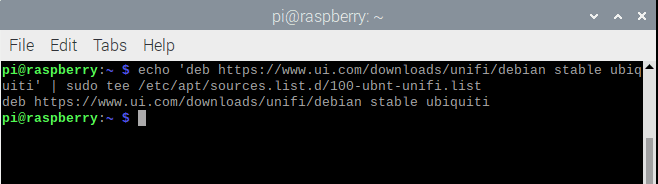
adding the unifi repo
To access that repository, we need the keys that Ubiquiti always publishes on their website. The principal reason for these keys is to prevent fraudsters from posting fake code to the repositories. To add the key, use the following command:
sudo wget -O /etc/apt/trusted.gpg.d/unifi-repo.gpg https://dl.ubnt.com/unifi/unifi-repo.gpg
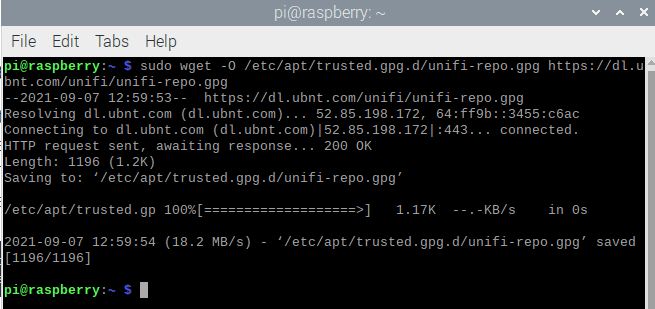
install GPG key
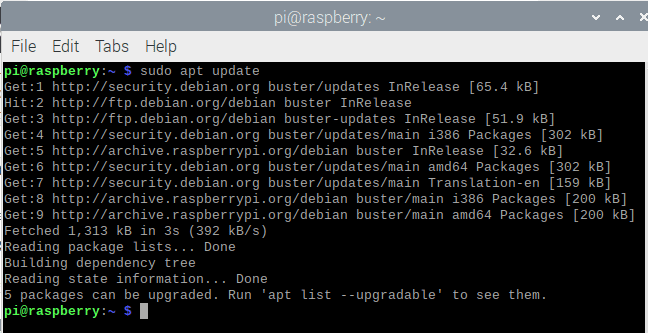
After that, we need to update our Apt again. This is because we need the Apt to create lists of the new repo’s that we have included in the systems:
sudo apt update

second update
Upgrade the system using “sudo apt upgrade” to configure the newly installed lists in the apt package manager.
sudo apt upgrade

second upgrade
After that, we will install the Mongo DB server, one of the dependencies to be met before installing the UniFi controller. To do this, copy and paste the following command to the terminal
To install the MongoDB 4.4 GPG key, use the following command:
wget -qO - https://www.mongodb.org/static/pgp/server-4.4.asc | sudo apt-key add -
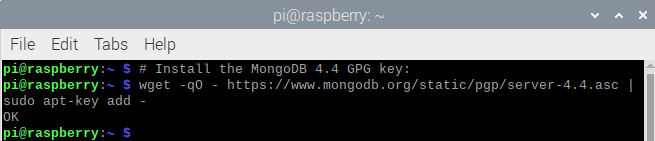
install mongodb gpg key
After that, we will add the source location for the MongoDB packages using the following command:
echo "deb [ arch=amd64,arm64 ] https://repo.mongodb.org/apt/ubuntu focal/mongodb-org/4.4 multiverse" | sudo tee /etc/apt/sources.list.d/mongodb-org-4.4.list

Add source to location
Last but not least, download the package details for MongoDB packages using the following command
sudo apt-get update
update system
Now go ahead and install MongoDB:
sudo apt-get install -y mongodb-org

install mongodb
Finally, we can now install the UniFi controller using the following simple command:
sudo apt install unifi

install unifi
The good thing about installing UniFi like this is that it automatically gets installed as a service. This means it spontaneously starts every time the RPi is rebooted, taking all of the configuration work.
That is all about installing the UniFi controller. However, this does not mean that we are done with the configuration of the UniFi controller.
Step 5: Configuring the Raspberry Pi Unifi controller
To get access to your new UniFi controller, you will need the IP address of your Raspberry Pi. After that, you will visit the following address https://YOUR.IP.ADDRESS:8443. If you are not aware of your Raspberry Pi’s IP address, then you need not worry since this command will have you well covered:
hostname -I

Hostname
In our case, the IP address is “192.168.213.129”. So we will input as shown in the snapshot below:
IP address
Note: Ensure that you don’t forget the “s” in the “https” because you will get an error during execution. Upon running the address, the following window will appear.
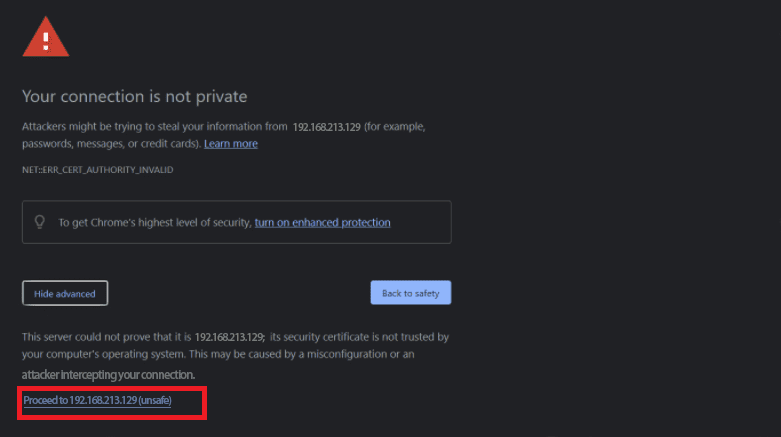
select proceed to (unsafe)
After that, click on Advanced, then “proceed to (Your.IP.Address) unsafe. You don’t need to wonder if it is safe or not because it should be safe since we know for sure that it is our device.
Once clicked, you should be greeted with a new UniFi controller setup screen! On this screen, you should enter your new Controller Name, click agree to the EULA, and then click on “Next.” In our course, we are going to use the “singleboardbytes” name for our new controller.
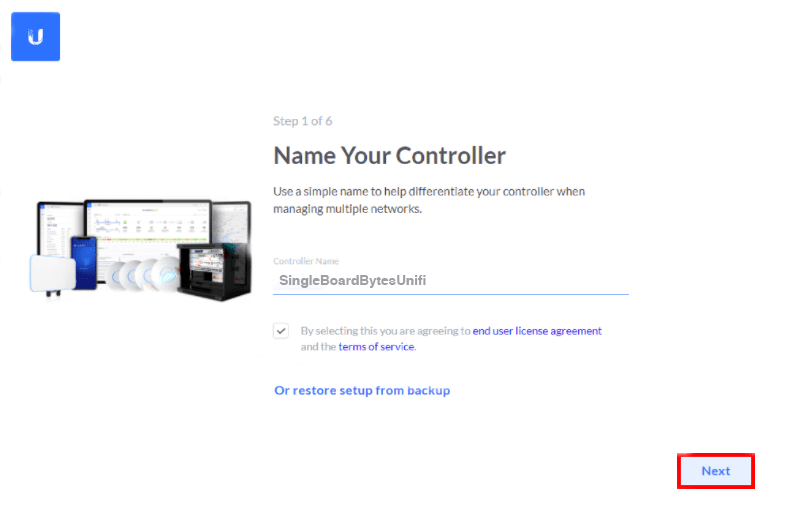
name your controller
In the next window, UniFi will ask you for a username and password. Here, you will either use your UI account or click on “Switch to Advanced Setup” and create a local account.
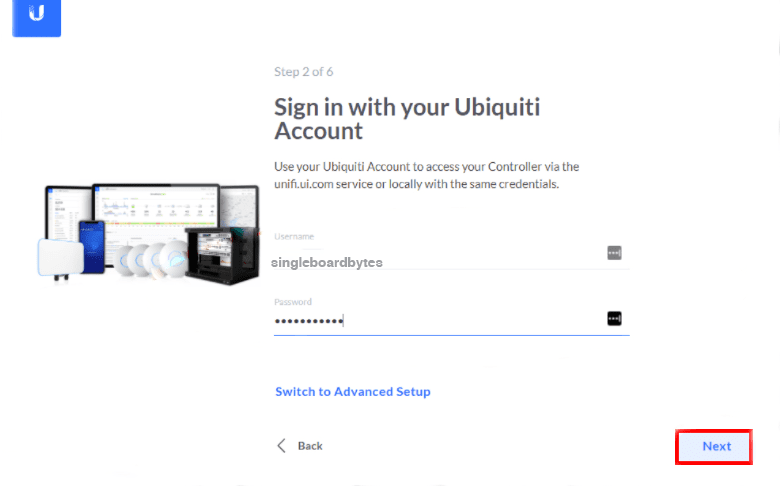
sign in to your Ubiquiti account
Whichever you like here will perfectly work. Nevertheless, ensure you select a strong password. This is your network controller, after all!
Upon finishing, click “Next.”
On the next screen, you will be queried by the Raspberry Pi UniFi controller if you would like to backup and optimize your network automatically. We recommend you activate the two options, which should come activated by default, then click “Next.”
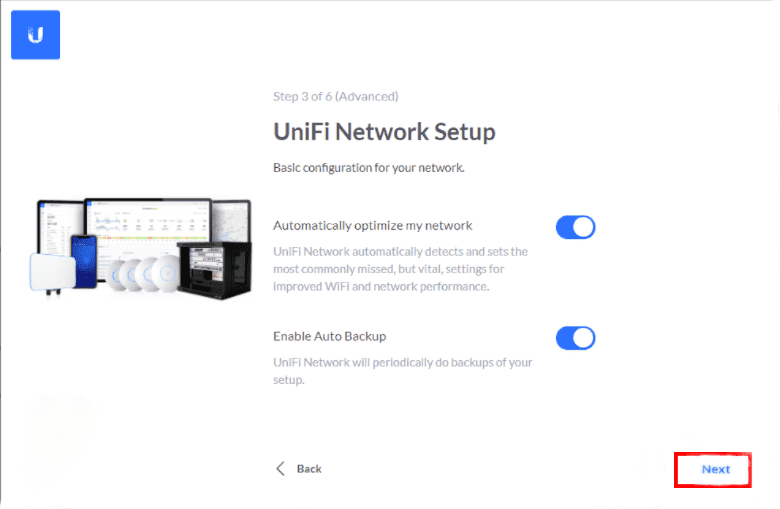
Backup option
At this point, you will be configured with the option to set up new devices. In our course, we don’t have any devices on the network that are not already adopted by a controller. So if you have un-adopted devices, you will be able to see them here! If you are moving your devices to this controller, you will need to “forget” them first in the old controller. After that, click “Next.”
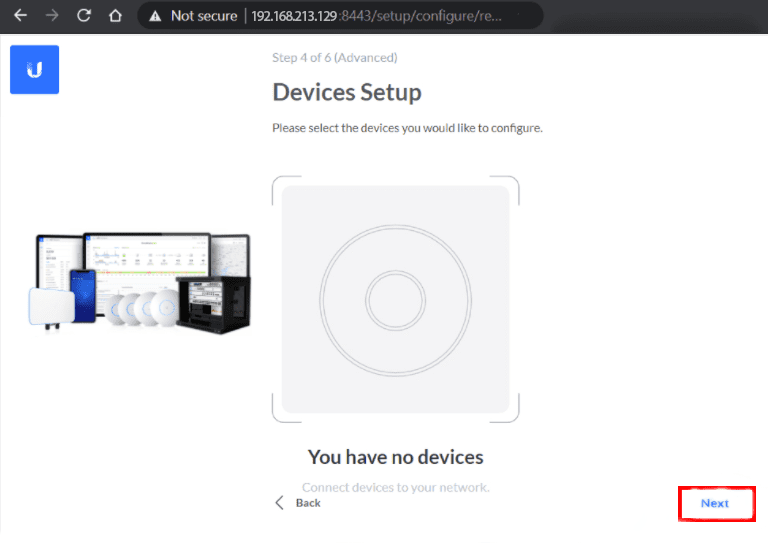
devices setup
It is time to configure our Wi-Fi settings to propagate to all UniFi Access Points on this controller/site combination. In case you don’t plan on using UniFi AutoPointSync(APS), a tool for syncing the PI server points for an interface with the tag definition in the data source linked with the interface, you can click “skip.” Else, enter the name of your network and a password. The name, in this case, will be your SSID, so choose wisely.
We highly recommend keeping your 2.4Ghz and 5Ghz in sync by clicking “ Combine 2 GHz and 5Ghz Wi-Fi Network Names into one.” After that, click “Next.”
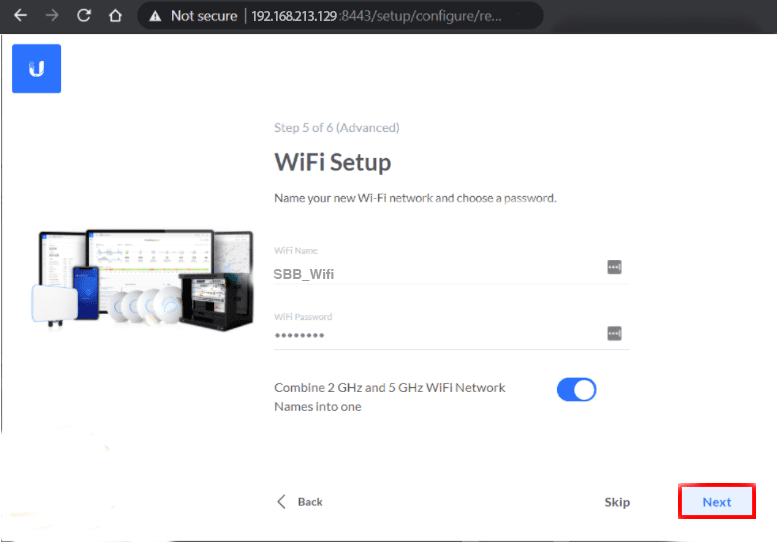
Wi-Fi setup
After that, you will be given a settings summary to review your settings and make changes where necessary. You can change the “time zone and country” here if it is, for some reason, incorrect. Click “Finish” when done.
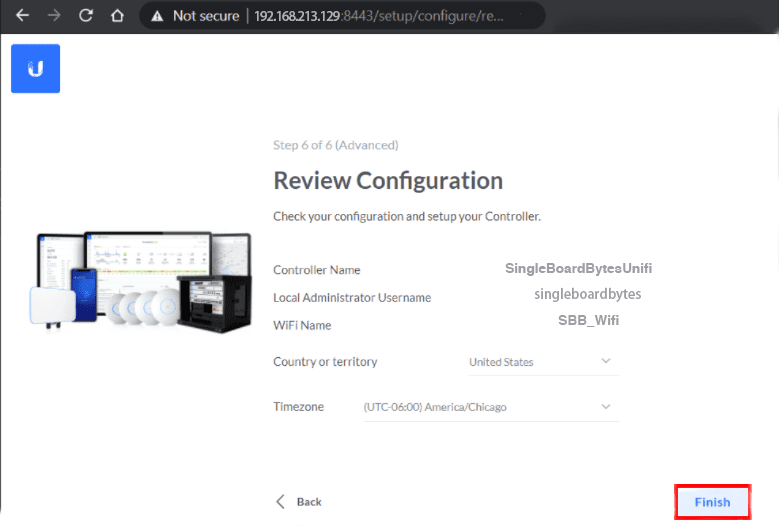
Configurations review
And with that, you are good to go! You now have a fully functional Raspberry Pi UniFi Controller. From now on, you have the flexibility to start adopting UniFi devices such as Dream machines, Switches, Access Points, and many more.
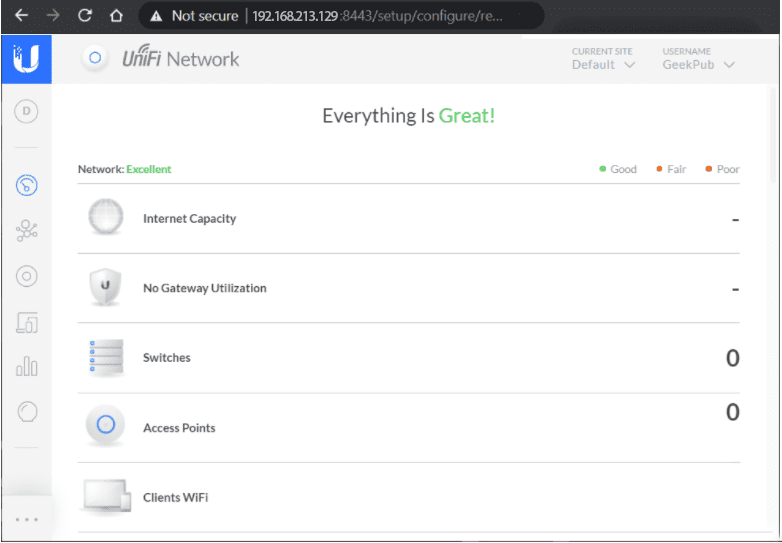
finalizing
Step 6: Web Interface overview
Once you are logged in to the web interface, you will get many sub-menus to manage everything. For the moment, it should be empty, but in the left bar, you can see the following:
Dashboard: Here, you can preview your network performance(number of Apps and clients). Most of this dashboard needs the UniFi Security Gateway, so it is not an important page.
Statistics: In this section, you can monitor clients and traffic in the whole network, but there is nothing here for the moment.
Map: In this one here, you can upload a map of your place and all the APS on it. This way, you can see the global Wi-Fi coverage (approximately).
Devices: This page displays all the UniFi devices you have on your network. This is an essential page since your APS is managed from here.
Clients: Same thing for the clients. You will see all the connected clients with information about them (IP, AP, network usage e.t.c.)
Insights: This page displays miscellaneous info. Here, you can see known clients that are currently not connected, but you can check the history and block or unblock them.
Events: This window shows you all of the recent logs on your network. This includes clients’ connections and APS upgrades.
Alert: offers alerts when there is an error or a warning.
Settings: On this page, you will configure everything. Alternatively, you can use this option to create a wireless network.
Chat support: in case you need any help from UniFi, seek it from this section.
Some of the common blunders you might encounter include:
During the installation process, you might get an error. This mostly happens with Linux-based systems. One of them is an “unexpected end of file or stream” and “abort-upgrade: please reinstall the previous version.”
One of the solutions you can offer is trying to clean up the already loaded list from APT. This way, the cleaned files will be downloaded again, solving any corrupt files during the download.
sudo apt-get clean
Wrapping Up
And that is it; you by now know how to install and configure an UniFi controller on your Raspberry Pi machine. This controller perfectly runs on Pi 3B+ and 4. We are, however, not sure how many clients it would handle, but at home, it is more than enough. A point to note is that you should ensure you backup your UniFi controller properly. This is because updates can brick your controller and even the whole Pi machine. As such, the easiest way to cub all this is to back up your controller to cloud storage, i.e., Dropbox.
It is also paramount to keep our network products up to date since new firmware contains important security fixes and fixes bugs in the software and can also boost the device’s performance. We hope this article solved your problem; if so, please give it a thumbs up!! Otherwise, thank you all for reading! And in case of anything, do not hesitate to reach out.