
AnyDesk is a closed-source remote desktop application made available by AnyDesk Software GmbH(Gesellschaft mit beschränkter Haftung). This ideal software offers platform independent remote access to personal computers and other interlinked devices running the host application. However, some internet scammers often use this app to control their victim’s computer over the net, which is one of the app’s wrong usage. But to your advantage as a user, this app provides remote control, VPN functionality, and file transfer to counter-attack the scammer’s issue.
This software has advanced functionality with a remote print, file transfer and manager, VPN support, unattended access, REST-API, custom clients, session protocol, individual host-server, two-factor authentication, chat functionality, remote access for several major operating systems, and an auto-discovery feature that works as automatic analysis of the local network.
Security-wise, AnyDesk uses TLS-1.2 with authenticated encryption. This, therefore, means that connection between AnyDesk-clients is secured with AES-256. When a direct network connection can be established, the session is endpoint encoded, and its data is not transmitted through AnyDesk servers. Furthermore, it supports whitelisting of incoming connections.
Interestingly, this software can be optionally installed on PCs and smartphones with full administrative permission if you (user) decide. Due to that, the app should be used with caution as it may result in full remote access to the device through the internet, just like all remote desktop applications.
What makes AnyDesk an excellent option than Teamviewer is that AnyDesk for PC offers an enhanced navigational property and a user-friendly interface with easy-to-use commands. In contrast, Teamviewer gives a variety of features for communication. Other vital reasons for having this software are its excellent performance, decent bandwidth utilization, and low latency, thanks to its native build for the Pi machine. And best of all, the AnyDesk team has developed an optimized version of their software just for the pi machine.
Let us now turn our attention to setting up or installing AnyDesk software on our Raspberry Pi.
Installing AnyDesk on to the Raspberry Pi
To be frank enough, the installation process of the AnyDesk remote desktop software is pretty straightforward since we will download the latest version of the software and install it. However, we will first have to update and upgrade our Pi machine before proceeding. Updating your pi machine is a process that you should be carrying out daily as it ensures that your device runs at its best and improves the overall functionality of your machine.
This update regularly updates your software with the latest bug and security fixes long after the initial release of an OS update. Luckily, updating Pi software is relatively simple, as we earlier said. So, besides showing you how to update your Pi OS, we will also take you through a quick dry run of updating your pi machine to the latest pre-release firmware.
Update your Pi OS
Since most operating systems people utilize are based on Debian, so are the official Raspberry Pi OS and the Ubuntu Server. Debian-based systems utilize the apt package manager to aid in updating and upgrading. To use the apt package manager, we will apply the following commands that are entirely run on the terminal. To launch up your terminal use “CTRL + ALT + T.”
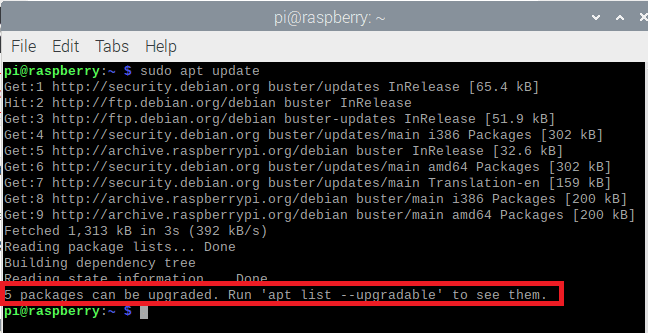
Step 1: Update the Pi list.
The package manager utilizes the package list to tell what packages need updating and where they can be downloaded. To update the package list, run the following command:
sudo apt update
update system
Step 2: Upgrade the available packages.
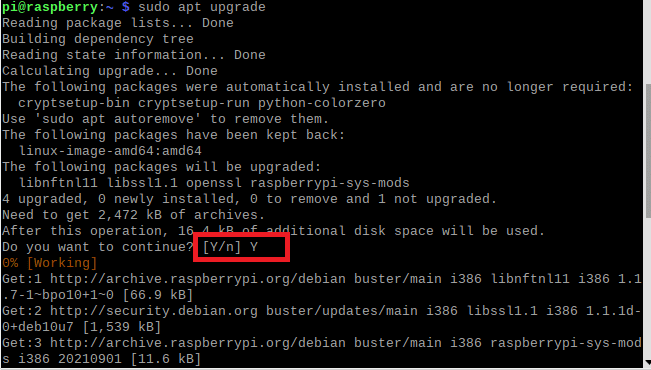
As soon as the package list has been updated, you can now run a complete upgrade on any available package. Basically, upon running the update command, you will be shown the number of packages that need an upgrade. In our case, five packages need an upgrade. So, to upgrade them, run the following command:
sudo apt upgrade

upgrade the system
The apt package manager will install any other added dependencies the software might require by running a complete upgrade.
Step 3: Prompt Window
Immediately running this command, you will be queried if you would like to proceed with the update. Type in “y/Y” and press the “ ENTER” key to continue the package upgrade process.
upgrade the system
Step 4: Reboot your machine
Once you are done upgrading the packages, you will be required to restart your device for the changes to take effect. To restart your Pi machine, run the following command:
sudo reboot
Step 5: Cleaning up
After updating your Pi system, you may want to clean up any remnants caused by the upgrade process. The remnants, in this case, refer to downloaded packages stored within the cache memory on your device. This cache may even comprise packages that are no longer available for download. So, during a complete update of your pi machine, some packages may no longer be required by your system. We can use these steps to clean up these leftover packages.
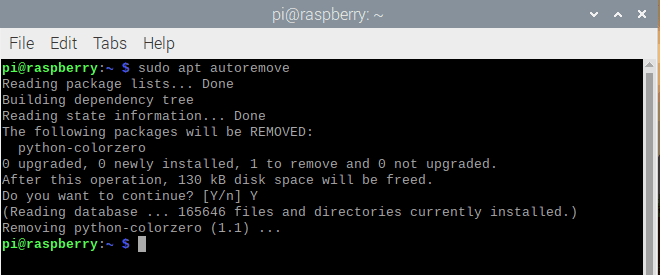
Step 6: Checking for outdated packages
Beforehand, we will start by using the “autoremove” argument for the apt package manager. This command will search for any installed packages but no longer needed by your system and uninstall them. To do this, use the following command:
sudo apt autoremove
autoremove
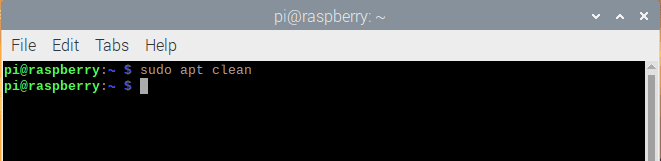
Step 7: Package cleaning
After the package manager completes removing the outdated packages, you can go ahead and clean up the package archive cache. To achieve this (cleaning up the cache), all we need to do is run the following command:
sudo apt clean
clean
A Manual Update of The Raspberry Pi’s Bootloader
Suppose you have been wondering if it is possible to update to the latest pre-release version of your Pi’s machine bootloader. Then after going through this review, you can confidently say yes. Ideally, it would be best to carry this out in cases where you are facing specific plights with your Pi machine that have been resolved with a BETA build.
Immediately the bootloader has attained stability; it spontaneously pushes through the Pi package repo. Most users often wait for the update to become available via this procedure/method. However, you can quickly check out the latest upgrades or changes to the Pi’s bootloader on their Github page.
Before proceeding with the following steps, a point to note is that you will be potentially installing an unstable version of the bootloader.
Step 1. To check if there is any update, run the following command:
sudo rpi-eeprom-update
The above command detects your Pi’s current bootloader version and lets you know an available update.
If an available update has been detected, you can proceed to the subsequent step.
Step 2. The next step is updating your Pi’s bootloader, and doing this, run the following command:
sudo rpi-eeprom-update –a
Note: The “-a” in the command tells the “rpi-eeprom-update” tool that we want to incorporate any available updates.
Step 3. Next, we will ensure that the bootloader changes take effect by restarting your device using the following command:
sudo reboot
Installing AnyDesk
Once your Pi machine has finished updating, we can move further to installing AnyDesk software. To achieve that, we will download the AnyDesk Debian package using the following command:
wget https://download.anydesk.com/rpi/anydesk_6.1.1-1_armhf.deb
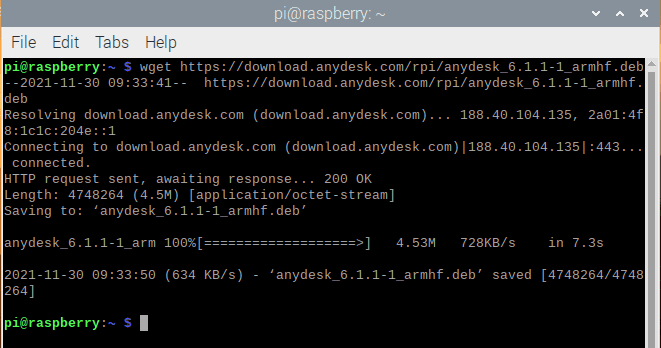
Download anydesk
However, this may not be the latest software at the time of your installation; So, you will visit Raspberry Pi’s official website to download the latest package.
Upon running the download command, use the following command to install the downloaded package:
sudo dpkg -i anydesk_6.1.1-1_armhf.deb
Note: use “sudo dpkg -i “ syntax and replace the version with the one you downloaded.
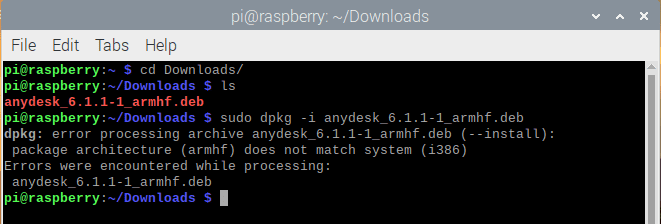
error alert
Here, the dpkg tool will extract the package and install the extracted packages into the desired location. However, in other instances, the package will raise an error “error processing archive anydesk_6.1.1_armhf.deb (–install): package architecture (armhf) does not match system (i386)”, this means that the downloaded file is not compatible with the version of your system. When you run into such an error, visit this link to download a compatible file and install it manually, like in our case, as this link gives you executable files to download.
Upon downloading, you should receive such a file on the Downloads folder or the exact location you redirected your downloads to in case you altered the default downloads settings:
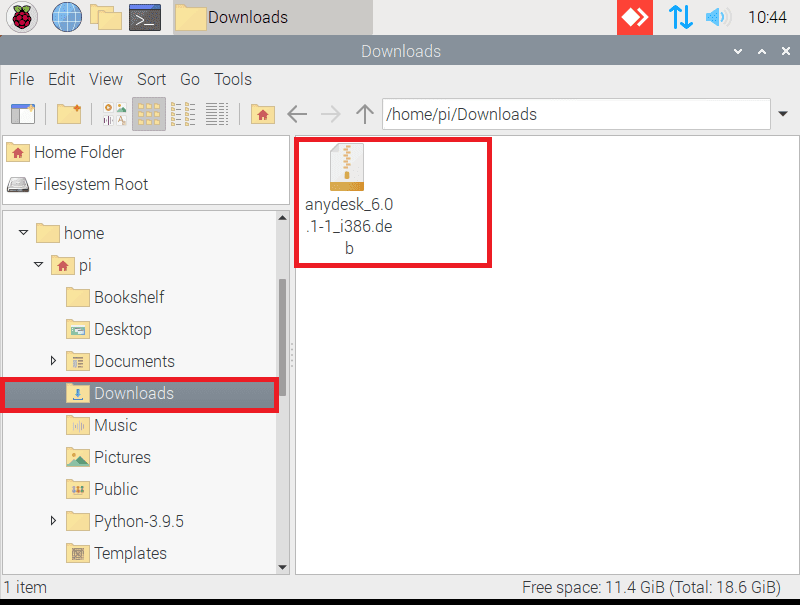
The executable downloaded file
To install the software, double click on the file, and you will be prompted by a window “Do you want to install this file?” click on “install.”
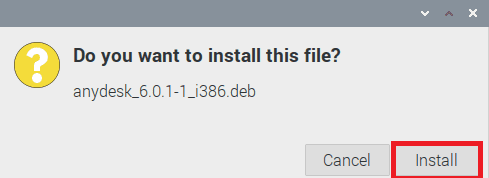
Click install
At this point, we now have AnyDesk software installed on our Raspberry Pi. Next, we need to ensure no packages are missing. Interestingly, for our case, we will run the following command to use the apt package manager to fix any missing packages.
sudo apt-get install -f
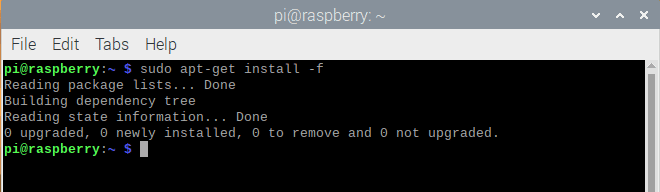
package fix command
After running this command, you should now be ready to get the software up and running.
Using the AnyDesk Software
This section will display how easy it is to open and run the software that we just installed. To add on, we will also show you how to handle an incoming remote connection.
1. There are two different ways that you can utilize to open AnyDesk on your Pi machine.
We will start with the most straightforward way, including a simple click on the AnyDesk icon that should have been spontaneously added to the taskbar at the top of the screen.
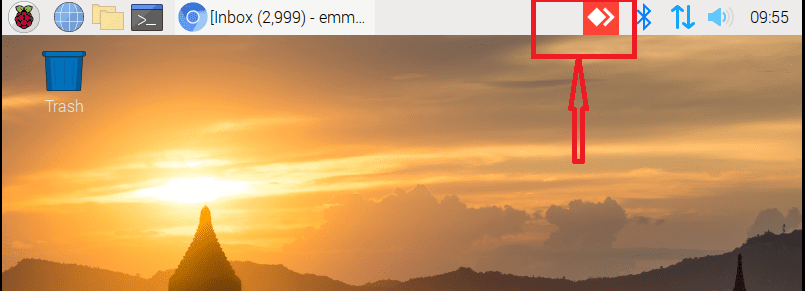
anydesk open step 1
Then again, you can find it within the desktop interfaces start menu.
- You will need to hover over the internet option on the start menu.
- Upon hovering over the internet option, a sub-menu will appear; you should see the “AnyDesk” option, click on it to open.
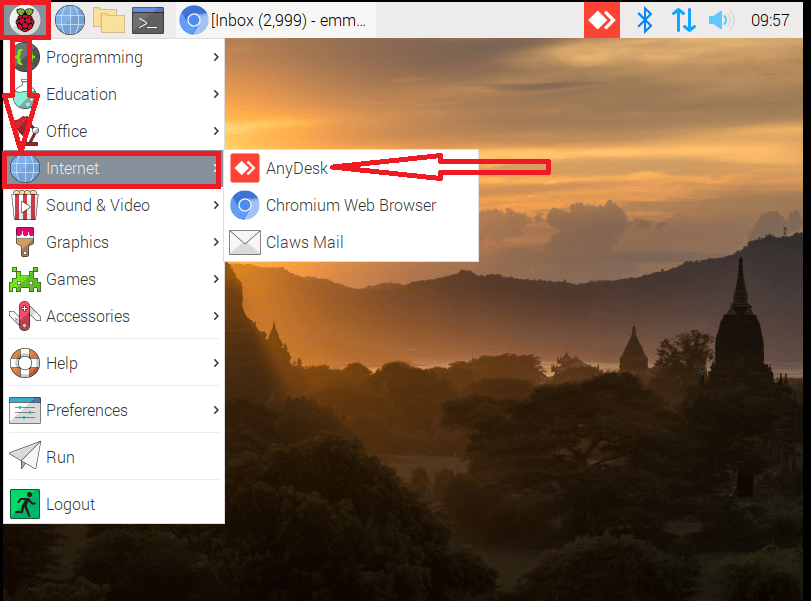
The menu option
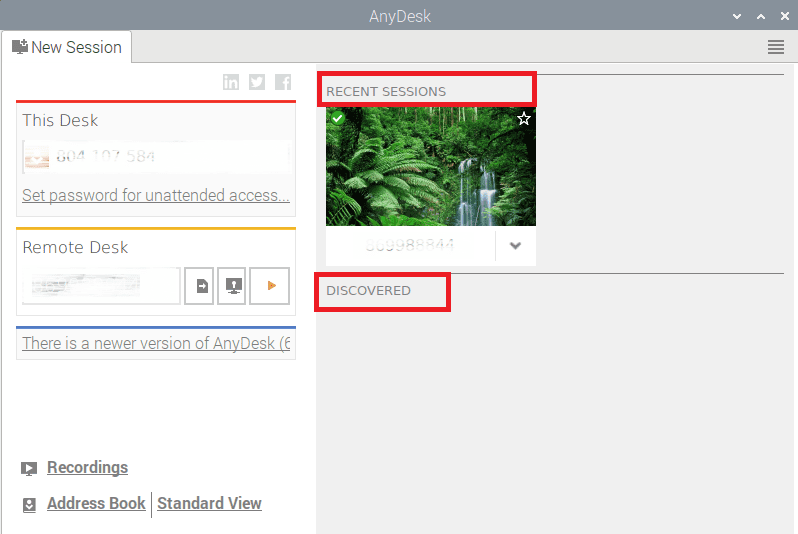
2. At this juncture, you should now be greeted by the AnyDesk remote interface.
The first thing displayed is the Identification (ID) situated beneath the written “This Desk” title. So, you will use this ID to link (connect) to your Pi machine from another PC running the AnyDesk software.
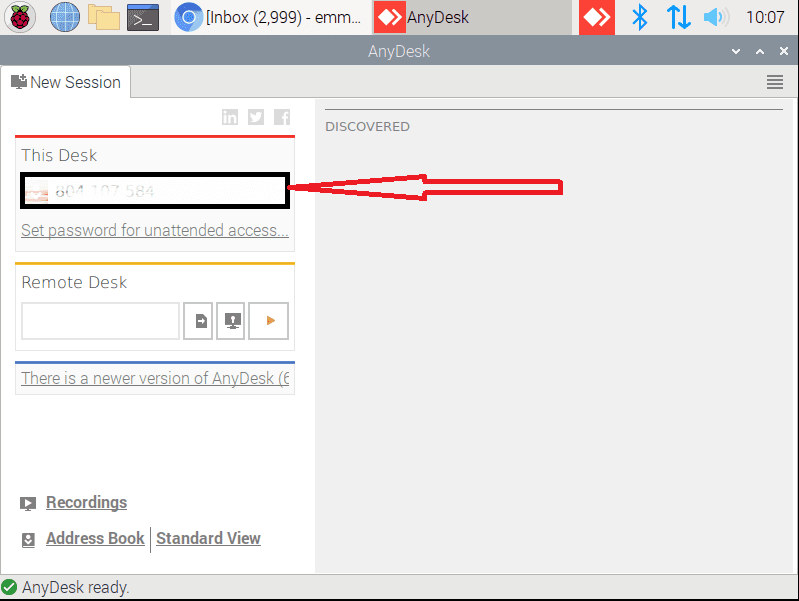
anydesk welcome window
3. Contrastingly, it is also possible to use the AnyDesk Raspberry Pi client to connect to another PC. Below the “Remote Desk” title, you should locate a textbox. So, you will use this textbox to input the ID for the PC you want to connect to.
With your other PC or partner’s ID (code) entered, you can initiate the connection by hitting the play-like icon (button) at the end of the row.
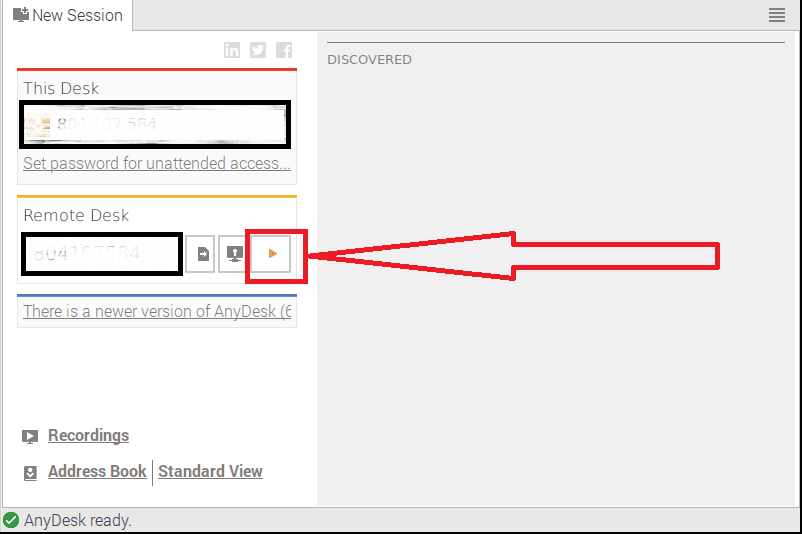
remote client
When you connect the other device (your other PC or partners), you will have to wait for them to interlink (approval of connection). If they have unattended access set up, you may have the choice of typing in your login credentials.
Getting a Remote Desktop Connection
When your Pi machine obtains a remote connection from an AnyDesk client, the connection process is unbelievably simple.
1. When you are on the other hand of receiving an incoming connection, you will see such a similar screen:
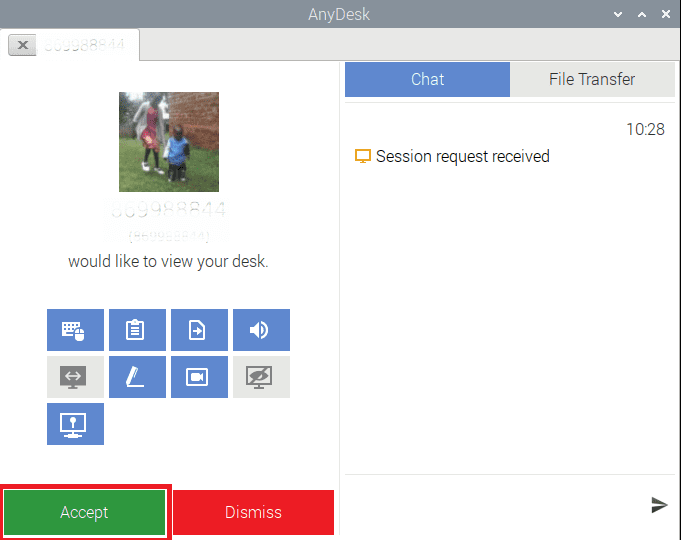
accept
Using this screen, you can accept or instead terminate an incoming connection. Furthermore, you can use the dialog box written “chat” to talk with the user on the incoming connection.
If you are sure that the connection is from the user you want to obtain a remote desktop link (connection) from, you can hit the green “Accept” button.
connected session
2. If you admit the connection, it is an equally simple progression to disconnect from the user. All you need to do that is click the “Disconnect” button.
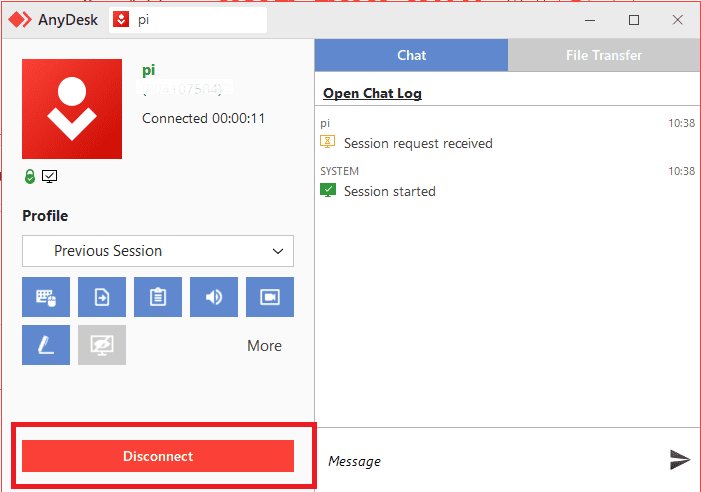
disconnect button
While the user is still connected, they still can control your operating systems as if they were there. Hence, we recommend being careful with who you give access to as a safety precaution.
Configuring Unattended Access
Are you looking for a way of accessing your Raspberry Pi using Anydesk without being there physically to approve the connection? If that is the case, you need not worry since the AnyDesk software ships with inbuilt support for unattended access.
Using this option, you can allow someone to enter a password to access your system remotely. Additionally, you can even enforce the 2-factor authentication support.
Step 1. We first need to get to the software (AnyDesk) settings to enable this option. And to do this, click the hamburger icon on the top right of the screen. After that, a drop-down menu should appear, look for settings and click on it.
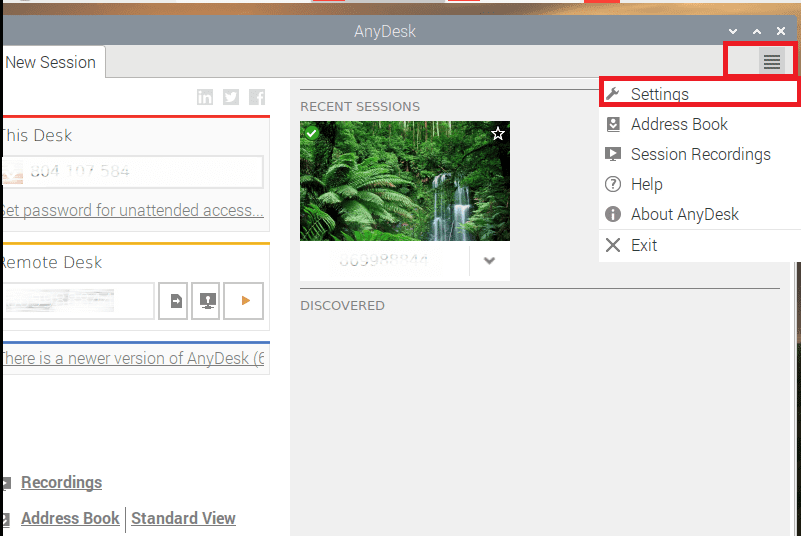
select settings
Step 2. We will need to change to the Security panel between the settings menu. However, we will not modify these settings until we unlock the settings. To begin the unlock process, click on “unlock security settings.”
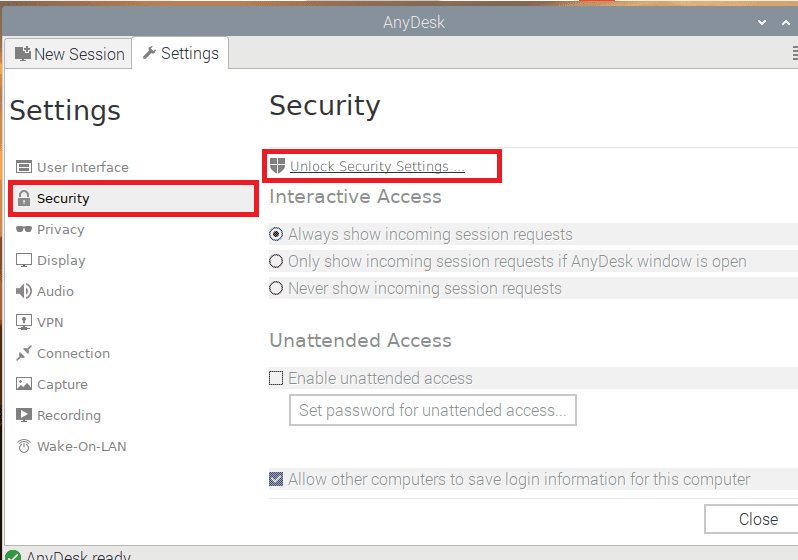
security settings
Step 3. Here, you will be required to carry out the authentication process. First, the identity should be habitually set to the current user, the “Pi” in our event. After that, input the password for the particular user, then click the “OK” button to unlock the settings.
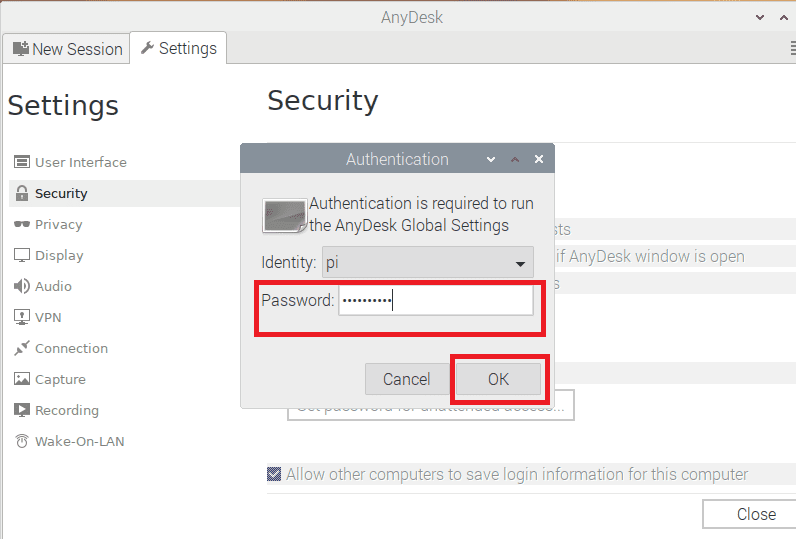
credentials section
Step 4. At this point, we can now play around or instead adjust the security settings, such as enabling unattended access to your Pi machine. To do this, Find the “Enable unattended access” option on this page and click on it to begin configuring the setting.
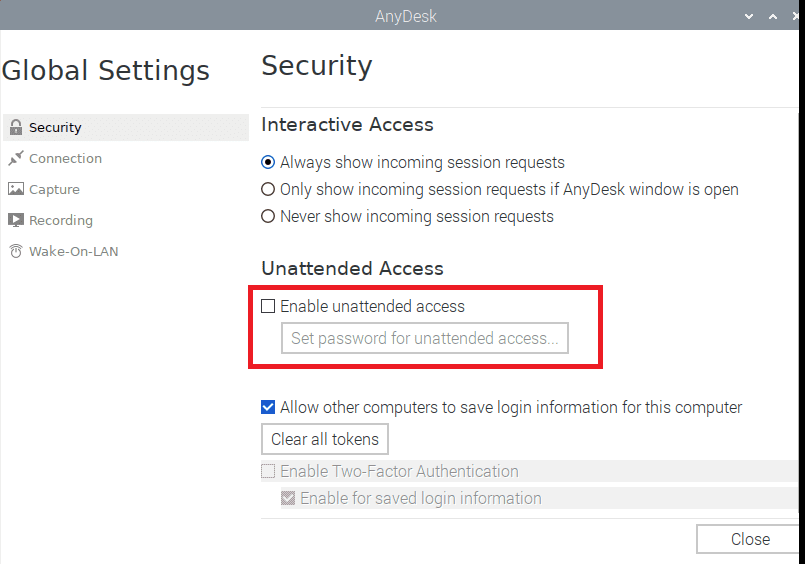
select unattended access
Step 5. Before using the unattended access, you will be required to set a password. As such, you will enter your preferred password and repeat the same password on the confirm section before completing the AnyDesk connection.
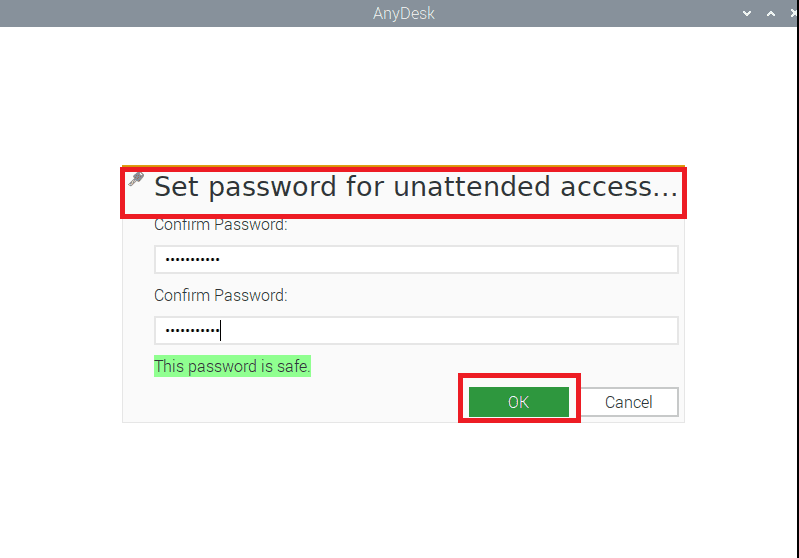
Once you have inputted the password, click the “OK” button to authorize it.
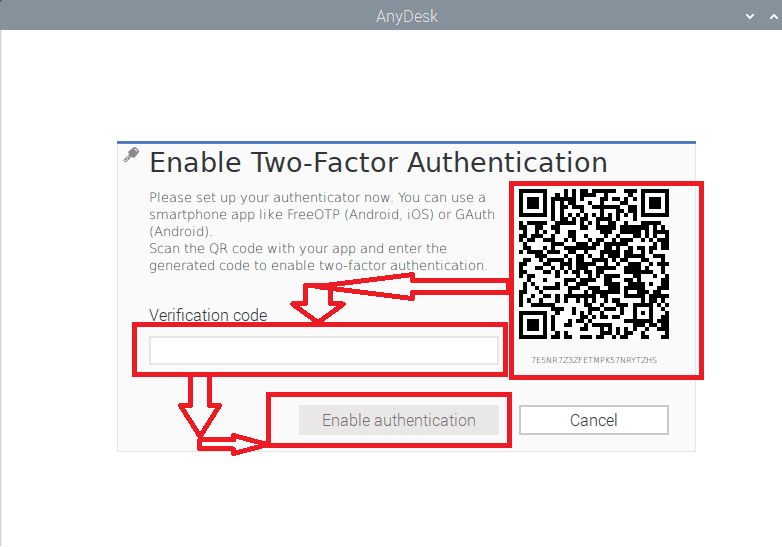
Step 6. If you are setting a password for unattended access for the first time, you may be urged to enable two-factor authentication. In this event, we advocate that you enable this feature as it aids in boosting the security of your device. If you don’t prefer using 2FA, click the “Cancel” button.
But if you are interested in using 2FA, scan the provided QR code using a 2FA application such as Authy or Google Authenticator. Upon scanning the code, you should start seeing generated codes on your device. Type this code to the provided textbox.
With everything set correctly, click the “enable authentication” button.
two-factor authentication
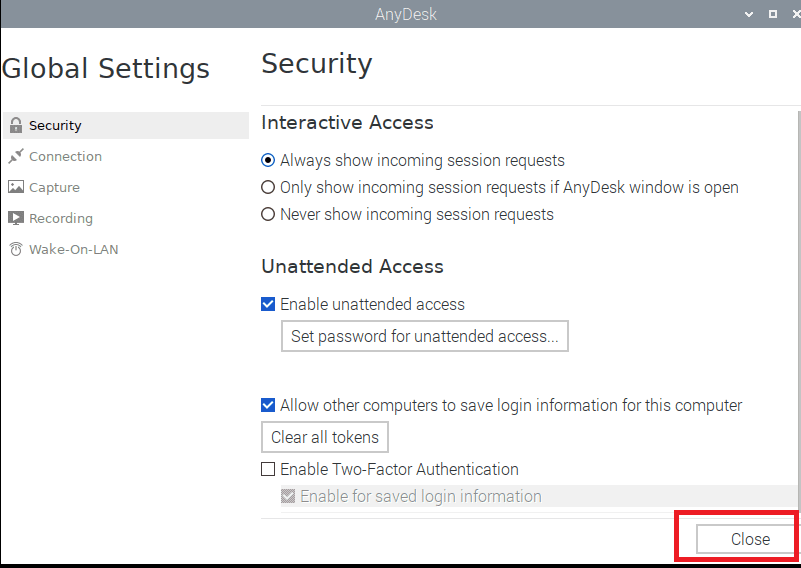
Step 7. Once you are done with the process of enabling unattended access on AnyDesk, you can now close out settings using the “Close” button at the bottom of the page.
close button
So, next time someone connects using your AnyDesk code, they will now be able to connect using a password instead of manually approving the connection.
Conclusion
AnyDesk is a worth trying software for any Pi user because of the advantages it ships with. Hopefully, this review has shown you how to get AnyDesk software up and running on your Raspberry Pi. We believe that you will get this right without any hitches with the steps followed. For the TeamViewer fanatics, you can try out this fantastic alternative of the Teamviewer to even connect to other remote devices. If you ram into any issues with getting AnyDesk installed, feel free to share with us in the comment section below. Otherwise, thanks for reading!