
A VPN (Virtual Private Network) is a technology that allows you to connect to a remote network over the internet securely. It can be helpful for DietPi and Raspberry Pi because it can help you protect your privacy and security by encrypting your internet traffic and hiding your IP address, making it harder for hackers or eavesdroppers to intercept your data or track your online activity.
Additionally, a VPN can help bypass internet censorship, access geo-restricted content, and improve your online anonymity. For example, some websites are only accessible to users in a particular country. With the help of a VPN, you can still access such sites, even from other countries.
If you are looking forward to installing DietPi on your Raspberry Pi, check out our comprehensive post – The beginner’s guide to setting up DietPi on Raspberry Pi. It will give you a detailed guide on setting up DietPi on your Raspberry and installing a Desktop Environment.
Types of VPNs available for DietPi
When setting up a VPN server on DietPi, there are various VPN protocols and types to choose from. The choice of VPN protocol will depend on the user’s specific needs, and the level of security and performance required. DietPi supports various VPN applications, including:
1. OpenVPN: Open-source VPN software supports multiple encryption protocols and is highly configurable. It’s widely used in many VPN services and can be set up on different platforms, including Raspberry Pi.
2. PiVPN: A command-line tool that helps to set up a VPN server using OpenVPN on a Raspberry Pi. It simplifies the installation and configuration process and allows users to connect to their home network remotely.
3. WireGuard: A newer open-source VPN protocol designed to be faster, simpler, and more secure than other VPN technologies. It has gained popularity due to its modern cryptographic design and ease of use.
4. Tailscale: A mesh VPN solution that provides secure access to a private network across different devices and locations. It uses a unique authentication mechanism to establish a secure connection between devices, making it easy to set up and use.
5. ZeroTier: Another mesh VPN software that allows for easy and secure connectivity between different devices and networks, even behind firewalls or NATs. It uses end-to-end encryption and has a straightforward user interface, making it a popular choice for personal and business use.
When choosing a VPN type and protocol for DietPi, it is important to consider the level of security required, the desired performance, and the compatibility with the devices and networks that will be using the VPN connection. OpenVPN and WireGuard are popular choices due to their high security and performance.
Setting up OpenVPN server on DietPi
Installing OpenVPN and performing all the configurations manually can be quite a technical and intimidating procedure, especially for users who are not well-versed in Linux systems. To streamline this whole process, we will use a script available on GitHub. This script will do all the “dirty” work for you and supports a wide range of platforms.
Follow the steps below to set up the OpenVPN server on DietPi
Step 1: Install Curl on your DietPi system by executing the command below. The curl command in Linux is a command-line tool used for transferring data from or to a server using various protocols, including HTTP, HTTPS, FTP, FTPS, SMTP, and more. curl can be used to download files from the internet, test APIs, and perform other tasks that involve transferring data over a network.
sudo apt install curl -y
Step 2: Now download the installation script from GitHub using the curl command. Copy the command below and execute it on your Terminal.
curl -O https://raw.githubusercontent.com/angristan/openvpn-install/master/openvpn-install.sh

Download Installation Script
You should see the script downloaded in your home directory when you run the ls command.
Step 3: Make the script executable by executing the command below.
sudo chmod +x openvpn-install.sh
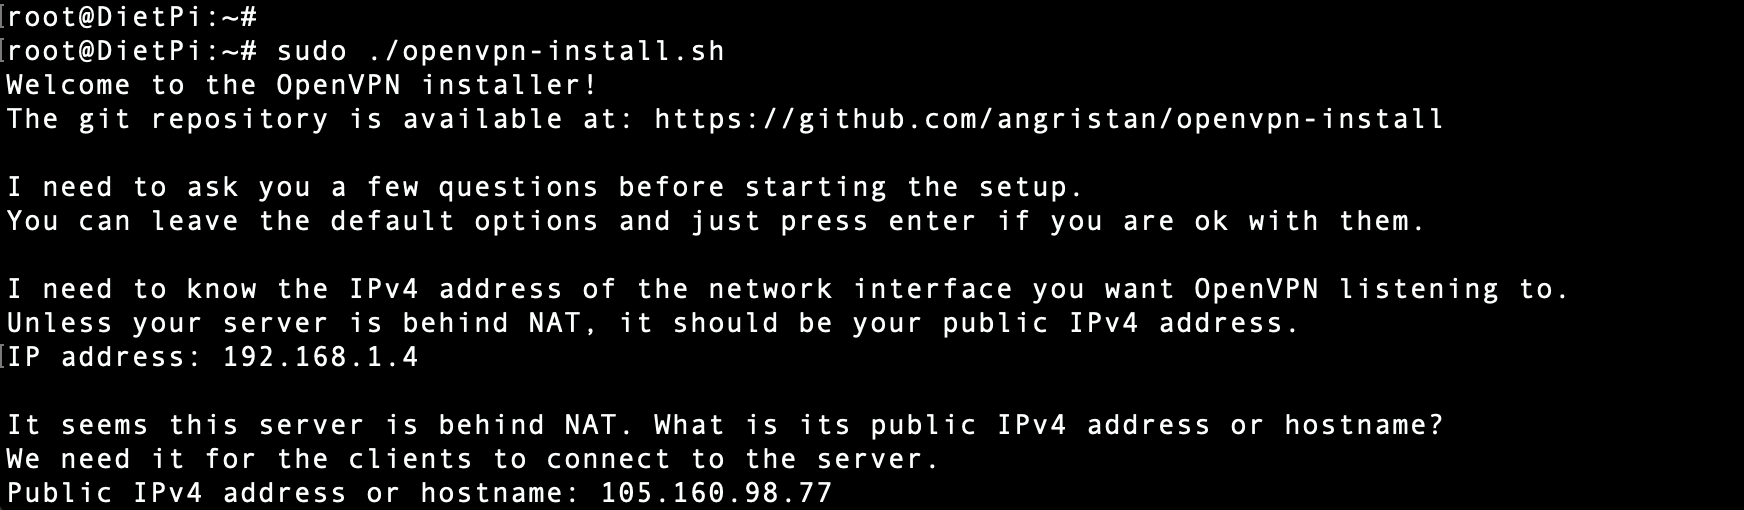
Step 4: Execute/ launch the script using the command below.
sudo ./openvpn-install.sh
This action will open the OpenVPN installer.
Install OpenVPN
You will see several prompts about the configurations you want to apply on your server and the features you want to enable or disable.
Once the installation is complete, the script will generate a configuration file in your current working directory with the file extension “.ovpn.” This file is crucial as it is required to configure clients that want to connect to this OpenVPN server.
Connecting a Debian client to the OpenVPN server
To connect a Debian OS to an OpenVPN server on DietPi – Raspberry Pi, you can follow these steps:
Install the OpenVPN client on your Debian system using the package manager. For example, you can run the following command to install the OpenVPN client:
sudo apt-get install openvpn
After successfully installing OpenVPN, you must copy the client configuration file (usually a .ovpn file) from the DietPi system to your Debian system. That is the configuration file generated by the OpenVPN installation script and saved with the “.ovpn” extension.
You can use different methods to copy the configuration from the DietPi system to your Debian Operating system. For example, you can physically connect a USB drive to the Raspberry Pi, copy the file to the USB and transfer it to your Debian system.
However, that would be tedious and hectic. We recommend using the SCP (Secure Copy) command, as shown below. You can check out our comprehensive post – 15 ways to use the SCP command to transfer data in Linux to understand the SCP command in-depth.
scp user@dietpi:/path/to/client.ovpn /path/to/save/client.ovpn
e.g
scp root@192.168.1.5:/root/dietpi_vpn.ovpn /home/johndoe/
Replace user with your username on the DietPi system, /path/to/client.ovpn with the path to the client configuration file on the DietPi system, and /path/to/save/client.ovpn with the path and filename where you want to save the file on your Debian system.
Edit the client configuration file and update the remote server IP address, hostname, and port number if they differ from the default values. You can use a text editor to open the file and make the changes. For example:
remote 192.168.1.4 1194
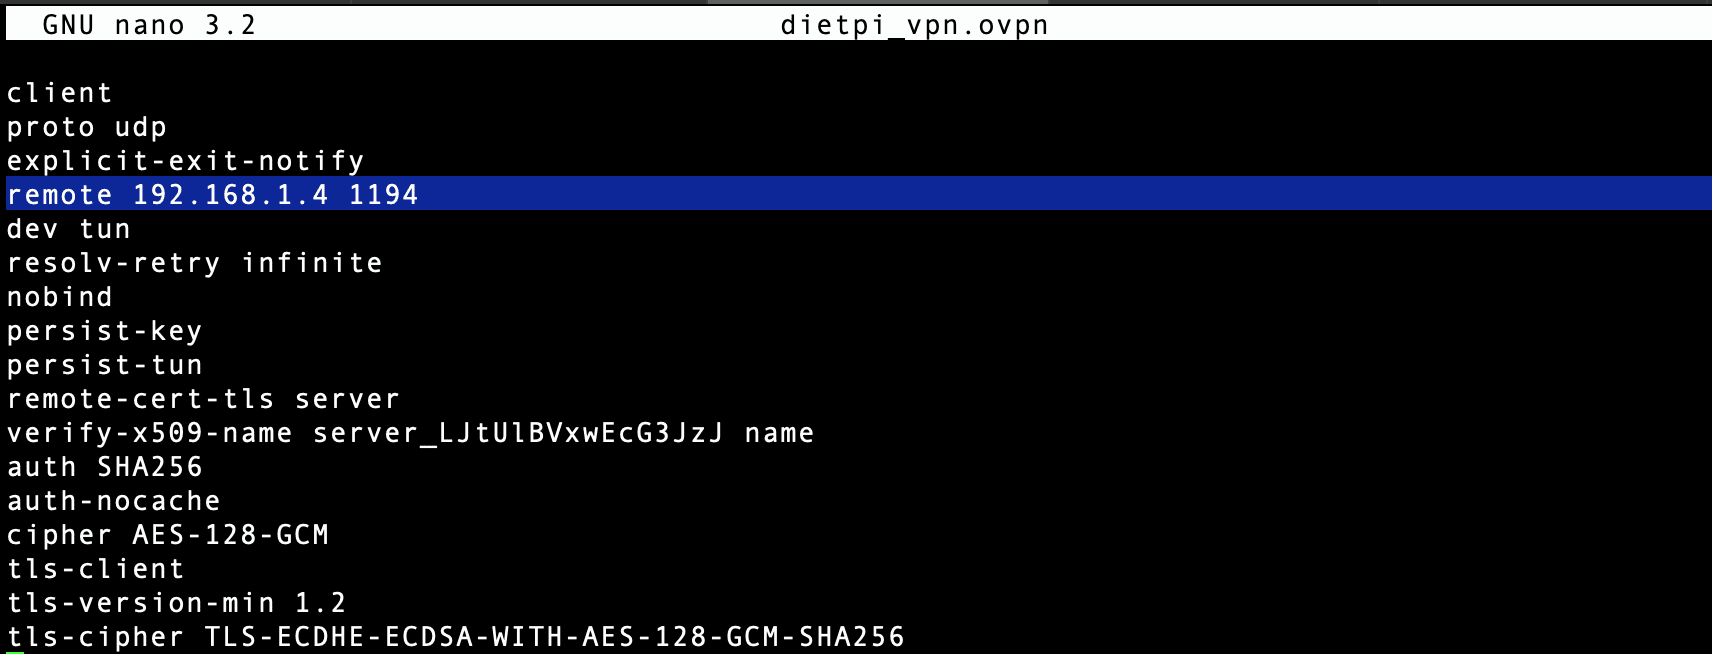
Edit the Configuration File
Replace 105.160.43.162 with the IP address or hostname of your DietPi system and 1194 with the port number used by the OpenVPN server on the DietPi system. For example, in our case, the IP address of our Raspberry Pi is 192.168.1.4
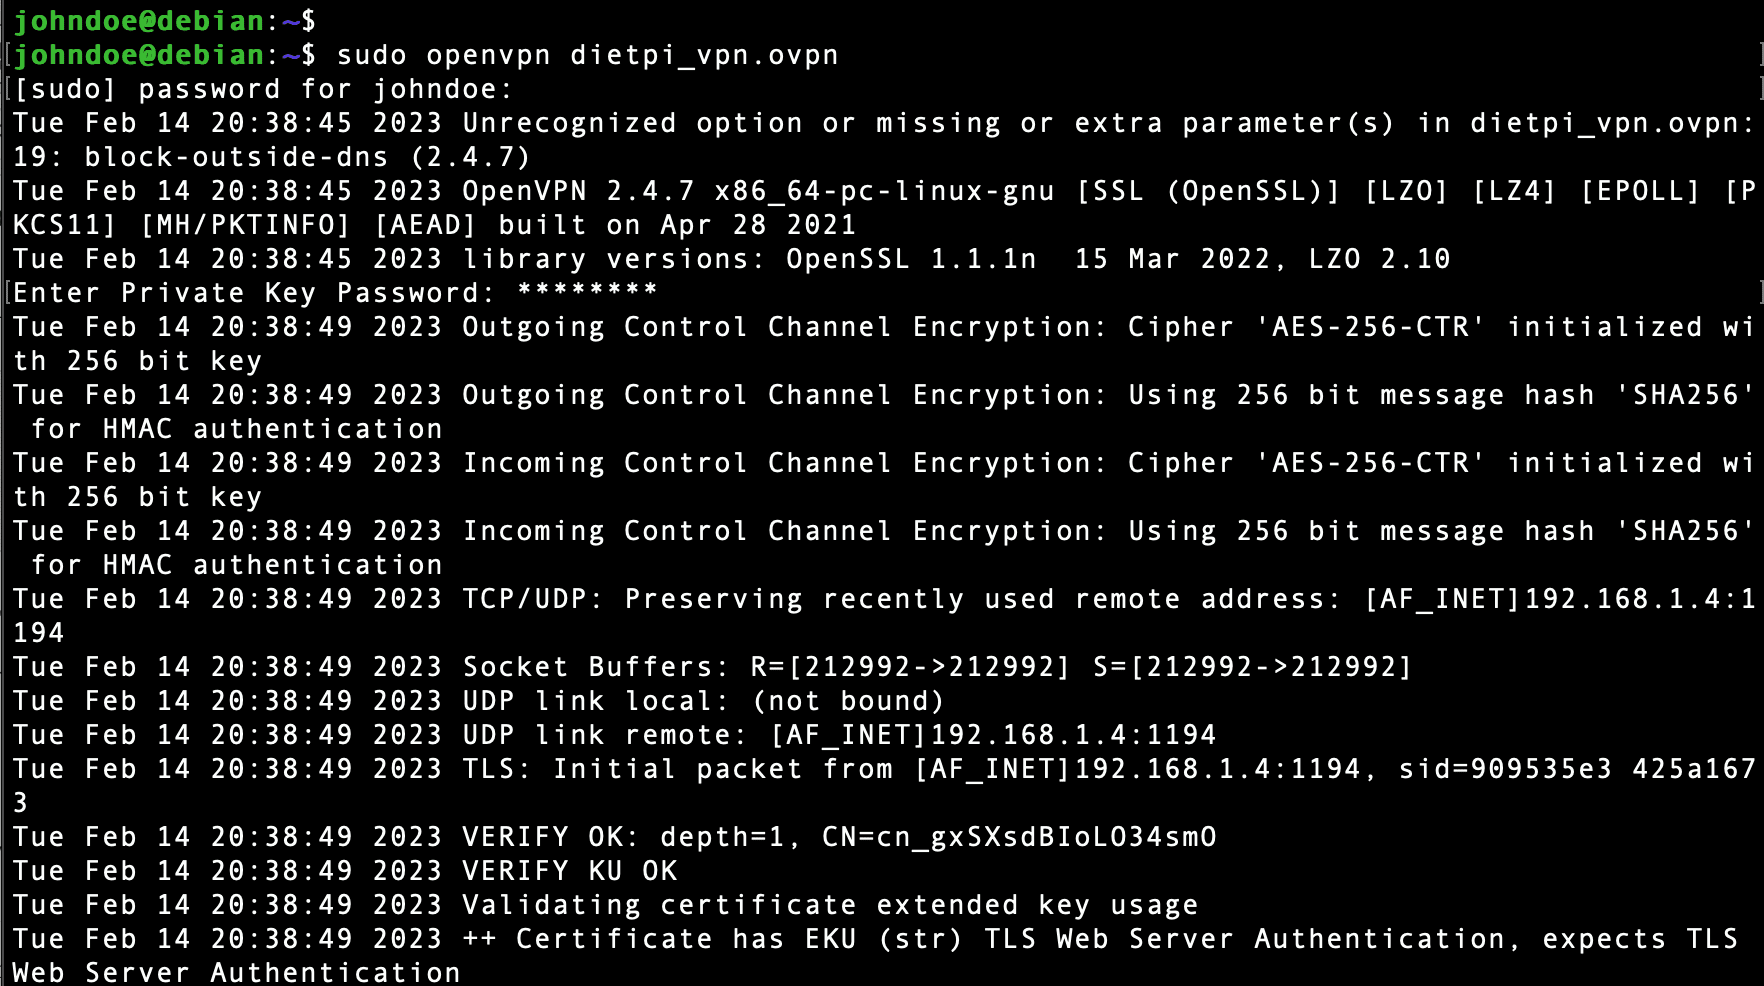
Run the OpenVPN client with the client configuration file as an argument.
sudo openvpn /path/to/client.ovpn
e.g
sudo openvpn dietpi_vpn.ovpn
As shown in the image below, this will start the OpenVPN client and establish a connection to the OpenVPN server on the DietPi system.
Connect to the VPN server
Verify the connection by checking the OpenVPN logs and verifying that you have been assigned an IP address on the VPN network. You can use the ifconfig command to check your IP address, and the sudo journalctl -u openvpn command to view the OpenVPN logs.
That’s it! You should now be connected to the OpenVPN server on the DietPi system from your Debian system.
Wrapping up
In conclusion, setting up a VPN server on DietPi is a great way to secure your internet connection and protect your online privacy. Several VPN software applications are available, such as OpenVPN, PiVPN, WireGuard, Tailscale, and ZeroTier, each with its own strengths and weaknesses. Once you have chosen a VPN application, you can install it on your DietPi system and configure it to your liking.
This post has given you a comprehensive guide on setting up the OpenVPN server on a Raspberry Pi. Did you encounter any errors? Please let us know in the comments below.