
OpenCV is an open-source Python library whose main focus is computer vision, image processing, and ML (Machine Learning). The OpenCV library plays a huge role in real-time systems. It is capable of identifying photographs and videos and identifying human faces too. When used together with libraries such as Numpy, it is capable of processing the OpenCV array structure. That enables identifying image patterns and features where we use vector space and mathematical operations.
OpenCV is available for several platforms, including Linux and Windows. In this tutorial, however, we will be installing OpenCV on our Raspberry Pi 4.
Installing OpenCV on Raspberry Pi 4
There are two methods you can use:
- Compile OpenCV from source (highly recommended Raspberry installation)
- Install OpenCV using Python Pip.
For those who have worked with OpenCV before, you know installing the library source can be quite a time-consuming and painstaking process. For Linux newbies, skipping a single step while executing the Terminal commands can lead to a fatal error. A solution to this is installing OpenCV via Python Pip. Pip is easier and much faster, but from experience, while working on several projects, I wouldn’t recommend it for a Raspberry installation. For large projects and even some educational projects, you would want to install OpenCV from the source. In this tutorial, we will look at both methods, and you can choose the one that works for you.
Requirements
- A Raspberry Pi 4 board
- Raspberry Pi official operating system
- An active internet connection
- A reliable power supply
- Balena Etcher
- At least 8GB SD card
With the above items, you can install OpenCV over SSH without the need for a graphical display. Do you know you can actually enable ssh and connect to wifi without a monitor on Raspberry Pi? Check our post – Connecting to Wi-Fi & Enabling SSH Without Monitor on Raspberry Pi.
If you prefer doing everything via the Pi’s graphical interface, then you will need the additional items below:
- A monitor/ TV screen with HDMI support
- A micro-HDMI to HDMI cable: If your monitor doesn’t support a VGA-to-HDMI converter.
Install Raspberry Pi OS
The operating system of choice in this particular tutorial is the Official Raspberry PI OS. If you haven’t installed it, Download the image from the link below:
Once downloaded, use Balena Etcher to burn the operating system to the SD card. You can check our post on How to install Raspberry Pi OS, which will give you a step-by-step procedure on carrying out the installation.
Expand the Filesystem
The Raspberry Pi OS root system is set to 2GB size by default. This might not be enough for us since the OpenCV library can occupy quite some space leaving you with only a small amount to hold other files. A quick solution to this would be to expand the Pi’s file system to fill out the rest of the unused space. Follow the steps below:
Launch the Terminal and execute the command below.
sudo raspi-config
That will open the Raspberry PI configuration tool window. Select Advanced Options and hit Enter.
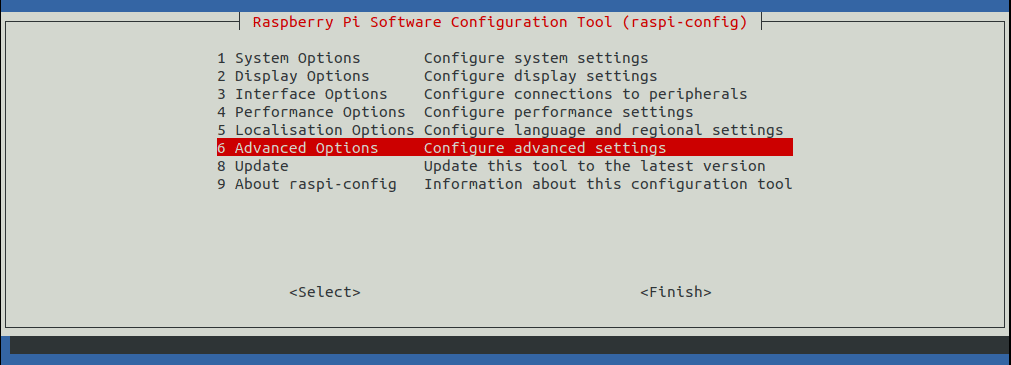
Raspi configuration tool
On the new window that appears, select A1 Expand Filesystem and hit Enter.
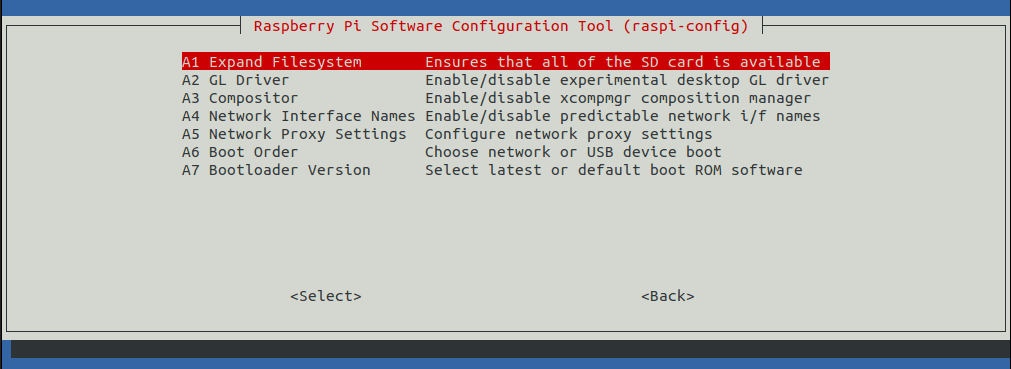
Expand filesystem
You will see a notification message –“the filesystem will be resized” on the next reboot. Click OK and reboot the Raspberry Pi. The process might take a couple of minutes – please be patient.
Install OpenCV dependencies
To get started, ensure you update your system by executing the commands below:
sudo apt update
sudo apt upgrade
Next, we will install the CMake developer tool necessary for building OpenCV. Execute the command below:
sudo apt install build-essential cmake pkg-config
We will also install additional libraries for opening image files on our computer. That includes JPG, JPEG, PNG, et. Execute the command below:
sudo apt install libjpeg-dev libtiff5-dev libjasper-dev libpng-dev
Other than images, we also need libraries that will enable the use of video files. Install these libraries with the commands below:
sudo apt install libavcodec-dev libavformat-dev libswscale-dev libv4l-dev
sudo apt install libxvidcore-dev libx264-dev
Now we have both images and videos sorted out. To display images on our computer screens and even develop Graphical User Interfaces (GUI) for our projects, we will need a module called highgui. That will require us to install all the necessary GTK libraries. Execute the commands below:
sudo apt install libfontconfig1-dev libcairo2-dev
sudo apt install libgdk-pixbuf2.0-dev libpango1.0-dev
sudo apt install libgtk2.0-dev libgtk-3-dev
For carrying out matrix operations, we will need to install additional dependencies. Execute the command below.
sudo apt install libatlas-base-dev gfortran
If you wish to install OpenCV via pip, install the additional libraries below necessary for HD5 datasets and the development of QT GUIs. There will be no problem even if you install OpenCV via source code. Execute the commands below:
sudo apt install libhdf5-dev libhdf5-serial-dev libhdf5-103
sudo apt install libqt5gui5 libqt5webkit5 libqt5test5 python3-pyqt5
Lastly, we will need to install Python 3 header files necessary for compiling OpenCV. Execute the commands below:
sudo apt install python3-dev

Install Python3-dev packages
If your OS is up to date, you will probably see the message above. “python3-dev is already the newest version.”
Install Numpy and create a Python Virtual environment
Virtual environments are beneficial as they create an isolated environment for running your Python projects. Therefore, every project in a virtual environment has its own set of dependencies and libraries regardless of the libraries available for other projects.
To get started installing a virtual environment on our Raspberry, we will first need to install pip. Execute the commands below to install pip.
sudo apt-get install python3-pip
With pip installed, we can now proceed to install virtualenv and virtualenvwrapper. These are great packages that you can use to manage your virtual environments in Python. Execute the commands below.
sudo pip3 install virtualenv virtualenvwrapper
Once the installation completes, we will need to edit the .bashrc file and point to the locations of the virtualenv and virtualenvwrapper. Execute the command below to open the .bashrc file with the nano editor.
nano ~/.bashrc
Add the following lines at the bottom of the file.
# virtualenv and virtualenvwrapper
export WORKON_HOME=$HOME/.virtualenvs
export VIRTUALENVWRAPPER_PYTHON=/usr/bin/python3
source /usr/local/bin/virtualenvwrapper.sh
Save the file (Ctrl + O, then Enter) and Exit (Ctrl + X). You will need to refresh the .bashrc file to apply the changes. Execute the command below.
source ~/.bashrc
Before getting started with OpenCV installation, we will need to create a virtual environment for our projects. Let’s call it sbb_cv. Execute the command below:
mkvirtualenv sbb_cv -p python3
You can use any name for the virtual environment, not necessarily sbb_cv. Additionally, if you are using a Raspberry Pi Camera for your projects, then you will need to install the PiCamera API with the command below:
pip3 install "picamera[array]"
Now we have all the necessary libraries, dependencies, and even a virtual environment set up. Let’s proceed to install OpenCV.
Install OpenCV
As described above, we will look at two ways which you can use to install OpenCV on your Raspberry.
- Method 1 – Install OpenCV with pip.
- Method 2 – Install OpenCV from the source.
Please select one method which you will use for the rest of your installation process. You can’t use both.
Method 1: Install OpenCV with pip on Raspberry
This method is one of the easiest and fastest ways to install OpenCV on your Raspberry Pi. I would highly recommend this for beginners and if you are time conscious since it only takes a couple of minutes. Execute the commands below.
If you had created a virtual environment, execute the command below to activate. If not, skip this step and proceed to install OpenCV
workon sbb_cv

activate virtual environment
You will notice the terminal prompt change and now start with the name of the virtual environment. To exit the virtual environment, use the deactivate command.
Once inside the virtual environment, you can now install OpenCV. Execute the command below.
pip3 install opencv-python
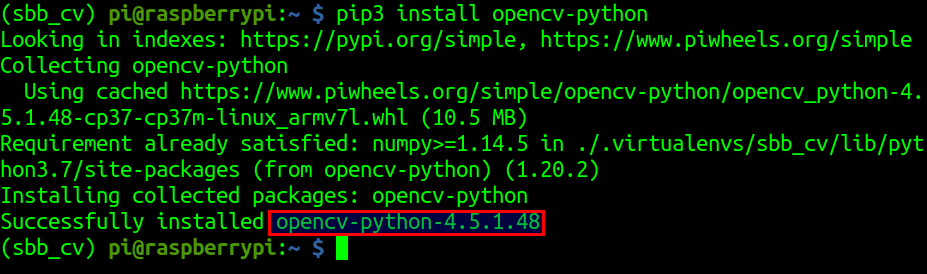
Install OpenCV with pip
From the image above, you can see we have successfully installed OpenCV version 4.5.1.48. That’s it! You are done with OpenCV installation. To test OpenCV in your project, skip to the Test section at the bottom of the article.
Method 2: Install OpenCV from the source
If you need a full installation of OpenCV, which includes patented algorithms, then you should use this method. Unlike the pip install method, which only takes a couple of minutes, compiling OpenCV from the source can take around two (2) hours. Follow the steps below:
Step 1. Activate your virtual environment with the workon command below.
workon sbb_cv
Step 2. Download the source code for both OpenCV and Opencv_contrib from Github. Use the wget commands below.
wget -O opencv_contrib.zip https://github.com/opencv/opencv_contrib/archive/4.5.2.zip
wget -O opencv.zip https://github.com/opencv/opencv/archive/4.5.2.zip
If you get an error like ‘wget command not found,’ then you will need to install it with the command – sudo apt install wget
Step 3. We need to unzip the contents of the two files we downloaded. Use the unzip command as shown below:
unzip opencv.zip
unzip opencv_contrib.zip
Step 4. After extracting the zip files, we will have two folders – opencv-4.5.2 and opencv_contrib-4.5.1. Let’s rename these two to something memorable like opencv and opencv_contrib.
mv opencv-4.5.2 opencv
mv opencv_contrib-4.5.1 opencv_contrib

Rename folders
Step 5. Compiling OpenCV can be quite heavy on the Raspberry Pi memory. To avoid freezing or hanging, we can increase the SWAP space and utilize all four cores of the Pi in the compiling process. To do so, we will edit the dphys-swapfile present in the /etc. directory. Execute the command below to open dphys-swapfile with the nano editor.
sudo nano /etc/dphys-swapfile
Find the line – CONF_SWAPSIZE and set its value to 2048. See the image below.

Increase SWAP space
Once done, save the file (Ctrl + O, then Enter) and Exit (Ctrl + X).
To apply the changes, restart the SWAP service with the commands below:
sudo /etc/init.d/dphys-swapfile stop
sudo /etc/init.d/dphys-swapfile start
Step 6. Now, we have everything set to start compiling and installing OpenCV. Activate the virtual environment with the workon command.
workon sbb_cv
Step 7. Install Numpy with the pip command.
pip3 install numpy

Install Numpy
Step 8. With NumPy installed, we can now start configuring OpenCV. Navigate to the OpenCV directory to get started.
Note: You need to be in the /opencv/build directory when executing the cmake command. You can use the pwd command to see your current working directory.
cd opencv
mkdir build
cd build
cmake -D CMAKE_BUILD_TYPE=RELEASE \
    -D CMAKE_INSTALL_PREFIX=/usr/local \
    -D OPENCV_EXTRA_MODULES_PATH=~/opencv_contrib/modules \
    -D ENABLE_NEON=ON \
    -D ENABLE_VFPV3=ON \
    -D BUILD_TESTS=OFF \
    -D INSTALL_PYTHON_EXAMPLES=OFF \
    -D OPENCV_ENABLE_NONFREE=ON \
    -D CMAKE_SHARED_LINKER_FLAGS=-latomic \
    -D BUILD_EXAMPLES=OFF ..

Configure OpenCV
The cmake command might take a couple of minutes to execute. Please be patient.
Step 9. We have already configured OpenCV for installation. Now let’s start compiling with all the Four cores of the Pi. Execute the command below:
make -j4
This is one of the longest steps. It might take between 1 to 4 hours, depending on the Raspberry Pi board you are using. As of writing this post, Raspberry Pi 4 is the fastest.
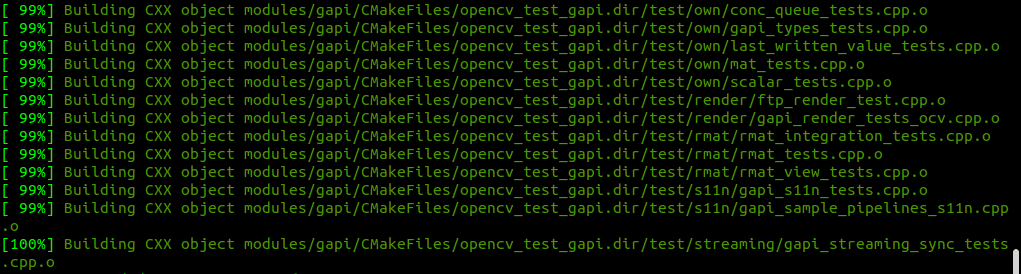
Compiling OpenCV
Step 10. Once the compiling process completes without an ERROR, we can now install OpenCV. Execute the commands below:
sudo make install
sudo ldconfig
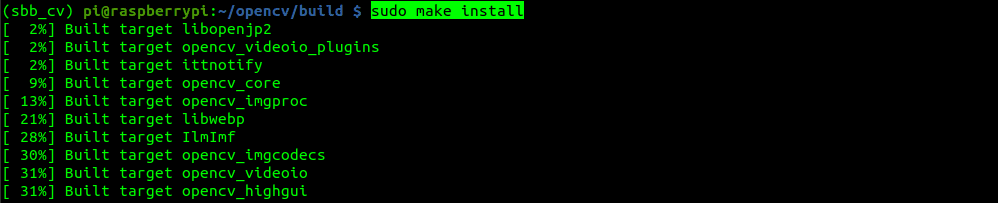
Install OpenCV
Step 11. Since we are done with installing OpenCV, we can reset the SWAP size to 100MB. Edit the /etc/dphys-swapfile and set the value of CONF_SWAPSIZE to 100MB as described in Step 5 above. Remember to Restart the swap service with the commands below:
sudo /etc/init.d/dphys-swapfile stop
sudo /etc/init.d/dphys-swapfile start
Step 12. To finalize our installation, we will create symbolic links of cv2 to our virtual environment – in this case, sbb_cv.
Note: The Python version and the virtual environment in the commands below might not be similar to yours. Therefore, copy-pasting these exact commands might raise an error. I advise you use the tab button to autocomplete the commands for you.
cd /usr/local/lib/python3.7/site-packages/cv2/python-3.7/
sudo mv cv2.cpython-37m-arm-linux-gnueabihf.so cv2.so
cd ~/.virtualenvs/sbb_cv/lib/python3.7/site-packages/
ln -s /usr/local/lib/python3.7/site-packages/cv2/python-3.7/cv2.so cv2.so
That’s it! We have successfully installed OpenCV on our Raspberry Pi and can now test it in our projects.
Testing OpenCV module on Raspberry Pi
For this particular post, we will test OpenCV on a Python shell.
$ workon sbb_cv
$ python3
>>> import cv2
>>> cv2.__version__
'4.5.2'
>>>
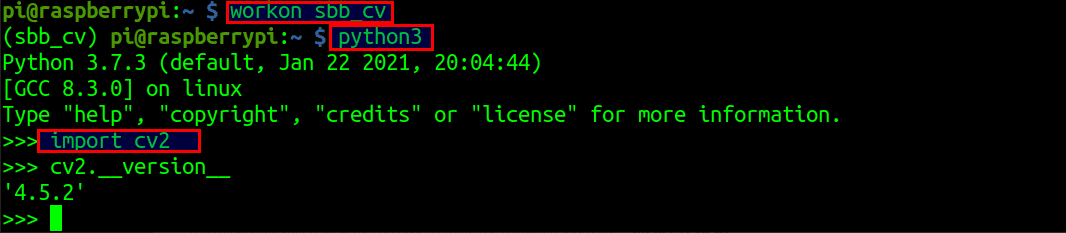
Test OpenCV
Congratulations! You have successfully installed OpenCV on your Raspberry Pi.
Conclusion
We have now come to the end of our tutorial. If you installed OpenCV with pip, I believe the process wasn’t complicated, and all went well. If you decided to install OpenCV by compiling the source code, I understand the process might have been quite hectic and time-consuming. Luckily, you now have all packages needed, including patented and non-patented algorithms. If you come across any error while executing the commands above, please leave a comment below and also remember to share the error message.
21 comments
Hi, Everything runs OK till I type
import cv2
The error is as below:
(sbb_cv) pi@pi4:~ $ python3
Python 3.7.3 (default, Jan 22 2021, 20:04:44)
[GCC 8.3.0] on linux
Type “help”, “copyright”, “credits” or “license” for more information.
>>> import cv2
Traceback (most recent call last):
File “”, line 1, in
File “/home/pi/.virtualenvs/sbb_cv/lib/python3.7/site-packages/cv2/__init__.py”, line 5, in
from .cv2 import *
ImportError: libIlmImf-2_2.so.23: cannot open shared object file: No such file or directory
>>>
I used: Method 1: Install OpenCV with pip on Raspberry
Thanks
Pi4 with Bullseye OS 211118
sudo apt install libqtgui4 libqtwebkit4 libqt4-test python3-pyqt5 no longer works.
This did
sudo apt install libqt5gui5 libqt5webkit5 libqt5test5 python3-pyqt5
ok i have a question, how can i use this cv2 on my imported project?
After following your instructions above and using pip for install how do I get access to cv2 using Thonny from raspberry pi desktop?
Step 7. Install Numpy with the pip command.
pip3 install numpy
–> error
note: This error originates from a subprocess, and is likely not a problem with pip.
ERROR: Failed building wheel for numpy
Failed to build numpy
ERROR: Could not build wheels for numpy, which is required to install pyproject.toml-based projects
please help me
I have the same error, where you aible to solve it? I haven’t found any documentation about it
Yes – I found a fix after a long time.
For me on buster it was trying to do latest version of Numpy which was not compatible (only works on Bullseye)
You need to force it to use version 1.21.4 which was last version compatible with Buster and Python 3.7.3
pip install numpy==1.21.4
Im stuck @ [100%] Built target opencv_perf_gapi
After I did all this i still get the error of no module name cv2
How do I fix this?
Hi KEJ,
I am having the same issue. Did you find a solution?
Having issues with the bashrc file setup….it says “no such file or directory” when trying to source it…
Actually bashrc is good now, having a new problem with mkvirtualenv….it says ‘virtualenv.create.via_global_ref.builtin.cpython.mac_oc’ have no clue what this is…!
problem with mkvirtualenv, it says the destination /home/pi/.virtualenv not writable…
same problem. anyone with some solution please
Hello, and thank you for your guide.
I was able to install everything using method #2. However when I try to test OpenCV I get an error message when trying to find cv2. I also had trouble with Step 12 when it came to locating the “cd ~/.virtualenvs/sbb_cv/lib/python3.7/site-packages/” command. I used the tab and autocomplete button but it couldn’t find anything after /sbb_cv/. Could this have something to do with the error message I get?
Any help is greatly appreciated
Thank you,
Michael
Silly me. I tried again using method 1 and ended up at the exact same place. Only then did I realize I was supposed to type :
workon sbb_cv
$ python3
>>> import cv2
>>> cv2.__version__
myself.
Thank you for a great tutorial.
3.june.22
Hello
A good tutoorial but when I implement this in a bash shell, I have problems with
activating the ven ( mine is called cv) inside a bash script.
I really do not want to perform this manually!
I have tried the source ~/cv/bin/activate || echo Activate failed ; exit 99
which fails and also open up another batch enviroment
I also tried this.
/bin/bash -c ~/cv/bin/activate || echo Activate failed ; exit 99
With any help on this, I either do not use a venv OR perhaps use two bash scripts:
1) Start batch one ( all the installs )
2) manually activate the active cv
3) start the second batch that compiles etc.
Any help on this, please?
Sorry, I forgot to add the */cv exists.
3.6.2022
Hello,
My last comment seems to have disappeared.
Because I do not want to perform a manual installation, I put the commands into a bash shell.
My venv is called cv and is predefined outside the batch. so cv exists in my home area.
The problem is now when I run my batch I have a problem activating the cv.
source ~/cv/bin/activate does not work correctly because it opens up a new shell
so I tried /bin/bash -c ~/bin/activate
that did not work either,
I can either not use a venv and then it installs correctly
OR perhaps I perform:
1) Run a batch with the installs
2) manually activate and inside the cv environment
3) start the compile batch
Perhaps that would work
Has anyone an idea how to get over this activate problem??
Many thanks for any assistance.
i get error with make -j4.. any solutions ?
I tried installing Opencv using pip but the RPi stopped with the yellow LED and red LED lit. So I decided to attempt an assemble from the source and used your method.
This also caused an error:
n Build Command(s):/usr/bin/gmake cmTC_c39a9/fast && /usr/bin/gmake -f CMakeFiles/cmTC_c39a9.dir/build.make CMakeFiles/cmTC_c39a9.dir/build
gmake[1]: Entering directory ‘/home/nt/opencv/build/CMakeFiles/CMakeTmp’
Building C object CMakeFiles/cmTC_c39a9.dir/CheckFunctionExists.c.o
/usr/bin/cc -fsigned-char -W -Wall -Werror=return-type -Werror=address -Werror=sequence-point -Wformat -Werror=format-security -Wmissing-declarations -Wmissing-prototypes -Wstrict-prototypes -Wundef -Winit-self -Wpointer-arith -Wshadow -Wuninitialized -Wno-comment -Wimplicit-fallthrough=3 -Wno-strict-overflow -fdiagnostics-show-option -pthread -fomit-frame-pointer -ffunction-sections -fdata-sections -mfpu=neon -fvisibility=hidden -DCHECK_FUNCTION_EXISTS=sgemm_ -O3 -DNDEBUG -DNDEBUG -fPIE -o CMakeFiles/cmTC_c39a9.dir/CheckFunctionExists.c.o -c /usr/share/cmake-3.18/Modules/CheckFunctionExists.c
Linking C executable cmTC_c39a9
/usr/bin/cmake -E cmake_link_script CMakeFiles/cmTC_c39a9.dir/link.txt –verbose=1
/usr/bin/cc -fsigned-char -W -Wall -Werror=return-type -Werror=address -Werror=sequence-point -Wformat -Werror=format-security -Wmissing-declarations -Wmissing-prototypes -Wstrict-prototypes -Wundef -Winit-self -Wpointer-arith -Wshadow -Wuninitialized -Wno-comment -Wimplicit-fallthrough=3 -Wno-strict-overflow -fdiagnostics-show-option -pthread -fomit-frame-pointer -ffunction-sections -fdata-sections -mfpu=neon -fvisibility=hidden -DCHECK_FUNCTION_EXISTS=sgemm_ -O3 -DNDEBUG -DNDEBUG -Wl,–gc-sections -Wl,–as-needed CMakeFiles/cmTC_c39a9.dir/CheckFunctionExists.c.o -o cmTC_c39a9
/usr/bin/ld: CMakeFiles/cmTC_c39a9.dir/CheckFunctionExists.c.o: in function `main’:
CheckFunctionExists.c:(.text.startup.main+0xc): undefined reference to `sgemm_’
collect2: error: ld returned 1 exit status
gmake[1]: *** [CMakeFiles/cmTC_c39a9.dir/build.make:106: cmTC_c39a9] Error 1
gmake[1]: Leaving directory ‘/home/nt/opencv/build/CMakeFiles/CMakeTmp’
gmake: *** [Makefile:140: cmTC_c39a9/fast] Error 2
Determining if the function cheev_ exists failed with the following output:
Change Dir: /home/nt/opencv/build/CMakeFiles/CMakeTmp
Run Build Command(s):/usr/bin/gmake cmTC_06031/fast && /usr/bin/gmake -f CMakeFiles/cmTC_06031.dir/build.make CMakeFiles/cmTC_06031.dir/build
gmake[1]: Entering directory ‘/home/nt/opencv/build/CMakeFiles/CMakeTmp’
Building C object CMakeFiles/cmTC_06031.dir/CheckFunctionExists.c.o
/usr/bin/cc -fsigned-char -W -Wall -Werror=return-type -Werror=address -Werror=sequence-point -Wformat -Werror=format-security -Wmissing-declarations -Wmissing-prototypes -Wstrict-prototypes -Wundef -Winit-self -Wpointer-arith -Wshadow -Wuninitialized -Wno-comment -Wimplicit-fallthrough=3 -Wno-strict-overflow -fdiagnostics-show-option -pthread -fomit-frame-pointer -ffunction-sections -fdata-sections -mfpu=neon -fvisibility=hidden -DCHECK_FUNCTION_EXISTS=cheev_ -O3 -DNDEBUG -DNDEBUG -fPIE -o CMakeFiles/cmTC_06031.dir/CheckFunctionExists.c.o -c /usr/share/cmake-3.18/Modules/CheckFunctionExists.c
Linking C executable cmTC_06031
/usr/bin/cmake -E cmake_link_script CMakeFiles/cmTC_06031.dir/link.txt –verbose=1
/usr/bin/cc -fsigned-char -W -Wall -Werror=return-type -Werror=address -Werror=sequence-point -Wformat -Werror=format-security -Wmissing-declarations -Wmissing-prototypes -Wstrict-prototypes -Wundef -Winit-self -Wpointer-arith -Wshadow -Wuninitialized -Wno-comment -Wimplicit-fallthrough=3 -Wno-strict-overflow -fdiagnostics-show-option -pthread -fomit-frame-pointer -ffunction-sections -fdata-sections -mfpu=neon -fvisibility=hidden -DCHECK_FUNCTION_EXISTS=cheev_ -O3 -DNDEBUG -DNDEBUG -Wl,–gc-sections -Wl,–as-needed CMakeFiles/cmTC_06031.dir/CheckFunctionExists.c.o -o cmTC_06031 /usr/lib/arm-linux-gnueabihf/libblas.so /usr/lib/arm-linux-gnueabihf/libf77blas.so /usr/lib/arm-linux-gnueabihf/libatlas.so -lm -ldl
/usr/bin/ld: CMakeFiles/cmTC_06031.dir/CheckFunctionExists.c.o: in function `main’:
CheckFunctionExists.c:(.text.startup.main+0xc): undefined reference to `cheev_’
collect2: error: ld returned 1 exit status
gmake[1]: *** [CMakeFiles/cmTC_06031.dir/build.make:109: cmTC_06031] Error 1
gmake[1]: Leaving directory ‘/home/nt/opencv/build/CMakeFiles/CMakeTmp’
gmake: *** [Makefile:140: cmTC_06031/fast] Error 2
Build output check failed:
Regex: ‘unrecognized .*option’
Output line: ‘cc1plus: note: unrecognized command-line option ‘-Wno-tautological-undefined-compare’ may have been intended to silence earlier diagnostics’
Compilation failed:
source file: ‘/home/nt/opencv/build/CMakeFiles/CMakeTmp/src.cxx’
check option: ‘ -Wno-tautological-undefined-compare’
===== BUILD LOG =====
Change Dir: /home/nt/opencv/build/CMakeFiles/CMakeTmp
Run Build Command(s):/usr/bin/gmake cmTC_9680f/fast && /usr/bin/gmake -f CMakeFiles/cmTC_9680f.dir/build.make CMakeFiles/cmTC_9680f.dir/build
gmake[1]: Entering directory ‘/home/nt/opencv/build/CMakeFiles/CMakeTmp’
Building CXX object CMakeFiles/cmTC_9680f.dir/src.cxx.o
/usr/bin/c++ -fsigned-char -W -Wall -Werror=return-type -Werror=non-virtual-dtor -Werror=address -Werror=sequence-point -Wformat -Werror=format-security -Winit-self -Wpointer-arith -Wuninitialized -Wsuggest-override -Wno-delete-non-virtual-dtor -Wno-comment -Wimplicit-fallthrough=3 -Wno-strict-overflow -fdiagnostics-show-option -pthread -fomit-frame-pointer -ffunction-sections -fdata-sections -mfpu=neon -fvisibility=hidden -fvisibility-inlines-hidden -Wno-deprecated -Wno-missing-declarations -Wno-shadow -Wno-unused-parameter -Wno-unused-local-typedefs -Wno-sign-compare -Wno-sign-promo -Wno-undef -O3 -DNDEBUG -DNDEBUG -fPIE -Wno-tautological-undefined-compare -std=c++11 -o CMakeFiles/cmTC_9680f.dir/src.cxx.o -c /home/nt/opencv/build/CMakeFiles/CMakeTmp/src.cxx
/home/nt/opencv/build/CMakeFiles/CMakeTmp/src.cxx:1: warning: ignoring ‘#pragma ’ [-Wunknown-pragmas]
1 | #pragma
|
cc1plus: note: unrecognized command-line option ‘-Wno-tautological-undefined-compare’ may have been intended to silence earlier diagnostics
Linking CXX executable cmTC_9680f
/usr/bin/cmake -E cmake_link_script CMakeFiles/cmTC_9680f.dir/link.txt –verbose=1
/usr/bin/c++ -fsigned-char -W -Wall -Werror=return-type -Werror=non-virtual-dtor -Werror=address -Werror=sequence-point -Wformat -Werror=format-security -Winit-self -Wpointer-arith -Wuninitialized -Wsuggest-override -Wno-delete-non-virtual-dtor -Wno-comment -Wimplicit-fallthrough=3 -Wno-strict-overflow -fdiagnostics-show-option -pthread -fomit-frame-pointer -ffunction-sections -fdata-sections -mfpu=neon -fvisibility=hidden -fvisibility-inlines-hidden -Wno-deprecated -Wno-missing-declarations -Wno-shadow -Wno-unused-parameter -Wno-unused-local-typedefs -Wno-sign-compare -Wno-sign-promo -Wno-undef -O3 -DNDEBUG -DNDEBUG -Wl,–gc-sections -Wl,–as-needed CMakeFiles/cmTC_9680f.dir/src.cxx.o -o cmTC_9680f
gmake[1]: Leaving directory ‘/home/nt/opencv/build/CMakeFiles/CMakeTmp’
===== END =====
Build output check failed:
Regex: ‘unrecognized .*option’
Output line: ‘cc1plus: note: unrecognized command-line option ‘-Wno-shorten-64-to-32’ may have been intended to silence earlier diagnostics’
Compilation failed:
source file: ‘/home/nt/opencv/build/CMakeFiles/CMakeTmp/src.cxx’
check option: ‘ -Wno-shorten-64-to-32’
===== BUILD LOG =====
Change Dir: /home/nt/opencv/build/CMakeFiles/CMakeTmp
Run Build Command(s):/usr/bin/gmake cmTC_ee533/fast && /usr/bin/gmake -f CMakeFiles/cmTC_ee533.dir/build.make CMakeFiles/cmTC_ee533.dir/build
gmake[1]: Entering directory ‘/home/nt/opencv/build/CMakeFiles/CMakeTmp’
Building CXX object CMakeFiles/cmTC_ee533.dir/src.cxx.o
/usr/bin/c++ -fsigned-char -W -Wall -Werror=return-type -Werror=non-virtual-dtor -Werror=address -Werror=sequence-point -Wformat -Werror=format-security -Winit-self -Wpointer-arith -Wuninitialized -Wsuggest-override -Wno-delete-non-virtual-dtor -Wno-comment -Wimplicit-fallthrough=3 -Wno-strict-overflow -fdiagnostics-show-option -pthread -fomit-frame-pointer -ffunction-sections -fdata-sections -mfpu=neon -fvisibility=hidden -fvisibility-inlines-hidden -Wno-deprecated -Wno-missing-declarations -Wno-shadow -Wno-unused-parameter -Wno-unused-local-typedefs -Wno-sign-compare -Wno-sign-promo -Wno-undef -Wno-ignored-qualifiers -Wno-extra -Wno-unused-function -Wno-unused-const-variable -O3 -DNDEBUG -DNDEBUG -fPIE -Wno-shorten-64-to-32 -std=c++11 -o CMakeFiles/cmTC_ee533.dir/src.cxx.o -c /home/nt/opencv/build/CMakeFiles/CMakeTmp/src.cxx
/home/nt/opencv/build/CMakeFiles/CMakeTmp/src.cxx:1: warning: ignoring ‘#pragma ’ [-Wunknown-pragmas]
1 | #pragma
|
cc1plus: note: unrecognized command-line option ‘-Wno-shorten-64-to-32’ may have been intended to silence earlier diagnostics
Linking CXX executable cmTC_ee533
/usr/bin/cmake -E cmake_link_script CMakeFiles/cmTC_ee533.dir/link.txt –verbose=1
/usr/bin/c++ -fsigned-char -W -Wall -Werror=return-type -Werror=non-virtual-dtor -Werror=address -Werror=sequence-point -Wformat -Werror=format-security -Winit-self -Wpointer-arith -Wuninitialized -Wsuggest-override -Wno-delete-non-virtual-dtor -Wno-comment -Wimplicit-fallthrough=3 -Wno-strict-overflow -fdiagnostics-show-option -pthread -fomit-frame-pointer -ffunction-sections -fdata-sections -mfpu=neon -fvisibility=hidden -fvisibility-inlines-hidden -Wno-deprecated -Wno-missing-declarations -Wno-shadow -Wno-unused-parameter -Wno-unused-local-typedefs -Wno-sign-compare -Wno-sign-promo -Wno-undef -Wno-ignored-qualifiers -Wno-extra -Wno-unused-function -Wno-unused-const-variable -O3 -DNDEBUG -DNDEBUG -Wl,–gc-sections -Wl,–as-needed CMakeFiles/cmTC_ee533.dir/src.cxx.o -o cmTC_ee533
gmake[1]: Leaving directory ‘/home/nt/opencv/build/CMakeFiles/CMakeTmp’
===== END =====
Build output check failed:
Regex: ‘unrecognized .*option’
Output line: ‘cc1plus: note: unrecognized command-line option ‘-Wno-enum-compare-switch’ may have been intended to silence earlier diagnostics’
Compilation failed:
source file: ‘/home/nt/opencv/build/CMakeFiles/CMakeTmp/src.cxx’
check option: ‘ -Wno-enum-compare-switch’
===== BUILD LOG =====
Change Dir: /home/nt/opencv/build/CMakeFiles/CMakeTmp
Run Build Command(s):/usr/bin/gmake cmTC_31d74/fast && /usr/bin/gmake -f CMakeFiles/cmTC_31d74.dir/build.make CMakeFiles/cmTC_31d74.dir/build
gmake[1]: Entering directory ‘/home/nt/opencv/build/CMakeFiles/CMakeTmp’
Building CXX object CMakeFiles/cmTC_31d74.dir/src.cxx.o
/usr/bin/c++ -fsigned-char -W -Wall -Werror=return-type -Werror=non-virtual-dtor -Werror=address -Werror=sequence-point -Wformat -Werror=format-security -Winit-self -Wpointer-arith -Wuninitialized -Wsuggest-override -Wno-delete-non-virtual-dtor -Wno-comment -Wimplicit-fallthrough=3 -Wno-strict-overflow -fdiagnostics-show-option -pthread -fomit-frame-pointer -ffunction-sections -fdata-sections -mfpu=neon -fvisibility=hidden -fvisibility-inlines-hidden -Wno-deprecated -Wno-missing-declarations -Wno-shadow -Wno-unused-parameter -Wno-unused-local-typedefs -Wno-sign-compare -Wno-sign-promo -Wno-undef -Wno-ignored-qualifiers -Wno-extra -Wno-unused-function -Wno-unused-const-variable -Wno-invalid-offsetof -O3 -DNDEBUG -DNDEBUG -fPIE -Wno-enum-compare-switch -std=c++11 -o CMakeFiles/cmTC_31d74.dir/src.cxx.o -c /home/nt/opencv/build/CMakeFiles/CMakeTmp/src.cxx
/home/nt/opencv/build/CMakeFiles/CMakeTmp/src.cxx:1: warning: ignoring ‘#pragma ’ [-Wunknown-pragmas]
1 | #pragma
|
cc1plus: note: unrecognized command-line option ‘-Wno-enum-compare-switch’ may have been intended to silence earlier diagnostics
Linking CXX executable cmTC_31d74
/usr/bin/cmake -E cmake_link_script CMakeFiles/cmTC_31d74.dir/link.txt –verbose=1
/usr/bin/c++ -fsigned-char -W -Wall -Werror=return-type -Werror=non-virtual-dtor -Werror=address -Werror=sequence-point -Wformat -Werror=format-security -Winit-self -Wpointer-arith -Wuninitialized -Wsuggest-override -Wno-delete-non-virtual-dtor -Wno-comment -Wimplicit-fallthrough=3 -Wno-strict-overflow -fdiagnostics-show-option -pthread -fomit-frame-pointer -ffunction-sections -fdata-sections -mfpu=neon -fvisibility=hidden -fvisibility-inlines-hidden -Wno-deprecated -Wno-missing-declarations -Wno-shadow -Wno-unused-parameter -Wno-unused-local-typedefs -Wno-sign-compare -Wno-sign-promo -Wno-undef -Wno-ignored-qualifiers -Wno-extra -Wno-unused-function -Wno-unused-const-variable -Wno-invalid-offsetof -O3 -DNDEBUG -DNDEBUG -Wl,–gc-sections -Wl,–as-needed CMakeFiles/cmTC_31d74.dir/src.cxx.o -o cmTC_31d74
gmake[1]: Leaving directory ‘/home/nt/opencv/build/CMakeFiles/CMakeTmp’
===== END =====
Determining if the include file sys/videoio.h exists failed with the following output:
Change Dir: /home/nt/opencv/build/CMakeFiles/CMakeTmp
Run Build Command(s):/usr/bin/gmake cmTC_0ef98/fast && /usr/bin/gmake -f CMakeFiles/cmTC_0ef98.dir/build.make CMakeFiles/cmTC_0ef98.dir/build
gmake[1]: Entering directory ‘/home/nt/opencv/build/CMakeFiles/CMakeTmp’
Building C object CMakeFiles/cmTC_0ef98.dir/CheckIncludeFile.c.o
/usr/bin/cc -fsigned-char -W -Wall -Werror=return-type -Werror=address -Werror=sequence-point -Wformat -Werror=format-security -Wmissing-declarations -Wmissing-prototypes -Wstrict-prototypes -Wundef -Winit-self -Wpointer-arith -Wshadow -Wuninitialized -Wno-comment -Wimplicit-fallthrough=3 -Wno-strict-overflow -fdiagnostics-show-option -pthread -fomit-frame-pointer -ffunction-sections -fdata-sections -mfpu=neon -fvisibility=hidden -O3 -DNDEBUG -DNDEBUG -fPIE -o CMakeFiles/cmTC_0ef98.dir/CheckIncludeFile.c.o -c /home/nt/opencv/build/CMakeFiles/CMakeTmp/CheckIncludeFile.c
/home/nt/opencv/build/CMakeFiles/CMakeTmp/CheckIncludeFile.c:1:10: fatal error: sys/videoio.h: No such file or directory
1 | #include
| ^~~~~~~~~~~~~~~
compilation terminated.
gmake[1]: *** [CMakeFiles/cmTC_0ef98.dir/build.make:85: CMakeFiles/cmTC_0ef98.dir/CheckIncludeFile.c.o] Error 1
gmake[1]: Leaving directory ‘/home/nt/opencv/build/CMakeFiles/CMakeTmp’
gmake: *** [Makefile:140: cmTC_0ef98/fast] Error 2
Build output check failed:
Regex: ‘unrecognized .*option’
Output line: ‘cc1plus: note: unrecognized command-line option ‘-Wno-unused-private-field’ may have been intended to silence earlier diagnostics’
Compilation failed:
source file: ‘/home/nt/opencv/build/CMakeFiles/CMakeTmp/src.cxx’
check option: ‘ -Wno-unused-private-field’
===== BUILD LOG =====
Change Dir: /home/nt/opencv/build/CMakeFiles/CMakeTmp
Run Build Command(s):/usr/bin/gmake cmTC_f812a/fast && /usr/bin/gmake -f CMakeFiles/cmTC_f812a.dir/build.make CMakeFiles/cmTC_f812a.dir/build
gmake[1]: Entering directory ‘/home/nt/opencv/build/CMakeFiles/CMakeTmp’
Building CXX object CMakeFiles/cmTC_f812a.dir/src.cxx.o
/usr/bin/c++ -fsigned-char -W -Wall -Werror=return-type -Werror=non-virtual-dtor -Werror=address -Werror=sequence-point -Wformat -Werror=format-security -Wmissing-declarations -Wundef -Winit-self -Wpointer-arith -Wshadow -Wsign-promo -Wuninitialized -Wsuggest-override -Wno-delete-non-virtual-dtor -Wno-comment -Wimplicit-fallthrough=3 -Wno-strict-overflow -fdiagnostics-show-option -pthread -fomit-frame-pointer -ffunction-sections -fdata-sections -mfpu=neon -fvisibility=hidden -fvisibility-inlines-hidden -Wno-unused-function -Wno-deprecated-declarations -Wno-overloaded-virtual -O3 -DNDEBUG -DNDEBUG -fPIE -Wno-unused-private-field -std=c++11 -o CMakeFiles/cmTC_f812a.dir/src.cxx.o -c /home/nt/opencv/build/CMakeFiles/CMakeTmp/src.cxx
/home/nt/opencv/build/CMakeFiles/CMakeTmp/src.cxx:1: warning: ignoring ‘#pragma ’ [-Wunknown-pragmas]
1 | #pragma
|
cc1plus: note: unrecognized command-line option ‘-Wno-unused-private-field’ may have been intended to silence earlier diagnostics
Linking CXX executable cmTC_f812a
/usr/bin/cmake -E cmake_link_script CMakeFiles/cmTC_f812a.dir/link.txt –verbose=1
/usr/bin/c++ -fsigned-char -W -Wall -Werror=return-type -Werror=non-virtual-dtor -Werror=address -Werror=sequence-point -Wformat -Werror=format-security -Wmissing-declarations -Wundef -Winit-self -Wpointer-arith -Wshadow -Wsign-promo -Wuninitialized -Wsuggest-override -Wno-delete-non-virtual-dtor -Wno-comment -Wimplicit-fallthrough=3 -Wno-strict-overflow -fdiagnostics-show-option -pthread -fomit-frame-pointer -ffunction-sections -fdata-sections -mfpu=neon -fvisibility=hidden -fvisibility-inlines-hidden -Wno-unused-function -Wno-deprecated-declarations -Wno-overloaded-virtual -O3 -DNDEBUG -DNDEBUG -Wl,–gc-sections -Wl,–as-needed CMakeFiles/cmTC_f812a.dir/src.cxx.o -o cmTC_f812a
gmake[1]: Leaving directory ‘/home/nt/opencv/build/CMakeFiles/CMakeTmp’
===== END =====