Oracle VM VirtualBox is free and open-source software developed by the Oracle Corporation. This great software was created by Innotek and acquired by Sun Microsystems in the year 2008. Thereafter, it was obtained by Oracle in 2010 up to date(2021). The software can be installed on all operating systems without raising any incompatibility issues.
On the other hand, Raspberry Pi is a collection of small single-board computers generated in the UK by the Raspberry Pi Foundation in association with Broadcom.
This article will focus more on installing Raspberry Pi Desktop on a virtual machine, specifically VirtualBox.
Raspberry Pi Desktop, formerly known as Raspbian, is a Debian-based stable OS installed on your computer. The OS does not only work on raspberry pi boards as you can easily install it on an x86 computer. In fact, there is a Raspberry version that was formulated just for that! And better still, you can install it directly on a virtual machine. This works better for users who love experimenting and trying different OSs on the virtual box without altering the host OS.
With that being said, let us get started with the first section that will include the installation of VirtualBox.
Below is a quick rush through the installation of VirtualBox on the host OS in your machine. You can run several guest OSs depending on your hardware configuration in the VirtualBox without any issues.
Installing VirtualBox
First, we need to download the virtual box installer file into our host computer. To do this, visit the site given on the link above, where you will download the VirtualBox installer file.
Step 1: Opening the VirtualBox website
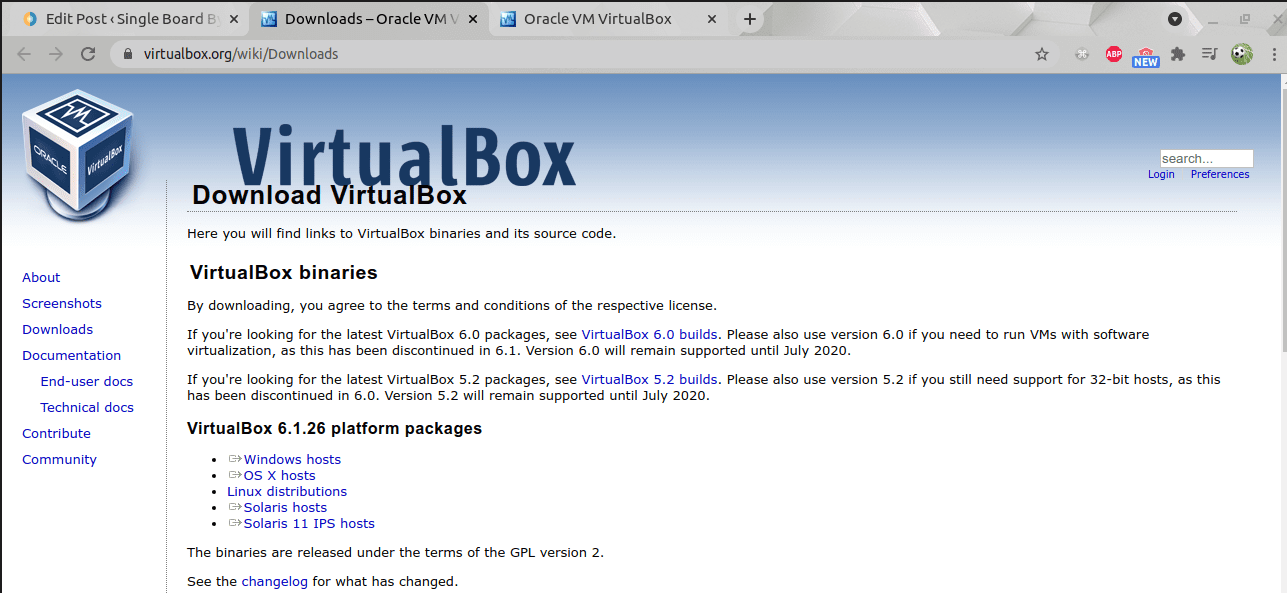
Upon clicking the link, the official download site for the virtual box will open as shown below:
VirtualBox website
Step 2: Click on windows hosts
Once the website opens, you will see the link below the “VirtualBox 6.1.26 platform packages,” which is the latest as of now(2021). Next, click on the first blue link written, “windows hosts,” and the VirtualBox.exe file will start downloading to your computer.
select windows hosts
Step 3: Setup wizard
Upon clicking the installer wizard, the software will ask you, “Do you want to allow this app to make changes to your device? click “yes” to initiate the installer wizard.
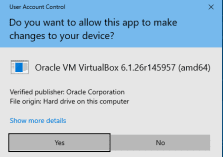
click yes
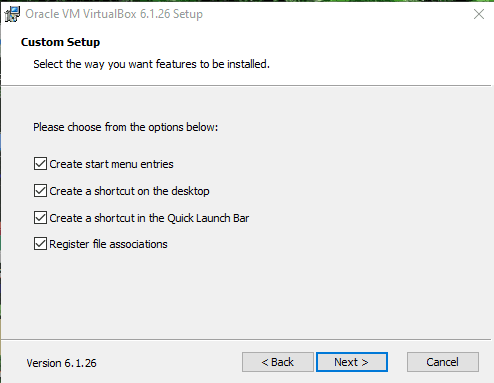
Step 4: Custom setup
Next is the custom setup that allows you to select the way you want features to be installed. Again, we recommend going with the defaults, so click Next.
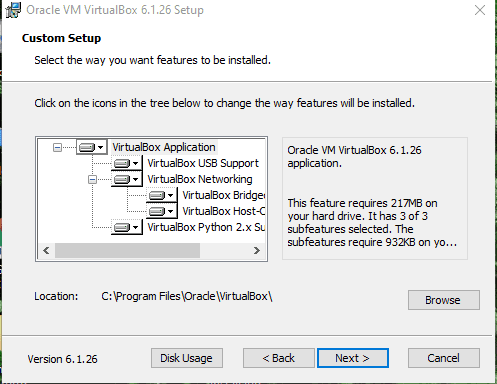
Custom setup
Step 5: Custom setup part 2
Here, you have several options to either check or uncheck. However, we suggest leaving them checked.
custom setup part two
Step 6: Network interfaces
This feature allows you to install the Oracle VM VirtualBox 6.1.26 networking module. Once you click yes, the module will reset your network connection, thus temporarily disconnecting you from the network. So, click yes to proceed.
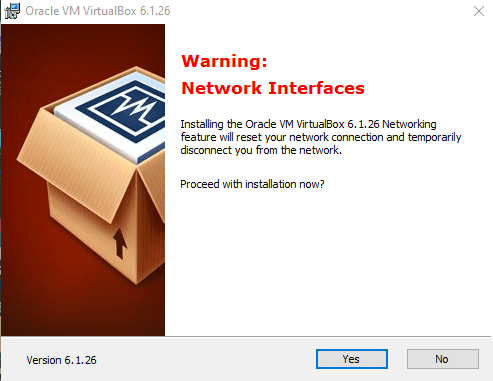
network interface
Step 7: Ready to install
Next, the window in the setup wizard is ready to start the custom installation. So go ahead and click install. Nonetheless, if you made any mistakes in the configuration settings, you can click back to review them.
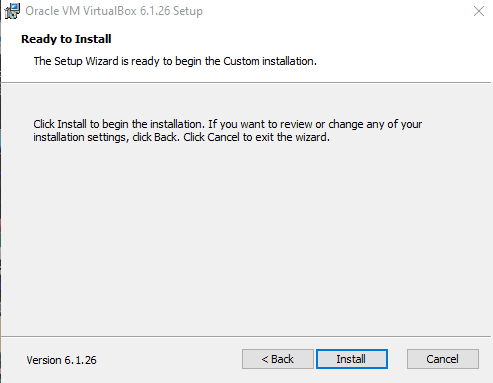
ready to install
Note: Upon clicking install, you will be asked if you want this software to make changes to your computer. Click yes.
Step 7: Installing the device software
In this section, you will be prompted, “ Would you like to install this device software?” click install.
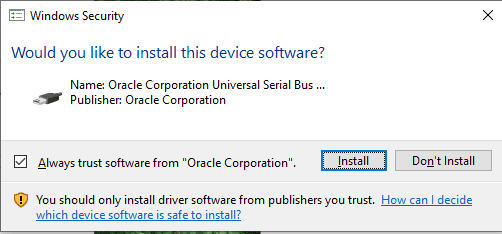
installing device software
Step 5: Finish
Click Finish on the next window situated on the lower-right side of the window.
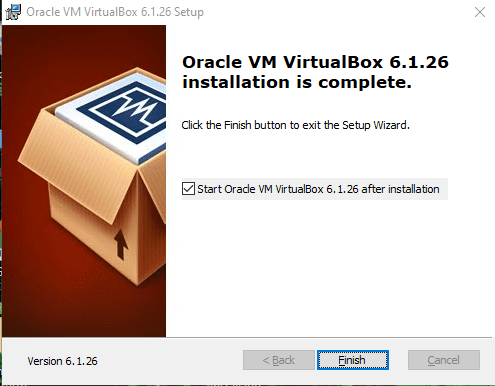
finish window
Doing so will close the installation window and open VirtualBox.
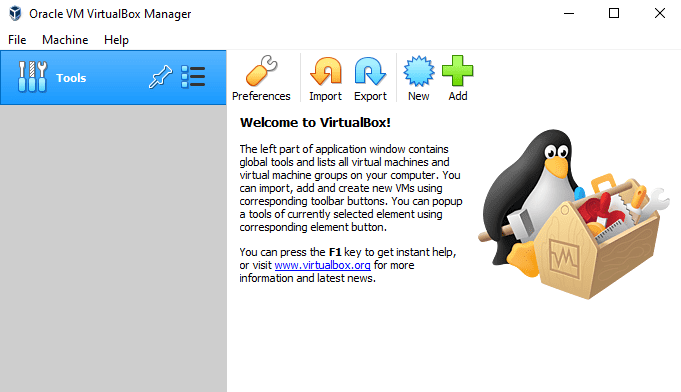
the final window of an installed VirtualBox
Now that we have installed and opened the virtual box, we can go ahead and push the article a notch higher by looking at section two. This section entails the installation of Raspberry Desktop ISO on our VirtualBox.
Installing Raspberry Pi Desktop on Virtual Box
Step 1: Download Raspberry Desktop ISO
To download the Raspberry ISO, we will visit Raspberry’s official download page; thereafter, go to the Raspberry Pi (Desktop section and click “Download ISO”) for a direct download. However, we recommend going with the torrent option because the direct download has had some issues of failing to complete downloading the entire file. To use the torrent option, please make sure you have torrent software installed on your machine. The download file is around 2.9GB.
Step 2: Creating a new virtual machine for Raspberry Desktop
First, start the VirtualBox, and you will see the list of all virtual machines you already created. However, this will be invisible to those who have just installed VirtualBox. Let us now create a new one for Raspberry Desktop. To do this, click on the “New” button.
Click on new
You will see a setting popup window for your virtual machine.
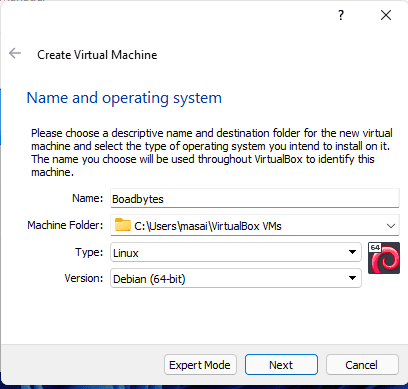
Step 3: Virtual machine name and type
Here, you will go with your preferred name, which will be somewhat easy to remember. In our case, we will go with “Boardbytes.”
naming the virtual machine
Note: remember to choose the type of machine as Linux and the version to Debian(64-bit). After that, click on “Next.”
Step 4: Random access memory (RAM) allocation
Now you will choose the size of RAM you want your machine allocated. By default, the VirtualBox allocates 1024MB, which is equivalent to 1GB. Nevertheless, it would be better to add more if you can, as long as you range your memory on the green area (this is to prevent the virtual machine from eating up the required resources for the host machine).
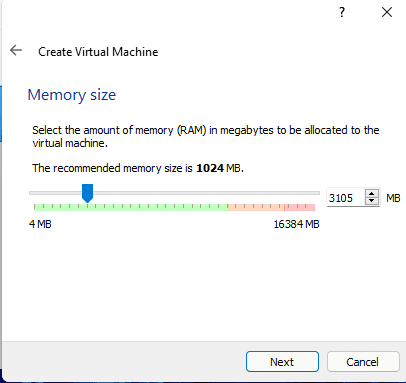
memory size allocation
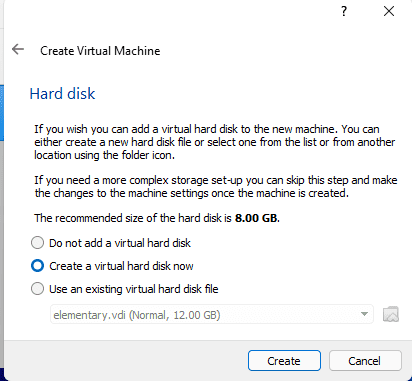
Step 5: Virtual hard disk
After allocating RAM, the virtual box will ask you to create a virtual hard disk for your machine. In this course, we recommend going with the default selection, “Create a virtual hard disk now.” After that, click on create to proceed to the next section.
hard disk creation
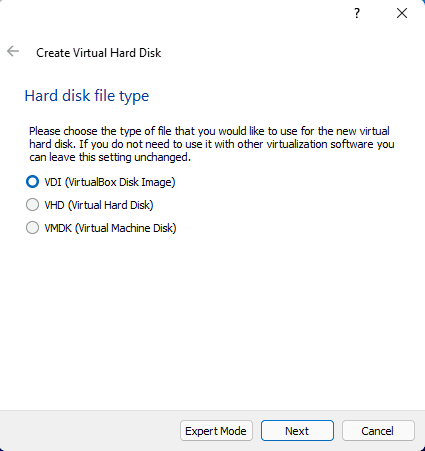
Step 6: Hard disk file type
If the VirtualBox asks you to choose the type of virtual hard disk you want, then go with VirtualBox Disk Image (VDI), which comes as default.
hard disk file type
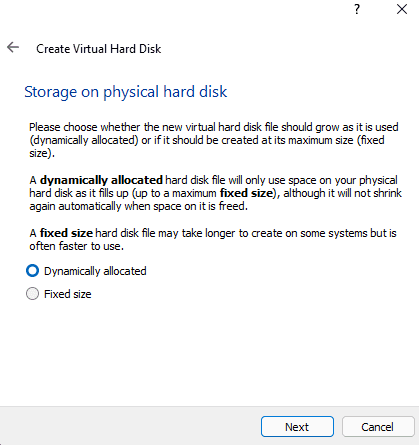
Step 7: Storage on the physical hard disk
Thereafter, you will be asked to choose between a dynamically allocated disk or a fixed one. For those who have a lot of space on their computer, and their performance is somehow low, we suggest you go with “Fixed size”; otherwise, go with the “dynamically allocated” option. This is because “dynamically allocated” uses a bit more resources when running the VM, but nothing to worry about if your machine has decent performances.
storage on the hard disk
Step 8: File location and size
The next step will allow you to select the amount of space to be allocated to the VM. It may, by default, be set to 32GB, but this differs depending on the machines. On our end, we suggest you put it at approximately 20GB plus(for those who are using the software for light purposes), so you don’t worry about it anymore. However, if you are using the machine for heavier stuff, you better increase the size of the hard disk to suit you.
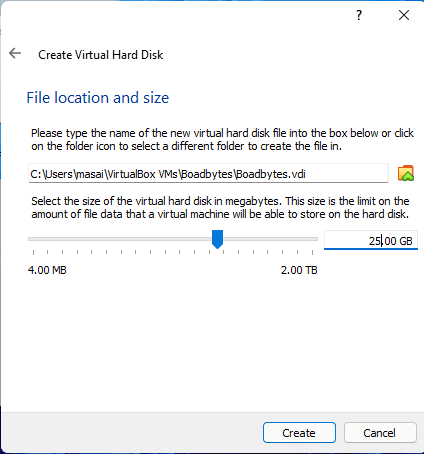
file location and size
When you click on “Create,” the virtual hard disk will be created, and the setup popup will disappear. After that, you will see a new virtual machine on your list.
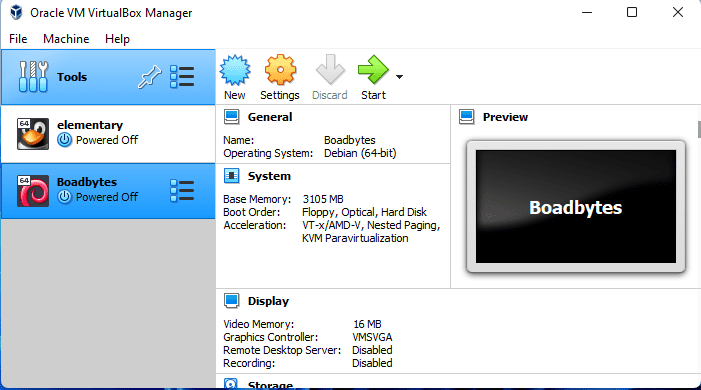
new virtual machine
Step 9: CPU allocation
To boost your VM, we need to make some alterations to the VM settings. Unfortunately, this setting is not available in the default setup wizard. So you will select your “Boardbytes Desktop” (select the name you gave to your virtual machine”) and click on “settings.” Alternatively, you can right-click on the “VM> settings.”
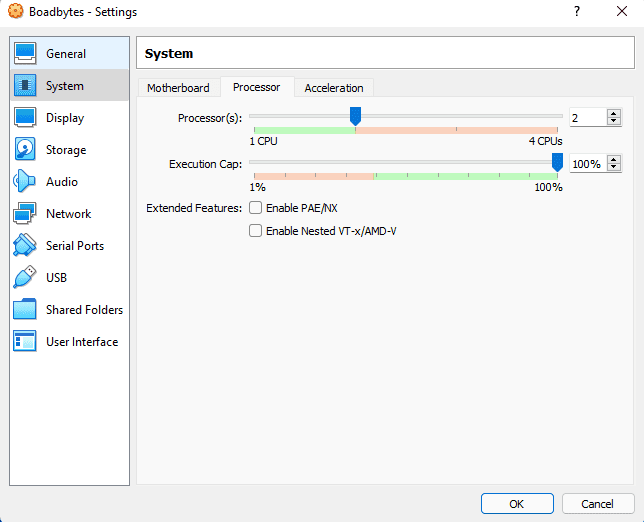
CPU allocation
After that, navigate to the “System” tab, then select the second option, the” Processor” panel. In there, you can see the number of CPUs allocated to your VM machine. By default, the machine will be allocated 1CPU. So you will increase this depending on the number of cores your machine has. If, for instance, you have 4 cores, give the VM 2 cores; if you have 8 cores, then give the VM 4 cores. This will really fire up things when your VM machine is running.
Step 10: Link the Raspberry Desktop ISO file to your virtual machine
This still takes place inside the settings. So go into the storage tab. Select the “Empty” disk icon below “Controller.IDE”. On the right, click on the disk icon and select the “Choose a disk file” option. Now it’s time to upload your downloaded file to the storage settings.
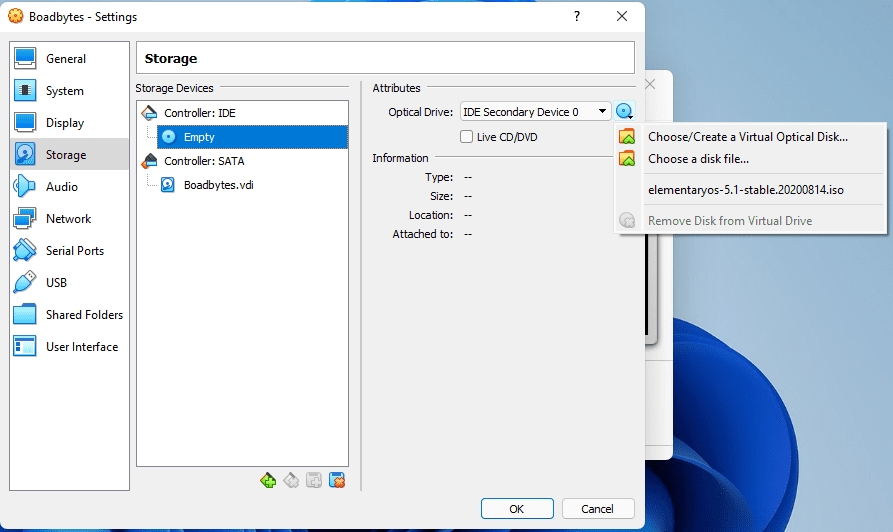
Linking the ISO file to the virtual machine
You should be able to see the selected file if it was correctly selected, as seen in the snapshot below:
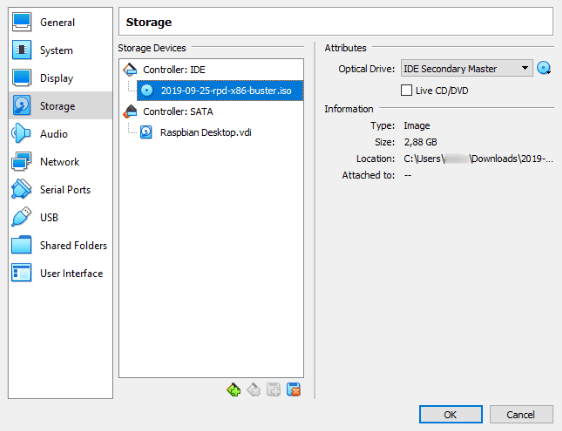
raspberry iso uploaded
After that, click on “OK” to save and close the settings window.
Now, you can startup your Raspbian Desktop VM by clicking on the “Start” button.
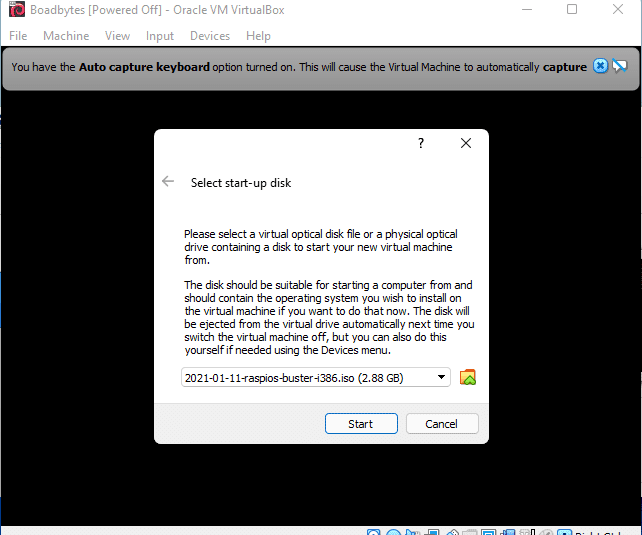
Click start
To this far, we are done with section two of the installation, which included (creating a virtual machine, allocating RAM, CPU, and linking the Raspberry file to our Virtual machine). Now, let’s go straight to section three that involves installing the Raspberry Desktop OS itself.
Step 11: Installing Raspbian Desktop on the virtual machine
After starting Raspbian Desktop from VirtualBox for the first time, you will receive a Graphical User Interface(GUI) with many options that will ask you to run or install the OS.
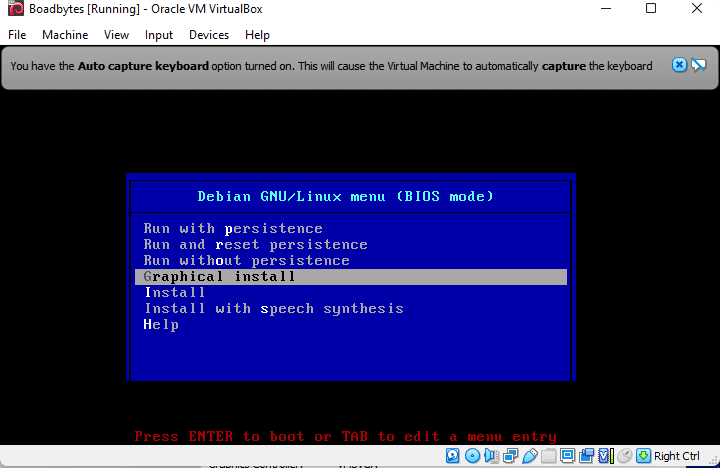
select graphical install
We will go with “Graphical install.” To achieve this, you will navigate from the “Run with persistence” to the “Graphical install” using your keyboard arrow keys and press “Enter.” Under normal circumstances, if you don’t do anything for 10 seconds, the VM machine will automatically select the first option. When you find yourself in such a situation, restart your VM.
After selecting “Graphical install,” a series of dialogues will appear.
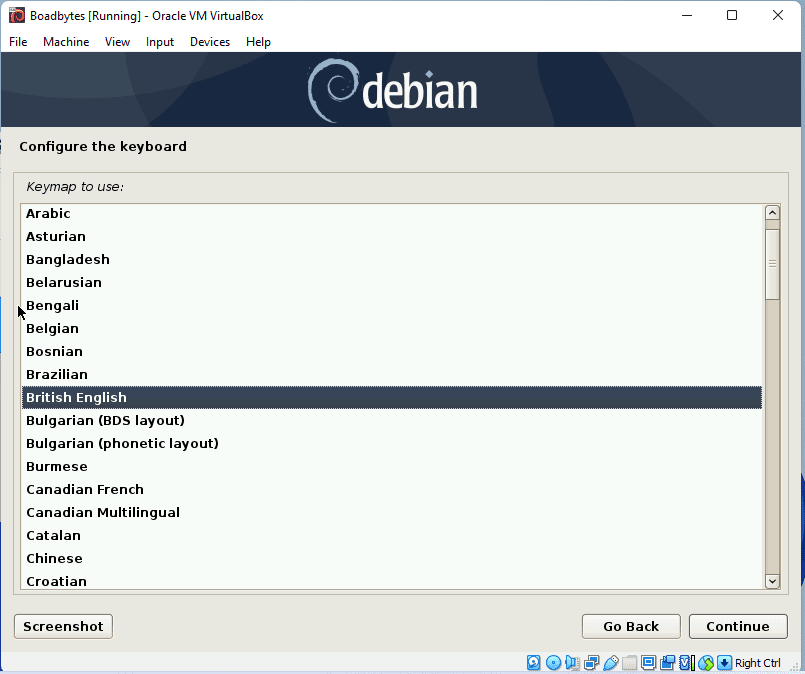
Step 12: Choose language
Here, you will select your language. In this case, we will go with “British English.”
After that, click on “Continue.” You might get a loading bar saying Loading additional components” we advise you to be patient until it’s done.
keyboard-configuration
Step 13: Disk partitioning
Previously, we allocated some space for our machine to use. So now is the time to create some partitions on that space.
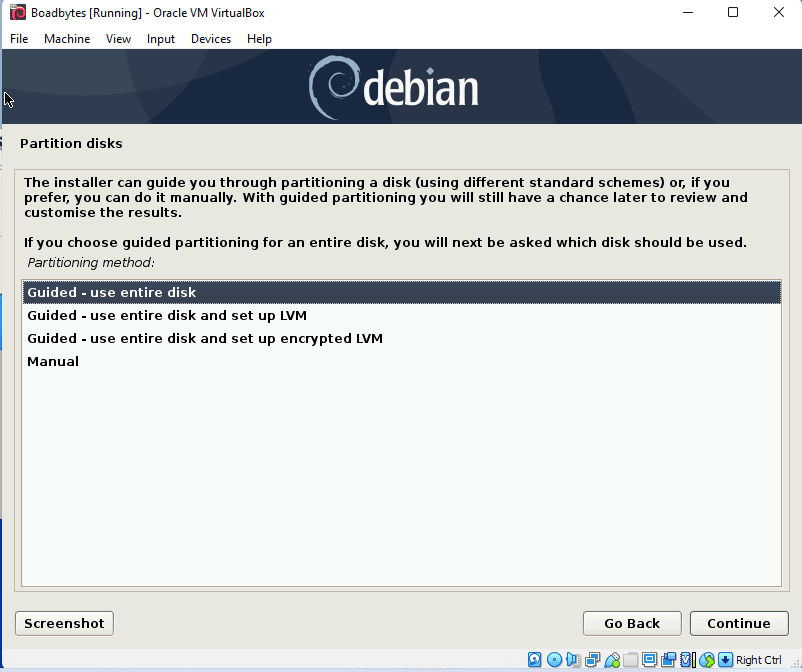
select guided use entire disk
Here we recommend that you go with “Guided-use entire disk” and click on “Continue.”
Step 14: Data erasing
Next, you will be asked if you want to clear/erase all data on your disk. I know you might start wondering if you clear all the hard disks plus all your files, then what? However, you need not worry since the space we are talking about here is your virtual disk space, not where your personal data is stored in the host machine. So yes, you can choose to erase everything since there is nothing yet inside the space.
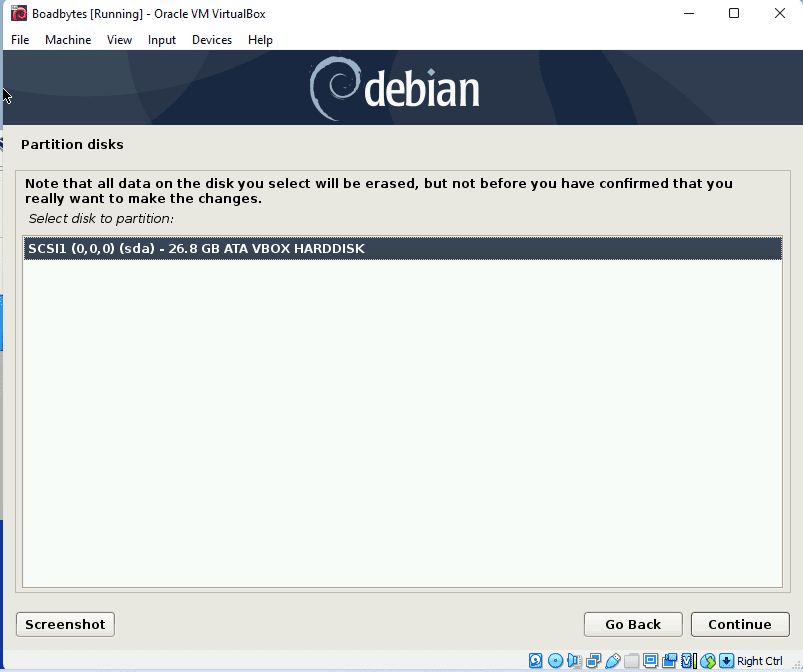
erasing of data
Step 15: Partition recommendation
If you know what you are up against, you can select “separate/home partition” from the rest. But if you are a beginner, then we suggest you go with “All files in one partition(recommended for new users).”
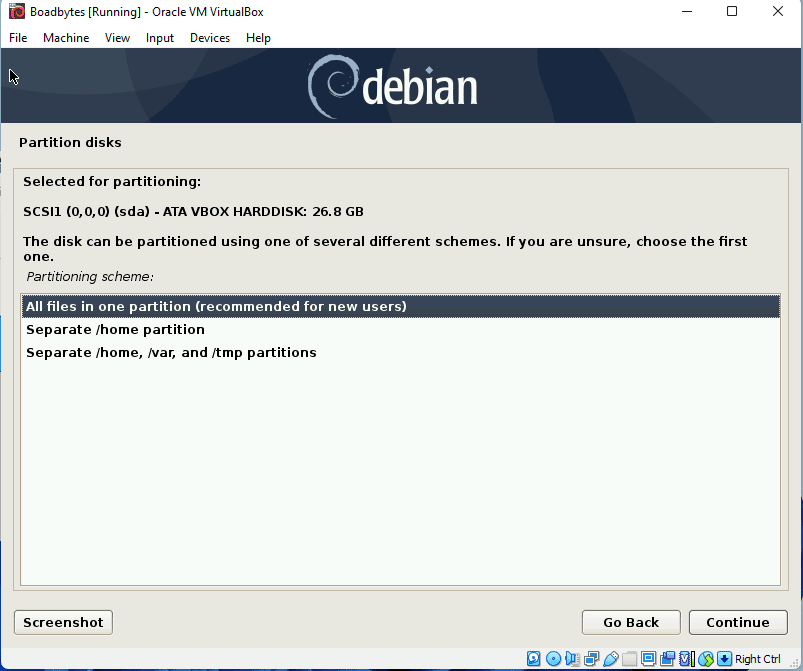
partition recommendation
Step 16:Creation Summary
After clicking continue, you will get a summary of what will be created. If you can keenly see, you will notice 2 partitions will be created on your hard disk.
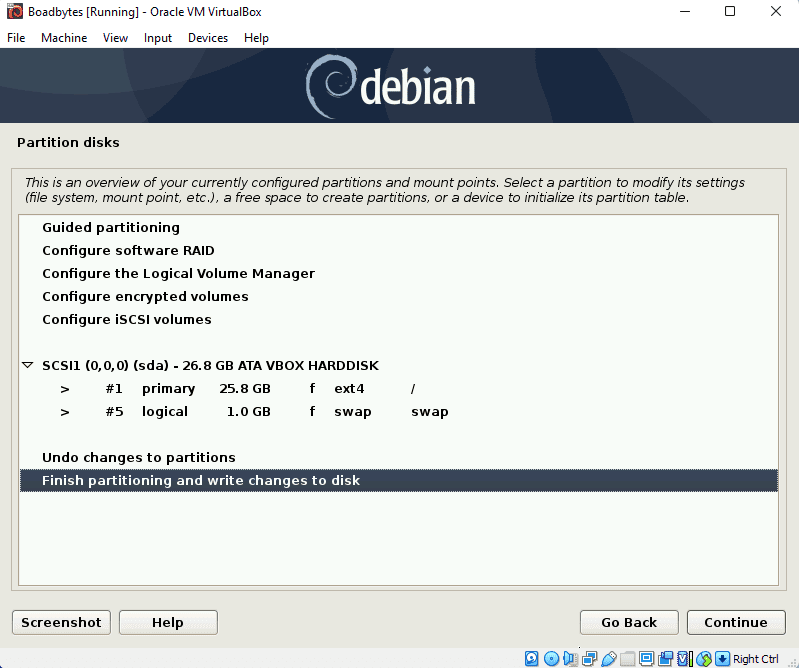
summary of partitioning
- Ext4: this one here contains the space where all files will be stored.
- Swap: This is an additional space that your newly created Raspberry OS will use in situations where the VM consumes too much RAM. This is a precautionary measure for any machine to have.
Step 17: Writing disk changes
Upon clicking the “Continue” button, the installer wizard will ask you for a final confirmation summary. Here, select “Yes” and click on “continue.”
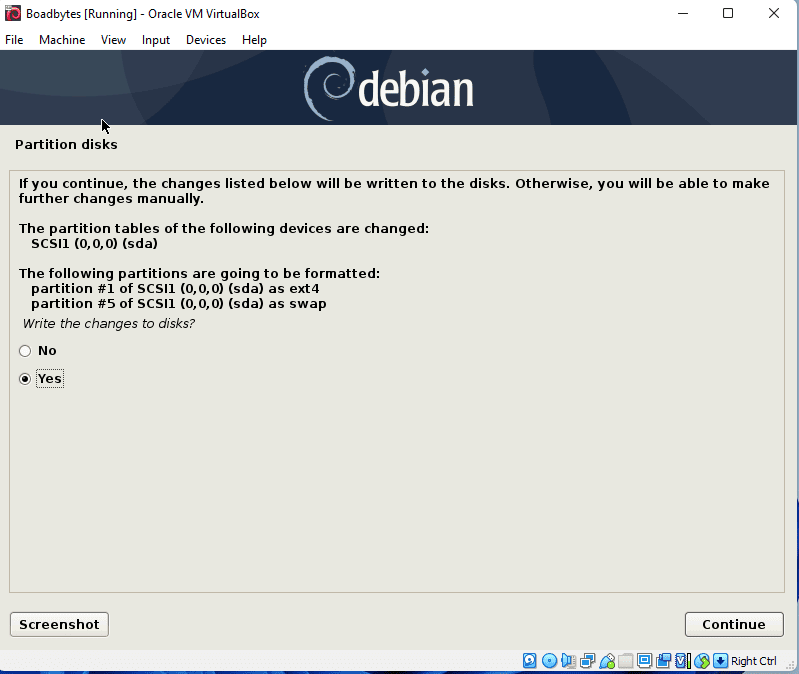
writing changes to disk
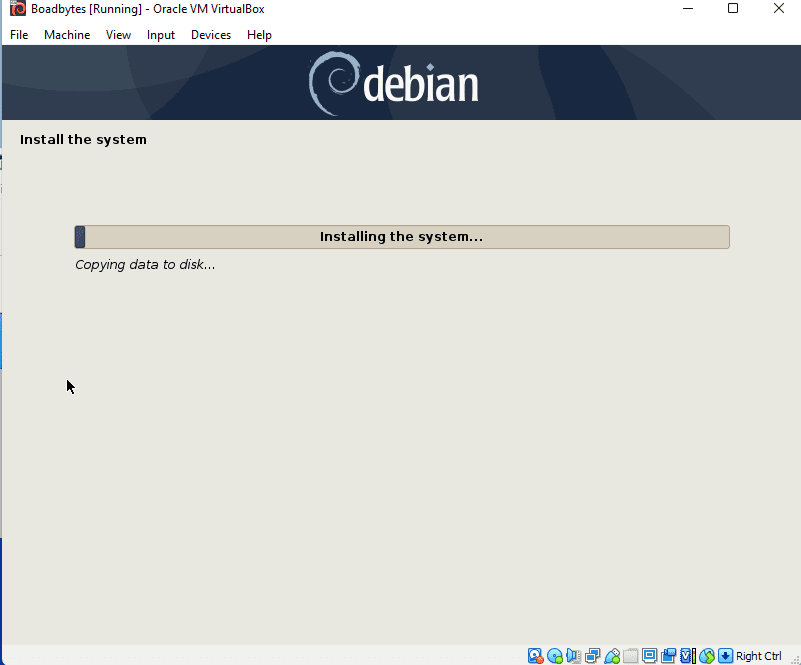
After clicking “Continue,” you should be able to see a loading bar saying “ installing the base system.”
installing base system
The installation should take time, depending on the resources you allocated to your VM.
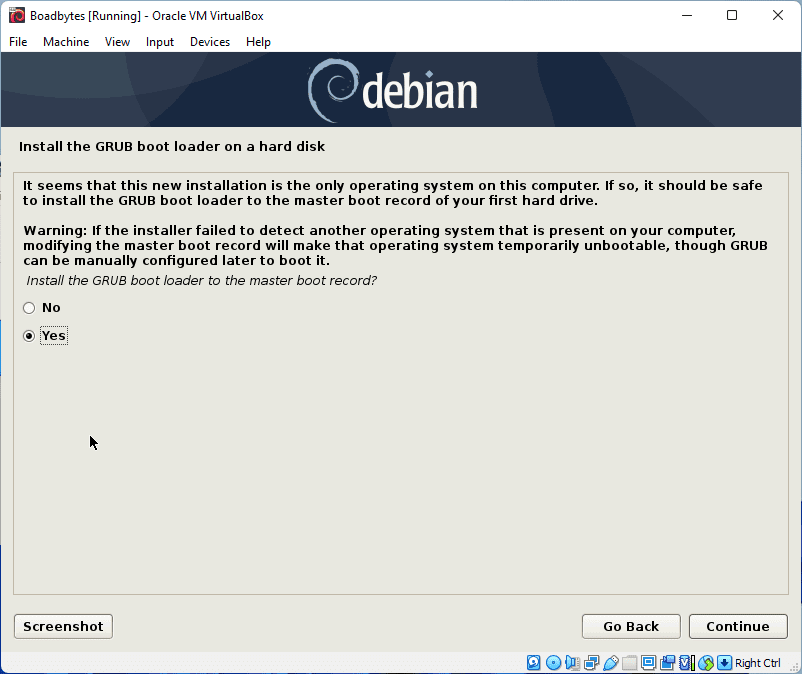
Step 18: Install Grub boot loader
After installing the base system, the installer wizard will ask if you can install the GRUB boot loader on your hard drive. It is safe to do so since this is a newly created hard drive with nothing installed. So select “Yes” and click on “Continue” to proceed.
installing the grub boot loader
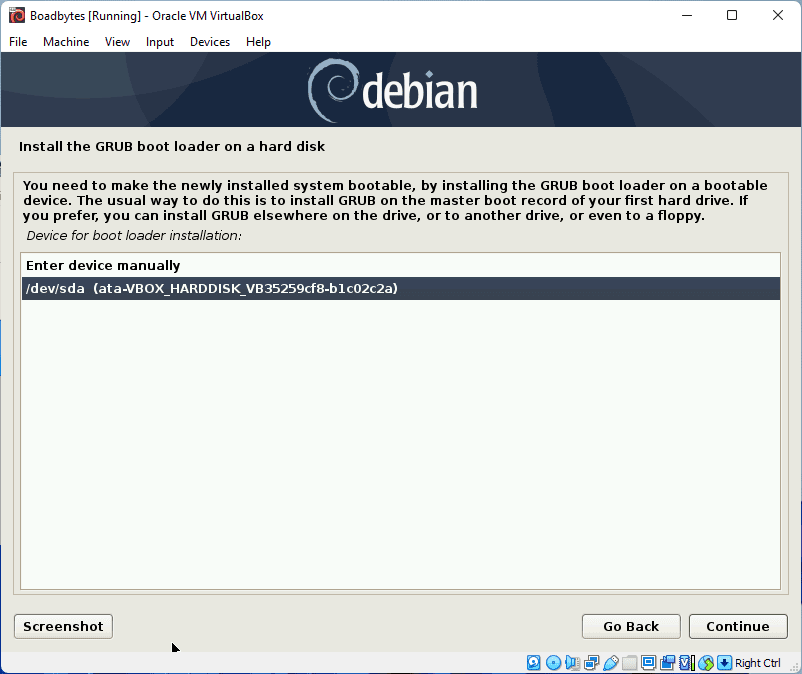
Step 19: How to install the Grub boot loader
In the next window, we need to make the newly installed system bootable. We will achieve this by installing the Grub boot loader on a bootable device. So, here you will see the virtual hard drive created by the VirtualBox in the list. Choose the device starting with “/dev/sda,” then click on “continue.”
how to install the grub boot loader
To this end, you need to congratulate yourself because it is the end of the Raspberry installation step as of section three. Now, you should have your Raspberry machine installed on your new virtual machine. Then, all needed is to launch the machine by hitting the “green start button.”

window
We now head to section four, which includes the first launch of your new Raspberry machine for the first time.
Note: After the last step of the installation, your Raspberry machine should automatically start. If it does not, simply start it from the VirtualBox main window.
Upon starting, you should be able to see this window:

Debian gnu part 2
To simplify, this GRUB menu only asks you to decide on which OS you want to start. If you do nothing within the next 5 seconds, then the first choice will automatically be executed, which we need. So here, you will either wait for 5 seconds or press ENTER to launch the Raspberry Desktop displayed as (“Debian GNU/Linux”).
Since it is our first time launching this OS, you will see a welcome screen.
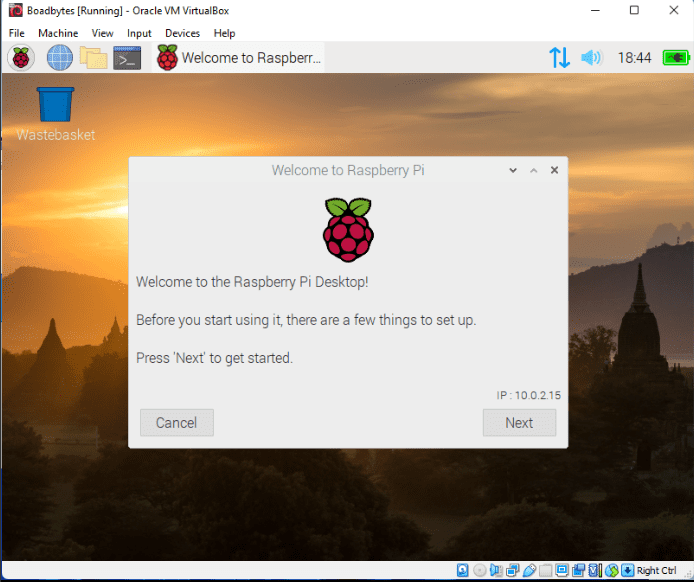
raspberry welcome window
In this welcome screen, click on “Next” to finish the configuration of your OS. Despite being optional, we recommend doing it.
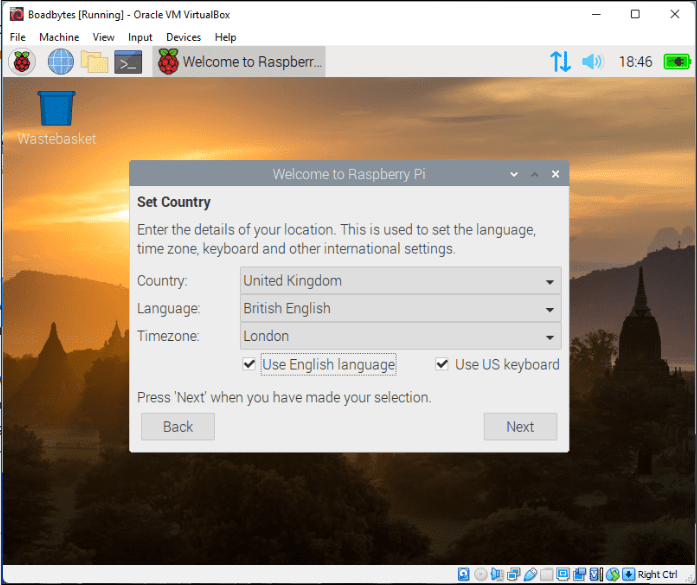
Step 20: Select country, language, timezone, and keyboard configuration
Here, you will use your current country to set the country location, language you need to use, the timezone of the place you are in, plus the keyboard configuration, then click “Next” to proceed
language, location, timezone, and keyboard selection
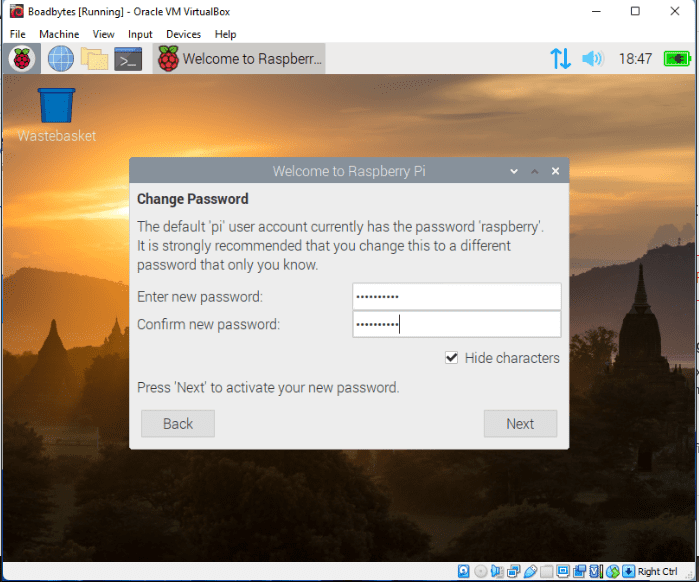
Step 21: Password configuration
After clicking next, the installer will direct you to the password configuration window. Here, you will key in your preferred password and click Next to continue.
password configuration
Step 22: Software update
The next window will be asking you to update the machine’s software. Here, you will click on “Next,” and the update will initiate. However, the update speed will differ depending on the resources allocated to the VM machine plus your internet’s speed.

software update
To add on, you can skip this part and update the OS later using the following commands in the terminal (sudo apt update && sudo apt upgrade).
Step 23: Final window display
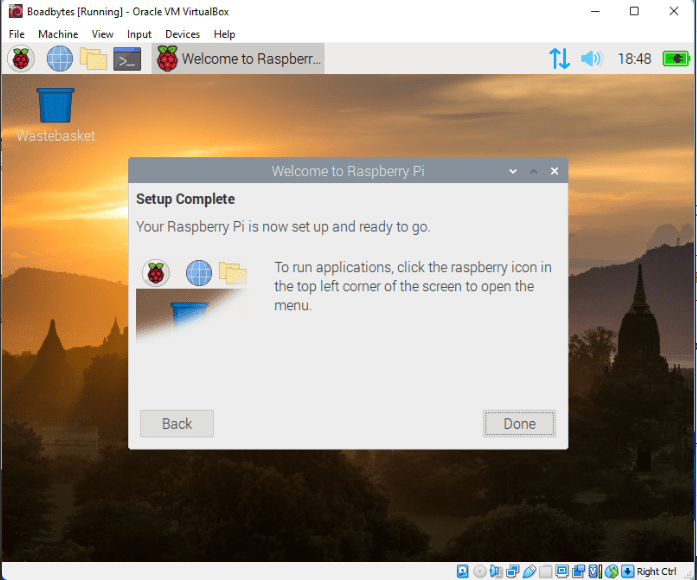
setup complete
Conclusion
By now, you should be well aware of the steps without missing anything since the article has been comprehensive enough to cover everything concerning the installation of Raspberry Pi on VirtualBox that you need to be acquainted with. We covered the article in four sections, thus making this easy for you to comprehend. You should at least be able to use the machine without any issues at this point. Don’t forget the final steps that included configuring the country, language, timezone, keyboard configuration, password setup, and software update since they are important for security measures.