
Do you want to turn your PI into a Network-Attached Storage solution? Well, that’s exactly what we will look at today. OpenMediaVault is a Debian-based software that you can use to set up a NAS solution on your Raspberry Pi. Previously, we did a post on how to use Samba to turn your Pi into a NAS. Today we will look at OpenMediaVault, which comes with a lot more exciting features.
As of writing this post, the latest release of OpenMediaVault is version 5. It provides users with out-of-the-box features including (S)FTP, SMB/CIFS, DAAP media server, RSync, and even features built-in support for Docker containers. From my experience, I found setting up a NAS solution on your Pi with OpenMediaVault much easier compared to other methods where you set up every service, such as Samba and FTP, manually.
Setting up OpenMediaVault on Raspberry Pi
To efficiently run OpenMediaVault on your Raspberry, we highly recommend using Pi 2 or newer. However, for this post, we will use Raspberry Pi 4, which supports enhanced IO capabilities.
Requirements
- Raspberry Pi 2B or newer models
- Micro SD card with at least 8GB of space
- Reliable Power supply
- An active internet connection – Preferably an ethernet connection
- Display monitor/Screen (Optional)
- An HDMI cable with a micro-HDMI to HDMI connector (Optional)
- Raspberry Pi casing (Optional)
Some of these items, like the Display monitor and HDMI cable, are listed as optional. That’s because you don’t necessarily need a Graphical User Interface to set up OpenMediaVault. If you are a command-line person, you can decide to use SSH or even enable VNC access. In this post, we will be using SSH. Don’t worry; we will show you how to enable and connect to SSH.
Step 1: Install the Official Raspberry Pi OS
We will install OpenMediaVault on top of the official Raspberry PI OS. However, if you are using another Linux distribution (preferably Debian-based), feel free and use it. Alternatively, you can check out our post on Instaling the official Raspberry Pi OS, which will give you a step-by-step guide.
Step 2: Enable SSH or VNC
If you don’t wish to use a Graphical display when setting up OpenMediaVault, you can use SSH or VNC. Did you know you can actually connect your Raspberry Pi to WIFI without a graphical display (headless)? Please, check out the posts, which will give you a step-by-step guide. Connecting to Wi-Fi & Enabling SSH Without Monitor on Raspberry Pi – How to Set up VNC Server on Raspberry Pi
Step 3: Install OpenMediaVault 5 on Raspberry Pi
After successfully creating an SSH connection to your Raspberry Pi, we can now install OpenMediaVault. To get started, we need to ensure our packages are up to date. Execute the commands below:
sudo apt update
sudo apt upgrade
The upgrade the command may take up quite some time, depending on your internet connection. After successful execution, reboot your Pi with the command below:
sudo reboot now
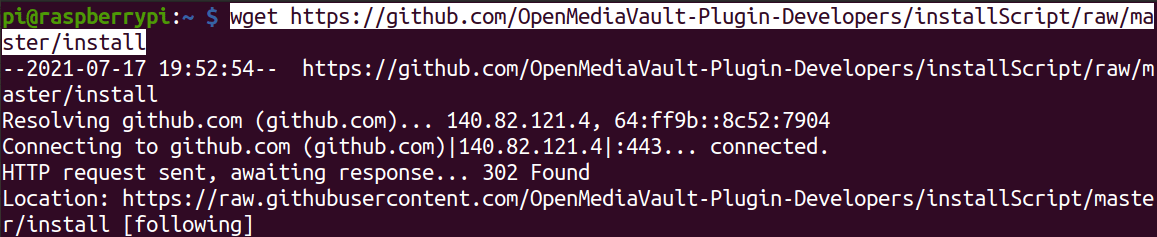
Once done, we will proceed to download the installation script for OpenMediaVault 5 using the command below:
wget https://github.com/OpenMediaVault-Plugin-Developers/installScript/raw/master/install
Download OpenMediaVault Installation script
This file will be downloaded to your current working directory. You can use the ls command to list the contents of the directory as in the image below.

List files
As in the image above, you should be able to see the install file. However, to execute it, we will first need to assign execution permissions using the command below.
chmod +x install
Once done, we can now execute it with the command below.
sudo ./install

Install OpenMediaVault
Depending on your internet connection, this step might take a while, as the script will download and install any required dependencies. Once the installation is complete, the Pi will reboot automatically. If that doesn’t happen, reboot the Pi manually with the command:
sudo reboot now
Step 4: Accessing OpenMediaVault
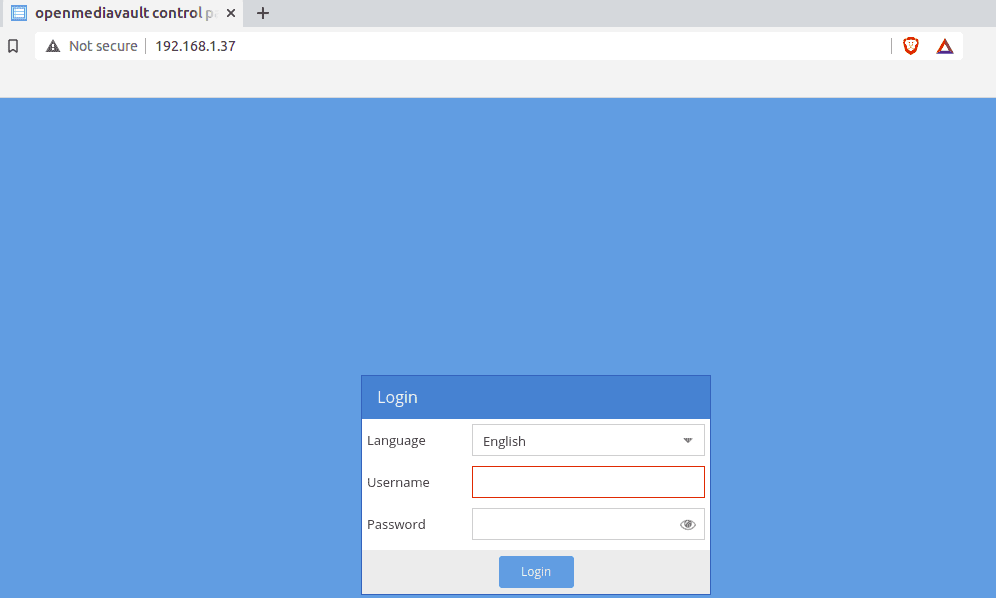
To access the OpenMediaVault control panel, enter the Pi’s IP address on your Web browser as in the image below. In case you don’t know the IP address assigned to your PI, use the hostname -I command.
OpenMediaVault Control Panel
Login with the following credentials:
Username: admin
Password: openmediavault
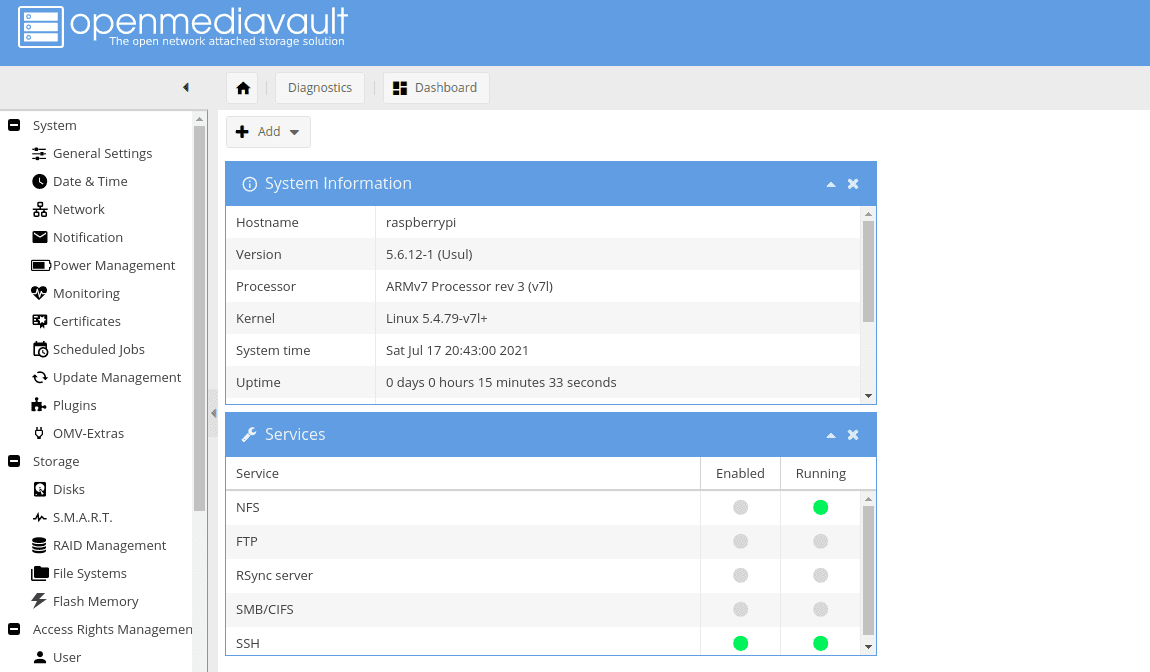
Once logged in, you should see the OpenMediaVault control panel.
OpenMediaVault Control Panel
Step 5: Change the Default Openmediavault Password
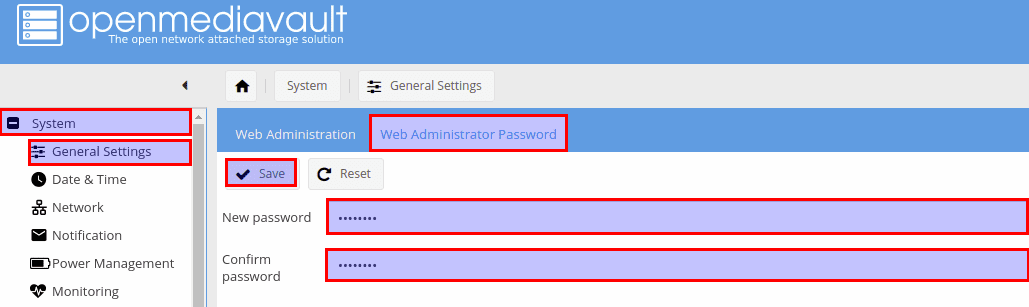
If you wish to change your default password – Click System -> General Settings -> Web Administrator Password. Enter your new password and click Save.
Change Password
Log out of the OpenMediaVault control panel and log back in with your new password to apply the new changes.
Step 6: Add a New Filesystem
We will need to create a shared folder on a storage media of choice to set up our NAS. In my case, I have connected a 16GB USB drive to my Raspberry Pi. To add this new files system, click on the File System menu on the control panel. Next, select your storage media and click Mount.
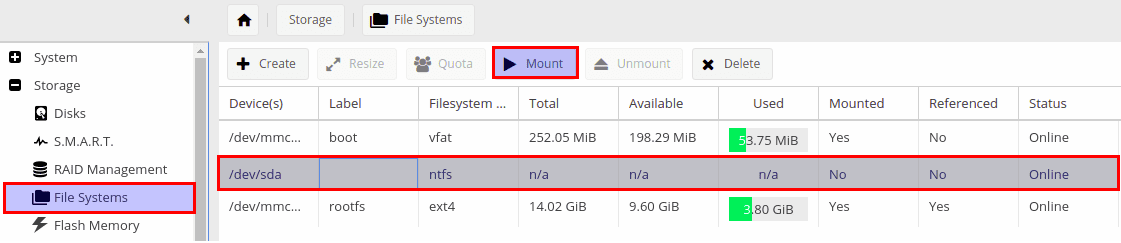
Add File system
You will see a notification like, “The configuration has been changed. You must apply the changes for them to take effect.” Click Apply.

Apply File system Changes
OpenMediaVault will apply these new configurations, and you can monitor the process in the progress window. It might take a few seconds.
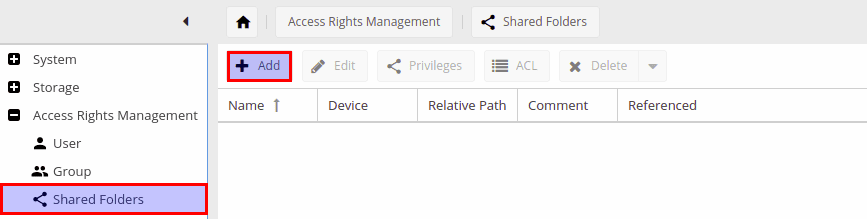
Step 7. Create a Shared Folder
To create a shared folder, click on the Shared Folders tab on the left panel and click on the Add button to set up a new shared folder.
Shared Folders
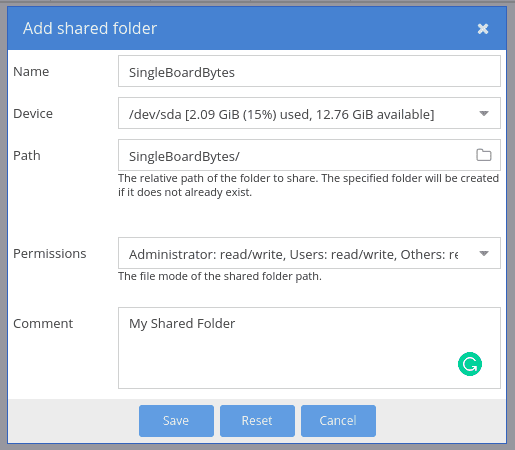
The Add Shared Folder setting window will open. You will see Five fields that you will need to fill.
- Name: Enter a name for your shared folder that will be visible to users.
- Device: Select the storage device that you mounted when adding a file system.
- Path: This is the path to your shared folder.
- Permissions: Here, you will assign permissions to the Admin, Users, and Others.
- Comment: You can decide to add a comment, but that’s optional.
When done, click Save.
Configure Shared folder
You will see a notification like, “The configuration has been changed. You must apply the changes for them to take effect.” Click Apply.
Apply File system Changes
Up to this point, we have successfully added a File System and created our Shared Folder. Next, we need to enable SMB/CIFS and add our Shared Folder.
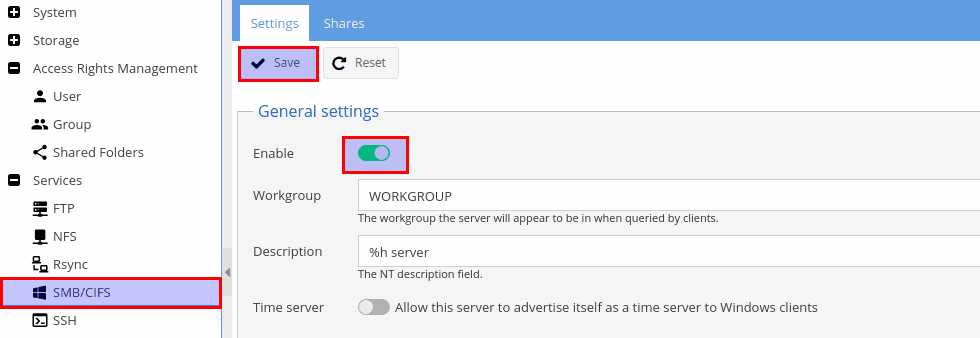
Step 8. Enable SAMBA/CIFS
Still, on the OpenMediaVault Control Panel, click on The SMB/CIFS tab under the Services menu. Next, click the Enable toggle button and click Save, as shown in the image below.
Enable SMB and CIFS
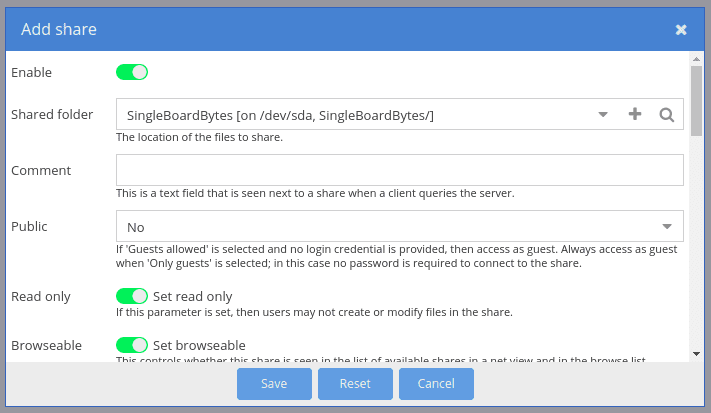
With SAMBA and CIFS enabled, we now need to add our Shared Folder. Still on the SMB/CIFS menu, click on the Shares tab then the Add button, as shown below.
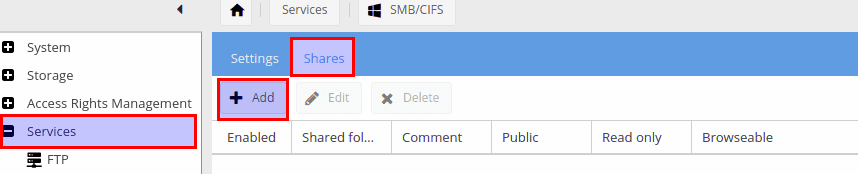
shares
The Add Share window will open, listing several options. However, we will focus on four main items:
- Click the Enable toggle button and ensure it’s enabled.
- Shared Folder: Select your Shared Folder.
- Public: Use this option to set whether non-authenticated users can access the Shared Folder.
- Read Only: You can enable this feature to prevent users from modifying the contents of the Shared Folder.
Click Save when done.
Add Share
You will see a notification like, “The configuration has been changed. You must apply the changes for them to take effect.” Click Apply.
Apply File system Changes
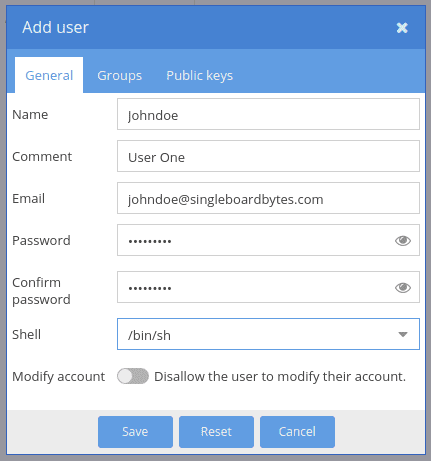
Step 9: Add Users to OpenMediaVault
Now, we need to add users who will connect and access our Shared folder. Under the Access Rights Management menu, click the User tab. On the new screen that appears, click Add.

Add User
The Add User window will open. Here, you can enter all the required user details, including the Email and Password. You will also see the Modify Account toggle button that, when enabled, allows users to modify their account details. Click Save when done.
Add User Settings window.
That’s it! You have successfully confogure3d your Raspberry into a NAS solution using OpenMediaVault. If you are only a Windows system, you can access the Shared Folder from the Network drive in the File manager.
Conclusion
There are several methods available that you can use to set up your PI as a Network-Attached Storage (NAS) solution. Of all those methods, I find the OpenMediaVault much more reliable as it provides users with advanced configurations to manage their NAS. Feel free to share your experience with our readers in the comments below. Also, if you encounter any problems carrying out any of the steps above, please let us know in the comments.
6 comments
Tried the steps above, unfortunately it didn’t work for the latest Pi Bullseye release. Flashed the SD with Buster and the steps worked.
This tutorial (at least up until the omv now that it’s up to v6) worked for me… and running on bullseye:
pi@omv:~ $ cat /etc/os-release | grep PRETTY_NAME
PRETTY_NAME=”Raspbian GNU/Linux 11 (bullseye)”
pi@omv:~ $ uname -a
Linux omv 5.10.63-v7l+ #1488 SMP Thu Nov 18 16:15:28 GMT 2021 armv7l GNU/Linux
pi@omv:~ $
The screens are updated a bit under v6 but while the names and GUI are changed the steps are pretty close to the same. I did have one problem with the word “confogure3d” though… 😉
I gat the following when I try to execute the install, what do I need to do to stop this –
pi@RPI4-OMV:~ $ sudo ./install
This system is running a desktop environment!
Please use a Lite version of the image or
do not choose to install a desktop environment.
This install is not supported. Exiting…
pi@RPI4-OMV:~ $
You need to be using the ‘lite’ version of raspbian which is the version with only a CLI – you can use the 32 or 64bit version depending on what Pi you have. It is avaliable to download from the raspberry pi website
When I tried to install openmedisvault I got the following –
This system is running a desktop environment!
Please use a Lite version of the image or
do not choose to install a desktop environment.
This install is not supported. Exiting…
How do I fix this?
I downloaded a Lite image manually and put that on, but it didn’t work – I can see that the pi boots up into a desktop environment. Then I used the Raspberry Pi Imager (I’m on Linux) and specifically selected a Lite OS from the menu. This worked, and I could see that the pi was starting in text mode. After this the steps to install OpenMediaVault worked.