If you prefer to listen to your favorite music while working in the office, traveling around with your friends, or just chilling out at home, a wireless speaker is definitely for you. You can enjoy all of the advantages of wireless speakers, such as freedom from cable wires and free mobility. The best part about wireless speakers is that you can easily convert any wired speaker into a wireless speaker.
But why all that hustle if you have a Raspberry Pi lying around? This post will guide you on using the Raspberry Pi to turn any speaker into a Bluetooth-enabled speaker.
Understanding the logic
Even though the whole process might seem complicated, it’s simple if you have the right tools and configurations. Therefore, we will follow the steps below.
- Get a Raspberry Pi board that has in-built Bluetooth support. These include Raspberry Pi Zero, Raspberry Pi 3, or newer. Alternatively, if you have an earlier Raspberry Pi board that doesn’t include Bluetooth support, you can opt to buy a Bluetooth USB dongle.
- Connect the Raspberry Pi to the non-Bluetooth speaker using an auxiliary cable (3.5 mm jack).
- Configure the Raspberry to output all audio only through the 3.5 mm jack (AUX cable). By default, the Raspberry Pi supports HDMI as the default audio output.
- Configure the Raspberry Pi to accept input audio from the Bluetooth receiver, then route all this audio to the 3.5 mm jack (AUX cable).
That’s it! We only need four steps to accomplish this whole project. Our final setup will look like this.
Turn any speaker into a Bluetooth enabled using Raspberry Pi
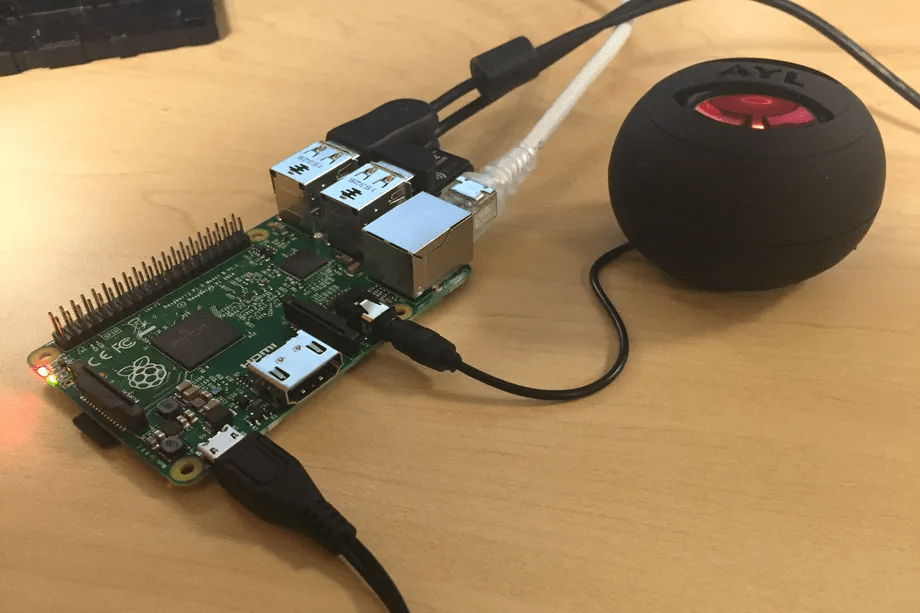
Raspberry Pi and Speaker
Project requirements
The only requirements you need for this project include:
- A Raspberry Pi with Bluetooth support (Raspberry Pi Zero, Raspberry Pi 3 or newer). Alternatively, you can use a Bluetooth USB dongle.
- A non-Bluetooth speaker
- A 3.5 mm Jack (Auxilliary cable)
- An active internet connection
Step 1. Setup the Raspberry Pi
Tip: When working on this project, we tried two operating systems, Raspbian Buster (Based on Debian 10) and Raspbian Bulls Eye (Based on Debian 11). Everything executed smoothly on Raspbian Buster, but we experienced minor issues with Raspbian Bulls Eye. Luckily, we will provide all the solutions in this post.
You need to install the official Raspberry Pi OS on the Micro SD card to get started. If you have never done this before, please check our post on installing the official Raspberry Pi OS. It will give you a detailed guide on formatting the SD card and using the Balena Etcher to flash the OS on the SD card.
Also, since we will do all the configurations via command-line, you don’t need to connect to a monitor or set up a VNC server – SSH will be enough. You only need to create an empty text file in the boot partition to enable SSH. You can check out our post – Connecting to Wi-Fi & Enabling SSH Without Monitor on Raspberry Pi.
When done, connect all the peripherals to your devices, including the 3.5 mm jack for the speaker and
Step 2. Set up the audio output on the Pi
The Raspberry Pi supports two main audio outputs:
- The 3.5 mm jack
- HDMI
For this project, we need to use the 3.5 mm jack to get audio from the speaker. To do so, execute the command below to launch the Raspberry Configuration screen.
sudo raspi-config
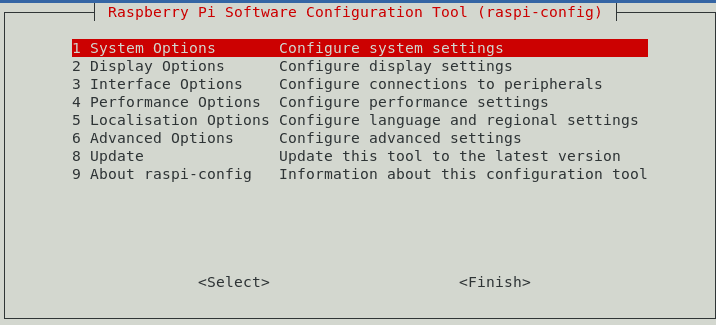
Raspberry Configuration
Use the arrow keys to select the “System Options.” Press Enter. On the new screen that appears, select “S2 Audio.” Press ‘Enter.’
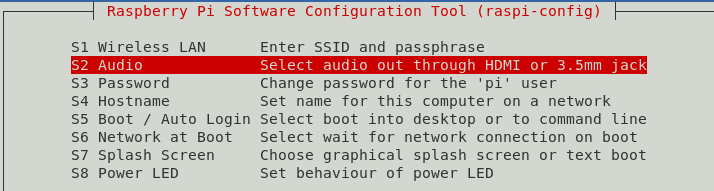
Configure Audio
A new screen will appear, and you will need to select the audio output you want to use. In the image below, we have two options: HDMI and Headphones. If you are not connected via HDMI, you might only see one option—select “headphones” and press Enter.

Choose Audio Output
Save the changes and click “Finish.”
To test whether audio is coming from the 3.5 mm jack, execute the command to test the speakers.
speaker-test -c2 -twav -l7
Step 3. Install BT-speaker software
As detailed above, we need to develop a way that the Raspberry Pi takes audio input from Bluetooth and directs it to the 3.5 mm jack so that we can listen to it on the speaker. There are different ways we can use to achieve that. Unfortunately, most methods are way too complicated, and they might not work in the end.
For this post, we will use a daemon known as BT-Speaker, available on the Github page of Lukas. It was developed with the default Raspberry Pi OS audio configuration in mind. Therefore, if you use an external sound card, there might be issues getting audio to play on the non-Bluetooth speaker.
Additionally, it is pretty advanced and does not work like the typical Bluetooth device. If a device disconnects from the Raspberry Pi, this daemon will immediately allow any other device to connect. It works with the “First Come, First Serve” policy. Also, there is no need to click “Pair” or “Unpair.” The daemon handles all this for you. You can read more about this tool on the official Github page.
Let’s now look at how to install the BT-Speaker on our Raspberry. Follow the instructions below depending on your Rasbian OS.
Raspbian Buster
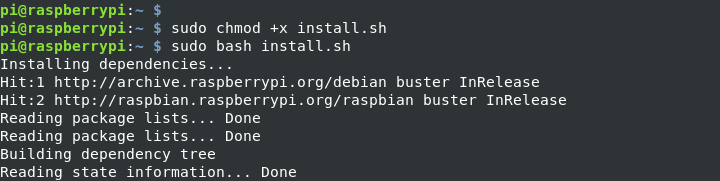
Assuming you are already connected via SSH, execute the command below to download the BT-Speaker installation script.
sudo wget https://raw.githubusercontent.com/lukasjapan/bt-speaker/master/install.sh
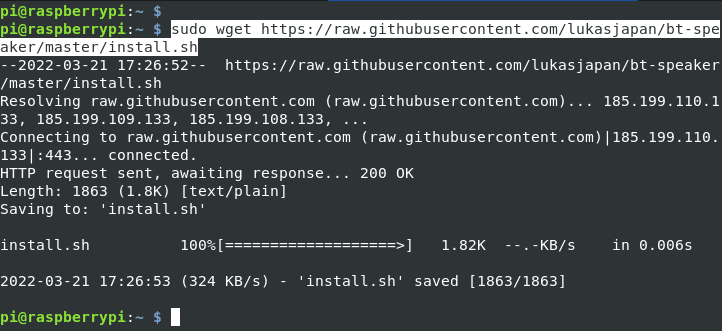
Download Script
Make the script executable by running the chmod command below.
sudo chmod +x install.sh
When done, execute the script.
sudo bash install.sh
Run Installation Script
After successfully installing the script, skip to Step 4 below.
Raspbian Bullseye
We had to modify the script forRaspbian Bullseye (based on Debian 11) since it was developed to run on Raspbian Buster. First, execute the commands below to install some packages that the script will not install.
sudo apt update
sudo apt install python3-pip
sudo pip3 install gobject
sudo pip3 install ConfigParser

Install Packages
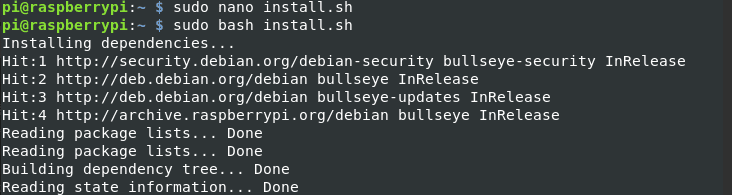
When done, run the command below and paste the newly modified script.
sudo nano install.sh
#!/bin/bash +x
set -e
echo "Installing dependencies..."
apt-get update
apt-get --yes --force-yes install git bluez python3 python3-cffi python3-dbus python3-alsaaudio sound-theme-freedesktop vorbis-tools
echo "done."

echo
echo "Adding btspeaker user..."
id -u btspeaker &>/dev/null || useradd btspeaker -G audio -d /opt/bt_speaker

getent group bluetooth &>/dev/null && usermod -a -G bluetooth btspeaker
echo "done."

echo
cd /opt
if [ -d bt-speaker ]; then
echo "Updating bt-speaker..."
cd bt-speaker && git pull && git checkout ${1:master}
else
echo "Downloading bt-speaker..."
git clone https://github.com/lukasjapan/bt-speaker.git
cd bt-speaker && git checkout ${1:master}
fi
echo "done."

# Prepare default config
mkdir -p /etc/bt_speaker/hooks
cp -n /opt/bt-speaker/config.ini.default /etc/bt_speaker/config.ini
cp -n /opt/bt-speaker/hooks.default/connect /etc/bt_speaker/hooks/connect

cp -n /opt/bt-speaker/hooks.default/disconnect /etc/bt_speaker/hooks/disconnect
cp -n /opt/bt-speaker/hooks.default/startup /etc/bt_speaker/hooks/startup
cp -n /opt/bt-speaker/hooks.default/track /etc/bt_speaker/hooks/track

# Install and start bt-speaker daemon
echo
echo "Registering and starting bt-speaker with systemd..."
systemctl enable /opt/bt-speaker/bt_speaker.service
if [ "`systemctl is-active bt_speaker`" != "active" ]; then
systemctl start bt_speaker
else
systemctl restart bt_speaker
fi
systemctl status bt_speaker --full --no-pager
echo "done."

# Finished
echo
echo "BT-Speaker has been installed."
Run the installation script
After a successful installation, proceed to Step 4 below.
Step 4. Connect to the Raspberry Pi – Bluetooth speaker
Run the command bt_speaker.service to confirm whether the service is running.
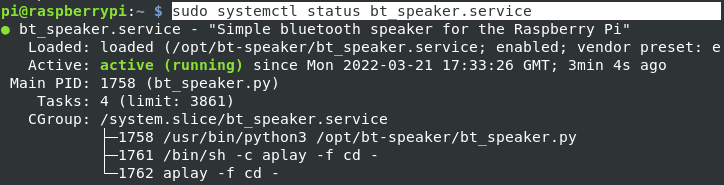
Check Status Service
Up to this point, everything is set up, and you can now connect your Bluetooth device (Phone, PC, etc.) to the Raspberry Pi via Bluetooth, and you should hear the sound on the speaker. To make the Raspberry Pi Bluetooth discoverable, run the command below.
sudo hciconfig hci0 piscan
Note: The name that will appear on your Bluetooth device (say Phone or Laptop) will be the hostname of the Raspberry Pi and not the Speaker name. You can edit that by changing the contents of the /etc/hostname file on your Pi.

iPhone Bluetooth
Conclusion
We believe this article has given you a great guide on enabling Bluetooth on a non-Bluetooth speaker using the Raspberry pi. To get a more detailed guide on managing Bluetooth devices that connect to the Raspberry, please check out our post – How to set up Bluetooth on a Raspberry Pi. If you encounter any issues, let us know in the comments below.
5 comments
its work!
thank you so much:)
I confirm. It`s really work on RPi-3B.
Finally, a tutorial that works! I had to change a few things and manually run through the install.sh script but it was worth it.
same here
hey man, when i go to connect with my smartphone say:the pin is incorrect