Doom is regarded as one of the most important games in video game history and is generally referred to as one of the best games ever created. Its predecessor Wolfenstein 3D helped define the FPS genre and spawned a slew of sequels known as Doom clones.
It was the first to use online distribution and technology, including 3D visuals, networked multiplayer gaming, and custom modification support via packed WAD files. Its violent brutality and ostensibly horrific visuals sparked quite some controversy. However, the game is still regarded as one of the best.
Installing Doom on the Raspberry Pi
Today, we will give you a step-by-step guide to installing and playing Doom on Raspberry Pi. We will use a version of Doom known as Chocolate-Doom to make everything simple. But, first, a brief history, in 1998, Doom source code was made public by its authors and developers. Since then, different programmers forked this code and re-created their versions of Doom by adding and stripping features.
Chocolate Doom
One of the most outstanding versions is Chocolate-Doom. Unlike other versions available in the market today, this particular port aims to reproduce the experience of playing Vanilla Doom accurately (Original Doom). This version of Doom is also compatible with numerous mods and levels, which were already available even before the source code was made public. It also comes with cool custom WADs short for “Where’s All the Data?“. These are files containing all the graphics and level designs.
Let’s dive into installing and playing Doom on Raspberry Pi with that in mind.
Requirements
Unlike other games that require you to run emulators like RetroPie, Recalbox, and more, Doom runs natively on the Raspberry Pi. All we need to do is install the game engine and the WAD files. The requirements we need for this tutorial include:
- Raspberry Pi 2 board or later.
- The official Raspberry Pi operating system.
- Any USB game controller. You can also check out our posts on How to use Xbox or PlayStation Controllers on Raspberry Pi.
- A display monitor. Alternatively, you can set up a VNC server if you don’t have a display monitor.
- An active internet connection. (preferably Ethernet for high speed).
Step 1. Install Doom on Raspberry Pi
To get started, install the official Raspberry pi OS. You can follow our step-by-step tutorial if you haven’t done it. To install the game on your system, we need to execute a few commands on the Terminal (command-line). However, you will require the display monitor to play the game when done. For this post, we are connected to Raspberry via SSH. Follow the steps below.
- Update the system packages. That ensures that you are downloading Doom from the latest mirror. Execute the command below.
sudo apt update
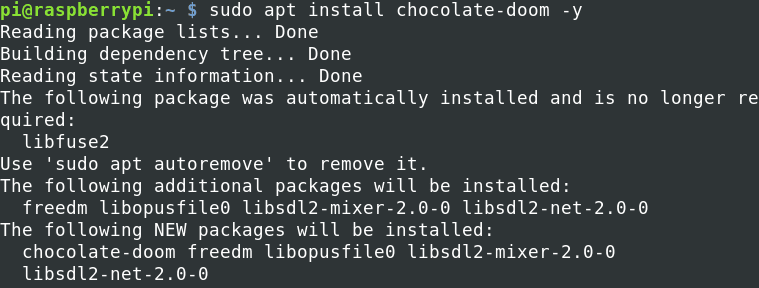
- When done, execute the command below to install Doom on your Raspberry Pi. Remember, we are installing chocolate-doom.
sudo apt install chocolate-doom -y

Install Chocolate-Doom
This package isn’t large and shouldn’t take long to install if you have good internet speed.
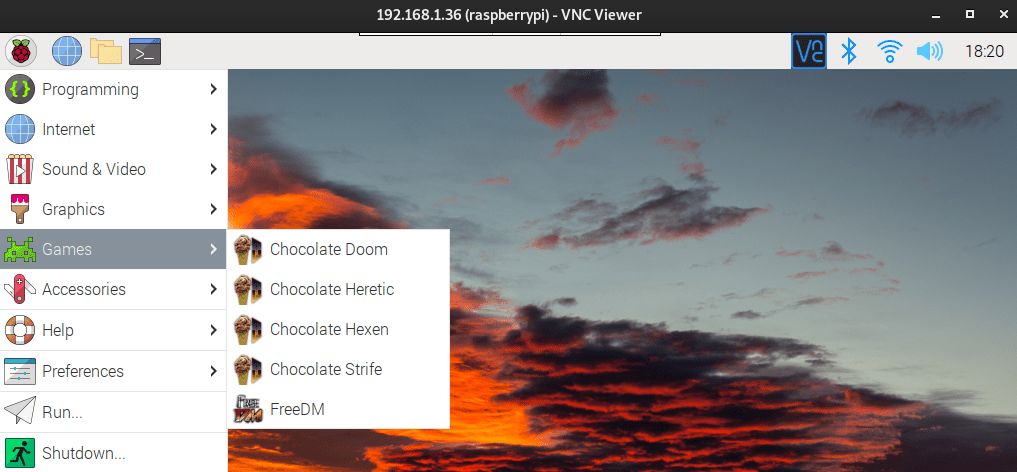
When you open the Games menu on your Raspberry Pi Desktop, you will see various Doom Chocolate ports like Chocolate Doom, Chocolate Heretic, Chocolate Hexen, and Chocolate Strife. You will also see FreeDM, a WAD file containing levels for multiplayer games.
Tip: For this post, we are accessing our Raspberry Pi Desktop via VNC. However, we will switch to a display monitor when done with the installation since the game might not launch on VNC.

Raspberry Games
Even though you can see the game on your menu, we are not yet done; we need to download the WAD files for Chocolate Doom.
Step 2. Download and install Doom WAD Files
As stated above, WADs files contain all the games’ graphics, level designs, etc. Up to this point, we only have the game engine installed now we need to download WAD files that we will run. Lucky for us, any WAD file that works with the original version of Doom can work with Chocolate-Doom.
For this post, we will be installing the Shareware WAD file. However, you shouldn’t feel limited. You can search for more WAD files online is sites like Doomworld. Follow the steps below to download and install the Shareware WAD file.
- Create a directory where you will store the WAD files. We highly recommend creating one in the
/usr/gamesdirectory. We will name the folder “DoomWADs.” Execute the commands below.sudo mkdir /etc/games/DoomWADs cd /usr/games/DoomWADs
- When done, navigate to the newly created directory with the cd command as shown above. Run the command below to download the Shareware WAD file.
sudo wget http://www.doomworld.com/3ddownloads/ports/shareware_doom_iwad.zip

Download Shareware
- After the download completes successfully, we need to extract the contents since it is a zipped package. Execute the commands below.
sudo apt install unzip
sudo unzip shareware_doom_iwad.zip
When done, run the ls command, and you should see a file with the name“DOOM1.WAD.”

Unzip WAD file
To save storage space on your Pi, you can delete the downloaded zip file using the
rmcommand below.sudo rm shareware_doom_iwad.zip
Step 3. Configure Chocolate Doom
Before you get started playing Doom on your Raspberry Pi, you can decide to do some configurations to get an even better gaming experience. For this, you will need to access the Raspberry Pi Desktop. Therefore, if you have not connected your display monitor, now is the time to do so. When done, proceed with the steps below.
- Launch the Terminal and execute the command below.
chocolate-doom-setup
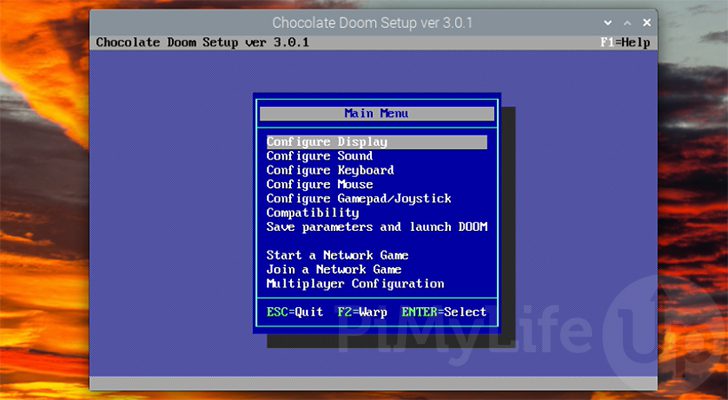
- You will see a window similar to the image below pop up on your Desktop. Here, you will see several configuration options, including Sound, Display, Keyboard, Mouse, Joystick, and even connecting over a network.

Doom Configuration menu
Step 4. Running Doom on your Raspberry
When you are done with the configurations, it’s time to play Doom on your Raspberry Pi. To get started, we will execute the command below on the Terminal.
chocolate-doom -iwad [path-to-WAD-file]
e.g
chocolate-doom -iwad /usr/games/DoomWADs/DOOM1.WAD
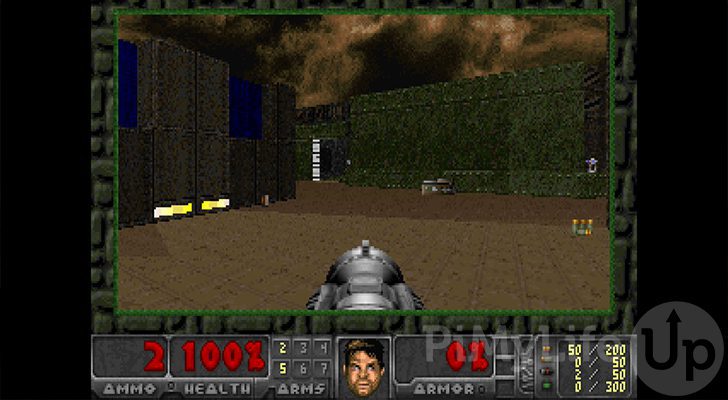
After a few seconds, you should see the Doom same window appear on your screen, as shown in the image below.

Doom Running on Raspberry Pi
Conclusion
That’s it! I believe at this point, you have Doom successfully running on your Raspberry Pi. You can now explore by downloading different WAD files and executing them on your Pi. Did you encounter any problems while carrying out any of the steps above? If so, please don’t hesitate to leave a comment below. Otherwise, Happy Gaming!


